Advertisement
Quick Links
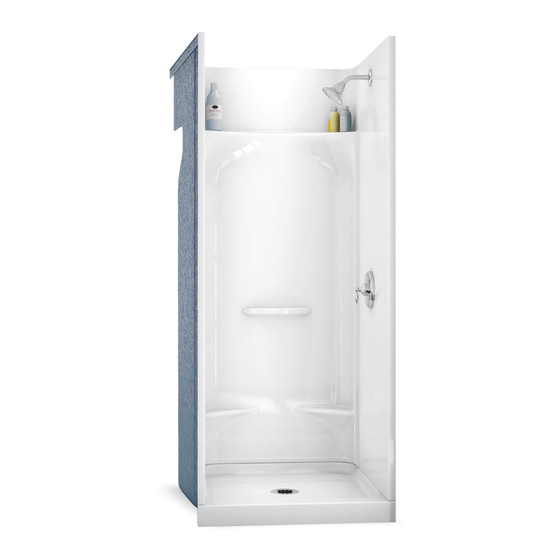
InsTAllATIon guIde
INSTRUCCIONES DE INSTALACIÓN
KDS 3232 / 3636
142018 / 142019 / 142024 / 142025
Base only | Base seulement | Base solamente
142020 / 142021 / 142026 / 142027
KDTS 2954 / 3060 / 3260
142000 142001 / 142006 142007 / 142012 142013
Bathtub only | Baignoire seulement | Bañera solamente
142002 142003 / 142008 142009 / 142014 142015
These guidelines are recommended by MAAX Bath Inc. (here-
after "MAAX") for the proper installation of their products.
A careful review of these procedures (and any referenced publica-
tions) before starting is important in avoiding unnecessary problems
resulting in an improper assembly or installation.
KDS 3448 / 3060 / 3460
142030 142031/ 142036 142037 / 142042 142043
Base only | Base seulement | Base solamente
142032 142033 / 142038 142039 / 142044 142045
MAAX Bath Inc. (en adelante "MAAX") recomienda las siguientes
instrucciones para la correcta instalación de su producto. Antes de
comenzar, es importante leer detenidamente estos procedimientos
(y todas las publicaciones a las que se haga referencia), para evi-
tar problemas innecesarios que puedan resultar en un montaje o
instalación incorrectos.
10024651
Advertisement

Related Manuals for MAAX AKER KDS 3060


Summarization of Contents
Installer Notes and Inspection Guidelines
Installer Responsibility for Codes
Installer must determine compliance with all applicable codes for the unit and installation.
Paperwork Handling
Save and present all unit documentation to the homeowner upon completion.
Dimension Accuracy
Published dimensions are for reference; take critical measurements directly from the unit.
Warranty Voiding Changes
Unauthorized changes to the unit or accessories may void warranties.
Unit Receipt Inspection
Inspect the unit upon receipt and notify the supplier of any issues immediately.
Pre-Installation Inspection Mandate
Do not install the unit until all inspection questions are resolved.
Basic Module Checks
Verify drain location, surface damage, color match, and accessories.
Accessory Checklist Review
Review the included checklist for factory authorized options and accessories.
Installation Preparation and Framing
Factory Assembly Note
Some units are factory assembled for shipping and require disassembly/reassembly.
Framing Guidelines
Framing guidelines are for typical applications and may vary based on site requirements.
Pre-Installation Safety Warning
Ensure the unit bottom is clear of debris and protected before entering.
Surface Protection Caution
Protect unit surface with plywood or cardboard while fastening the flange.
Water Supply and Drain Connections
Follow provided instructions for supply valves and drain system; check for leaks.
Access Requirements
Ensure minimum 30"x15" space for plumbing/pump access for repairs.
Disassemble Assembled Models
Remove and discard all bolts and screws from assembled models.
Marking Radius for Caulking
Mark radius behind the back wall on base ends for caulking.
Marking Back Wall Position
Mark the front of the back wall on base ends to guide back wall installation.
Base and Wall Installation Steps
Base Installation
Install the base, ensuring proper alignment and hand-tightening screws.
Hand Tighten & Flange Inspection
Hand tighten screws only; inspect the flange for proper fit.
Fasten Base to Wall Structure
Drill and fasten the base to the wall structure using 1½" screws, hand tightening only.
Wall Assembly
Assemble the walls using positioning pins and bolt holes for alignment.
Side Wall Installation
Install side walls, applying silicone and using guide pins for positioning.
Apply Silicone to Side Wall Edge
Apply silicone to the edge of the side wall before installation.
Position Side Wall with Guide Pin
Slide the side wall into place using the back wall's horizontal pin as a guide.
Install Second Side Wall
Slide the second side wall into its final position.
Finishing Guidelines
Follow finishing steps including leveling the flange and securing walls.
Secure Walls from Bottom Up
Begin securing walls from the bottom and proceed upwards and around.
Leveling the Flange
Ensure the flange is level before proceeding with fastening.
Optional Features and Door Installation
Optional Tile Adaptor Installation
Instructions for drilling and screwing the optional tile adaptor.
Door Installation Tips
Measure openings, use adjustment mechanisms, and file framing for fit.
Measure Door Opening
Measure the top and bottom of the shower or tub opening before choosing a door.
Adjust Door Mechanism
Use the adjustment mechanism to fit the door against the shower wall when closed.
Fit Door Framing to Base Radius
File down door framing so it fits the radius on the base.
Unit Surface Care and Warranty Information
Unit Surface Care Warnings
Never use abrasive materials or cleaners; avoid wax on the unit bottom.
Routine Cleaning Recommendations
Use mild, non-abrasive cleaners; rinse surface thoroughly after cleaning.
Cleaning Heavy Soap Deposits
Use liquid ammonia household cleaner, applied full strength.
Addressing Stubborn Stains
Use household cleaner or peroxide; apply paste and let sit.
Removing Hard Water Scale
Use liquid scale remover or white vinegar, applied full strength.
Mold and Mildew Removal
Use liquid mildew remover or baking soda paste; allow to fizz.
Removing Construction Adhesive
Soften adhesive with a dryer; peel off carefully.
Suction Item Warning
Remove suction items from unit floor after each use to prevent surface damage.
Limited Warranty Overview
Express limited warranty for personal household use; specific terms for acrylic and fiberglass.
Warranty Limitations
Excludes damage from misuse, accidents, improper installation, and certain water conditions.
Installer Responsibility for Installation
Owner/end-user is responsible for proper installation and wiring; Maax does not supervise.
Warranty Service Procedure
Contact dealer or Maax; provide proof of purchase and allow inspection for service.
Need help?
Do you have a question about the AKER KDS 3060 and is the answer not in the manual?
Questions and answers