Table of Contents
Advertisement
Advertisement
Table of Contents

Related Manuals for OHAUS Aviator 5000 Series


Summary of Contents for OHAUS Aviator 5000 Series
- Page 1 Aviator 7000/5000 Service Manual Service_Manual_Aviator_V1...
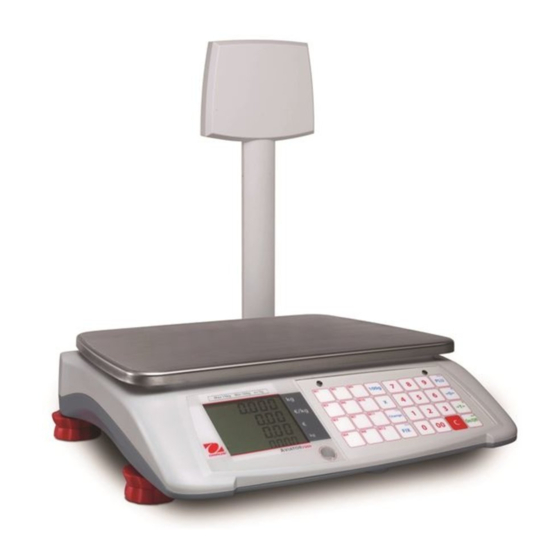
- Page 2 Service Manual Dimensions: Compact version: Tower version: Page 2 of 50...
- Page 3 No part of this manual may be reproduced or transmitted in any form or by any means, electronic or mechanical, including photocopying and recording, for any purpose without the express, written permission of Ohaus, Inc. OHAUS RESERVES THE RIGHT TO MAKE REFINEMENTS OR CHANGES WITHOUT NOTICE.
- Page 4 AND WAIT AT LEAST THIRTY (30) SECONDS BEFORE ANY CONNECTIONS OR DISCONNECTIONS ARE MADE. FAILURE TO maintenance. OBSERVE THESE PRECAUTIONS COULD RESULT IN DAMAGE TO OR DESTRUCTION OF THE EQUIPMENT OR BODILY HARM. Call OHAUS for parts, information, and CAUTION service. OBSERVE PRECAUTIONS FOR HANDLING ELECTROSTATICALLY SENSITIVE DEVICES.
- Page 5 Service Manual The GEO-Value of verified balances explains for which usage location the balance has been verified. This GEO-Value is shown on the balance total price display shortly after the balance is turned on. GEO-Value Further details are shown in the “GEO-Value table“ below. GEO-Value Table Country Geo-Width...
-
Page 6: Table Of Contents
Service Manual Table of Contents 1. Introduction ..........................7 1.1. Overview ........................... 7 1.2. Service Facilities ....................... 7 1.3. Tools & Test equipment required ..................7 1.4. System Specifications ....................... 8 1.4.1. Aviator 5000 ........................8 1.4.2. Aviator 7000 ........................8 1.5. -
Page 7: Introduction
The information contained in this manual is service. believed to be accurate at the time of publication, but OHAUS assumes no liability arising from the Please contact your local OHAUS use or misuse of this material. Reproduction of this agency. -
Page 8: System Specifications
Service Manual 1.4. System Specifications Aviator family consists of two products lines: Aviator 5000 and 7000 The specifications of the Aviator are listed in the below table. „ After servicing the scale, the below specifications must be met. „ 1.4.1. Aviator 5000 Model Aviator-A51P15L Aviator-A51P12L... -
Page 9: Model Configuration
Service Manual 1.5. Model Configuration Aviator-A X1 PXX X X X (country code) Power: Blank =No lead acid battery; L = Lead acid, N = NIMH Construction: Blank = compact; T = tower Ranges: Blank = single range; D = dual ranges Capacity: 3 = 3kg;... -
Page 10: Sealing
Service Manual 1.8. Sealing After installation is completed, legal-for-trade applications require that the enclosure is sealed with a sticker. Metrological relevant settings can’t be adjusted without breaking the sealing. Attention: Assuming the user is to use the (non-automatic) scales/balance in the legally regulated field, the user will be responsible for notifying the appropriate calibration authorities of the repaired scales/balance, so that the latter can take the appropriate measures (calibration/recalibration). -
Page 11: Keyboard
Service Manual 1.9. Keyboard Keyboard layouts by region: Aviator 1.9.1. 5000 Keyboard Europe’s keyboard Europe’s preset card Americas & other countries’ keyboard America’s Preset Card Other Countries’ Preset Card Aviator 1.9.2. 7000 Keyboard Europe’s keyboard America’s keyboard Page 11 of 50... -
Page 12: Battery
Service Manual America’s keyboard Other countries’ keyboard 1.10. Battery Aviator 5000 Series can only use lead acid batteries. Aviator 7000 Series can be operated by using NIMH and D-cell batteries. Aviator 5000: Lead acid battery, 6V 4.5 Ah rechargeable battery „... -
Page 13: Installation
Service Manual 2. Installation Before installing your Aviator scale, identify the best location for your new equipment. A suitable installation environment enhances operation and ensures a long life of the scale. Keep in mind the following factors, which might have a negative influence on the scale's performance: Vibration diminishes the scale’s ability to measure accurately. -
Page 14: Setup Navigation
Service Manual 3.1. Setup Navigation The system is structure in 5 major setup categories: Set 1: Operational Setup ƒ Set 2: Scale Configuration Setup ƒ Set 3: Calibration Setup ƒ Set 4: Precision measurement (manufacturing) ƒ Set 5*: Date & Time Setup ƒ... -
Page 15: Entering Operational Setup
Service Manual 3.2. Entering Operational Setup When unit price is 0, Press the Menu key for around 3 seconds. After hearing a long beep, the display will show "SET 1 OP". Press ON/OFF key to enter the Operational Setup Group. Operational Settings Summary: Aviator 5000 Series: Step... - Page 16 Service Manual Aviator 7000 Series: Step Function Explanation Default Initialize to ON: Initialize softswitch parameters to the defaults Defaults (only for OFF: Scale will not initialize scale softswitch parameters operation configuration) Buzzer OFF: No sound when a key is pressed...
- Page 17 Service Manual 5= 38400bps 6= 57600bps Data bits, 0= 7, Even, 1 Parity, 1= 7, Odd, 1 Stop bits 2= 7, No, 1 3= 8, No, 1 4= 7, Even, 2 5= 7, Odd, 2 6= 7, No, 2 7= 8, No, 2 Protocol 0= CAS (Price computing) 1= Avery Berkel (Price computing)
-
Page 18: Entering Scale Configuration Setup
Service Manual 3.3. Entering Scale Configuration Setup When unit price is 0, Press the Manu key for around 3 seconds. After hearing a long beep, the display will show "SET 1 OP". Press the Tare key to go down to set 2, then press ON/OFF key. Display messages: Press Seal. - Page 19 Service Manual Aviator 7000 Series: Step Function Explanation Country Detail in the section “specification by country” Initialize to Defaults YES: Initialize softswitch parameters to the defaults NO: Scale will not initialize scale softswitch parameters Display comma or OFF: Use a “.” in all weight and price data period ON: Use a “,”...
-
Page 20: Time & Date Settings (Aviator 7000 Only)
Service Manual 3.4. Time & Date Settings (Aviator 7000 only) Access Setup menu as described above Press arrow up or down to set the time. Year configuration: Press up or down arrow key to choose the accurate year. Then press on/off key. - Page 21 Service Manual Country Country type Display Keyboard Keyboard Accumula Gross or Tare Chain Tare Tare te/+ uuuuu’s Net Zero Enable Tare When Enable Clear Enable China Germany France Austria Spain/ Portugal Belgium/ Netherlands Italy Swiss Ukraine Russia Hungary Slovakia Czechia Poland slovenia Croatia...
- Page 22 Service Manual Country Country type Total Unit price 1/2lb or 1/4Lb Change Hold switch on Price multiplicat 100g pricing Function function kg/lb Round pricing enable China Germany France Austria Spain/ Portugal Belgium/ Netherlands Italy Swiss Ukraine Russia Hungary Slovakia Czechia Poland slovenia Croatia...
-
Page 23: External Peripheral Printer (Not Available In All Countries)
* Please be aware that all transaction data is lost if the mainboard is exchanged. OHAUS does not take over any liabilities that come up due to the connection of printers not officially recommended by OHAUS for the concerned product line. Printers connected to the system & not officially recommended by OHAUS might not be covered by the scale approval. -
Page 24: Calibration
Service Manual 3.7. Calibration Important Note: Assuming the user is to use the (non-automatic) scales/balance in the legally regulated field, the user will be responsible for notifying the competent calibration authorities of the repaired scales/balance, so that the latter can take the appropriate measures (calibration/recalibration). Capacity and Increments Weight unit Resolution Capacity (kg) Increment (g) Capacity of the load cell (kg) Load Cell BOM... - Page 25 Service Manual Display Display Display on Display On Procedure Description on 1st on 2nd the bottom Lit cursor operation 3rd line line line line Step16 Put the weight on the platter Add ** (*valid weight is about 2/3 capacity) Step17 Count down from 5 to 0 [on/off] Capture 0...
-
Page 26: Maintenance
4. Maintenance 4.1. Preventive Maintenance OHAUS scales are precision instruments which should be handled carefully, stored in a clean, dry, dust-free area, and cleaned periodically. Follow these precautionary steps: When a scale has had chemicals or liquids spilled on it, all exterior surfaces should be cleaned as soon „... -
Page 27: Error Shooting
Error messages indicate serious hardware malfunctions. The error table below lists error codes & their problem solutions. Error Reason Solution RAM error Call Ohaus service ROM error EEPROM error No PLU PLU not found Program PLU nnnnnn in weight display... -
Page 28: Diagnosis
Service Manual 4.4. Diagnosis 1. Isolate and identify the symptom. 2. Refer to the diagnostic guide and locate the symptom (Please also refer to the Troubleshooting chapter). 3. Follow the suggested remedies in the order they appear. 4. Perform the indicated checks, or refer to the appropriate section of the manual. 5. -
Page 29: Opening Of The Housing
Service Manual 5.2. Opening of the Housing Important notice: Please refer to the service preparations chapter before opening the housing. Procedure for opening the housing: 1. Open the top cover. Unscrew the 8 bolts A (7 screws, 1 sealing screw) . 2. - Page 30 Service Manual Apply local currency/country setting ƒ After changing the mainboard calibration of the system is mandatory ƒ Attention: Assuming the user is to use the (non-automatic) scales/balance in the legally regulated field, the User will be responsible for notifying the appropriate calibration authorities of the repaired scales/balance, so that the latter can take the appropriate measures (calibration/recalibration).
-
Page 31: Load Cell
Service Manual 5.4. Load Cell Preparation: Write down the geo code Procedure for replacing the load cell: 1. Open top cover (More details please refer to open housing chapter, service preparations section). 2. Unscrew the four screws (A). 3. Open adapter housing and unscrew 1 screw (A). 4. - Page 32 Service Manual Limits: Levels Max. error Delta Span 1 Mpe Weighing Max. error 0e<m<500e 0.5e 500e<m<2000e 1.0e 2000e<m<max 1.5e Conditions: standard conditions. Procedure: 10 times individual weighing with full load (nearest the capacity). Position on the center of the plate „...
-
Page 33: Display Exchange
Service Manual 5.5. Display Exchange Procedure for replacing the display: Replacing the operator side display 1. Open the top cover (please refer to opening housing chapter, please see also service preparations section) 2. Disconnect all cables. 3. Remove the old display directly. 4. -
Page 34: Keyboard Exchange
Service Manual 5.6. Keyboard Exchange Procedure for replacing the keyboard: Replacing Aviator 5000 keyboard 1. Open top cover (please refer to open the housing chapter, service preparations section). 2. Disconnect keyboard cable (A). 3. Remove the old keyboard 4. Install new keyboard, following the same instructions in the reverse order. Replacing Aviator 7000 keyboard (PCB layer) 1. -
Page 35: Appendix1
Service Manual 6. Appendix1 6.1 Protocols For the Price Computing version, there are 7 different protocols. The numbers correspond to the number that will show up in the Softswitch settings: Berkel Dialog 06 L2 Mettler-Toledo Anker Dialog 02/04 6.1.1 CAS 6.1.1.1 Data Format 9600 Baud (select 2400, 4800 or 9600) 7 data bits (select 7 or 8) - Page 36 Service Manual Command COMMENTS ENQ (05h) Starts the communication sequence ACK (06h) Data Available NAK (15h) No acknowledgement DC1 (11h) Data Request (Format 1, Weight Only) DC2 (12h) Data Request (Format 2, Total Price, Weight, and Unit Prict) STX (02h) Start of text Status –...
- Page 37 Service Manual 6.1.2 Berkel 6.1.2.1 Data Format 2400 Baud (select 2400, 4800 or 9600) 7 data bits (select 7 or 8) Even parity (select Even, None or Odd parity) 1 stop bit (select 1 or 2 stop bit) 6.1.2.2 Handshaking For PC DB25 serial port connector: Jumper 4 to 5, and 6, 8, &...
- Page 38 Service Manual 6.1.2.4 Command Flow Scale COMMENTS ENQ (05h) Data Available. Errors could be: ACK (06h) CAN - repeat weighing NAK - no acknowledgement NUL - no data available Data Request DC1 (11h) Errors could be: NAK – no acknowledgement STX ID W5W4W3W2W1 BCC ETX Transmitted Data Confirm Data...
- Page 39 Service Manual 6.1.3.3 Command Descriptions Records for Communications from a POS system to the Scale Record 01: Transmitting of unit price EOT STX 01 ESC D5 D4 D3 D2 D1 D0 ESC ETX \_______________________/ Record No. Unit price 5/6 digits Record 03: Transmitting of unit price and tare value EOT STX 03 ESC D5 D4 D3 D2 D1 D0 ESC T3 T2 T1 T0 ETX \_______________________/...
- Page 40 Service Manual Records for Communications from the Scale to a POS system Record 02: Result of weighing (answer to records 01, 03, 04, 05) STX 02 ESC X ESC D4 D3 D2 D1 D0 ESC D5 D4 D3 D2 D1 D0 ESC D5 D4 D3 D2 D1 D0 ETX \_______________/ \__________________/ \__________________/...
- Page 41 Service Manual Order of events: ƒ ƒ The POS-system transmits one of the Records 01, 03, 04 or 05. ƒ The scale answers with Record 11. ƒ Example: STX 11 ESC 247 ETX (transmit record 10, use random number 47H) ƒ...
- Page 42 Service Manual 6.1.4.2 Command Descriptions Operation P.O.S Scale Initialization and cancellation of a <ACK><CR><LF> -> weighing procedure. <- <ACK><CR><LF> (scale not ready, gross weight = Transmission price/unit GXXXXX<CR><LF> -> (price) Together with the price/unit a tare GXXXXXTxxxx<CR><LF> -> value can be transmitted. Only (price, tare) tare values corresponding to the range of the scale can be...
- Page 43 Service Manual 6.1.4.3 Flow Chart S A T Z 1 1 ( 3 2 H , Z ) SATZ 01 SATZ 03 SATZ 04 SATZ 05 SATZ 10 SATZ 20 SATZ 02 S A T Z 1 1 ( 3 1 H ) S A T Z 1 1 ( 3 0 H ) SATZ 09 SATZ 08...
- Page 44 Service Manual 6.1.5 Anker Note: Scale replies to L5 request with SOH if in motion, under zero, over capacity, can not capture zero, or if there is no weight available. Page 44 of 50...
- Page 45 Service Manual 6.1.6 Dialog 02 / 04 Note: To use Dialog 04, select this protocol but set the baud rate to 4800 6.1.6.1 Data Format Baud rate: 2400 Baud Type of transmission: asynchronous Data format: 7 Bit + Parity Parity: odd Stop bits: 1 Bit Connection Scale...
- Page 46 Service Manual \____/ \__________________/ \____________/ Setting number Basic price text (04) 6 digits 13 chars Setting number 05: Basic Price, Tare value, Text EOT STX 30h 35h ESC D5 D4 D3 D2 D1 D0 ESC T3 T2 T1 T0 ESC A....A ETX \___/ \__________________/...
- Page 47 Service Manual Status bytes are prefaced by the letter 'S'. Units of measure abbreviations are always upper case. The weight is always positive. Therefore there is no polarity byte Key to symbols used: <ETX> End of Text character (03 hexadecimal). <LF>...
- Page 48 Service Manual <LF>xxxxxxMM<CR><LF>Shh<CR><ETX> Name: unrecognized command Command: all others Response: Unrecognized command <LF>?<CR><ETX> NOTES: 1) Weight field is always six characters (5 for weight, 1 for decimal point), regardless of display size. 2) Leading zeroes are not suppressed. 3) High resolution weight field is seven characters (6 for weight, 1 for decimal point), regardless of display size.
- Page 49 Service Manual The status bits are defined as follows: Status Byte 1 Status Byte 2 Status Byte 3 Status Byte 4 (optional) (optional) 1 = Scale in motion 1 = Under capacity 1 = Weight Change 00 = Low range 0 = Stable 0 = Not under capacity 0 = No Change...
-
Page 50: Appendix2
Note: COM driver need to be installed when USB connects with POS. If customers use RS232, no need to install it. OHAUS P/N: 72246394 (10/2010) 1.0 OHAUS ® is a Trademark of OHAUS,Inc. Printed in China * 72246394* Page 50 of 50...
Need help?
Do you have a question about the Aviator 5000 Series and is the answer not in the manual?
Questions and answers