Table of Contents

Advertisement

SERVICE MANUAL
ADVENTURER PRO BALANCES
ADVENTURER SL BALANCES
Visit us at www.TestEquipmentDepot.com
and
99 Washington Street
Melrose, MA 02176
Phone 781-665-1400
Toll Free 1-800-517-8431

Advertisement

Table of Contents
loading
Need help?

Need help?

Do you have a question about the Adventurer Pro Balances and is the answer not in the manual?

Questions and answers

Ray Wasosky
April 15, 2025

how do I change from grams to pennyweights

1 comments:
Mr. Anderson
April 15, 2025

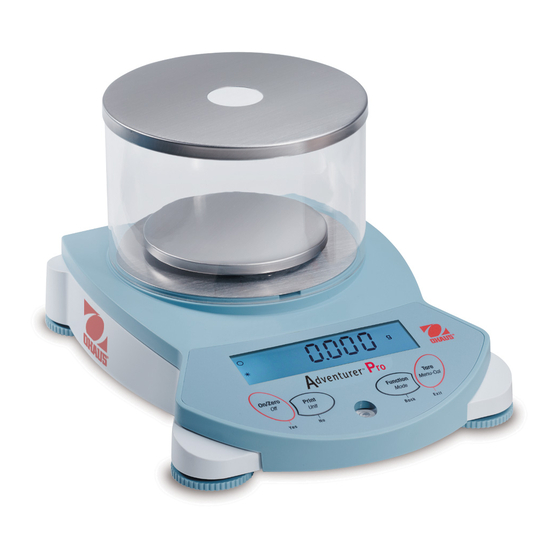
To change the measurement unit from grams to pennyweights on the OHAUS Adventurer Pro Balance, follow these steps:

1. Access the Unit menu.
2. Set "Custom" to ON to enable custom units.
3. Define the custom unit using a conversion factor and exponent:
- For pennyweights, use the appropriate conversion factor from grams (e.g., 1 gram = 0.6430149 pennyweights).
4. Enter the conversion factor (between 0.1000000 and 1.999999) and exponent to set the decimal position.
5. Confirm the settings to apply the custom unit.

This sets the balance to display weight in pennyweights instead of grams.

This answer is automatically generated

Subscribe to Our Youtube Channel

Summary of Contents for OHAUS Adventurer Pro Balances

  • Page 1 99 Washington Street Melrose, MA 02176 Phone 781-665-1400 Toll Free 1-800-517-8431 Visit us at www.TestEquipmentDepot.com SERVICE MANUAL ADVENTURER PRO BALANCES ADVENTURER SL BALANCES...
  • Page 3 ADVENTURER PRO BALANCES ADVENTURER SL BALANCES The information contained in this manual is believed to be accurate at the time of publication, but Ohaus Corporation assumes no liability arising from the use or misuse of this material. Reproduction of this material is strictly prohibited.
  • Page 5: Table Of Contents

    TABLE OF CONTENTS Page No. CHAPTER 1 INTRODUCTION Introduction ......................1-1 Service Facilities ..................... 1-1 Tools and Test Equipment Required............... 1-2 1.3.1 Special Tools and Test Equipment List ............. 1-2 1.3.2 Standard Tools and Test Equipment List ............1-2 Test Masses Required .................... 1-3 Specifications ......................
  • Page 6 TABLE OF CONTENTS (Cont.) Page No. CHAPTER 4 TESTING Testing ........................4-1 4.1.1 Operation Test ....................4-1 4.1.2 AV Models Segment Display Test ..............4-1 4.1.3 AS Models Segment Display Test ..............4-1 AV and AS Models Strain Gauge Performance Tests ..........4-2 4.2.1 Repeatability Test ....................
  • Page 7 LIST OF TABLES TABLE NO. TITLE Page No. Adventurer AV Models Calibration Points ............1-3 Adventurer AS Models Calibration Points ............1-4 Adventurer AV Model Specifications ..............1-5 Adventurer AS Model Specifications ..............1-6 Balance Will Not Turn On with AC Adapter (All Models) ........2-2 Balance Will Not Turn On Using Batteries............
  • Page 8 LIST OF ILLUSTRATIONS (Cont.) FIGURE TITLE Page No. 3-12 Removing Strain Gauge Load Cell ..............3-14 3-13 InCal Mechanism Identification ................3-15 3-14 Motor Mounting Screws Location ............... 3-15 3-15 Disengauge Timing Belt ..................3-16 3-16 Removing Top Gear ................... 3-16 3-17 Top Gear Removed ....................
  • Page 9 LIST OF ILLUSTRATIONS (Cont.) FIGURE TITLE Page No. 3-55 Removing the Ratio Beam.................. 3-33 3-56 Removing the Aluminum Sleeves ..............3-33 3-57 Ratio Beam Weight Removed ................3-34 3-58 Load Cell Critical Area ..................3-34 3-59 Load Cell Magnet Area ..................3-35 3-60 Ratio Beam vane Slotted Area ................
  • Page 11: Chapter 1 Introduction

    CHAPTER 1 INTRODUCTION 1.1 INTRODUCTION This service manual contains the information needed to perform routine maintenance and service on the Adventurer Pro (AV Models) and Adventurer SL (AS Models) Balances. The contents of this manual is contained in five chapters, three appendixes and are listed as follows: Chapter 1 Introduction - Contains information regarding service facilities, tools, test equipment, calibration masses and specifications.
  • Page 12: Tools And Test Equipment Required

    1.3 TOOLS AND TEST EQUIPMENT REQUIRED In order to properly service the Adventurer Pro or Adventurer SL balances, certain Ohaus special tools and test items are required in addition to standard electronic tool kits. These items are listed as follows: 1.3.1 Special Tools and Test Equipment List...
  • Page 13: Test Masses Required

    CHAPTER 1 INTRODUCTION 1.4 TEST MASSES REQUIRED The masses required to test the Adventurer AV Models and Adventurer AS Models balances must meet or exceed the requirements of ASTM / OIML Class specified. The calibration points for the Adventurer AV Models are listed in Table 1-1 and the calibration points for the Adventurer AS Models are listed in Table 1-2.
  • Page 14: Adventurer As Models Calibration Points

    CHAPTER 1 INTRODUCTION TABLE 1-2. ADVENTURER AS MODELS CALIBRATION POINTS WEIGHT CLASS MODEL CAPACITY SPAN LINEARITY ASTM OIML CAL POINTS (g) CAL POINTS (g) AS64 40, 50 or 60 25 and 50 AS153 150g 100 or 150 100 and 150 AS214 100 or 200 100 and 200...
  • Page 15: Specifications

    CHAPTER 1 INTRODUCTION 1.5 SPECIFICATIONS Specifications for the Adventurer AV Model balances are listed in Table 1-3. Table 1-4 contains the specifications for the Adventurer AS Model balances. When a balance has been serviced, it must meet the specifications listed in the tables. Before servicing the balance, determine what specifications are not met.
  • Page 16: Adventurer As Model Specifications

    CHAPTER 1 INTRODUCTION TABLE 1-3. ADVENTURER AV MODEL SPECIFICATIONS (Cont.) Item Number AV8100* AV2101C** AV4101C** AV8101C** Capacity (g) 8100 2100 4100 8100 Readability (g) Repeatability (Std.dev.)(g) Linearity (g) ± 0.2 Off Center Load 1/2 cap, 1/2 distance 0.1g 0.2g 0.3g Weighing Units Milligram, Gram, Kilogram, Ounce, Pound, Carat, Pennyweight, Ounce Troy, Grain, Newton, Hong Kong Tael, Singapore Tael, Taiwan Tael,Momme, Tical,...
  • Page 17: Chapter 2 Diagnosis

    The repeatability test will quickly point out whether the Load Cell is operating properly or whether the problem is due to an electronic malfunction. If a problem arises that is not covered in this manual, contact Ohaus Corporation for further information.
  • Page 18: Balance Will Not Turn On With Ac Adapter (All Models)

    CHAPTER 2 DIAGNOSIS TABLE 2-1 BALANCE WILL NOT TURN ON WITH AC ADAPTER (ALL MODELS). REMEDY SYMPTOM PROBABLE CAUSE Check the main power source outlet for Balance will not turn on with Main power source is off. proper voltage. AC adapter supplied. Check the ac adapter voltage output.
  • Page 19: Balance Will Not Turn On Using Batteries

    CHAPTER 2 DIAGNOSIS TABLE 2-2 BALANCE WILL NOT TURN ON USING BATTERIES. (See Note) REMEDY SYMPTOM PROBABLE CAUSE Check position of batteries. Balance will not turn on Incorrect battery installa- with new batteries installed. tion. Refer to section 3.1.1 and open the bal- Wiring harness defective ance.
  • Page 20: Balance Does Not Respond To Front Panel Controls

    CHAPTER 2 DIAGNOSIS TABLE 2-3 BALANCE DOES NOT RESPOND TO FRONT PANEL CONTROLS. REMEDY SYMPTOM PROBABLE CAUSE CAUTION: For the following procedure, Balance does not respond disconnect the ac adapter and remove to front panel controls with power and or batteries from the balance to ac adapter connected.
  • Page 21: Balance Cannot Calibrate Manually

    CHAPTER 2 DIAGNOSIS TABLE 2-5 BALANCE CANNOT CALIBRATE MANUALLY SYMPTOM PROBABLE CAUSE REMEDY Incorrect weights. Verify that proper weights are used. Balance can be turned on but will not calibrate manu- Balance is set for legal Check that LFT lock switch is set to un- ally.
  • Page 22 CHAPTER 2 DIAGNOSIS TABLE 2-6 BALANCE CANNOT CALIBRATE INTERNALLY- AV MODELS ONLY. SYMPTOM PROBABLE CAUSE REMEDY Main PC Board is defec- Verify that all other functions are opera- Balance can be turned on tive. tional. If fuctions are OK, continue with the but will not calibrate using procedure.
  • Page 23: Error Codes For All Models

    CHAPTER 2 DIAGNOSIS 2.3 ERROR CODES FOR ALL MODELS Adventurer AV and AS balances are equipped with software which will display an error condition when it occurs. Table 2-7 Error Codes, describes the various error codes which can appear on the display and specifies the probable reason.
  • Page 24 CHAPTER 2 DIAGNOSIS 2.3 ERROR CODES FOR ALL MODELS (Cont.) TABLE 2-7. ERROR CODES (Cont.) ERROR CODE PROBABLE CAUSE REMEDY Error 9.9 Internal calibration error. InCal motor running longer than normal (check motor and mechanism, replace main PC board. Error 53 EEPROM checksum error.
  • Page 25: Chapter 3 Repair Procedures

    CHAPTER 3 REPAIR PROCEDURES 3.1 REPAIR PROCEDURES SMALL FRAME AS and AV MODELS This section of the manual contains detailed disassembly procedures of the AV and AS model balances. There are two physical sizes of balances for the AV and AS models (large and small). This section deals only with the small frame models.
  • Page 26 CHAPTER 3 REPAIR PROCEDURES 3.1.1 Opening the Balance (Cont.) AV MODELS AS MODELS Pan Support Wind Ring / Adapter Ring EMC Plate Cover Screws (2) AV212 AS312 Pan Support Adapter Ring EMC Plate Cover Screws (2) AS612, AS1502, AS811, AS3101, AS6101, AV412, AV812, AV2101, AV4101, AV8101 AS8100 Draft Shield Cover...
  • Page 27: Display Circuit Board Repair Or Replacement

    CHAPTER 3 REPAIR PROCEDURES 3.1.1 Opening the Balance (Cont.) Cover Screws (4) Battery Compartment Cover Figure 3-2. Bottom of Balance. 3.1.2 Display Circuit Board Repair or Replacement It is suggested that if the Display Circuit Board is suspected of being faulty, it should be replaced rather than repaired.
  • Page 28 CHAPTER 3 REPAIR PROCEDURES 3.1.2 Display Circuit Board Repair or Replacement (Cont.) Figure 3-3. Balance Opened.
  • Page 29: Main Printed Circuit Board Replacement

    CHAPTER 3 REPAIR PROCEDURES 3.1.2 Display Circuit Board Repair or Replacement (Cont.) 3. Disconnect the interconnecting cable from the Display Printed Circuit Board. 4. Connect the interconnecting cable to the replacement Display Printed Circuit Board. 5. Install the new Display Printed Circuit Board into position on the top Cover. 6.
  • Page 30: Rs232 Interface Printed Circuit Board Replacement (Av Models Only)

    CHAPTER 3 REPAIR PROCEDURES 3.1.3 Main Printed Circuit Board Replacement (Cont.) 3. The Main Printed Circuit Board is fastened in place by 4 screws located on top of the board. Remove the screws and the Printed Circuit Board. 4. Install the replacement Printed Circuit board using the 4 screws previously removed. 5.
  • Page 31: Strain Gauge Load Cell Replacement

    CHAPTER 3 REPAIR PROCEDURES 3.1.5 Strain Gauge Load Cell Replacement Load Cell Kits are available for replacement purposes for all AV and AS model balances. Each Kit is fully assembled and consists of metal base plate, a Load Cell mounted to the base plate and a package of labels.
  • Page 32: Repair Procedures Large Frame As And Av Models

    CHAPTER 3 REPAIR PROCEDURES 3.2 REPAIR PROCEDURES LARGE FRAME AS and AV MODELS This section of the manual contains detailed disassembly procedures of the AV and AS model balances. There are two physical sizes of balances for the AV and AS models (large and small). This section deals only with the larger frame models.
  • Page 33 CHAPTER 3 REPAIR PROCEDURES 3.2.1 Opening the Balance (Cont.) AV MODELS Glass Doors Cover Screws (2) AV64, AV64C, AV114, AV114C, AV264, AV213, AV213C, AV313, AV313C, AV413, AV264C - MFR TYPE AV413C - MFR TYPE Pan Support Pan Support Wind Ring EMC Plate EMC Plate Cover Screws (2)
  • Page 34 CHAPTER 3 REPAIR PROCEDURES 3.2.1 Opening the Balance (Cont.) AS MODELS Glass Doors Cover Screws (2) AS313- MFR TYPE AS64, AS214 - MFR TYPE Pan Support EMC Plate Cover Screws (2) AS3102 - MFR TYPE Figure 3-8. Top of AS Balances. 3-10...
  • Page 35: Display Circuit Board Repair Or Replacement

    CHAPTER 3 REPAIR PROCEDURES 3.2.2 Display Circuit Board Repair or Replacement It is suggested that if the Display Circuit Board is suspected of being faulty, it should be replaced rather than repaired. The switches can be easily replaced. They are available as a set of 4. The LCD and Backlight are difficult to replace.
  • Page 36: Main Printed Circuit Board Replacement

    CHAPTER 3 REPAIR PROCEDURES 3.2.2 Display Circuit Board Repair or Replacement (Cont.) 3. Disconnect the interconnecting cable from the Display Printed Circuit Board. 4. Connect the interconnecting cable to the replacement Display Printed Circuit Board. 5. Install the new Display Printed Circuit Board into position on the top Cover. 6.
  • Page 37: Rs232 Interface Com 1 Or (Com 2 Rs Or Usb) Printed Circuit Board Replacement

    CHAPTER 3 REPAIR PROCEDURES 3.2.3 Main Printed Circuit Board Replacement (Cont.) 3. The Main Printed Circuit Board is fastened in place by 3 screws located on top of the board. Remove the screws and the Printed Circuit Board. 4. Install the replacement Printed Circuit board using the 3 screws previously removed. 5.
  • Page 38: Strain Gauge Load Cell Replacement With Incal

    CHAPTER 3 REPAIR PROCEDURES 3.2.5 Strain Gauge Load Cell Replacement with InCal Load Cell Kits are available for replacement purposes for all AV model balances. Each Kit is fully assembled and consists of metal base plate, a Load Cell mounted to the base plate and a package of labels.
  • Page 39: Strain Gauge Calibration Incal Mechanism Removal/Replacement

    CHAPTER 3 REPAIR PROCEDURES 3.2.6 Strain Gauge Calibration InCal Mechanism Removal/Replacement This procedure describes how to remove the calibration motor and the calibration mechanism from the load cell. There can be several reasons why the internal calibration does not function including, a broken or jammed timing belt, defective motor or defective main PC.
  • Page 40 CHAPTER 3 REPAIR PROCEDURES 3.2.6 Strain Gauge Calibration InCal Mechanism Removal/Replacement (Cont.) Motor Removal (Cont.) 2. Refer to Figure 3-15 and lift the Motor up from the InCal Mechanism just enough to disengauge the Timing Belt. 3. Refer to Figure 3-16 and slide the Timing Belt off of the Top Gear and remove the Top Gear. Lift Motor Top Gear Slide Timing Belt...
  • Page 41 CHAPTER 3 REPAIR PROCEDURES 3.2.6 Strain Gauge Calibration InCal Mechanism Removal/Replacement (Cont.) Motor Installation (Cont.) 5. Refer to Figure 3-19, hold the Motor down and install and tighten the 4 Motor screws. Hold Motor Down Screws Figure 3-19. Motor Installation. 6.
  • Page 42: Load Cell (Mfr) Replacement

    CHAPTER 3 REPAIR PROCEDURES 3.2.7 Load Cell (MFR) Replacement Figure 3-22 illustrates a typical MFR Load Cell shown with an InCal Mechanism installed. The Load Cell illustration may vary from actual load cells. Major components are shown. InCal Weight InCal Motor Cable Connector Aluminum Sleeves Ratio Beam Vertical Stop Screw...
  • Page 43 CHAPTER 3 REPAIR PROCEDURES 3.2.7 Load Cell (MFR) Replacement (Cont.) Load Cell Kits are available for replacement purposes for all AV and AS model balances. Each Kit is assembled and consists of metal base plate, a Load Cell mounted to the base plate and a package of labels.
  • Page 44: Incal Motor Removal/Replacement

    CHAPTER 3 REPAIR PROCEDURES 3.2.7 Load Cell (MFR) Replacement (Cont.) 9. See Appendix C, Adventurer Pro Service Tools and follow instructions for replacing Load Cell. 10. Remove the RS232 board and cable from the balance and assemble. 11. Recalibrate the balance in accordance with instructions in Appendix A, Linearity Calibra- tion A.2 12.
  • Page 45 CHAPTER 3 REPAIR PROCEDURES 3.2.8 InCal Motor Removal/Replacement (Cont.) InCal Motor Replacement 1. Refer to Figure 3-26 and gently rotate the InCal Mechanism to lower the InCal Weight and rotate in the opposite direction to raise the InCal Weight. If the operation is not smooth, replace the entire InCal Mechanism.
  • Page 46: Incal Mechanism Removal/Replacement

    CHAPTER 3 REPAIR PROCEDURES 3.2.8 InCal Motor Removal/Replacement (Cont.) InCal Motor Replacement (Cont.) 5. Install the InCal Motor to the InCal Mechanism, the motor shaft must be in the position as shown in Figure 3-28. The InCal Motor shaft must be in the fully counter-clockwise position. 6.
  • Page 47 CHAPTER 3 REPAIR PROCEDURES 3.2.9 InCal Mechanism Removal/Replacement (Cont.) InCal Mechanism Replacement 1. Rotate shaft of the InCal Mechanism to it's lowest position and slide in the weight. 2. Rotate the shaft until weight is in the top position. 3. Slide the new InCal Mechanism into position. Fasten with the 3 screws previously removed, do not fully tighten at this time.
  • Page 48 CHAPTER 3 REPAIR PROCEDURES 3.2.10 Position Sensor Assembly Removal/Installation Position Sensor Removal 1. Unscrew the three fastener screws of the Position Sensor Assembly. 2. Raise the Position Sensor Assembly, which is held by the magnetic field. 3. If the Position Sensor Assembly has to be changed: unsolder Flexible Board , see Figure 3-34.
  • Page 49: Unmounting The Load Cell From The Base Plate

    CHAPTER 3 REPAIR PROCEDURES 3.2.11 Unmounting the Load Cell from the Base Plate This procedure is necessary before proceeding with other repairs to the Load Cell. Base Plate Removal 1. Refer to Figure 3-36 and remove the Weigh Below Hook and screw. Weigh Below Hook and Screw Mounting Screws Figure 3-36.
  • Page 50 CHAPTER 3 REPAIR PROCEDURES 3.2.11 Unmounting the Load Cell from the Base Plate (Cont.) Base Plate Installation 1. Make sure the mating surfaces on the Base plate and the Load Cell as shown in Figure 3-37 are clean. 2. Position the Load Cell on the base and install the 2 mounting screws. Do not tighten fully. 3.
  • Page 51: Changing The Load Cell Board

    CHAPTER 3 REPAIR PROCEDURES 3.2.12 Changing the Load Cell Board (Cont.) 3. Unsolder Position Sensor Assembly from Load Cell PC board. Unsolder Position Sensor Assembly Unsolder Temperature Sensor Board Load Cell Load Cell Ratio Beam Cable PC Board Board Screw Figure 3-40.
  • Page 52: Removing The Ratio Beam

    CHAPTER 3 REPAIR PROCEDURES 3.2.13 Removing the Ratio Beam Note: Perform procedures in paragraphs 3.2.7, 3.2.8, 3.2.10, 3.2.11, 3.2.12 first. 1. Hold Contact Board to ensure the fine coil wires cannot tear off, then remove screw as shown in Figure 3-42. Coil Wires Contact Board...
  • Page 53 CHAPTER 3 REPAIR PROCEDURES 3.2.13 Removing the Ratio Beam (Cont.) Centering Pins Installed Centering Pins Installed Figure 3-45. Centering Pins Installation. 4. Refer to Figures 3-44 and 3-45 and carefully loosen and remove the nuts on the Ratio Beam while holding the screw heads to prevent movement. This is very important! Ratio Beam Loosen Nut Hold Stationery...
  • Page 54 CHAPTER 3 REPAIR PROCEDURES 3.2.13 Removing the Ratio Beam (Cont.) 5. Remove the screws and washers as shown in Figure 3-47. Figure 3-47. Ratio Beam Screws and Washers Removed. 6. Refer to Figures 3-44 and 3-48 and carefully loosen and remove the nuts on the InCal Weight Arm while holding the screw head to prevent movement.
  • Page 55 CHAPTER 3 REPAIR PROCEDURES 3.2.13 Removing the Ratio Beam (Cont.) 7. Remove the screws and washers as shown in Figure 3-49. Figure 3-49. InCal Weight Arm Screws and Washers Removed. Carefully slide the InCal Weight Arm as shown in Figure 3-50. Figure 3-51 illustrates the InCal Weight Arm removed.
  • Page 56 CHAPTER 3 REPAIR PROCEDURES 3.2.13 Removing the Ratio Beam (Cont.) 9. Refer to Figure 3-52 and remove the alumnum sleeves as shown. Aluminum Sleeves Aluminum Sleeves Figure 3-52. Aluminum Sleeves Removed. 10. Refer to Figure 3-53 and remove the centering pins as shown. Centering Pins Figure 3-53.
  • Page 57 CHAPTER 3 REPAIR PROCEDURES 3.2.13 Removing the Ratio Beam (Cont.) 12. Carefully lift out the Ratio Beam as shown in Figure 3-55 Ratio Beam Ratio Beam Removed Figure 3-55. Removing the Ratio Beam. 12. Remove the Aluminum Sleeves, see Figure 3-56. This completes the disassembly. Sleeves Sleeves Figure 3-56.
  • Page 58: Installing The Ratio Beam

    CHAPTER 3 REPAIR PROCEDURES 3.2.14 Installing the Ratio Beam 1. If a new Ratio Beam is being installed, remove the existing weights from the old Ratio Beam and install on the replacement Ratio Beam. See Figure 3-57. Note: Some Load Cells do not require weights. Ratio Beam Weights Ratio Beam Figure 3-57.
  • Page 59 CHAPTER 3 REPAIR PROCEDURES 3.2.14 Installing the Ratio Beam (Cont.) 3. Refer to Figure 3-59 and check and clean the Magnet area. To clean, use a small wooden stick with double-sided tape to remove any debris. Magnet Area Figure 3-59. Load Cell Magnet Area. 4.
  • Page 60 CHAPTER 3 REPAIR PROCEDURES 3.2.14 Installing the Ratio Beam (Cont.) 10. Insert the Centering Pins. See Figures 3-44 and 3-45. 11. Refer to Figure 3-48 and hold the screw head while tightening the nuts for InCal Weight Arm. 12. Refer to Figure 3-46 while holding the screws, tighten the nuts on the Ratio Beam Arm. 13.
  • Page 61: Vertical Stop Adjustment

    CHAPTER 3 REPAIR PROCEDURES 3.2.15 Vertical Stop Adjustment This procedure is required when the Ratio Beam or the Sensor Board has been replaced. Note Note Note Note Note: The vertical stop setting is the reference for the Ratio Beam height (horizontal position). 1.
  • Page 62 CHAPTER 3 REPAIR PROCEDURES 3-38...
  • Page 63: Chapter 4 Testing

    CHAPTER 4 TESTING TESTING After servicing the balance, an operational test and various performance tests should be made to ascertain whether or not the balance meets specifications. Turn the balance on and allow it warm up for at least five minutes before performing these tests. Make sure the test area is free from drafts and that the balance rests on a level and vibration free surface.
  • Page 64: Av And As Models Strain Gauge Performance Tests

    CHAPTER 4 TESTING 4.2 AV AND AS MODELS STRAIN GAUGE PERFORMANCE TESTS The following performance tests are used to evaluate the balance operation before and after repairs. Each balance tested must meet the requirements specified in each test as well as the specifications listed in Table 1-2 and Tables 4-1and 4-2.
  • Page 65: Repeatability Test

    CHAPTER 4 TESTING 4.2.1 Repeatability Test Repeatability is a word used in balance specifications meaning the Standard Deviation of a set of similar weight readings. To determine whether a balance meets the calculated Standard Deviation value in the Specification Table 1-2, perform the following test: Test 1.
  • Page 66: Linearity Test

    CHAPTER 4 TESTING 4.2.3 Linearity Test This test is used to determine the linearity of the unit throughout its operating range. The masses used to perform this test can be utility masses. NOTE: The balance must pass the Off-Center Load Test and Re- peatability Test before the Linearity Test may be performed.
  • Page 67: Load Cell Adjustments (Strain Gauge Models Only)

    CHAPTER 4 TESTING 4.2.3 Linearity Test (Cont.) Test (Cont.) 5. Place the test load on the balance and record the weight. 6. Place Load 3 on the balance and press the ON/ZERO/ Off button. 7. Place the test load on the balance and record the weight. 8.
  • Page 68: Av Models Test Mass Values

    CHAPTER 4 TESTING 4.2.4 Load Cell Adjustments (Strain Gauge Models Only) (Cont.) Up Stop Adjustment Checking and adjusting the up stop. CAUTION DO NOT PULL UP ON THE LOAD CELL AS DAMAGE MAY OCCUR. USE FEELER GAUGES TO CHECK CLEARANCES. 1.
  • Page 69: Av Models Load Cell Up Stop Adjustment Tolerances

    CHAPTER 4 TESTING 4.2.4 Load Cell Adjustments (Strain Gauge Models Only) (Cont.) Up Stop Adjustment (Cont.) TABLE 4-7. AV MODELS LOAD CELL UP STOP ADJUSTMENT TOLERANCES Capacity of Load Cell Min(mm/in) Max(mm/in) 0.40/0.016 0.45/0/018 210g 0.60/0.024 0.70/0.028 410g 0.50/0/020 0.60/0.024 810g 0.65/0.026 0.75/0.030...
  • Page 70: Mfr Load Cell Performance Tests

    CHAPTER 4 TESTING 4.3 MFR LOAD CELL PERFORMANCE TESTS 4.3.1 Repeatability Test Repeatability is a word used in balance specifications meaning the Standard Deviation of a set of similar weight readings. To determine whether a balance meets the calculated Standard Deviation value in the Specification Table 1-3, perform the following test: Test 1.
  • Page 71: Linearity Test

    CHAPTER 4 TESTING 4.3.3 Linearity Test This test is used to determine the linearity of the unit throughout its operating range. The masses used to perform this test can be utility masses. NOTE: The balance must pass the Off-Center Load Test and Re- peatability Test before the Linearity Test may be performed.
  • Page 72 CHAPTER 4 TESTING 4.3.4 Adjusting the MFR Load Cell Off-Center Load (Cont.) 1. With Top Housing and Load Cell Shield removed, and power removed, install Pan Support, and weighing Pan then apply power. 2. Perform off center load test and deter- mine error.
  • Page 73: Rs232 Interface Test Av Models Only

    CHAPTER 4 TESTING 4.4 RS232 Interface Test AV Models Only The RS232 Interface can have its performance monitored using an external printer or computer connected to the balance. The RS232 Interface is a bi-directional interface which enables the balance to communicate with a printer or computer equipped with an RS232 serial port.
  • Page 74: Com 1 Interface Pin Connections

    * External PRINT and/or TARE switches may be installed as shown in the diagram. Momentary contact switches must be used. To enable this feature, contact your local Ohaus office. A 6-pin Mini DIN connector is provided when the optional second RS232 interface is installed.
  • Page 75: Communication

    CHAPTER 4 TESTING 4.4.2 Communication The balance is equipped with an RS232 interface (COM1). Some models are also equipped with a second RS232 interface (COM2). Connecting the balance to a computer enables you to send commands from the computer and receive data such as displayed weight from the balance. 4.4.3 Commands Commands listed in the following table will be acknowledged by the balance.
  • Page 76: Print Test

    CHAPTER 4 TESTING 4.4.3 Commands (Cont.) TABLE 4-12. RS232 COMMAND TABLE (Cont.) Command Function Print Serial Number. Print Version: name, software revision and LFT ON (if LFT is set ON). Set PC reference weight (x) in grams. (Must have an APW stored.) Print PC reference weight.
  • Page 77: Testing The Ac Adapter

    CHAPTER 4 TESTING 4.6 TESTING THE AC ADAPTER The AC Adapters are available with different input voltages. Before testing the Adapter, make sure the Adapter rating agrees with the power source being used. All Adapters are rated with an output of 12 V ac at 500mA.
  • Page 78 CHAPTER 4 TESTING 4.7 INCAL MOTOR TESTING (CONT.) 6. Check the potentiometer in the motor by measuring the resistance across pins 3 and 5 it should be 5K Ohms nominal. Then measure across pins 4 to 3 and rotate the motor shaft by hand to one stop and then the other stop.
  • Page 79: Chapter 5 Drawings And Parts Lists

    If further technical information is needed, in the United States call Ohaus Aftermarket toll-free 1-800- 526-0659 between 8.00 a.m. and 4.00 p.m. EST. An Ohaus factory service technician will be available to provide assistance. Outside the U.S.A., please contact:...
  • Page 80 CHAPTER 5 DRAWINGS AND PARTS LISTS Figure 5-1. Adventurer AS and AV Models, Small Frames, Exploded View.
  • Page 81: Parts Lists

    CHAPTER 5 DRAWINGS AND PARTS LISTS 5.2 PARTS LISTS This section of the manual contains the replaceable parts for the Adventurer AS and AV Balances. TABLE 5-1. REPLACEMENT PARTS LIST FOR AV AND AS SMALL FRAME MODELS KEY NO. PART NO. DESCRIPTION 12102937 Draft Shield Top, AV53, M, N, NR, NU, R, U, AS153, ASG153...
  • Page 82 CHAPTER 5 DRAWINGS AND PARTS LISTS TABLE 5-1. REPLACEMENT PARTS LIST FOR AV AND AS SMALL FRAME MODELS (Cont.) KEY NO. PART NO. DESCRIPTION 12103944 Pan Support, 5.8" x 6.3", 149mm x 162mm (Cont.) AVG812, R, U, AV2101, R, U, DM, DMR, DMU, N, NR, NU AVG2101, R, U, AV4101, R, U, DM, DMR, DMU, N, NR, NU AVG4101, R,U,...
  • Page 83 CHAPTER 5 DRAWINGS AND PARTS LISTS TABLE 5-1. REPLACEMENT PARTS LIST FOR AV AND AS SMALL FRAME MODELS (Cont.) KEY NO. PART NO. DESCRIPTION 12103945 Windring, AV212, R, U, DM, DMR, DMU, N, NR, NU AVG212, R, U AS312, ASG312. 12103946 Adapter Ring, square, AV412, R, U, DM, DMR, DMU, N, NR, NU...
  • Page 84 CHAPTER 5 DRAWINGS AND PARTS LISTS TABLE 5-1. REPLACEMENT PARTS LIST FOR AV AND AS SMALL FRAME MODELS (Cont.) KEY NO. PART NO. DESCRIPTION 12103851 LCD, AS, (See Note 3) 12103910 Cables, Set of 5 (See Note 1) 12103925 Weigh Below Cover (See Note 1) 12103902 RS232 Interface Board Assembly, AV...
  • Page 85 CHAPTER 5 DRAWINGS AND PARTS LISTS TABLE 5-1. REPLACEMENT PARTS LIST FOR AV AND AS SMALL FRAME MODELS (Cont.) KEY NO. PART NO. DESCRIPTION 42904572 Kit, Load Cell replacement, AV212DM , DMR, DMU, N, NR, NU. 42904573 Kit, Load Cell replacement, AV412, R, U, DM, DMR, DMU, N, NR, NU AVG412, R, U AV812, R, U, M, MR, MU, N, NR, NU...
  • Page 86 CHAPTER 5 DRAWINGS AND PARTS LISTS TABLE 5-1. REPLACEMENT PARTS LIST FOR AV AND AS SMALL FRAME MODELS (Cont.) NOTES: 1. All Models: AV53, R, U, N, NR, NU, M, AVG53, R, U, AV212, R, U, DM, DMR, DMU, N, NR, NU, AVG212, R, U, AV412, R, U, DM, DMR, DMU, N, NR, NU, AVG412, R, U,...
  • Page 87 CHAPTER 5 DRAWINGS AND PARTS LISTS Figure 5-2. Adventurer AS and AV Models, Large Frames, Exploded View.
  • Page 88: Replacement Parts List For Av And As Large Frame Models

    CHAPTER 5 DRAWINGS AND PARTS LISTS TABLE 5-2. REPLACEMENT PARTS LIST FOR AV AND AS LARGE FRAME MODELS KEY NO. PART NO. DESCRIPTION 12103875 Draft Shield Glass 4 sides (tall) 12103873 Draft Shield Top 12103874 Draft Shield Frame Set 12103885 Draft Shield Posts (set of 4 tall) AV64, R, U, C, CR, CU, CN, CNR, CNU, AVG64R, U, C, CR,...
  • Page 89 CHAPTER 5 DRAWINGS AND PARTS LISTS TABLE 5-2. REPLACEMENT PARTS LIST FOR AV AND AS LARGE FRAME MODELS (Cont.) KEY NO. PART NO. DESCRIPTION 12102943 Pan Support, 4.7" x 120 mm AV212C, CDM, CDMR, CDMU, CN, CNR, CNU, CR, CU, AVG212C, CR, CU, AV213, R, U, N, NR, NU, C, CR, CU, CM, CMR, CMU, CN, CNR, CNU,...
  • Page 90 CHAPTER 5 DRAWINGS AND PARTS LISTS TABLE 5-2. REPLACEMENT PARTS LIST FOR AV AND AS LARGE FRAME MODELS (Cont.) KEY NO. PART NO. DESCRIPTION 12103861 EMC Plate, Square - InCal Balances AV2101C, R, U, CDM, CDMR, CDMU, CN, CNR, CNU, CR, CU, AVG2101C, R, U, AV2102C, CR, CU, CM, CMR, CMU, CN, CNR, CNU, AVG2102C, CR, CU,...
  • Page 91 CHAPTER 5 DRAWINGS AND PARTS LISTS TABLE 5-2. REPLACEMENT PARTS LIST FOR AV AND AS LARGE FRAME MODELS (Cont.) KEY NO. PART NO. DESCRIPTION 12103859 Wind Ring, Square (Cont.) AVG3102C, CR, CU, AV4101C, CU, CR, CN, CNR, CNU, CDM, CDMR, CDMU, AVG4101C, CU, AV4102C, CU, CM, CMR, CMU, CN, CNR, CNU, CR, AVG4102C, CR, CU,...
  • Page 92 CHAPTER 5 DRAWINGS AND PARTS LISTS TABLE 5-2. REPLACEMENT PARTS LIST FOR AV AND AS LARGE FRAME MODELS (Cont.) KEY NO. PART NO. DESCRIPTION 12103862 Cables, Set of 4 (See Note 1) 12103902 RS232 Interface Board Assembly, AV (See Note 2) 12103863 Level, (See Note 1)
  • Page 93 CHAPTER 5 DRAWINGS AND PARTS LISTS TABLE 5-2. REPLACEMENT PARTS LIST FOR AV AND AS LARGE FRAME MODELS (Cont.) KEY NO. PART NO. DESCRIPTION 42904903 Load Cell Cable, (MFR Load Cells up to 410g) AS64, ASG64, AS214, ASG214, AS313, ASG313, AV64,C, CN, CNR, CNU, CR, CU, R, U, AVG64C, CR, CU, R, U, AV114, C, CM, CMR, CMU, CNR, CNU, CR, CU, R, U,...
  • Page 94 CHAPTER 5 DRAWINGS AND PARTS LISTS TABLE 5-2. REPLACEMENT PARTS LIST FOR AV AND AS LARGE FRAME MODELS (Cont.) KEY NO. PART NO. DESCRIPTION 42904515 Kit, Load Cell Replacement, MFR (Cont.) AVG313, R, U, C, CR, CU, AV413, R, U, N, NR, NU, C, CR, CU, CM, CMR, CMU, CN, CNR, CNU, AVG413, R, U, C, CR, CU, AS313, ASG313.
  • Page 95 CHAPTER 5 DRAWINGS AND PARTS LISTS TABLE 5-2. REPLACEMENT PARTS LIST FOR AV AND AS LARGE FRAME MODELS (Cont.) KEY NO. PART NO. DESCRIPTION 42904906 InCal Motor AV64C, CR, CU, CN, CNR, CNU, AVG64C, CR, CU AV114C, CR, CU, CM, CMR, CMU, CNR, CNU, AVG114C, CR, CU, AV212C, CDM, CDMR, CDMU, CN, CNR, CNU, CR, CU, AVG212C, CR, CU,...
  • Page 96 CHAPTER 5 DRAWINGS AND PARTS LISTS TABLE 5-2. REPLACEMENT PARTS LIST FOR AV AND AS LARGE FRAME MODELS (Cont.) KEY NO. PART NO. DESCRIPTION 42904900 InCal Assembly, Magnetic Force Restoration (MFR) 42904901 InCal Assembly, Strain Gauge (SG) 12102323 Adapter, 230V/AU, 12102322 Adapter, 240V/GB, 12102321...
  • Page 97 CHAPTER 5 DRAWINGS AND PARTS LISTS TABLE 5-2. REPLACEMENT PARTS LIST FOR AV AND AS LARGE FRAME MODELS (Cont.) NOTES: 1. All Models: AV64, R, U, C, CR, CU, CN, CNR, CNU, AVG64, C, CR, CU, R, U, AV114, C, R, U, CR, CU, CM, CMR, CMU, CNR, CNU, AVG114, R, U, C, CR, CU, AV212C, CDM, CDMR, CDMU, CN, CNR, CNU, CR, CU, AVG212C, CR, CU,...
  • Page 98 CHAPTER 5 DRAWINGS AND PARTS LISTS TABLE 5-2. REPLACEMENT PARTS LIST FOR AV AND AS LARGE FRAME MODELS (Cont.) NOTES (Cont.): 2. All AV Models: AV64, R, U, C, CR, CU, CN, CNR, CNU, AVG64, C, CR, CU, R, U, AV114, C, R, U, CR, CU, CM, CMR, CMU, CNR, CNU, AVG114, R, U, C, CR, CU, AV212C, CDM, CDMR, CDMU, CN, CNR, CNU, CR, CU,...
  • Page 99: Appendix A Standard Calibration

    PPENDIX A STANDARD CALIBRATION STANDARD CALIBRATION Adventurer Pro balances can be calibrated in two ways: Span calibration or Linearity calibration. Span calibration resets the balance's weighing range using two weight values: zero and a weight value between 25% and 100% of the balance's capacity. Linearity calibration minimizes deviation between actual and displayed weights within the balance's weighing range.
  • Page 100: Appendix B Service Calibration

    PPENDIX B SERVICE CALIBRATION SERVICE CALIBRATION This section describes the Service Menu and sub-menus, which allows authorized service personnel to perform factory Span and Linearity calibrations. Please refer to the Menu Structure diagram. The Service Menu cannot be entered while LFT is ON. Figure B.1 Service Mode Menu.
  • Page 101: Linearity Calibration

    APPENDIX B SERVICE CALIBRATION B.4 Linearity Calibration 1. Press the Yes button, to enter the Service Linearity Calibration function. The display indicates the calibration weight on the first line and 'PUT LOAD 1" on the second line. The examples shown are for a 400g balance. Press the No button to skip.
  • Page 102: Software Service Tool Instructions

    PPENDIX C AVENTURER PRO SOFTWARE SERVICE TOOL INSTRUCTIONS SOFTWARE SERVICE TOOL INSTRUCTIONS This tool is used for three purposes: To restore EEPROM data. Install a new load cell. Update the software in the balance. To install the software, run Setup.exe After installation, run the program Adventurer Pro Service tool.
  • Page 103 Model Number from the label on the side of the balance. c. All the information from the label inside the battery compartment. 2. Contact Ohaus Corporation in Pine Brook NJ, and request the data file to down load. The information recorded above will need to be provided with your request.
  • Page 104: To Replace A Loadcell

    PPENDIX C AVENTURER PRO SOFTWARE SERVICE TOOL INSTRUCTIONS C.2 To Replace a Load Cell: 1. Follow the steps in section 3.1.5 to replace the defective load cell. 2. Open the packet containing labels that was supplied with the replacement load cell. These labels each contain a model number followed by the IDNR number.
  • Page 105: To Update Software In The Balance

    APPENDIX C ADVENTURER PRO SOFTWARE SERVICE TOOL INSTRUCTIONS C.2 To Replace a Load Cell: (Cont.) 7. Click on the tab labeled Load Cell Replacement. 8. Enter the IDNR number (xxx.xx.xx.xxxx) from the label supplied with the replacement load cell and the Serial Number from the label on the side of the balance. 9.
  • Page 106 PPENDIX C AVENTURER PRO SOFTWARE SERVICE TOOL INSTRUCTIONS C.3 To Update the Software in the Balance:(Cont.) 4. Click on the tab labeled Software Download. 5. Enter the path to the location of the file to download, or click the browse button to locate the file.
  • Page 108 Test Equipment Depot - 800.517.8431 - 99 Washington Street Melrose, MA 02176 - TestEquipmentDepot.com *80250994* P/N 80250994 A SERVICE MANUAL ADVENTURER AV and AS MODEL BALANCES...

Table of Contents

Save PDF