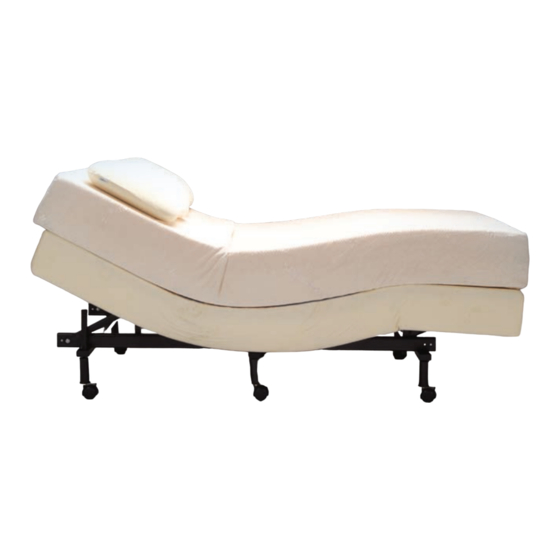
Summarization of Contents
20-Year Limited Warranty
Year 1: Full Coverage
Details first year warranty coverage for parts and labor, including replacement parts and authorized labor costs.
Years 2-3: Parts Only Coverage
Covers replacement parts only for years 2 and 3, with the purchaser paying for service, labor, and shipping.
Years 4-20: Prorated Parts Coverage
Provides prorated parts coverage for years 4-20, excluding electronics and motors, with purchaser covering costs.
Warranty Terms and Conditions
Outlines exclusions, limitations, remedies, and conditions for the limited warranty, including disclaimers.
Safety Precautions
General Safety Instructions
Includes reading instructions, keeping away from heat, avoiding blockages, and using the product as intended.
Electrical Safety and Grounding
Instructions for proper grounding, avoiding electric shock, and using appropriate electrical connections.
Usage Restrictions and Warnings
Warnings for medical devices, in-home use, children/pets, and tampering with components to maintain warranty.
Additional Safety and Usage Guidelines
Operational Safety Features
Highlights features like locking casters, motor duty cycle, and weight restrictions for safe operation.
User and Device Warnings
Advisories for pacemaker users, children, pets, and medical device users regarding product use.
Electrical and Regulatory Compliance
Details power ratings, FCC compliance, and recommendations for surge protection devices.
Commonly Asked Questions
Ergo System Base Dimensions
Information on the base height, floor clearance, and options for raising the base height.
Base Functionality and Reset
Explanation of the 20-second reset delay after using the flat button and fitting into furniture.
Parts, Serial Number, and Support
Details on serial number location, lift capacity, service contacts, and warranty for floor models.
Electrical Requirements
Covers power ratings, fuse details, DC motors, and surge protector recommendations.
Product Specifications
Bed Type Dimensions
Provides approximate dimensions (frame width, base width, base length) and weight for various bed types.
Leg and Caster Height Options
Details the height from the floor to the frame, base, and mattress for different leg and caster configurations.
Installation Process
Parts Identification
Lists all components included with the Ergo System for installation, including the parts list.
Initial Setup Steps
Covers unboxing, attaching legs, extending power cord, and setting up the Power Down Box.
Final Positioning
Instructions for flipping the Ergo System to the upright position and removing protective packaging.
Installation and Headboard Setup
Connecting Power and Remote
Steps for plugging into an outlet, installing remote batteries, and testing functions.
Mattress Retainer Installation
Instructions for detaching and installing the Mattress Retainer Bar at the foot of the frame.
Headboard Bracket Assembly
Detailed steps for assembling headboard brackets, including alignment and attachment to the frame.
Attaching Headboard
Guidance on measuring, adjusting brackets, and securing the headboard to the assembled brackets.
Wireless Remote Control Operation
Remote Control Programming
Instructions for programming the wireless remote control to the Ergo System base.
Controlling Two Ergo Systems
Steps to program the same wireless remote control for a second Ergo System.
Operating the Ergo System
Remote Control Features Overview
Identifies and explains the functions of each button on the wireless remote control.
Head and Foot Adjustments
How to adjust head and foot sections to desired positions using the remote control.
Flat Position and Memory Settings
Instructions for returning the base to flat position and setting/recalling memory positions.
Massage and Wave Speed Controls
Details on activating, adjusting massage intensity, stopping massage, and selecting wave speeds.
Additional Remote Features
Information on backlit buttons, remote range, and preventing unintended function activation.
Troubleshooting Common Issues
Remote Not Activating System
Solutions for when the remote is operable but does not activate the Ergo System.
No Features Activate
Troubleshooting steps for when none of the Ergo System features will activate.
Remote Light Not Illuminating
Steps to resolve issues where the Wireless Remote Control LED Signature Light will not illuminate.
Head/Foot Section Not Returning Flat
Solutions for elevation issues, obstructions, and proximity to walls or headboards.
Massage Motor Noise and Overheating
Addresses excessive massage noise, clicking sounds, and motors overheating or stopping.
Emergency Power Down Cycle
Power Down Box Setup
Instructions for installing 9-volt batteries into the Emergency Power Down Box.
Initiating Power Down
Steps to press the red button to lower the base to the flat position during a power loss.


Need help?
Do you have a question about the Split Queen and is the answer not in the manual?
Questions and answers