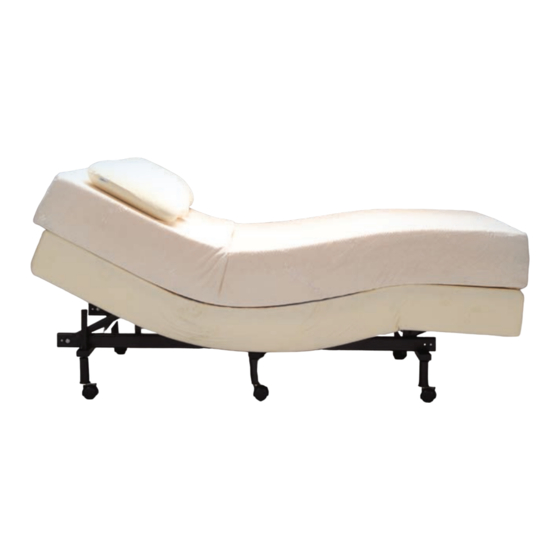
Summarization of Contents
20-Year Limited Warranty
Year 1: Full Coverage of Parts and Labor
Covers all defects in workmanship and materials for the first year, including parts and labor.
Years 2-3: Full Coverage of Parts Only
Covers defects in workmanship and materials for years 2 and 3, excluding labor and transportation costs.
Years 4-20: Prorated Parts Coverage
Covers mechanical bed parts with prorated costs from year 4 to 20, excluding electronics and motors.
Additional Warranty Terms and Conditions
Outlines exclusions, limitations, and specific conditions that may void the warranty.
Safety Precautions
Essential Safety Instructions
Critical instructions to read before using the product for safe operation.
Electrical Safety Warnings
Covers risks of electric shock, proper grounding, and avoiding hazards.
General Usage Safety
Guidelines to prevent burns, fire, and injury during normal operation.
Grounding and Warranty Precautions
Importance of grounding and warnings against tampering that voids warranty.
Specific User Advisories
Includes disclaimers for hospital use and warnings for medical device users.
Additional Safety Information
Key Safety Features
Highlights features like locking casters and recommended usage practices for safety.
Pacemaker User Advisory
Information for pacemaker users regarding potential effects of vibrating motion.
User-Serviceable Parts Warning
Advises against user maintenance or modification, as it voids the warranty.
Child and Pet Safety
Safety warnings concerning packaging disposal and supervision of children and pets.
FCC Compliance Statement
Details FCC compliance rules and potential radio frequency interference.
Product Ratings and Weight Limits
Specifies motor duty cycle and recommended weight restrictions for safe operation.
Intended Usage Guidelines
Guidance on proper installation and usage to ensure optimal performance.
Frequently Asked Questions
Ergo System Base Height
Explains the base height with standard legs and options for increasing height.
Flat Button Reset Delay
Clarifies the 20-second delay after using the flat button for system reset.
Raising Ergo System Height
Details how to increase the Ergo System's height using riser leg sets.
Ergo System Lift Capacity
Provides information on the recommended total people weight limits for the system.
Customer Service and Support
Lists contact numbers for technical support and service inquiries.
Electrical Requirements
Outlines the electrical specifications, including power consumption and fuse details.
Installation Instructions
Parts List Verification
Guide to checking all included parts against the provided list before assembly.
Step 1: Unpacking the Ergo System
Instructions for safely removing the Ergo System from its shipping carton.
Step 2: Attaching Ergo System Legs
Detailed steps for securely attaching the six legs to the base frame.
Step 3: Power Cord Setup
Guidance on extending and managing the power cord during installation.
Step 4: Power Down Box Setup
Instructions for locating and preparing the Emergency Power Down Box.
Step 5: Final Positioning
Steps for safely flipping the unit and removing protective packaging.
Installation Procedures
Step 6: Connect to Power Outlet
Instructions for plugging the unit into a grounded electrical outlet.
Step 7: Wireless Remote Setup
Steps for installing batteries and testing the wireless remote control.
Step 8: Return to Flat Position
How to use the remote to return the base to its flat position.
Step 9: Detach Mattress Retainer Bar
Instructions for detaching the mattress retainer bar for proper installation.
Step 10: Install Mattress Retainer Bar
Steps for correctly installing the mattress retainer bar at the foot of the base.
Headboard Attachment Guide
Detailed steps for assembling and attaching headboard brackets.
Remote Control Operation
Wireless Remote Control Programming
Comprehensive guide to programming the wireless remote control for the Ergo System.
Programming One Remote for One Base
Step-by-step instructions for pairing a single remote with one Ergo System base.
Programming One Remote for Two Bases
Instructions on how to use a single remote to control two Ergo System bases.
Remote Control Features and Operation
Wireless Remote Features Overview
Detailed explanation of each button and its function on the wireless remote.
Head and Foot Adjustment Operation
How to use the remote to adjust the head and foot sections of the bed.
Bed Flat Button Operation
Instructions for using the flat button to return the base to its level position.
Memory Position Operation
Guide on setting and recalling custom bed positions using memory buttons.
Massage Intensity Controls
How to adjust and control the intensity of the head and foot massage features.
Massage Stop and Wave Speed Controls
Instructions for stopping massage features and selecting wave massage speeds.
Troubleshooting Guide
Remote Control Troubleshooting
Solutions for issues with remote activation, illumination, and system response.
System Operation Issues
Addresses problems like sections not returning to flat or lift function interference.
Motor and Massage Problems
Guidance for excessive noise, normal clicking, and motor overheating issues.
Emergency Power Down Cycle
Step 1: Insert Emergency Batteries
Instructions for installing 9-volt batteries into the Emergency Power Down Box.
Step 2: Initiate Power Down
How to begin the power down sequence using the red button.
Step 3: Complete Base Lowering
Guidance on fully lowering the base to a flat position during a power outage.


Need help?
Do you have a question about the TEMPUR Advanced Ergo System and is the answer not in the manual?
Questions and answers