Table of Contents
Advertisement
REMOTE CONTROL UNIT
RC-8000
OPERATING INSTRUCTIONS
MODE D'EMPLOI
FOR ENGLISH READERS
POUR LES LECTEURS FRANCAIS
"SERIAL NO.
PLEASE RECORD UNIT SERIAL NUMBER ATTACHED TO THE REAR OF THE CABINET FOR
FUTURE REFERENCE"
"NO. DE SERIE
PRIERE DE NOTER LE NUMERO DE SERIE DE L'APPAREIL INSCRIT A L'ARRIERE DU
COFFRET DE FAÇON A POUVOIR LE CONSULTER EN CAS DE PROBLEME."
¥
) )
PAGE 42 ~ PAGE 33
PAGE 34 ~ PAGE 65
Advertisement
Table of Contents

Related Manuals for Denon RC-8000


Summary of Contents for Denon RC-8000
- Page 1 REMOTE CONTROL UNIT RC-8000 OPERATING INSTRUCTIONS MODE D’EMPLOI FOR ENGLISH READERS PAGE 42 ~ PAGE 33 POUR LES LECTEURS FRANCAIS PAGE 34 ~ PAGE 65 “SERIAL NO. PLEASE RECORD UNIT SERIAL NUMBER ATTACHED TO THE REAR OF THE CABINET FOR FUTURE REFERENCE”...
-
Page 2: Table Of Contents
ENGLISH 2 We greatly appreciate your purchase of this unit. 2 To be sure you take maximum advantage of all the features this unit has to offer, read these instructions carefully and use the set properly. Be sure to keep this manual for future reference should any questions or problems arise. -
Page 3: Features
FEATURES The RC-8000 can be used for integrated control of remote controllable devices connected to an AV amplifier (for example TV sets and DVD players) as well as remote control compatible peripheral devices (for example lighting equipment and power screens). -
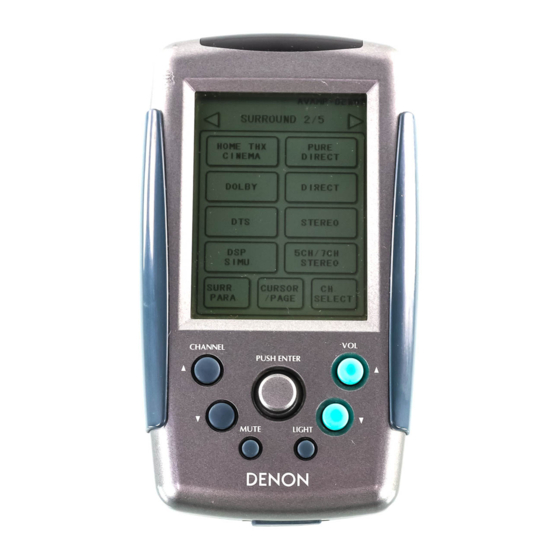
Page 4: Names Of Parts
ENGLISH NAMES OF PARTS Transmitter Touch panel CHANNEL up/down buttons MUTE button USB terminal JOG stick NOTE: The USB terminal is a terminal that will be used in the future to update the microprocessor program, etc. OPERATION Introduction [1] Turning on the liquid crystal display After loading the batteries, turn on the liquid crystal display. -
Page 5: Adjusting The Touch Panel
Also adjust the touch panel after replacing the batteries. [4] Basic operation of the liquid crystal display With the RC-8000, remote control signals are sent by gently touching buttons displayed on the liquid crystal display. When icons or buttons are touched lightly, operation is notified by a beep and the display of that part switches to a half-tone dot mesh. -
Page 6: Operating Preset Devices
• The button names for buttons at which no transmission codes are set are displayed in gray characters. • No transmission codes are set for buttons which do not have button names. 2 DENON AVAMP (AV amplifier) system buttons y CD (CD player) - Page 7 • Denon AV receivers with one set of multi-room outputs can be operated with the M-ZONE 2 buttons. About the CURSOR/PAGE button When the CURSOR/PAGE button is pressed once, the display is highlighted. When the JOG stick is operated while the display is highlighted, the cursor movement and enter remote control codes are sent.
- Page 8 ENGLISH 2 DENON DVD (DVD player and DVD changer) system buttons 2 VCR (video cassette recorder) system buttons The default setting is HITACHI 1. To change the specified brand, refer to “Changing the preset memory of preset devices” on page 12.
- Page 9 2 DENON CD (CD player and CD changer) system buttons 2 DENON CDR (CD recorder) system buttons The transmission codes of independent buttons are the same as for “CD”. Transmission codes of independent buttons VOL• : Main volume of AV amplifier VOLª...
-
Page 10: Preset Memory
Various remote control codes are preset in the RC-8000. If your device is one that is preset in the RC-8000, it can be operated from the RC-8000 using the preset memory. Note that some devices and some buttons may not be operable. If this is not the case, use the learning function (see page 18) to store the device’s remote control signals in the RC-8000. - Page 11 YAMAHA (1, 2) DENON (1) DENON (2) PHILIPS (1) PIONEER (1) TAPE DENON (1) SETUP SYSTEM CALL DENON (1 to 3) PIONEER (1 to 3) SONY (1) HITACHI (1) ECHOSTAR (1) GENERAL INSTRUMENT (1) JVC (1) MAGNAVOX (1) PANASONIC (1) PRIMESTAR (1)
-
Page 12: Changing The Preset Memory Of Preset Devices
ENGLISH [1] Changing the preset memory of preset devices q Touch the liquid crystal display to turn the display on. w Press the JOG stick to display the icon display section. e Press the display section to display the “SETUP” icon. a. -
Page 13: Adding New Devices
[2] Adding new devices a. Press the “SETUP” icon in the icon display section for at least 3 seconds to display the setup screen (a). Press the “Add Device” button on the “Setup 1/4” page to display the device selection screen (b). -
Page 14: Operating Devices For Which The Preset Memory Is Set
The names of buttons on the devices you are operating with the RC-8000 may differ from the names of the buttons on the RC-8000. If so, the names can be changed for greater ease using the procedure described in section “Changing the button names”... - Page 15 2 VCR (video cassette recorder) preset memory buttons 2 CD (CD player and CD changer) preset memory buttons Transmission codes of independent buttons CH• : VCR channel CHª : VCR channel VOL• : Main volume of AV amplifier VOLª : Main volume of AV amplifier MUTE : Muting of AV amplifier Transmission codes of independent buttons VOL•...
- Page 16 ENGLISH 2 CDR (CD recorder) preset memory buttons 2 VDP (video disc player) preset memory buttons 2 DBS (satellite) preset memory buttons Transmission codes of independent buttons CH• : DBS channel CHª : DBS channel VOL• : Main volume of AV amplifier VOLª...
- Page 17 2 Cable (cable TV) preset memory buttons 2 LIGHT preset memory buttons A “UTILITY” page is added at the last page for the device. Buttons can be added to this page using the learning function. Refer to the instructions on using the learning function in section to “learn”...
-
Page 18: Learning Function
Devices and buttons that cannot be operated using the preset memory (for which no preset signals are stored) can be operated by storing the remote control signals of that device in the RC-8000. • Remote control signals can be “learned” at the buttons on the liquid crystal display. -
Page 19: Inputting Button Names
r When learning is successful, “SUCCESS” is displayed. After this, the button name input screen (“Key Label”) appears. Button name entry will not be possible when an independent button has been used for learning. t For buttons that have default button names, the button name is displayed with a half-tone dot mesh. -
Page 20: System Call Function
ENGLISH System Call Function The RC-8000 is equipped with a system call function for emitting a series of remote control signals by pressing a single button. This function can be used for example to turn on the power of the amplifier, switch the amplifier’s input source, turn on the power of a monitor TV, turn on the power of a DVD player, and set the DVD player to the play mode –... - Page 21 r Press the display section to display the DVD icon, then press the DVD icon to select it. Here, press the DVD “ON” and “PLAY” buttons. To select buttons on other pages, press the JOG switch’s left and right buttons to switch the page.
-
Page 22: Editing Registered System Call Settings
ENGLISH e-2 Deleting buttons a. At the system call editing screen, press the button you want to delete so that it is displayed in half- tone dot mesh. b. Press the “Del” button. The setting is deleted. e-3 Changing the order of buttons a. -
Page 23: Making The Various Settings
Press the “SETUP” icon in the icon display section for at least 3 seconds to display the setup screen. Press the “User Backup” button on the “Setup 3/4” page to display the confirmation screen, then press the “Yes” button. The current settings of the RC-8000 are backed up. [2] Making the sound settings Here, set the sound that is made when buttons are pressed. -
Page 24: Setting The Back Light's Auto Off Time
It is not possible to set the back light auto off time to a time longer than the liquid crystal display’s auto off time. When performing the system setup procedure for Denon AV receivers, set the LCD’s auto off time to a long time before operating. -
Page 25: Other Registerable Devices
There is no preset memory for these additional devices. Use the learning function to store their signals. NOTE: For “AIR” (air-conditioner), some air-conditioner remote control signals include time and temperature data sent along with the control codes, so they may not work properly when they are “learned” in the RC-8000. 2 PROJECTOR 2 AIR... -
Page 26: (Setting The Operating Environment)
Customizing (setting the operating environment) Editing the Icon Display Section With the RC-8000, a total of up to 23 devices to be operated can be registered. Up to 8 devices of the same type can be registered. Icons for the registered devices are displayed in the icon display section. If more than one device of the same type is registered, the devices are identified by numbers. -
Page 27: Changing The Positions Of Devices In The Icon Display Section
[3] Changing the positions of devices in the icon display section Use the procedure described below to change the order of the devices displayed in the icon display section. q Press “SETUP” in the icon display section for at least 3 seconds to display the setup screen. Press the “Move Device”... -
Page 28: Registering Device Names
ENGLISH [4] Registering device names Use the procedure described below to register names, etc., for registered devices. q Press “SETUP” in the icon display section for at least 3 seconds to display the setup screen. Press the “Device Label” button on the “Setup 1/4”... -
Page 29: Customizing The Buttons
Customizing the Buttons [1] Adding buttons “Learn” buttons to add them. Refer to section “Using the learning function” on page 18. [2] Deleting buttons q Press “SETUP” in the icon display section for at least 3 seconds to display the setup screen. Press the “Delete Key”... -
Page 30: Changing Button Names
ENGLISH e Use the buttons in the page display section to display the page containing the button you want to move, then press that button. r Now press the button at the position to which you want to move the first button. The buttons automatically switch places. -
Page 31: User Menu
User Menu When “USER” is registered in the icon display section and the “User Menu” is set, the user screen (“CUSTOM 1/2”) always appears when the liquid crystal display is redisplayed. “Learn” buttons that are frequently used at the user menu to eliminate the trouble of searching for buttons and make operation easier. -
Page 32: Rf Transmission Function
RF TRANSMISSION FUNCTION RF transmission is possible when the RC-8000 is used in combination with the separately sold RC-8001ST charger base station. For instructions, refer to the RC-8001ST’s operating instructions. -
Page 33: Cautions On Use
CAUTIONS ON USE 2 Place of use Do not drop or subject to strong shocks. Doing to could result in damage. 2 Handling The touch panel (display) is made of glass. Do not apply pressure to it, drop the set, lean on the touch panel with your elbows or place heavy objects on it. - Page 34 CHARGER BASE STATION RC-8001ST OPERATING INSTRUCTIONS MODE D’EMPLOI “SERIAL NO. PLEASE RECORD UNIT SERIAL NUMBER ATTACHED TO THE REAR OF THE CABINET FOR FUTURE REFERENCE” “NO. DE SERIE PRIERE DE NOTER LE NUMERO DE SERIE DE L’APPAREIL INSCRIT A L’ARRIERE DU COFFRET DE FAÇON A POUVOIR LE CONSULTER EN CAS DE PROBLEME.”...
- Page 35 Names of Parts ...3 FEATURES • RF reception and conversion to infra-red emitter output, when used in combination with the RC-8000. RF control is possible only when the RC-8001ST is used in combination with the RC-8000. • Charging function (only when the RC-8000 and RC-8001ST are used in combination). The RC-8000 can be charged on the RC-8001ST only when using the included nickel cadmium battery pack.
-
Page 36: Names Of Parts
CONNECTING TO OTHER DEVICES Connecting to a Denon AV Receiver Use the procedure described below to connect the RC-8001ST to a Denon AV receiver equipped with a REMOTE IN terminal. q Connect the included AC adapter to a wall power outlet, then connect the power cord to the RC-8001ST’s DC IN terminal. - Page 37 ENGLISH Connecting to Other Devices Use the procedure described below to connect the RC-8001ST to a Denon device not equipped with a REMOTE IN terminal or to other devices. q Connect the included AC adapter to a wall power outlet, then connect the power cord to the RC-8001ST’s DC IN terminal.
- Page 38 OPERATION About the RF Transmission Function RF transmission is possible when the RC-8001ST is used in combination with the RC-8000 (included with the AVR- 5800 or sold separately) remote control transmitter. With this function it is possible to operate your components from another room in your home, or to operate your components if they are in an enclosed cabinet not conveniently nearby, etc.
- Page 39 ENGLISH RF Secret Number When using the RF transmission function with multiple pairs of RC-8000 and RC-8001ST, inadvertent operations could occur if the same RF transmission frequency is shared. If so, set different RF secret numbers for the different pairs.
Need help?
Do you have a question about the RC-8000 and is the answer not in the manual?
Questions and answers