Table of Contents
Advertisement
Available languages
Available languages
Quick Links
Download this manual
See also:
User Manual
Advertisement
Chapters
Table of Contents

Related Manuals for BREIL CHRONO YM92


Summary of Contents for BREIL CHRONO YM92
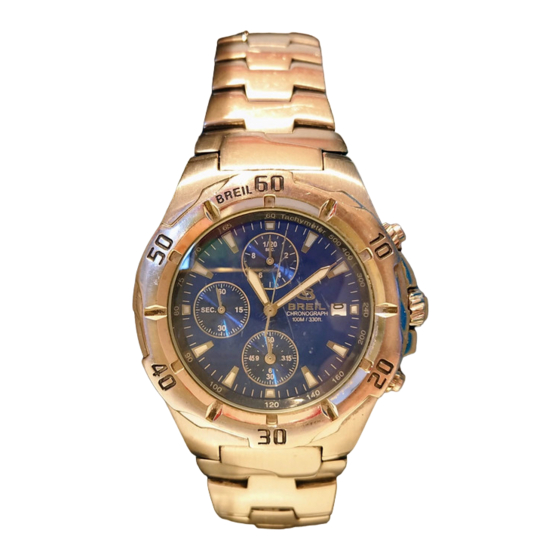
- Page 1 CHRONO YM92 Instruction book pag. 1 • Mode d'emploi pag. 17 Gebrauchsanleitung pag. 33 • Manuale di funzionamento pag. 49 Manual de instrucciones pag. 65...
- Page 3 When reading this instruction booklet, keep the watch diagram on the left unfolded and in full view. The symbols (A, B, etc.) on the diagram are those referred to in the section describing the operating instructions. Pendant la lecture de ce mode d'emploi, gardez le schéma d'illustration de la montre ci-contre ouvert et bien en vue.
- Page 4 Thank you very much for purchasing a BREIL WATCH. To ensure its correct use, please read these instructions carefully. In order to be able to make full use of the guarantee service (subject to the guarantee terms), please ensure that the Breil international guarantee card is supplied with the watch at the time of purchase.
- Page 5 INDEX MAIN COMPONENTS ........2 FEATURES ......... .3 DISPLAY AND CROW OPERATION .
-
Page 6: A Main Components
MAIN COMPONENTS Hour hand Button Minute hand Button Chronograph second hand Crown Date Small second hand Chronograph hour hand Chronograph minute hand Chronograph 1/20 second hand... -
Page 7: B Features
FEATURES [TIME] • indicated by the hour minute and small second hands. [DATE] • displayed in numerals [CHRONOGRAPH] • measure up to 12 hours in 1/20 second increments. • split time measurement... -
Page 8: C Display And Crow Operation
DISPLAY AND CROW OPERATION Chronograph 1/20 second hand minute hand hour hand Date (1) (2) (3) small second hand chronograph second hand chronograph hour chronograph minute hand hand Crown (A) Normal position : free (B) First click : date setting (C) Second click : time setting;... -
Page 9: Position
SETTING THE TIME AND ADJUSTING CHRONOGRAPH HAND POSITION This watch is so designed that: • time setting and • Chronograph hand position adjustment are both made with the crown at the second click position Once the crown is pulled out to the second click, be sure to make the above adjustments at the same time. - Page 10 1. put out the crown to the second click when the small second hand is at the 12 0’clock position. If the chronograph is measuring or stopped, it is automatically reset to 0 2. Turn the crown to set the hour and minute hands. It is recommended that the hands be set to the time a few minutes ahead of the current time, taking into consideration the time required to adjust the chronograph hand position if necessary.
- Page 11 1. Press button for 2 seconds to select the chronograph hand (s) to be adjusted this selection is made in the following order by pressing button for 2 seconds. chronograph Chronograph chronograph 1/20 second second hour and minute hand hand hand *The select hand(s) turn(s) a full circle.
-
Page 12: E Setting The Date
SETTING THE DATE • Before setting the date, be sure to set the time. • It is necessary to adjust the date at the and of February and 30 day months. Date 1. Pull out the crow to the first click 2. -
Page 13: F Chronograph
CHRONOGRAPH • The chronograph can measure up to 12 hours in 1/20 second increments. • The measured time is indicated by the four chronograph hands that move independently of the hands for time display. • When the measurement reaches 12 hours, the chronograph automatically stops counting. - Page 14 MOVEMENT OF THE CHRONOGRAPH 1/20 – SECOND HAND • After the chronograph is started, the chronograph 1/20 second hand moves for about 10 minutes and automatically stops at the 0 position. • When the measurement is stopped or split time is measured, it moves to indicate the elapsed 1/20 –...
- Page 15 [Accumulated elapsed time measurement] Start Stop Restart Stop Reset Restart and stop of chronograph can be replaced by pressing button [Split time measurement] Split Start Release Reset Stop split Measurement and release of split time can be repeated by pressing button [Measurement of two competitors] Finish time Start...
- Page 16 PRECAUTIONS AND USEFUL INFORMATION Indication Spray, sweat, light Swimming, Dial Case rain, washing, etc. etc. WATER RESISTANT WATER RESISTANT 30M (3ATM) WATER RESISTANT WATER RESISTANT 50M (5ATM) WATER RESISTANT WATER RESISTANT 100M (10ATM) WATER RESISTANT WATER RESISTANT 200M (20ATM) or more “WATER RESISTANT”...
- Page 17 in water Skin-diving Scuba diving Water-resistance characteristics Not water resistant. Must be kept away from water and moisture Average water resistance. Can withstand spray, sweat, light rain, washing, etc. during daily use Can be worn while swimming but not diving Suitable for skin-diving.
- Page 18 Temperature Do not leave the watch exposed to direct sunlight or temperature extremes for long periods of time. Long exposure, in fact, may adversely affect the operation of the watch and actually shorten battery life, causing it to gain or lose time and affect its other functions. Impact This watch can withstand normal everyday impacts and shocks and those normally imparted by non-contact sports.
- Page 19 The watch case and strap may discolour if they come into contact with mercury from a broken thermometer or other equipment. Keeping the watch clean Use an absorbent soft cloth to clean off any dirt or damp from the watch glass. Wearing the watch when the strap or back of the case is dirty can cause skin irritation.
- Page 21 INDEX PIECES PRINCIPALES ....... .18 CARACTERISTIQUES ....... . .19 UTILISATION DU CADRAN ET DU REMONTOIR .
- Page 22 PIECES PRINCIPALES Aiguille des heures Bouton Aiguille des minutes Bouton Aiguille des secondes du chronographe Remontoir Date Trotteuse Aiguille des heures du chronographe Aiguille des minutes du chronographe Aiguille 1/20 de seconde du chronographe...
- Page 23 CARACTERISTIQUES [HEURE] • indiquée par l’aiguille des heures, des minutes et par la trotteuse. [DATE] • visualisée sous le format numérique [CHRONOGRAPHE] • mesure jusqu’à 12 heures avec augmentations de 1/20 de seconde. • mesure des temps intermédiaires...
- Page 24 UTILISATION DU CADRAN ET DU REMONTOIR Aiguille 1/20 de seconde du chronographe Aiguille des minutes Aiguille des heures Date (1) (2) (3) Trotteuse Aiguille des secondes du chronographe Aiguille des heures Aiguille des minutes du chronographe du chronographe Remontoir (1) Position normale : libere (2) Premier déclic : réglage de la date (3) Deuxième déclic...
- Page 25 REGLAGE DE L’HEURE ET DE LA POSITION DES AIGUILLES DU CHRONOGRAPHE Cette montre est conçue afin que: • le réglage de l’heure et • le réglage de la position des aiguilles du chronographe soient tous deux faits avec le remontoir dans la position de deuxième clic. Veiller à effectuer en même temps les réglages reportés ci-dessus quand le remontoir est extrait après le deuxième déclic.
- Page 26 1. Extraire le remontoir jusqu’au deuxième déclic quand la trotteuse se trouve sur le 12. Le chronographe est automatiquement remis à 0 s’il est en train de relever un temps ou s’il est arrêté. 2. Tourner le remontoir pour régler les aiguilles des heures et des minutes. Il est conseillé...
- Page 27 1. Appuyer sur le bouton pendant 2 secondes pour régler l’/les aiguille/s du chronographe. Sélectionner l’aiguille à régler dans l’ordre suivant en appuyant sur le bouton pendant 2 secondes. Trotteuse Aiguille 1/20 de Aiguille des heures seconde du des minutes chronographe chronographe du chronographe...
- Page 28 REGLAGE DE LA DATE • Contrôler si l’heure est réglée avant de régler les dates. • Il est nécessaire de régler la date à la fin du mois de février et des mois de trente jours. Date 1. Extraire le remontoir jusqu’au premier déclic 2.
- Page 29 CHRONOGRAPHE • Le chronographe permet de mesurer jusqu’à 12 heures avec des augmentations de 1/20 de seconde. • Le temps mesuré est indiqué par les quatre aiguilles du chronographe qui se déplacent indépendamment des aiguilles du cadran de l’heure. • Le chronographe interrompt automatiquement le comptage quand le temps mesuré atteint 12 heures.
- Page 30 DEPLACEMENT DE L’AIGUILLE 1/20 DE SECONDE DU CHRONOGRAPHE • Dès que le chronographe a été mis en route, l’aiguille 1/20 de seconde du chronographe se déplace pendant environ 10 minutes et s’interrompt automatiquement sur 0. • Elle se déplace pour indiquer les secondes qui se sont écoulées quand le chronographe est arrêté...
- Page 31 [Mesures standard] Démarrage Arrêt Remise à zéro Arrêt Remise à zéro Les fonctions de redémarrage et d’arrêt du chronographe peuvent être remplacées en appuyant sur le bouton [Mesure du temps accumulé qui s’est écoulé] Split Démarrage Remise à zéro Indication Stop de la mesure du split...
- Page 32 PRECAUTIONS D’UTILISATION ET INFORMATIONS UTILES Indicacion Utilisation Eclaboussure, Natation Cadran Boîtier sueur, pluie légère, etc. ablutions, etc. WATER RESISTANT WATER RESISTANT 30M (3ATM) WATER RESISTANT WATER RESISTANT 50M (5ATM) WATER RESISTANT WATER RESISTANT 100M (10ATM) WATER RESISTANT WATER RESISTANT 200M (20ATM) ou plus L’indication “WATER RESISTANT”...
- Page 33 sous l’eau Immersion Caractéristiques Immersion en d’étanchéité profondeur Non étanche. Doit être protégée de l’eau et de l’humidité. Etanchéité normale. Résiste aux éclaboussures, à la sueur, à la pluie légère, aux ablutions, etc. pendant l’utilisation quotidienne. Utilisation possible pendant la natation. Adaptée à...
- Page 34 Température Ne pas laisser la montre exposée aux rayons directs du soleil ou dans des endroits extrêmement chauds ou extrêmement froids pendant une longue période. Cela pourrait en effet provoquer un mauvais fonctionnement de la montre ou réduire la durée de la pile, ou encore un ralentissement ou une accélération de la montre et des conséquences sur les autres fonctions.
- Page 35 contenants des substances telles que essence, cires, détergents, adhesifs, ses pièces peuvent se décolorer, se dissoudre ou se rompre. Faire particulièrement attention à éviter les substances chimiques. Le boîtier de la montre et le bracelet peuvent se décolorer s'ils entrent en contact avec le mercure d'un thermomètre cassé...
-
Page 37: Table Of Contents
INHALTSVERZEICHNIS HAUPTBESTANDTEILE .......34 EIGENSCHAFTEN ........35 VERWENDUNG VON ZIFFERBLATT UND STELLKRONE . -
Page 38: Ahauptbestandteile
HAUPTBESTANDTEILE Stundenzeiger Knopf Minutenzeiger Knopf Sekundenzeiger des Chronographen Stellkrone Datum Kleiner Sekundenzeiger Stundenzeiger des Chronographen Minutenzeiger des Chronographen 1/20-Sekundenzeiger des Chronographen... -
Page 39: Beigenschaften
EIGENSCHAFTEN [UHRZEIT] • Angezeigt von den Stundenzeigern, Minutenzeigern und dem kleinen Sekundenzeiger. [DATUM] • Im Nummernformat angezeigt [CHRONOGRAPH] • Misst bis zu 12 Stunden in Abschnitten von 1/20 Sekunde. • Zwischenzeitmessung... -
Page 40: Verwendung Von Zifferblatt Und Stellkrone
1/20-Sekundenzeiger des Chronographen Minutenzeiger Stundenzeiger Datum (1) (2) (3) Kleiner Sekunden- zeiger Sekundenzeiger des Chronographen Stundenzeiger des Minutenzeiger des Chronographen Chronographen VERWENDUNG VON ZIFFERBLATT UND STELLKRONE Stellkrone (1) Normale Stellung : frei (2) Erste Position : Datumseinstellung... -
Page 41: Uhrzeiteinstellung Und Einstellung Der Chronographenzeigerposition
(3) Zweite Position : Uhrzeiteinstellung; Einstellung der Chronographenzeigerposition. UHRZEITEINSTELLUNG UND EINSTELLUNG DER CHRONOGRAPHENZEIGERPOSITION Diese Uhr ist so konzipiert, dass: • die Uhrzeit • und die Position der Chronographenzeiger beide mit der Stellkrone in der zweiten Position eingestellt werden. Nachdem die Stellkrone auf die zweite Position herausgezogen wurde, sicherstellen, dass die obigen Einstellungen gleichzeitig ausgeführt werden. - Page 42 [Uhrzeiteinstellung] 1. Stellkrone auf die zweite Position herausziehen, wenn sich der kleine Sekundenzeiger auf 12 Uhr befindet. Wenn der Chronograph die Zeit misst oder stillsteht, wird er automatisch auf 0 gesetzt 2. Stellkrone drehen, um die Stunden- und Minutenzeiger einzustellen. Es wird empfohlen, die Uhrzeit einige Minuten im Voraus bezogen auf die aktuelle Uhrzeit einzustellen und dabei die Zeit zu berücksichtigen, die zum Einstellen der Chronographenzeiger notwendig ist.
- Page 43 Wenn sich die Zeiger des Chronographen nicht in der Position “0” befinden, das Verfahren zum Einstellen auf der 0-Position befolgen. 1. Knopf 2 Sekunden lang drücken, um den/die Zeiger des Chronographen Sekundenzeiger 1/20 Stunden-und Sekundenzeiger Minutenzeiger des des Chronographen Chronographen Chronographen einzustellen.
-
Page 44: Datumseinstellung
Minutenzeigers des Zifferblatts die aktuelle Uhrzeit anzeigen. Datum DATUMSEINSTELLUNG • Vor der Datumseinstellung sicherstellen, dass die Uhrzeit eingestellt wurde. • Das Datum muss Ende Februar und bei Monaten mit 30 Tagen eingestellt werden. 1. Stellkrone in die erste Position herausziehen... -
Page 45: Chronograph
2. Stellkrone im Uhrzeigersinn drehen, bis das gewünschte Datum erscheint 3. Stellkrone wieder in die Normalstellung bringen. Anm: Das Datum nicht zwischen 21.00 und 01.00 Uhr einstellen da der Datumswechsel nicht richtig erfolgen kann. CHRONOGRAPH Sekundenzeiger 1/20 Chronographen Sekundenzeiger Start / Chronographen Stopp Minutenzeiger... - Page 46 1/20 Sekunde. • Die gemessene Zeit wird von den vier Zeigern des Chronographen angezeigt, die sich unabhängig von den Zeigern auf der Stundenanzeige bewegen. • Wenn die Messung 12 Stunden erreicht, unterbricht der Chronograph automatisch die Messung. Beispiel: 2 Stunden, 30 Minuten und 13,35 Sekunden VERSTELLEN DES 1/20-SEKUNDENZEIGERS DES CHRONOGRAPHEN •...
- Page 47 Stellung ist und dass die Zeiger des Chronographen auf 0 stehen. Start Stopp Nullsetzen Stopp Nullsetzen Die Funktionen Neustart und Stopp des Chronographen können durch Drücken von Knopf ausgewechselt • Wenn die Zeiger nicht auf die 0-Position gehen, das Verfahren lt. Abschnitt Split Start der Nullsetzen...
-
Page 48: Ghinweise Zum Tragen Der Uhr
HINWEISE ZUM TRAGEN DER UHR Angabe Gebrauch Spritzwasser, Schwimmen Ziffernblatt Gehäuse Schweifl, leichter usw. regen, Waschen, usw. NEIN NEIN WATER RESISTANT WATER RESISTANT NEIN 30M (3ATM) WATER RESISTANT WATER RESISTANT 50M (5ATM) WATER RESISTANT WATER RESISTANT 100M (10ATM) WATER RESISTANT WATER RESISTANT 200M (20ATM) oder mehr Die Angabe “WATER RESISTANT”... - Page 49 in Wasser Tauchen Tieftauchen Dichtheit NEIN NEIN Nicht wasserdicht. Vor Wasser und Feuchte schützen. NEIN NEIN Normal wasserdicht. Widersteht Spritzwasser, Schweib, leichtem Regen, Waschen usw. im täglichen Gebrauch. NEIN NEIN Kann zum Schwimmen eingesetzt werden, zum Tauchen nicht empfohlen. NEIN Zum Tauchen ohne Flaschen geeignet.
- Page 50 Temperatur Setzen Sie die Uhr nie längerer Zeit direkter Sonneneinstrahlung aus und legen Sie nicht an besonders heißen oder kalten Orten ab. Dies kann die Funktionsweise der Uhr beeinträchtigen und die Lebensdauer der Batterie verkürzen, was einen schnelleren oder langsameren Lauf der Uhr bewirkt und auch Auswirkungen auf ihre sonstige Funktionen hat.
- Page 51 Chemikalien und Gase Tragen Sie die Uhr nicht in Räumen, in denen aggressive chemische Substanzen oder Gase vorhanden sind. Kommt die Uhr mit Lösungsmittel wie Benzol oder chemischen Substanzen wie Benzin, Poliermittel, Waschflüssigkeiten oder Klebstoffen in Berührung, können ihre Komponenten entfärben, sich auflösen oder zerbrechen.
- Page 53 INDICE COMPONENTI PRINCIPALI ......50 CARATTERISTICHE ........51 UTILIZZO DEL DISPLAY DELLA CORONA .
-
Page 54: Acomponenti Principali
COMPONENTI PRINCIPALI Lancetta delle ore Pulsante Lancetta dei minuti Pulsante Lancetta dei secondi del cronografo Corona Data Piccola lancetta dei secondi Lancetta delle ore del cronografo Lancetta dei minuti del cronografo Lancetta dei ventesimi di secondo del cronografo... -
Page 55: Bcaratteristiche
CARATTERISTICHE [ORA] • indicata dalle lancette delle ore, dei minuti e dalla piccola lancetta dei secondi. [DATA] • visualizzata in formato numerico [CRONOGRAFO] • misura fino a 12 ore con incrementi di 1/20 di secondo. • tempi intermedi... -
Page 56: Cutilizzo Del Display Della Corona
UTILIZZO DEL DISPLAY E DELLA CORONA Lancetta dei secondi 1/20 del cronografo Lancetta dei minuti Lancetta delle ore Data (1) (2) (3) Piccola lancetta dei secondi Lancetta dei secondi del cronografo Lancetta delle ore Lancetta dei minuti del cronografo del cronografo Corona (1) posizione normale : libera (2) primo scatto... -
Page 57: Dimpostazione Dell'ora E Regolazione Della Posizione Delle Lancette Del Cronografo
IMPOSTAZIONE DELL’ORA E REGOLAZIONE DELLA POSIZIONE DELLE LANCETTE DEL CRONOGRAFO Questo orologio è progettato in modo che: • l’impostazione dell’ora e • la regolazione della posizione delle lancette del cronografo siano entrambe eseguite con la corona in posizione (3). Una volta che la corona è stata estratta al secondo scatto, assicurarsi di effettuare le regolazioni riportate sopra contemporaneamente. - Page 58 1. Estrarre la corona fino al secondo scatto con la piccola lancetta dei secondi a ore 12. Il cronografo verrà automaticamente azzerato. 2. Ruotare la corona per impostare le lancette delle ore e dei minuti. Si consiglia di impostare un orario di qualche minuto avanti rispetto all’ora corrente, considerando, se necessario, il tempo richiesto per regolare la posizione delle lancette del cronografo.
- Page 59 1. Premere il pulsante 2 secondi per regolare la/le lancetta/e del cronografo. La selezione della lancetta da regolare può essere eseguita nel seguente ordine mantenendo premendo il pulsante 2 secondi. Lancetta dei Lancetta dei Lancetta delle ore ventesimi di seconoi secondi e dei minuti del cronografo...
-
Page 60: Eimpostazione Della Data
IMPOSTAZIONE DELLA DATA • Prima di impostare la data, assicurarsi di avere impostato l’ora. • È necessario regolare la data alla fine del mese di febbraio e di tutti gli altri mesi con meno di 31gg.. Data 1. Estrarre la corona fino al primo scatto. 2. -
Page 61: Fcronografo
CRONOGRAFO • Il cronografo consente di misurare fino a 12 ore in incrementi di 1/20 di secondo. • Il tempo misurato viene indicato dalle quattro lancette del cronografo che si spostano indipendentemente dalle lancette dell’ora. • Quando la misurazione raggiunge le 12 ore, il cronografo interrompe automaticamente il conteggio. - Page 62 SPOSTAMENTO DELLA LANCETTA DI 1/20 SECONDO DEL CRONOGRAFO • Dopo che il cronografo è stato avviato, la lancetta di 1/20 di secondo del cronografo si sposta per circa 10 minuti e si interrompe automaticamente sullo 0. • Quando la misura viene interrotta oppure durante la misura dei tempi intermedi si sposta per indicare i secondi trascorsi.
- Page 63 [Misurazione del tempo trascorso accumulato] Avvio Arresto Azzeramento Arresto Azzeramento Le funzioni di riavvio e di arresto del cronografo possono essere eseguite premendo il pulsante [Misurazione dei tempi intermedi] Tempo Avvio Azzeramento Rilascio Stop intermedio della misurazione La misurazione e il rilascio nella misura dei tempi intermedipossono essere ripetuti premendo il pulsante [Misurazione di due tempi] Tempo di...
-
Page 64: Gprecauzioni Per L'uso E Notizie Utili
PRECAUZIONI PER L’USO E NOTIZIE UTILI Indicazione Spruzzi, sudore, Nuoto Quadrante Cassa pioggia leggera, ecc. abluzione, ecc. WATER RESISTANT WATER RESISTANT 30M (3ATM) WATER RESISTANT WATER RESISTANT 50M (5ATM) WATER RESISTANT WATER RESISTANT 100M (10ATM) WATER RESISTANT WATER RESISTANT 200M (20ATM) e oltre L’indicazione “WATER RESISTANT”... - Page 65 in acqua Immersione Immersione in Caratteristiche profondità di impermeabilità Non impermeabile. Va protetto da acqua e umidità Impermeabilità normale. Resiste a spruzzi, sudore, pioggia leggera, abluzioni ecc. durante l’uso quotidiano. Utilizzabile durante il nuoto ma sconsigliato per immersioni. Adatto ad immersioni poco impegnative. Adatto a tutte le immersioni.
- Page 66 Temperatura Non lasciare l’orologio sotto i raggi diretti del sole o in luoghi estremamente caldi o estremamente freddi per un lungo periodo di tempo. Ciò potrebbe infatti creare degli inconvenienti al funzionamento dell’orologio ed accorciare la durata della batteria, provocando anche un rallentamento o un’accelerazione dell’orologio e conseguenze sulle altre funzioni.
- Page 67 Fare particolare attenzione ad evitare le sostanze chimiche. La cassa dell’orologio e il cinturino possono scolorirsi se vengono a contatto con il mercurio di un termometro rotto o di altra provenienza. Tenere l’orologio pulito Strofinare con un panno soffice assorbente il terriccio e l’umidità dal vetro dell’orologio. Se l’orologio viene indossato quando il retro della cassa e il cinturino sono sporchi, questi possono provocare un’irritazione cutanea in quanto a contatto diretto con la pelle.
- Page 69 INDICE COMPONENTES PRINCIPALES ......66 CARACTERÍSTICAS ........67 USO DEL VISOR Y DE LA CORONA .
-
Page 70: Acomponentes Principales
COMPONENTES PRINCIPALES Horario Botón Minutero Botón Segundero del cronógrafo Corona Fecha Segundero pequeño Horario del cronógrafo Minutero del cronógrafo Aguja de 1/20 de segundo del cronógrafo... -
Page 71: Bcaracterísticas
CARACTERÍSTICAS [HORA] • indicada por las agujas del horario, minutero y segundero. [FECHA] • visualizada en formato numérico. [CRONÓGRAFO] • mide hasta 12 horas con incrementos de 1/20 de segundo. • medición de los tiempos intermedios. -
Page 72: Cuso Del Visor Y De La Corona
USO DEL VISOR Y DE LA CORONA Aguja de 1/20 de segundo del cronógrafo Minutero Horario Fecha (1) (2) (3) Segundero pequeño Segundero del cronógrafo Horario del Minutero del cronógrafo cronógrafo Corona (1) posición normal : libre (2) primer clic : ajuste de la fecha (3) segundo clic : ajuste de la hora, ajuste de la posición de las agujas del... -
Page 73: Dajuste De La Hora Y De La Posición De Las Agujas Del Cronógrafo
AJUSTE DE LA HORA Y DE LA POSICIÓN DE LAS AGUJAS DEL CRONÓGRAFO Este reloj ha sido diseñado de modo que: • el ajuste de la hora y • el ajuste de la posición de las agujas del cronógrafo sean ambos ejecutados con la corona en la posición del segundo clic. - Page 74 1. Extraiga la corona hasta el segundo clic cuando el segundero pequeño se encuentre en las 12. Si el cronógrafo está midiendo un tiempo, o está detenido, el mismo se reposiciona automáticamente en 0. 2. Gire la corona para regular las agujas de la hora y los minutos. Se aconseja ajustar la hora adelantada de algunos minutos respecto a la hora actual, considerando, si es necesario, el tiempo requerido para regular la posición de las agujas del cronógrafo.
- Page 75 1. Presione el botón durante 2 segundos para ajustar la / las aguja/s del cronógrafo. La selección de la aguja que se ha de ajustar se puede efectuar en el siguiente orden, pulsando el botón durante 2 segundos. Segundero Aguja de 1/20 de Horario y minutero segundo del cronógrafo...
-
Page 76: Eajuste De La Fecha
AJUSTE DE LA FECHA • Antes de regular la fecha, asegúrese de haber regulado la hora. • Es necesario regular la fecha al final de febrero y de los meses de treinta días. Fecha 1. Extraiga la corona hasta el primer clic 2. -
Page 77: Fcronógrafo
CRONÓGRAFO • El cronógrafo permite medir hasta 12 horas con incrementos de 1/20 de segundo. • El tiempo medido es indicado por las cuatro agujas del cronógrafo que se desplazan independientemente de las agujas del visor de la hora. • Cuando la medición llega a 12 horas, el cronógrafo interrumpe automáticamente la cuenta. - Page 78 DESPLAZAMIENTO DE LA AGUJA DI 1/20 DE SEGUNDO DEL CRONÓGRAFO • Después que el cronógrafo ha iniciado a funcionar, la aguja de 1/20 de segundo del mismo se mueve por aproximadamente 10 minutos y se interrumpe automáticamente en el 0. •...
- Page 79 [Medición del tiempo transcurrido acumulado] Activación Parada Puesta en cero Parada Puesta en cer Las funciones de reanudación y de parada del cronógrafo se pueden sustituir pulsando el botón [Medición del tiempo intermedio] Split Activación de Reposición Liberación Parada la medición del tiempo de los intermedio...
-
Page 80: Gprecauciones Para El Usoe Informaciones Utiles
PRECAUCIONES PARA EL USO E INFORMACIONES UTILES Indicación Salpicaduras, Natación Esfera Caja transpiración, etc. llovizna, abluciones, etc. WATER RESISTANT WATER RESISTANT 30M (3ATM) WATER RESISTANT WATER RESISTANT 50M (5ATM) WATER RESISTANT WATER RESISTANT 100M (10ATM) WATER RESISTANT WATER RESISTANT 200M (20ATM) o más Algunas veces la indicación “WATER RESISTANT”... - Page 81 en agua Inmersión Características Inmersión de impermeabilidad profundidad No es impermeable. Debe protegerse del agua y la humedad. Impermeabilidad normal. Durante el uso cotidiano resiste a salpicaduras, transpiración, llovizna, abluciones, etc. Utilizable durante la natación pero no para inmersiones. Idóneo para inmersiones poco importantes. Idóneo para inmersiones importantes de profundidad.
- Page 82 Temperatura No exponga nunca el reloj a los rayos directos del sol ni lo deje en lugares extremadamente calurosos o fríos durante un largo período de tiempo. En todos estos casos, se podría afectar el funcionamiento del reloj y acortar la duración de la pila.
- Page 83 Si el reloj entra en contacto con solvente como el benceno, o con productos que contienen substancias como bencina, barnices, bruñidores, detergentes o adhesivos, sus partes pueden desteñirse, disolverse o romperse. Ponga mucha atención para evitar las substancias químicas. La caja y la correa del reloj pueden desteñirse si entran en contacto con el mercurio de un termómetro roto o de otra proveniencia.
Need help?
Do you have a question about the CHRONO YM92 and is the answer not in the manual?
Questions and answers