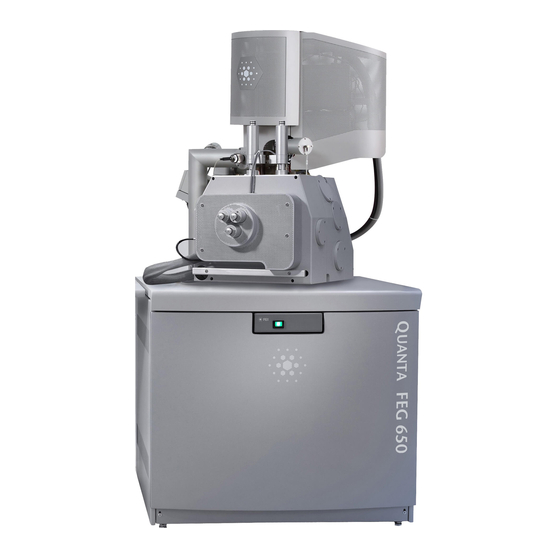

Related Manuals for FEI Quanta FEG 450


Summarization of Contents
Chapter 1 Preface
User Manuals
Context for other related manuals such as the Safety Manual.
THE USER SAFETY MANUAL
Provides critical safety information for operation and maintenance.
THE USER OPERATION MANUAL
Details the structure and content of this operation manual.
Preface: How to Use this Manual
How to Use this Manual
Provides guidance on navigating and utilizing the manual effectively.
Chapter 2 System Overview
How Quanta FEG SEM Works
Explains the fundamental components and operation of the SEM.
VACUUM SYSTEM
Details the vacuum system essential for electron path integrity.
IMAGE VIEWING AND CAPTURE
Describes how images are displayed and captured.
POSITIONING OF THE STAGE
Explains the manipulation and automation of the specimen stage.
System Overview: System Layout of Quanta FEG
System Layout of Quanta FEG
Describes the overall architecture and layout of the system.
SOFTWARE INTERFACE ELEMENTS
Details the graphical components of the user interface.
HARDWARE INTERFACE ELEMENTS
Explains the physical components used for system interaction.
System Control Panel
Information on the main console for system activation and control.
Stage Controls
Details on how the specimen stage is controlled.
Final Lens Aperture Strip
Describes the component that controls beam aperture size.
System Overview: Quanta FEG Options
Quanta FEG Options
Lists available hardware and software options for the system.
Chapter 3 System Operation
The Quanta FEG vacuum system
Explains the vacuum system, modes, and related actions.
Quanta FEG System States
Describes various operational states of the system.
System Operation: Quanta FEG Vacuum System
Quanta FEG Vacuum System
Details the three main vacuum sections: Gun, Column, and Specimen Chamber.
System Operation: Vacuum Statuses
Vacuum Statuses
Explains how to monitor and interpret vacuum status indicators.
PUMP BUTTON
Describes the function of the pump button for vacuum operations.
VENT BUTTON
Describes the function of the vent button for atmospheric release.
System Operation: Vacuum Modes
Vacuum Modes
Details the High Vacuum, Low Vacuum, and ESEM operating modes.
HIGH VACUUM (HiVac) MODE
Describes the standard high vacuum operating condition.
LOW VACUUM (LoVac) AND ESEM MODES
Explains alternative modes for specific sample types.
System Operation: Quanta FEG System States
Quanta FEG System States
Outlines the different operational states of the microscope system.
POWER OFF
Describes procedures for safely powering off the instrument.
The Emergency Off
Details the procedure for immediate electrical power shutdown.
Chapter 4 SOFTWARE CONTROL
OTHER SOFTWARE AND HARDWARE
Information on other software and hardware affecting system operation.
Software Control: Software Interface Elements
Software Interface Elements
Overview of graphical elements like icons and menus in the UI.
ICONS
Explanation of small graphical symbols representing software applications.
TOOL-TIPS
Functionality providing short explanations for UI items.
PULL-DOWN MENUS
Describes the menu bar structure and selection process.
COMMAND BUTTONS
Details on interactive buttons used to carry out or cancel functions.
LIST BOXES
UI elements used for selecting from available choices.
PROPERTY EDITORS
UI elements for grouping and editing related parameters.
EDIT BOXES
UI elements for inputting text or numerical information.
RADIO BUTTONS / CHECK BOXES
UI elements for making single or multiple selections.
ADJUSTERS
UI elements used for continuous parameter adjustment.
2D CONTROLS
Specific UI controls represented by an X-Y box.
MODULES
Describes UI organization combining related software elements.
DIALOGUES
Explains pop-up windows for information or user input.
TABS
UI feature for organizing interface elements into sections.
PROGRESS BARS
UI element indicating the progress of an ongoing procedure.
Software Control: xT microscope Server Software
xT microscope Server Software
Details the server application controlling basic microscope functions.
Software Control: xT microscope Control Software
xT microscope Control Software
Describes the main user interface for controlling microscope operations.
THE TITLE BAR
Identifies the title bar with application name and standard buttons.
THE MENU BAR
Explains the pull-down menus for accessing application functions.
SAVE AS… DIALOGUE
Details the dialogue box for saving images with various options.
Import / Export
Functionality for importing and exporting system data.
The Edit Menu
Provides helpful functions for editing items within the UI.
The Detectors Menu
Allows selection and setting of installed detectors.
The Scan Menu
Contains functions for controlling image scanning parameters.
Pause (F6)
Function to pause or resume image scanning.
Snapshot (F4) / Photo (F2)
Functions for capturing single images.
Reduced area (F7)
Feature for optimizing focus and stigmation on a smaller area.
Full Frame (Ctrl + M)
The default scanning mode for navigation and imaging.
Spot (Ctrl + K)
Controls the electron beam spot size for imaging.
Line
A specific scanning mode displaying a horizontal line.
External
Mode for activating external control of the scanning system.
Beam Blank (Ctrl + B)
Function to deflect the beam to protect the specimen.
Live
Default imaging mode for collecting unfiltered, raw images.
Average
Image processing technique to reduce noise by averaging frames.
Integrate
Image processing technique using true integration for noise reduction.
The Stage Menu
Provides access to stage and sample navigation functions.
Auto Beam Shift Zero
Resets beam shift and corrects image position with stage movement.
Home Stage (Shift + F3)
Procedure to move all motorized stage axes to their hardware limits.
Unlink Z to FWD
Feature to set Z coordinate relative to Free Working Distance.
Sample Navigation
Function to navigate live images across the sample surface.
The Tools Menu
Provides access to various utility and adjustment functions.
Set HFW… (Ctrl + H)
Enables setting the horizontal field width of the scanned area.
Image Post Processing (Ctrl + F7) / Undo … (Ctrl + Shift + F7)
Functions for correcting image properties and undoing changes.
The Window Menu
Manages the display of different windows and quads.
Center Cross (Shift + F5)
Displays a crosshair in the center of image quads for alignment aid.
Alignment Rectangle (Shift + F6)
Displays a dashed rectangle for automatic alignment procedures.
Remote Display Mode
Enables correct UI imaging at a remote site or for remote service.
The Help Menu
Provides access to documentation and system information.
THE TOOLBAR
Contains functional icons for quick access to system controls.
IMAGE WINDOWS
Describes the four independent windows (quads) for image display.
The Databar
Displays instrument and imaging information at the base of quads.
PAGES AND MODULES
Explains the organization of the software interface into pages and modules.
1. The Vacuum module
Controls chamber pressure, gas type, and vacuum modes.
2. The Column Module
Contains controls for setting electron beam conditions.
3. Magnification / HFW Module
Provides controls for adjusting image magnification and field width.
4. Beam Module
Includes controls for image astigmatism and beam shift.
5. The Tuning Module
Enables fine alignment of the electron source.
6. The Detectors Module
Allows continuous adjustment of detector contrast and brightness.
7. The Status Module
Displays vital system information and status icons.
8. The Stage Module
Controls stage movements and navigation via map, coordinates, and tilt tabs.
The Navigation tab
Provides functionality to navigate across the sample surface.
9. Rotation Module
Controls and displays the scan rotation value.
10. Detector settings Module
Enables selection and adjustment of parameters for chosen detectors.
11. The Measurement / Annotation Module
Provides tools for measuring and annotating images.
12. The Digital Zoom Module
Allows digital zooming of images within the active quad.
13. The Enhanced Image Module
Offers various digital image enhancements like LUT, Mix, and Color.
14. The Alignments Module
Contains procedures to optimize system performance.
PREFERENCES… DIALOGUE
Allows configuration of various system and UI settings.
The Units Tab
Enables changing units for measure, pressure, and temperature.
The Databar Tab
Specifies the content and layout of the databar displayed on quads.
The Scanning Tab
Allows adjustment of dwell-times and scanning functions.
The Presets Tab
Enables changing predefined values for High Voltage, Magnification, and Pressure.
The ESEM Tab
Customizes specimen chamber purging for ESEM/Low Vacuum modes.
The General Tab
Contains various UI behavior and microscope operation settings.
Spot Size Step (0.1 / 0.01 / 0.001)
Sets the accuracy for the spot size setting.
Image and graphics
Settings related to image averaging, icons, and display options.
Microscope operation
Settings affecting automatic stage movement and CCD camera behavior.
The Movie Tab
Provides controls for setting up movie frame-rate and save conditions.
Magnification Tab
Controls imaging and stored image databar magnification display.
Software Control: FEI User Management Software
FEI User Management Software
Software for organizing and managing user accounts.
The File Menu
Contains options for logging on/off, refreshing, and exiting the program.
The Account Menu
Allows administrators to create, remove, and set properties for user accounts.
The Userdata menu
Provides functions for copying, pasting, and removing user data.
ACCOUNT LOGGING
Utility for monitoring user actions, session time, and system status.
Software Control: Entering Commands in Summary
USING THE MOUSE
Explains mouse button functions for software interaction.
USING THE KEYBOARD
Details keyboard keys and shortcuts for software control.
FUNCTION AND SPECIFIC KEY SHORT-CUTS
Lists functions and their corresponding keyboard shortcuts.
Chapter 5 OPERATING PROCEDURES
Specimen Preparation and Handling
Covers essential steps for preparing specimens before imaging.
Obtaining an Image
Guides the user through the process of acquiring an initial image.
Optimising an Image
Provides techniques to improve image quality.
Operating Procedures: Specimen Preparation and Handling
Specimen Preparation and Handling
Details requirements for specimen material and preparation.
NEEDED ITEMS
Lists essential items required for specimen preparation.
MOUNTING THE SPECIMEN TO THE HOLDER
Describes the procedure for attaching specimens to holders.
INSERTING / EXCHANGING A SPECIMEN AND / OR A DETECTOR
Procedure for installing or changing system components.
Operating Procedures: Obtaining an Image
OBTAINING AN IMAGE
Guides the user through the process of acquiring an image.
OPERATION PRE-CHECK
Ensures correct system settings before starting image acquisition.
SELECTING VACUUM MODE
Details how to select the appropriate vacuum mode for imaging.
SPOT SIZE
Explains the importance and selection of electron beam spot size.
Operating Procedures: Optimising an Image
OBTAINING AN IMAGE ON SCREEN
Steps to get an initial image displayed on the screen.
PRINCIPLES OF SEM IMAGING
Explains the fundamental concepts of SEM image formation.
MAGNIFICATION
Describes how magnification affects image detail and field of view.
Changing Magnification
Details methods for adjusting image magnification.
SCAN SPEED AND FILTERING
Balancing scan speed, image quality, and noise reduction.
CONTRAST AND BRIGHTNESS
Guides on manually adjusting contrast and brightness for optimal image visibility.
FOCUSING
Provides methods for achieving sharp images of specimen features.
CORRECTING ASTIGMATISM
Describes procedures to correct image aberrations.
PRESSURE AND WORKING DISTANCE (WD)
Explains how pressure and WD affect image quality and analysis.
DIGITAL IMAGING ENHANCEMENT / IMAGING MIXING / COLORING
Covers advanced techniques for image manipulation and enhancement.
Operating Procedures: Detector Types and Usage
Detector Types and Usage
Overview of available detectors and their typical usage modes.
DETECTOR CONNECTION
Details how detectors are physically connected to the system.
EVERHART THORNLEY DETECTOR (ETD)
Information on the ETD detector and its operating modes.
BACKSCATTERED ELECTRONS (BSED) AND GASEOUS ANALYTICAL (GAD - optional) DETECTORS
Details on BSED and GAD detectors for BSE and X-ray analysis.
Obtaining Image in BSE Mode
Procedure for acquiring images using the Backscattered Electron detector.
LARGE FIELD DETECTOR (LFD)
Information on the LFD detector for general imaging.
GASEOUS SECONDARY ELECTRON DETECTOR (GSED)
Details on the GSED detector for wet and high-pressure imaging.
PLA CONES
Describes optional cones that enhance detector characteristics.
DISCHARGES BETWEEN THE GASEOUS DETECTORS AND THE SAMPLE
Troubleshooting guide for discharges with gaseous detectors.
OBTAINING IMAGE PROCEDURE FOR GASEOUS DETECTORS
Steps for acquiring images using gaseous detectors.
Operating Procedures: Capturing and Handling Single Image
Capturing and Handling Single Image
Covers pausing, saving, and managing single images.
IMAGE TYPES
Explains different image data formats and bit depths.
SAVING / OPENING / PRINTING
Details universal functions for file handling operations.
Operating Procedures: Recording Movies (Saving Multiple Images)
Recording Movies (Saving Multiple Images)
Describes capturing dynamic experiments as digital video files.
MOVIE TAB PREFERENCES DIALOGUE
Configuration settings for movie recording parameters.
Timer module
Settings for controlling movie frame rate and delay time.
File module
Settings for naming, saving, and formatting movie files.
MOVIE PROCEDURE
Step-by-step guide for starting and stopping movie recording.
FEI MOVIE CREATOR
Software used to create movies from sequences of TIF images.
FEI MOVIE CREATOR TAB: DATABAR
Configuration options for the databar within the movie creator.
Operating Procedures: Measurement and Annotation Functions
Measurement and Annotation Functions
Capabilities for measuring distances, angles, and annotating images.
TOOLS
Selection of measurement and annotation tools.
The Property Editor
Allows editing properties of selected measurement or annotation graphics.
Shape Editing
Describes how to modify drawn graphical elements in images.
Chapter 6 ALIGNMENTS
Recommendation
General advice on when and how to perform system alignments.
Alignments: Quanta FEG System Alignments
Quanta FEG System Alignments
Overview of available alignment procedures for the system.
COMMON RULES
General guidelines applicable to all alignment procedures.
BUTTONS AND CONTROL ELEMENTS
Describes common buttons and controls used in alignment procedures.
Alignments: Final Lens Aperture Strip Alignment
Final Lens Aperture Strip Alignment
Procedure for mechanical alignment of the final lens aperture.
ALIGNING PROCEDURE
Step-by-step guide for performing the aperture alignment.
Alignments: 1 - Gun Alignment
1 - Gun Alignment
Procedure to center the electron beam for optimal illumination.
Alignments: 2 - Stigmator Alignment
2 - Stigmator Alignment
Procedure to correct image astigmatism.
Particular Control Elements
Details specific UI elements for stigmator adjustment.
Alignments: 3 - Stage Rotation Centre
3 - Stage Rotation Centre
Alignment procedure for setting the stage rotation center.
Alignments: 5 - Emitter Startup
5 - Emitter Startup
Procedure for switching the electron source on and off.
Alignments: 94 - CCD Camera Alignment
94 - CCD Camera Alignment
Procedure to optimize CCD camera imaging performance.
Alignments: 154 - Water Bottle Venting
154 - Water Bottle Venting
Procedure to vent the water bottle for refilling.
Chapter 7 STAGES
Stages types and accessories:
Overview of different stage models and their associated accessories.
Software Stage Functions
Describes how stage movements are controlled via software.
Stage Related Functions
Covers additional functionalities related to stage operation.
Stages: Stages Types and Accessories
QUANTA FEG 250 – 50 mm STAGE
Details the specifications and movements of the 50 mm stage.
QUANTA FEG 450 / 650 – 100 / 150 mm STAGE
Details the specifications and movements of the 100/150 mm stages.
EUCENTRIC POSITION
Explains the importance and procedure for setting the eucentric position.
Finding Eucentric Position Procedure
Step-by-step guide to find and set the eucentric position.
Sample Top Surface Positioning
Procedure for positioning the sample surface relative to the lens.
STAGE MOVEMENT LIMITS
Provides specifications on the operational ranges of stage movements.
Stages: Software Stage Functions
Software Stage Functions
Overview of stage control functionalities via software.
MAP TAB
Feature for displaying and selecting stored stage positions on a map.
COORDINATES TAB
Displays and allows editing of stage coordinates.
TILT TAB
Controls for tilting the stage and correcting image distortions.
Stages: Stage Related Functions
Stage Related Functions
Describes additional functions related to stage operation.
STAGE MOVEMENTS
Explains various methods for moving the specimen stage.
Track
Function for continuous, variable speed stage movement.
Get
Function to center an image point on the screen using stage movement.
Beam Shift
Controlling beam position without moving the stage.
Compucentric Rotation (F12)
Aligns stage rotation for compucentric movement.
SPECIMEN ALIGNMENT
Procedures for aligning features on the sample.
xT Align Feature
Utility for aligning long features for easier navigation.
User Units
Procedure to activate and define user-defined units for stage coordination.
Using 1-, 2- or 3- Point Alignments
Describes different alignment types based on sample points.
Sample Navigation / Navigation Montage...
Features for previewing and navigating the sample surface.
SCAN ROTATION (SHIFT + F12)
Activates onscreen tool to rotate scan and align the image.
Chapter 8 MAINTENANCE AND TROUBLESHOOTING
Cleaning Procedures Overview
General overview of recommended cleaning procedures.
The Standard Insert
Maintenance procedures for the standard insert component.
Gaseous Detectors
Maintenance instructions specific to gaseous detectors.
LIST OF APPLIED CLEANERS
Lists suitable cleaning agents for instrument parts.
MATERIALS AND TECHNIQUE
Describes methods and materials for cleaning components.
The Standard Insert
Details on the standard insert, including removal and disassembly.
REMOVING AND DISASSEMBLING
Instructions on how to remove and take apart the standard insert.
HOUSING CLEANING
Procedure for cleaning the housing of the standard insert.
PLATINUM APERTURES CLEANING
Critical cleaning procedures for platinum apertures.
PLATINUM APERTURES INSTALLING
Step-by-step guide for installing platinum apertures.
Aperture Strip Module
Maintenance procedures for the aperture strip and its module.
REMOVING THE APERTURE ROD
Procedure for removing the aperture rod from the microscope.
REPLACING THE APERTURE MODULE
Instructions for fitting a new aperture module.
REPLACING THE APERTURE ROD
Procedure for replacing the aperture rod assembly.
Gaseous Detectors
Maintenance procedures specific to gaseous detectors.
CLEANING THE GSED / LFD
Cleaning instructions for the GSED and LFD detectors.
Stage maintenance
Regular maintenance activities for the specimen stage.
STAGE MECHANICS
Details on checking and maintaining the mechanical aspects of the stage.
Cleaning Stage parts
Procedure for cleaning stage components.
Refilling the Water Bottle
Procedure for refilling the water bottle for the cooling system.
Pre-Vacuum Pump Maintenance
Maintenance procedures for the pre-vacuum pump.
PERIODIC CHECK
Routine checks for the pre-vacuum pump's oil level and condition.
Troubleshooting
Guidance for diagnosing and resolving common system problems.
Not possible to switch the microscope or the PC on
Troubleshooting steps for power-on issues.
Server crashes at the Start-Up
Steps to resolve issues when the server crashes during startup.
No signal / illumination
Troubleshooting steps for issues with signal or illumination.
Poor ETD image
Troubleshooting steps for poor image quality with the ETD detector.
Water interlock failure
Troubleshooting steps for issues related to water interlock failures.
DIAGNOSTICS AUTO REPORT
Tool for generating a comprehensive system diagnostic report.
SIMPLE TAD
Diagnostic tool for performing system tests and collecting results.
Chapter 9 SYSTEM OPTIONS
Manual User Interface
Description of the optional manual interface hardware.
Joystick
Description of the optional joystick control device.
Automatic Aperture System
Details the optional motorized final lens aperture exchange system.
Nav-Cam
Feature for navigating across the stage movement area.
Optional Detectors
Overview of various optional detector types available for the system.
Energy Dispersive X-ray (EDX) Analysis
Explains the technique for elemental composition identification.
Cooling Stage / Waterless Cooling Stage
Describes temperature control stages for sample observation.
Wet STEM
Describes observation of objects in thin liquid layers using transmitted electrons.
Heating Stage 1000 °C / Heating Stage 1500 °C
Details high-temperature stages for sample observation.
CryoCleanerEC
Equipment designed to decrease contamination level in the system.
Plasma Cleaner
Equipment for removing thin contamination layers using plasma.
Quanta Morphologi
Method for precise determination of size and shape of submicron particles.
Image Analysis
Software for image processing and calculation of morphological data.
Remote Imaging
Enables remote connection to the microscope PC for control.
Beam Deceleration
Technique using negative voltage to enhance electron detection.
Specimen Holder Kit Option
Description of the universal specimen holder kit.
Quick Loader
Description of the automated sample loading and unloading system.
System Options: Manual User Interface
Manual User Interface
Details the knobs and functions of the MUI hardware.
Joystick
Details the functions and controls of the joystick device.
System Options: Automatic Aperture System
Automatic Aperture System
Enables motorized final lens strip aperture exchange.
6 - APERTURE ALIGNMENT
Supervisor procedure for high precision aperture setting.
System Options: Nav-Cam
Nav-Cam
Functionality for navigating across the stage movement area.
CAPTURING NAVIGATION IMAGE PROCEDURE
Procedure for capturing navigation images with the Nav-Cam.
401 - NAV-CAM AUTOBRIGHTNESS
Sets Nav-Cam parameters for automatic brightness adjustment.
System Options: Optional Detectors
Optional Detectors
Overview of various optional detectors available for the system.
GASEOUS BACK SCATTERED ELECTRON DETECTOR (GBSD)
Details on the GBSD detector for imaging at higher pressures.
IN COLUMN DETECTOR (ICD)
Details on the ICD detector ideal for use with Beam Deceleration.
SCANNING TRANSMISSION ELECTRONS MICROSCOPY DETECTOR (STEM I)
Details on the STEM I detector for transmitted electron imaging.
ANNULAR SCANNING TRANSMISSION ELECTRONS MICROSCOPY DETECTOR (STEM II)
Details on the STEM II detector, a 14-segment solid-state diode.
LOW-VOLTAGE HIGH-CONTRAST DETECTOR LENS MOUNTED / RETRACTABLE (vCD)
Details on the vCD detector for low accelerating voltages.
DIRECTIONAL BACKSCATTERED DETECTOR – CONCENTRIC BACKSCATTERED DETECTOR (CBS)
Details on the CBS detector for distinguishing scattered electrons.
ESEM & GASEOUS ANALYTICAL DETECTOR
Details on the detector combining GAD and GSED functionalities.
QUAD BACKSCATTERED ELECTRONS DETECTOR (QUAD BSED)
Details on the Quad BSED detector for backscattered electron imaging.
System Options: Energy Dispersive X-ray (EDX) Analysis
Energy Dispersive X-ray (EDX) Analysis
Technique for identifying elemental composition using X-rays.
THE SUPPORT PC
Describes the PC and associated hardware required for EDX functionality.
LFD EDX ANALYSIS
Procedure for performing EDX analysis using the LFD detector.
GAD EDX ANALYSIS
Procedure for performing EDX analysis using the GAD detector.
STEM EDX ANALYSIS
Procedure for performing EDX analysis in STEM mode.
System Options: Cooling Stage / Waterless Cooling Stage
Cooling Stage / Waterless Cooling Stage
Describes temperature control stages for sample observation.
COOLING STAGE PARTS
Lists the components of the cooling stage assembly.
SOFTWARE CONTROL
Details the software control module for temperature stages.
Temperature Stage Control Module
Module for controlling heating and cooling stage operations.
The Humidity tab
Provides controls for managing sample humidity.
153 - Cooling Stage Calibration
Alignment procedure for precise humidity control calibration.
COOLING STAGES BASIC OPERATIONS
Fundamental operations for using cooling stages.
Condensation Point
Determining the stage condensation point for sample wetness.
Pressure and Temperature control
Methods for controlling sample temperature and pressure.
System Options: Wet STEM
Wet STEM
Describes observation of objects in thin liquid layers via transmitted electrons.
WET STEM BASIC OPERATIONS
Procedures for conducting Wet STEM experiments.
System Options: Heating Stage 1000 °C / Heating Stage 1500 °C
Heating Stage 1000 °C / Heating Stage 1500 °C
Details the high-temperature stages for sample observation.
HEATING STAGES PARTS
Lists the components included in the heating stage assembly.
Heating Stages Assembly
Describes the process of mounting the heating stage assembly.
Cables
Details the cable connections for the heating stage.
High Temperature GSED
Describes the GSED detector for use at high temperatures.
1000 °C Heating Stage variances
Specifics and components of the 1000 °C heating stage.
Heat Shield
Describes the heat shield's function and components.
Crucibles
Information on crucibles used with the heating stages.
1500 °C Heating Stage variance
Specifics and components of the 1500 °C heating stage.
Heat Shield Assembly
Details the assembly and adjustment of the heat shield.
Heat Shield and Sample Bias (SSB) board
Describes the board providing voltages for heating stage features.
HEATING STAGE INSTALLATION
Step-by-step guide for installing the heating stage.
SOFTWARE CONTROL
Details the software interface for controlling temperature stages.
Temperature Stage Control Module
Module for controlling heating and cooling stage operations.
The Advanced tab
Provides advanced settings for heating stages.
150 - Heating Stage Settings
Supervisor alignment procedure for heating stage settings.
151 - Temperature Calibration
Calibration procedure to ensure temperature readout accuracy.
HEATING STAGES BASIC OPERATIONS
Fundamental operations for using heating stages.
Outgassing Samples
Handling samples that may outgas at high temperatures.
Using HS with BSED
Guidelines for operating the heating stage with the BSED detector.
Using the HS with EDX Detectors
Guidelines for using heating stages with EDX detectors at high temperatures.
System Options: CryoCleanerEC
CryoCleanerEC
Equipment for reducing contamination levels using liquid nitrogen.
PARTS AND ACCESSORIES
Lists the components included in the CryoCleanerEC kit.
System Options: Plasma Cleaner
Plasma Cleaner
Equipment that uses plasma to clean vacuum parts and samples.
SAMPLE CLEANING PROCEDURE
Procedure for cleaning samples using the plasma cleaner.
104 - PLASMA CLEANING ALIGNMENT
Alignment procedure for optimizing plasma cleaning duration.
System Options: Quanta Morphologi
Quanta Morphologi
Software for precise determination of particle size and shape.
SAMPLE PREPARATION
Describes sample preparation methods like ITO slides and filter membranes.
ITO slides
Procedure for preparing samples using ITO slides.
IMAGE ACQUISITION
Guidelines for acquiring images for accurate particle size calculation.
RECOMMENDED SETTINGS
Provides recommended settings for image acquisition based on sample type.
Filter membranes
Alternative sample preparation method using filter membranes.
SYMMETRICAL LOW VACUUM DETECTOR (SLVD)
Details on the SLVD detector used to prevent shadowing effects.
MAPPING TOOL
Tool for automatic acquisition of user-defined number of images.
System Options: Image Analysis
Image Analysis
Software for processing images and calculating particle data.
MEASUREMENT ACCURACY VERIFICATION
Procedure to verify calculation accuracy using standard spheres.
System Options: Remote Imaging
Remote Imaging
Enables remote connection and control of the microscope.
CONNECTION TO THE MICROSCOPE PC
Steps to establish a connection to the microscope PC.
MICROSCOPE PC'S DESKTOP SHARING
Allows multiple users to view the microscope PC's desktop.
CONTROLLING THE MICROSCOPE REMOTELY
Provides recommendations for effective remote control operation.
System Options: Beam Deceleration
Beam Deceleration
Technique using negative stage bias to enhance electron detection.
DETECTION PRINCIPLES
Explains how beam deceleration affects primary and signal electrons.
STAGE MODIFICATION
Describes the necessary stage modification for beam deceleration.
BEAM DECELERATION APPLICATIONS
Outlines the benefits and use cases of beam deceleration.
System Options: Specimen Holder Kit Option
Specimen Holder Kit Option
Description of the universal specimen holder kit components.
LOCATION POSITIONS
Explains the 2 pin / 2 hole location system for holder positioning.
OLDER INTERFACE ADAPTER
Adapter for pre-Quanta 50 mm stages without 2 pin locating holes.
MULTI-HOLDERS
Details various multi-holders and their fitting system.
System Options: Quick Loader
Quick Loader
Description of the automated sample loading system.
GENERAL DESCRIPTION
Overview of the Quick Loader's components and design purpose.
Loading rod
Describes the function and components of the loading rod.
Gate valve
Explains the status and movement of the gate valve.
INSTALLATION
Steps required for installing the Quick Loader.
OPERATIONS
Procedures for operating the Quick Loader system.
Loading a sample
Step-by-step guide for loading a sample into the Quick Loader.
Rod Loading Sequence
Detailed sequence for coupling and moving the loading rod.
Unloading a sample
Steps for safely unloading a sample from the Quick Loader.
Need help?
Do you have a question about the Quanta FEG 450 and is the answer not in the manual?
Questions and answers