
Related Manuals for Silver Marine Phoenix 660


Summary of Contents for Silver Marine Phoenix 660
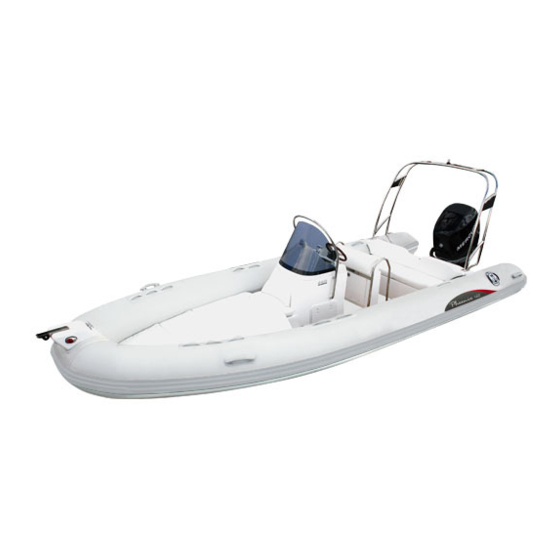
- Page 1 Phoenix 530 Phoenix 530 (H) Phoenix 570 Phoenix 570 (H) Phoenix 610 Phoenix 610 (H) Phoenix 660 Phoenix 660 (H) Owner’s manual www.silvermarine.com...
-
Page 2: Volume
Owner’s Manual-Volume 1 CAREFULLY READ THIS MANUAL BEFORE OPERATING YOUR BOAT. THE OWNER’S MANUAL IS IN TWO VOLUMES: -VOLUME 1 DEALS WITH OPERATING PRECAUTIONS AND SAFETY NOTICE: RECOMMENDATIONS. -VOLUME 2 DEALS WITH TECHNICAL SPECIFICATIONS AND ASSEMBLY PROCE- DURE OF THE BOAT AND ITS EQUIPMENTS. -
Page 3: Table Of Contents
BOATS ARE FUN, AND WE WANT YOU TO ENJOY YOUR BOAT FOR YEARS TO COME. PLEASE SPEND SOME TIME READING YOUR OWNER’S MANUAL AND SAFETY PRECAUTIONS TO UNDERSTAND THE OPERATION AND SAFETY CONSIDERATIONS OF THIS BOAT. AND REMEMBER: SAFETY FIRST. VOLUME 1 GENERALITIES-PRECAUTIONS-SECURITY CONTENTS... -
Page 4: Glossary Of Symbols
GLOSSARY OF SYMBOLS Throughout this manual there are advisories of safe operation. The symbols below are advisories relative to various types of situations. SECURITY SYMBOLS DENOTES AN IMMINENT HAZARD WHICH MAY RESULT IN DEATH OR SEVERE INJURY IF NOT AVOIDED. DENOTES A HAZARD WHICH MAY RESULT INJURY OR DEATH IF NOT AVOIDED. - Page 5 AN IMPORTANT MESSAGE Congratulations on your purchase of an inflatable boat. We take pride in bringing you a quality product which will offer you years of pleasure. Your boat is an investment which deserves your care and attention. This manual has been compiled to help you to operate your craft with safety and pleasure. It contains details of the craft, the equipment supplied or fitted, its systems, and information on its operation and maintenance.
-
Page 6: Certification-Identification
APPROVAL / CERTIFICATION / IDENTIFICATION All our boats comply with ISO standard 6185 established by the International Standards Organization, and with the European Directive 94/25/EC changed by the directive 2003/44/EC. We are a member of NMMA (National Marine Manufacturer’s Association), Record below the data indicated on the manufacturer’s plate provided on the inside of the transom. -
Page 7: Manufacture's Id Plate
MANUFACTURER’S PLATE The indications on the manufacturer’s plate on the transom are important: they give information about limitations imposed by local or national regulations. However, these indications are not a complete list: the security requirements (obligatory) security equipment of the boat, maximum authorized distance you can navigate from a shelter, etc. may change according to the country or state. -
Page 8: Type Of Motor And Adjustment
TYPE OF MOTOR AND ADJUSTMENT 1. TYPE OF MOTOR 1.1 Motor’s power The maximum and recommended powers are listed in the table of technical specifications (volume 2 of the manual). For smaller outboards, go for tiller control, giving direct control over the boat and allowing for quick maneuvering. -
Page 9: Installing The Motor
INSTALLING AND ADJUSTING THE MOTOR 3. INSTALLING THE MOTOR Install the motor along the centerline of the boat, in the middle on the mounting plates (4) Fully tighten the brackets (1) by hand and check that they are still properly tightened after 15 minutes of running. - Page 10 ADJUSTING THE MOTOR 4.2 Motor position (TRIM) As a rule, the motor must be positioned so that the axis of the propeller is parallel with the water surface. However, an adjustment of the tilt is often recommended (see the chapter Operating instructions of this manual).
-
Page 11: Operating Instructions
OPERATING INSTRUCTIONS Distribution of the load Evenly distribute the load. (i.e, placing the fuel tank on the front can help to offset the weight of the outboard). To counterbalance the effects of the propeller’s rotation on the compartment of the boat, we recom- mend that the pilot remains on the starboard side. - Page 12 OPERATING INSTRUCTIONS SAFETY FIRST: LEARN HOW TO AVOID ACCIDENTS CHECK-LIST BEFORE DEPARTING GET REQUIRED INFORMATION AND INFORM OTHER PASSENGERS: v GET INFORMED on local regulations and hazards related to water activities and boat operation. v CHECK weather forecast, local currents, tides and wind conditions. v ADVISE someone on land of the time you plan to be back.
- Page 13 OPERATING INSTRUCTIONS SAFETY FIRST: LEARN HOW TO AVOID ACCIDENTS RULES TO OBSERVE DURING NAVIGATION Be responsible: do not neglect the safety rules, this could jeopardize your life and the lives of others. Learn to always keep control of your boat. Always operate with courtesy and respect.
- Page 14 OPERATING INSTRUCTIONS SAFETY FIRST: LEARN HOW TO AVOID ACCIDENTS RULES TO OBSERVE DURING NAVIGATION v BATTERY: - Avoid sparks and open flames near battery (Hydrogen gas from battery may explode). - Do not allow contact between positive and negative poles. - Turn off engine before inspecting or servicing battery.
-
Page 15: Environment
ENVIRONMENT RESPONSIBLE BOATING BEGINS WITH YOU With your inflatable boat, you can discover the richness of the marine environment. Help keep it beautiful. Enjoying time on the water is great, but it comes with a responsibility to ensure a strong healthy environment. -
Page 16: Handling
HANDLING 1. MOORING AND TOWING 1.1 MOORING Use the hull’s mooring ring. When moored, the self bailers should remain open to drain the rain NOTICE: water. 1.2 TOWING Use a single line attached to the mooring ring. Unload the boat before tow ing (bags, fuel tank, outboard). -
Page 17: Hauling On Trailer
HANDLING 3. HAULING ON TRAILER v The boat must be properly inflated. v The self bailer should remain open. Adjust the rollers -or supports- (1) of the trailer to fit the hull. Haul the boat onto the trailer using the mooring ring (2). Check if the boat is stable. -
Page 18: Maintenance
MAINTENANCE The buoyancy tube of your boat is made of fabric using plastomer. Maintenance is easy but essential for the longevity of your boat. 1. CLEANING 1.1 Clean your boat often, and always before wintering NEVER USE HIGH PRESSURE CLEANING EQUIPMENT, IT IS LIKELY TO DAMAGE THE BOAT. -
Page 19: Winter-Storage
MAINTENANCE 1.4 Maintenance of stainless steel We use only top quality stainless steel, which is resistant to corrosion. However, salt water is a harsh environment and maintenance is required to avoid corrosion. Stainless steel is not permanent Avoid contamination that results from contact with iron tools: Use chromed tools. -
Page 20: How To Repair Small Punctures
MAINTENANCE 4. HOW TO REPAIR SMALL PUNCTURES Cleaning: - Grease remover of the alcohol type. REPAIR KIT Repairing: - Patch. - Tube of special glue, ready for use (carefully replace the cap on the tube of glue. If properly sealed, it keeps perfectly). - Brush. -
Page 21: Troubleshooting Guide
TROUBLESHOOTING GUIDE... -
Page 22: Warranty-General Conditions
WARRANTY – GENERAL CONDITIONS YOUR BOAT IS DELIVERED WITH A WARRANTY CARD THAT DETAILS THE TYPE AND MODEL NUMBER OF THE BOAT. NOTICE: THIS CARD ALSO CONTAINS IMPORTANT INFORMATION NECESSARY FOR WARRANTY’S VALIDATION. YOU MUST COMPLETE IT AND SEND IT TO THE DESIGNATED ADDRESS TO REGISTER YOUR WARRANTY. -
Page 23: At Your Service
AT YOUR SERVICE Our service network assures you a dependable service. You will always find one of our dealers to advise you and to carry out any servicing or repair. We have created a complete range of accessories, specially adapted to our boats. You can find more by consulting the catalogue available from our website. - Page 24 Owner’s Manual-Volume 2 CAREFULLY READ THIS MANUAL BEFORE OPERATING YOUR BOAT. VOLUME 2 TECHNICAL SPECIFICATIONS-ASSEMBLY PROCEDURE CONTENTS PAGE I -Description I -1-Standard Features………………………………………………. 24-25 I -2-Description of Deck Layout………………….………………… I -3-Inventory………………………………………………………….. I -4-Handling…………………………………………………………... II -Buoyancy Tube II -1-Commissioning…………...……………………………………………. II -2-Inflating System……………………...………………………………… 30-31 II -3-Pressure…………………………..………………………………………...
-
Page 25: I -1-Standard Features
DESCRIPTION –STANDARD FEATURES I-2-Standard Features HULL Fiberglass hull Moulded non-skid deck 1 bow roller 1 anchor storage locker 1 bow locker Console side storage (console) Forehead seat storage (console) Windscreen and stainless steel grab handle (console) Sofa with up holstery Handles 3 aft mooring cleats Drain valve... - Page 26 STANDARD EQUIPMENT Sofa with upholstery Anchor locker Bow locker Molded fiberglass deck Engine well Rubbing strake Lifting handles Polyester bow roller Recessed valves Bolster 610/660 Bolster 530/570 Standard steering wheel Hydraulic steering system Windscreen and stainless steel grab handle 6 circuit brakers Automatic bilge pump 2 paddles Pump...
- Page 27 Navigation lights Teak* deck* TECHNICAL SPECIFICATIONS Phoenix 530 Phoenix 570 Phoenix 610 Phoenix 660 MODEL Phoenix 530 (H) Phoenix 570 (H) Phoenix 610 (H) Phoenix 660 (H) DESIGN CATEGORY C, TYPE VII C, TYPE VII C, TYPE VIII C, TYPE VIII STANDARD NO.
- Page 28 DESCRIPTION – HANDLING I -4-1-Transport: Advice on a properly sized trailer which can be provided by Silver Marine I -4-2-Lifting: The lifting sling is not included in the boat package. You may find it at any marine store. The capacity of the sling should be at least 1000kgs/2205lbs.
-
Page 29: 1-Commissioning
BUOYANCY TUBE- Commissioning II -1- Commissioning Be sure to observe the correct procedural sequence at all times. Proceed step by step, referring each time to the pages indicated for explanation of procedures. PAGE SECTION PROCEDURE Inventory / description of the 1. -
Page 30: 2-Inflating System
BUOYANCY TUBE - Inflating System II -2- INFLATION SYSTEM AIR PUMP a. adapter b. hose fitting c. hose base d. inflation port RECESSED VALVES The built-in valve plugs are designed to be screwed on or off; they alone provide final air tightness. NOTE: Never exert force as this could cause the com- plete internal inflation system of the valve to come... - Page 31 BUOYANCY TUBE - Inflating System PRESSURE GAUGE (Screw pressure gauge in place of valve cap) Pressure too low INFLATE Correct pressure Pressure too high DEFLATE INFLATING THE BOAT Set all valves to inflation position. Attach hose base to air pump port. For good results, air pump must sit firmly on ground For rapid inflation, squeeze the air pump quickly but gently.
-
Page 32: 3-Pressure
BUOYANCY TUBE - Pressure INFLATING THE TUBE Add the adapter corresponding to the recessed valve diameter to the air pump hose fitting. Inflate the tube balancing pressure between the various compartments until partitions are no longer visible. NEVER INFLATE A COM- PARTMENT FULLY WHEN OTHER COMPARTMENTS ARE FULLY DEFLATED... - Page 33 BUOYANCY TUBE - Pressure RISK OF UNDER PRESSURE: EXAMPLE: You have beached your boat and it is exposed to direct sunlight (temperature=50 C/122 F) at the recommended pressure (0.25bar/3.6 PSI). When you launch the boat (temperature=21 C/70 F), the internal temperature and pressure of inflatable compartments will simultaneously drop (down to 0. 163bar).
-
Page 34: Propulsion System
PROPULSION SYSTEM Observe Silver Marine’s recommendations and the engine manufacturer’s recommendations. See your dealer for optimum use of your boat. INSTALLATION AND CIRCUIT-Fuel The fuel tank of Phoenix series is located under the fiberglass hull. Phonix 530: Phonix 570: Phonix 610:... -
Page 35: Electrical
ON AND CIRCUIT- Electrical IV-2-ELECTRICAL DIAGRAM For Phoenix 530/570 For Phoenix 610/660... - Page 36 ALWAYS PROTECT YOUR EYES WHEN WORKING CLOSE TO A BATTERY. If you do not plan to use your Silver Marine® for a month or more, remove the battery and store it in a cool, dark and dry place. Com- pletely recharge the battery before reusing it.
- Page 39 INSTALLATION AND CIRCUIT- Electrical -1-Precaution A bilge pump and navigation lights are provided as standard equipment from the factory. Four or six positions are provided in the fuse block in order to install additional accessories: (1) All accessories added must be connected to the fuse block. (2) The accessories are divided into two categories: A---accessories used, or that maybe used, continuously in normal boat operation B---accessories only used intermittently.
- Page 40 Designed in USA by Silver Marine International Co., Ltd ©2008. All rights reserved. www. silvermarine.com...
Need help?
Do you have a question about the Phoenix 660 and is the answer not in the manual?
Questions and answers