Table of Contents
Advertisement
Quick Links
This Instruction Manual is also available for download on our Web-site: eutechinst.com or 4oakton.com
INSTRUCTION MANUAL
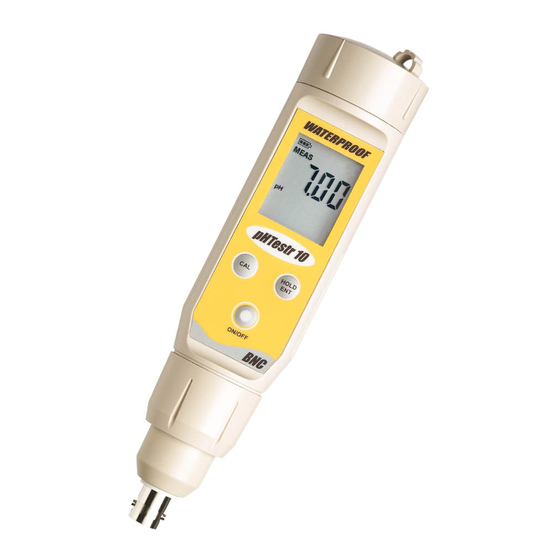
pHTestr 10, 20, 30, 10BNC, Spear
Large Screen
Waterproof pH / Temperature Tester
Double Junction
Introduction
Thank you for selecting our microprocessor waterproof pH tester with USA or NIST
buffer set selection. You have one of five models:
• pHTestr10
• pHTestr20
• pHTestr30
• pHTestr10BNC
• pHSpear
This manual provides a step-by-step guide to operate the testers.
Before you begin:
Condition your pHTestr 10, 20, 30 electrodes by immersing it in electrode storage
solution or tap water for at least 30 minutes before use. DO NOT use de-ionized water.
Ensure that your pHSpear electrode is always soaked in the electrode storage solution
or tap water via its protective cap.
Note: For pHTestr10BNC, please refer to the pH electrode's instruction manual.
pH Buffer Set Selection
Your tester features USA (pH 4.01, pH 7.00 and pH 10.01) or NIST (pH 4.01, pH 6.86,
and pH 9.18) standards. Select either one to suit your requirements.
1. While pressing the HOLD/ENT button, switch on the tester by pressing the ON/OFF
button.
2. Release the HOLD/ENT button. The display will flash either USA or NIST.
3. Press CAL button to toggle between the two buffer set standards.
4. Press the HOLD/ENT button to confirm the selection of the buffer set.
With meter
powered off,
press
HOLD/ENT
and ON/OFF
at the same
time. First release
ON/OFF button,
then HOLD/ENT
Figure 1: Buffer Selection Sequence
button.
pH Calibration
Calibration should be done regularly, preferably once a week. You can calibrate up to
three points using either the USA or the NIST buffer set standards.
1. Press ON/OFF button to switch unit on.
2. Dip electrode about 2 to 3 cm into the pH standard buffer solution.
3. Press the CAL button to enter calibration mode. The 'CAL' indicator will be
shown. The upper display will show the measured reading based on the last
calibration while the lower display will indicate the pH standard buffer solution.
Note: All testers have dual display during calibration mode
Note: To abort calibration, press the 'CAL' button.
4. Allow about 2 minutes for the tester reading to stabilize before pressing the
HOLD/ENT button to confirm the first calibration point. The upper display will
be calibrated to the pH standard buffer solution and the lower display will then
be toggling in between readings of the next pH standard buffer solution.
5. Repeat with other buffers if necessary. Rinse electrode in tap water before
dipping into next buffer.
Note: The calibration mode allows you to perform up to three calibration points
before returning to the measurement mode automatically. However, if you opted to
have only one or two calibration points, simply skip the remaining calibration points
by exiting to the measurement mode by pressing the CAL button.
Figure 2: Example of pH Calibration Sequence
After buffer
pH Measurement
selection,
whole LCD
1. Press the ON/OFF button to switch the tester on.
segment lits
2. Dip the electrode about 2 to 3 cm into the test solution. Stir and let the
up and goes
reading stabilize. For pHSpear, pierce the penetrating tip electrode through
back to
your semi solid sample as per the desired depth. Rotate left and right several
measureme
nt mode.
times and tilt to ensure sample contact.
3. Note the pH value or press HOLD/ENT button to freeze the reading. To release
the reading, press HOLD/ENT again.
4. Press ON/OFF to turn off tester. If you do not press a button for 8.5 minutes,
the tester will automatically shut off to conserve batteries.
HOLD Function
This feature lets you freeze the display for a delayed observation
1. Press HOLD/ENT button to freeze the measurement. A 'HOLD' indicator will be
displayed and the measurement will be frozen.
2. Press HOLD/ENT again to release the measurement. The 'HOLD' indicator will not be
displayed anymore indicating the held measurement is released.
User Reset
You can reset the pH calibration to the factory default by using the user reset function.
Buffer set selection and temperature user calibration (pHTestr30) are not affected by the
user reset function.
1. Switch off the tester.
2. While pressing the 'CAL' button, press and release the ON/OFF button to enter the
'User Reset' selection menu. The screen will display 'rSt' on the bottom display with
a flashing 'nO' selection.
3. Use the 'CAL' button to toggle between 'nO' and 'YES' selection.
• nO deactivates reset selection
To do a 1 point
• YES activates the reset selection
calibration only, press
CAL button at this point
4. Press the HOLD/ENT button to confirm the selection made.
to exit to the
5. If you have selected 'YES', the unit will show 'CO' momentarily and proceed to the
measurement mode.
measurement mode with the calibration reset back to factory default value.
Otherwise, proceed to
6. If 'nO' is selected, the unit will proceed to the measurement mode without any
second buffer for a
second buffer for a
calibration reset performed.
second point calibration.
With meter
To do a 2 point calibration only,
powered off,
press CAL button at this point to
press CAL and
exit to the measurement mode.
ON/OFF at the
Otherwise, proceed to third buffer
same time.
for a third buffer for a third point
First release
calibration.
ON/OFF
button, then
CAL button.
After the third point calibration, the
meter will automatically return to the
measurement mode. At any point, an
Automatic Temperature Compensation (ATC)
error message 'Er. 1' will be displayed
momentarily if the confirmed pH value
ATC feature is available only in pHTestr 10, pH Testr 20 and pH Testr 30. Through its in-
is not within the pH calibration window.
built temperature sensor, the measurement error due to the changes in electrode sensitivity
due to changes in temperature is compensated to give the actual pH reading of the
sample measured.
pH Testr10BNC and pH Spear has no ATC function and therefore the error should be
calculated to derive the actual pH reading of the sample. For these testers, the impact
on temperature compensation is 0.003 pH /°C / pH away from pH 7. For example, if
pHSpear is calibrated at room temperature (25 °C) and is measuring sample around pH 4
at around 5 °C.
Temperature difference : 25°C - 5°C = 20 °C
pH away from neutral : 7pH - 4pH = 3 pH
Total error
This error value of 0.18 pH should be taken into consideration to derive the actual pH
reading of the sample.
Figure 4: Example of HOLD Function
After reset,
whole LCD
segment lits
up and goes
back to
measurement
mode.
Figure 5: User Reset Sequence
: 0.003 x 20 x 3 = 0.18 pH
Advertisement
Table of Contents

Related Manuals for EUTECH INSTRUMENTS WATERPROOF PHTESTER 102030BNC


Summary of Contents for EUTECH INSTRUMENTS WATERPROOF PHTESTER 102030BNC
- Page 1 This Instruction Manual is also available for download on our Web-site: eutechinst.com or 4oakton.com pH Calibration HOLD Function This feature lets you freeze the display for a delayed observation Calibration should be done regularly, preferably once a week. You can calibrate up to 1.
- Page 2 Temperature Calibration (Only for pHTestr 30) Warranty Changing Batteries The waterproof pHTestr10, pHTestr20, pHTestr30, pHTestr10BNC and pHSpear are warranted 1. Open battery compartment lid (with attached lanyard loop). From the measurement mode, to be free from manufacturing defects for 2 years and electrode module for 6 months. If 2.
Need help?
Do you have a question about the WATERPROOF PHTESTER 102030BNC and is the answer not in the manual?
Questions and answers