Table of Contents
Advertisement
Quick Links
M8-AV-PRO INSTRUCTIONS - English
Phone Jacks
Telco and LAN Connector RJ-45
1
Coax Connectors
2 sets of IN /OUT, bidirectional,
2
universal coax connectors
1 RG-6 Coax Cable
DC Trigger
For high current
outlets (5-8)
This model has 4 diagnostic LEDs for max-
The Panamax $5,000,000 Connected
M8-AV-PRO - Provides AC power
Equipment Protection Policy is void if any
imum safety. They are designated as fol-
(surge, under-voltage and over-voltage)
lows:
wire leading into or out of the equipment
protection, coaxial (CATV, off-air antenna,
is not properly connected to the appropri-
SAT or cable modem) protection and tele-
1. POWER ON, PROTECTION OK -
ate Panamax surge protector(s).
phone/LAN line protection for electronic
(green) normally ON; indicates that the
surge protector must also be plugged into
devices. In addition, it features a 12VDC
a properly wired and grounded outlet.
surge protector is functioning properly and
input trigger and two banks (4 AC outlets
that all connected equipment is protected.
Please see the warranty for details or con-
each) of noise filtration circuitry. One, a
tact the Panamax Customer Support
capacitive filter circuit, is for high-current
2. GROUND OK - (green) normally ON;
Department with questions.
draw components like powered sub-
indicates that the wall outlet is properly
woofers or amplifiers. The other is a bal-
wired and grounded.
anced double L filter for A/V source
equipment or display devices.
IMPORTANT SAFETY POINTS
3. UNSAFE VOLTAGE - (red) normally
This model features Panamax's patent-
OFF; flashes when lit, indicates that
Panamax surge protectors and the con-
pending Automatic Voltage Monitoring
incoming voltages are unsafe and the
nected equipment must be indoors, in a
(AVM) circuitry for over and under voltage
surge protector has disconnected the
dry location and in the same building.
protection. This circuitry continuously
power to your connected equipment.
Although your Panamax protector is very
monitors the power and protects against
durable, its internal components are not
damage caused by brownouts (under-
4. DC Trigger - (green) ON/OFF status
isolated from the environment. Do not
voltages) and sustained over-voltages. It
depends upon whether or not a 12VDC
install any Panamax product near heat
automatically disconnects the power to
signal is being received from another
emitting appliances such as a radiator or
your connected equipment when either of
component when utilizing.
heat register. Do not install this product
these conditions are detected, then re-
ON = DC voltage signal is being received
where excessive moisture is present; for
connects it when the power returns to a
and high-current outlets are ON;
example near a bathtub, sink, pool, base-
safe level.
OFF = No signal from source component
ment floor, fish tank, etc.
and power to high-current outlets is OFF.
It is not uncommon for a building to be
The M8-AV-PRO has been designed with
improperly grounded. In order to protect
flexibility and expansion in mind. It will
your equipment, Panamax products must
accept add-on signal-line protection mod-
be plugged into a properly wired and
ules in the event that your installation has
grounded 3-wire outlet.
more signal-lines than can be protected
building wiring and grounding must con-
with one unit. More information is avail-
form to applicable NEC (USA) or CEC
able on our website (www.panamax.com)
(Canada) codes for the Panamax protec-
or from our Customer Support Department
tion policy to be valid.
(800-472-5555; 7:30AM - 4:30PM PST).
Do not use 2-blade adapters or any other
If you have any questions about which pro-
"power strips" with this product. Use only
The M8-AV-PRO's coaxial protection cir-
tector is best for your application, please
Panamax extension cords if a longer cord
cuits achieve optimum signal quality from
check our website (www.panamax.com) or
is required.
our new coaxial protectors that have the
contact Panamax Customer Support.
smallest signal loss on the market - less
than 0.5dB of attenuation from 5MHz to 2
NOTE to TV ANTENNA, SATELLITE
GHz. Our upgraded coaxial protection has
PROPERLY CONNECTING YOUR
been specifically designed to virtually elim-
DISH and CATV INSTALLERS:
SURGE PROTECTOR
inate signal loss. The clamping level of 75V
Articles 810.21 and 820.40 of the NEC
will meet the demands of both cable and
provide specific guidelines for proper
To completely protect your equipment from
satellite voltage while minimizing exposure
grounding, and in particular, specify that
surges, every wire leading into or out of
the cable ground shall be connected to
to damaging spikes and surges.
the equipment you want to protect must be
the grounding system of the building, as
connected to the appropriate Panamax
surge protector. Damaging lightning and
close to the point of cable entry as prac-
tical.
power surges can enter your system
through any AC power or signal-line
(phone line, grounding wires, coax cables,
modem cables, LAN cables, etc.) connect-
ed to your electronic equipment.
CAUTION – Do not install this device if there is not at least 10 meters (30 feet) or more of wire between the electrical
outlet and electrical service panel.
5. Turn OFF the unit and all connected
equipment before connecting any signal-
lines or installing any add-on signal line
modules.
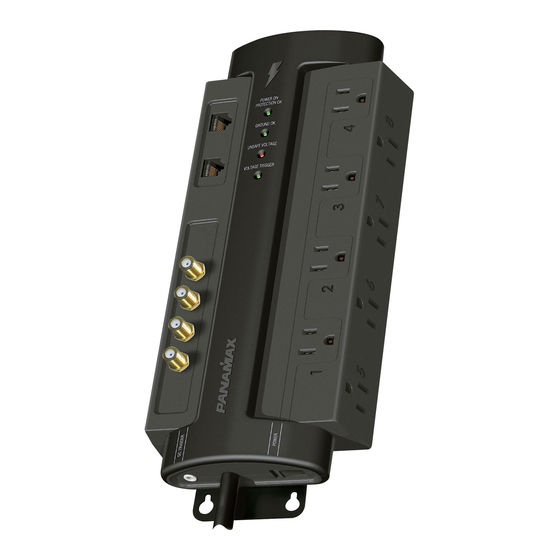
LED Indicators
DC Trigger LED
Unsafe Voltage LED
Ground OK LED
Power ON/Protection OK LED
8 AC Outlets
INSTALLATION & OPERATION OF DC
Outlets 1-4 feature
TRIGGER (optional):
Ï Balanced Double LÓ
Filtration Circuit
Outlets 5-8 for high
current equipment
8 ft. AC Power Cord
The DC Trigger input uses a standard
Right Angle with
3.5mm (1/8Ó ) mono jack. The circuitry is
45 Degree Offset Plug
bidirectional regarding signal polarity so it
doesnÌt matter whether the center-pin of
the plug is positive or negative. Connect a
standard 2-wire cable with a 3.5mm mini-
plug from your source componentÌs DC
Trigger output (or appropriate AC Adapter
plugged into a switched outlet on your
Top and Bottom
receiver) to this jack. The 4 high-current
Mounting Brackets
outlets turn ON when a DC voltage signal
(Screws and Spacer
is received from your source component.
Eyelets included)
Power to these 4 outlets is turned OFF
when a DC voltage signal is not being
received.
ON/OFF Power Switch and
Please note: Power to the high-current
Circuit Breaker Combo
outlets will be controlled by the combina-
tion power switch/circuit breaker if noth-
ing is plugged into the DC Trigger jack.
INSTALLATION (AC Power):
1. Turn OFF the power to all equipment
that will be plugged into the unit.
The
2. Make sure that the ON/OFF switch is in
INSTALLATION (Telephone or LAN
the OFF position (see figure). Plug the unit
Lines):
into the wall outlet and then turn it ON.
IMPORTANT: Note the position of the
LINE and EQUIP jacks on the Panamax
unit. LINE is for the line connection that
comes from the wall or floor jack. EQUIP
is for the line connection to your connect-
3. Verify that the green Ï Ground OKÓLED
ed equipment. The protection circuit will
is lit, indicating that the wall outlet is prop-
only function if connected properly.
erly wired and grounded.
Reversed connections will pass the signal
to the connected equipment but will also
prevent the protection circuitry from
working and will invalidate the Panamax
Connected Equipment Protection Policy.
The M8-AV-PRO provides telephone and
LAN protection on one set of RJ-45 (RJ-11
4. Plug the equipment to be protected into
compatible) jacks. The telephone circuit
the Panamax unit and one at a time, turn
uses pins 4 & 5 while the LAN circuit uses
each piece of connected equipment ON and
pins 1, 2, 3 & 6. Adaptors or custom
check for correct operation.
cables (not included) must be used when
utilizing both protection circuits at the
a. Audio/Video equipment like receivers,
same time.
DVD players, TVs, etc. should be plugged
Additionally,
into the outlets numbered 1-4. This bank
EQUIP (out)
LAN
of outlets provides power from a
Ï Balanced Double LÓ filtration circuit so
LINE (in)
that EMI/RFI noise is prevented from
1 2 3 4 5 6 7 8
reaching your source/display equipment.
RJ-45
1. Make sure the Panamax protector and
all connected equipment is turned OFF.
2. Take the incoming telephone or LAN
line and plug it into the appropriate LINE
jack on the protector. The line should now
be connected between the wall and the
Panamax unit.
b. High-current equipment like amplifiers
and powered subwoofers should be
3. Plug a telephone or LAN line into the
plugged into the outlets numbered 5-8.
This bankÌs capacitive (inductor-less) filter
EQUIP jack and then plug the other end
into the equipment to be protected.
circuit cleans the power without limiting
current flow to your amplifiers.
4. Turn ON the protector and the connect-
ed equipment. Verify that each piece of
connected equipment is receiving power
and signal.
INSTALLATION (Coaxial Lines):
WALL MOUNTING (optional):
Coaxial connectors are bi-directional. You
The small triangular bracket with one
may install your equipment into either
"key-hole" is for the top end of the unit.
jack. When used with diplexers, this pro-
This bracket mounts directly to the back
tection circuit must be placed between the
of the unit with the #8-32 x 5/16Ó
diplexer and the Satellite receiver; it will
machine screws, then to the wall with one
not protect the diplexer.
small rectangular bracket with a grounding
of the #6-20 x 3/4Ópan-head screws and
interface. This bracket replaces the small
spacer eyelets (drywall anchors optional).
triangular wall-mount bracket that comes
with the AC base unit and is needed only
when add-on modules are being installed.
More information can be obtained on the
EQUIP (out)
Panamax website or by calling our
Customer Support Department.
SAT/CATV (in)
EQUIP (out)
TROUBLESHOOTING–
SAT/CATV (in)
If you are having problems with your surge
protector, read this section.
The "Power On/Protection OK" LED
is not lit, there is no AC power to my
equipment, or my equipment does-
nÌt turn on.
1. Make sure the Panamax protector and
all connected equipment is turned OFF.
• Make sure that the protector is plugged
into a working AC outlet.
2. Connect the coaxial cable from the
• Check all AC power connections.
CATV system, antenna or Satellite dish to
the appropriate LINE connector on the
• Make sure that the protector and con-
Panamax protector.
nected equipment are turned on.
3. Connect a coaxial cable from the
• If using the DC Trigger input, verify that
the source equipment is providing the
EQUIP jack on the protector to appropriate
proper DC voltage signal.
input jack on your TV, VCR, Satellite
receiver or cable modem.
• Verify that the "Unsafe Voltage" LED is
The large rectangular bracket with two
not lit. If it is on, the incoming line voltage
"key-holes" is for the bottom, line-cord
is either too high or too low and has been
4. Repeat steps 2 & 3 for all additional
end of the unit. It mounts directly to the
disconnected from your connected equip-
coaxial line.
ment.
unit with the thread-forming screws, then
to the wall with the other two #6 pan-head
• Check to see if the circuit breaker on the
screws and spacer eyelets (drywall
surge protector (combination power
anchors optional).
switch/circuit breaker) needs to be reset
(press "ON" to reset).
Mounting procedure:
• If you still have no power, the protector
may be damaged. Contact Panamax (web-
site or Customer Support Department) for
1. Mount both brackets to the unit with
replacement.
the appropriate screws.
2. Determine the mounting location on
the wall and mark the position for the top
There is no audio or video for my TV,
stereo or VCR.
mounting screw.
• Check the coaxial connections, making
sure they are correctly and securely
installed.
• Bypass the coaxial connectors. If your
3. Place a spacer eyelet on one of the #6
picture returns, the protector is damaged.
pan-head screws with the flared end of the
Contact Panamax (website or Customer
eyelet toward the wall. Drive the screw into
Support Department) for replacement.
the wall (use the included drywall anchors
• If you still have no picture, a problem
for hollow walls) at the marked location,
with your cable provider' s signal may exist.
leaving the eyelet exposed.
4. Position the key-hole on the unit's top
My fax machine, modem or tele-
mounting bracket over the eyelet/screw
phone has AC power but still does
and slide the unit down to lock the screw-
not work.
head into the bracket.
• Check to see if your connected equip-
ment is receiving a dial tone.
5. Mark the location for the two lower
mounting screws (in the narrow portion of
• If not, bypass the surge protectorÌs phone
the key-holes) and drive the screws into
jacks to see if the protector is damaged.
the wall using the other 2 spacer eyelets
• If your dial tone returns, the protector is
like in step #3. The included drywall
damaged. Contact Panamax (website or
anchors should be used for mounting on
Customer Support Department) for
hollow walls.
replacement.
TEL
• If you still have no dial tone, a problem
6. Position the protector over the 3 eye-
with the phone companyÌs lines may exist.
lets/screws and slide the unit down to lock
it into place.
The Panamax circuit breaker dis-
7. Using the above procedure allows easy
connects AC power from the con-
removal of the unit by sliding the unit up to
nected equipment.
disengage the brackets from the
eyelets/screws.
• You have exceeded the ampere rating for
your surge protector. As a temporary fix,
disconnect one or more pieces of equip-
ment. Ask your Panamax dealer about
additional Panamax protectors that may be
required.
ADDING SIGNAL-LINE MODULES
(Optional):
Some connected equipment may have
more signal-lines than can be protected by
the base unit alone. Panamax offers a line
of add-on signal-line modules (sold sepa-
rately) for these situations. Each module
includes installation instructions and a
INS00874-ENG-A
M8-AV-PRO INSTRUCCIONES - Español
Phone Jacks
Telco and LAN Connector RJ-45
1
2
Coax Connectors
2 sets of IN /OUT, bidirectional,
universal coax connectors
1 RG-6 Coax Cable
DC Trigger
For high current
outlets (5-8)
M8-AV-PRO - Provee protecci n CA
Esto modelo tiene 4 diodos emisores de luz
(sobrecargas, subtensi n y sobretensi n),
(LED) para seguridad m xima. Est n nom-
protección coaxial (CATV, antena fuera de
brados como sigue:
aire o cable para modem) y protección de
là nea de teléfono para aparatos electróni-
1. Power ON, Protection OK - (verde)
cos. Además tiene un disparador de
normalmente ON; indica que el protector
entrada y dos bancos de (4 enchufes de
est funcionando correctamente y que todo
CA cada uno) de circuitos de filtración de
el equipo conectado est protegido.
ruido. El primero, es un circuito de fil-
2. Ground OK (tierra OK) - (verde) nor-
tración capacitativa, es para componentes
malmente ON; indica que el tomacorriente de
de alta corriente tales como amplificadores
la pared est correctamente alambrado y
y subwoofers. El otro es un filtro equili-
puesto a tierra.
brador doble L para equipo con fuentes
3. Unsafe Voltage (voltaje peligroso) -
A/V o aparatos de visualización.
(rojo) normalmente OFF; cuando est encen-
dida, es una luz intermitente que indica que
el voltaje es inseguro y que el protector ha
desconectado su equipo conectado.
4. DC Trigger (disparador de corriente
continuo) - (verde) el status ON/OFF
depende de si una se al 12VDC est siendo
recibida de otro componente.
ON = La se" al de voltaje de corriente contin-
ua (DC) est siendo recibida y los enchufes
de alta corriente est n encendidos;
OFF = No hay se" al de un componente y los
enchufes de alta corriente est n apagados.
Ésto modelo tiene 8 enchufes CA que son
controladas por la combinación cortacir-
El M8-AV-PRO ha sido dise" ada, teniendo en
cuito/conmutador de electricidad. Los 4
mente, flexibilidad y expansion. Esto modelo
enchufes de alta corriente tambi n pueden
acepta m dulos de protecci n de linea de
ser controlados por una señal 12VDC de
se" al adicionales en el evento que su insta-
laci n tenga m s lineas de se" ales que nece-
otro componente. Este circuito continua-
mente monitorea la electricidad y protege
siten protecci n con una de la unidades
contra daño causado por la reducción de
nombradas. M s informaci n est a su dis-
tensión de línea y sobretensión continua.
posici n en nuestro sitio web (www.pana-
Autom ticamente desconecta la electricidad
max.com) o de nuestro departamento de
cuidado del cliente (800-472-5555; 7:30 am-
a su equipo conectado cuando cualquiera
de estas condiciones es detectada, y
4:30 PM tiempo pacifico).
entonces lo reconecta cuando la electricidad
ha regresado a un nivel prudente.
Si tiene alguna pregunta sobre cual protector
es el mejor para su equipo, favor de ir a nue-
stro sitio web (www.panamax.com) o p n-
gase en contacto con nuestro departamento
de cuidado del cliente.
Conectando su protector contra
sobrecargas de tensi n correcta-
mente
Para proteger su equipo completamente de
sobrecargas, cada alambre que sale o entra
del equipo que usted quiere proteger debe
ser conectado al protector de sobrecargas de
tensión indicado. Rel mpagos dañinos y
sobrecargas de tensión pueden entrar a su
sistema por cualquier línea de señal (Ã
telefonica, alambres de tierra, cables coaxi-
800-472-5555
ales, cables modem, cables red de rea local
www.panamax.com
(LAN), etc.) o corriente alterna que estén
conectados a su equipo electrónico.
PRECAUCIÓN - No instale este dispositivo si no hay al menos 10 metros (30 pies) o más de cable entre la toma de
8/09
corriente eléctrica y el servicio de energía eléctrica del panel.
LED Indicators
DC Trigger LED
Unsafe Voltage LED
Ground OK LED
Power ON/Protection OK LED
8 AC Outlets
Outlets 1-4 feature
Balanced Double L
Filtration Circuit
Outlets 5-8 for high
current equipment
8 ft. AC Power Cord
Right Angle with
45 Degree Offset Plug
Top and Bottom
Mounting Brackets
(Screws and Spacer
Eyelets included)
ON/OFF Power Switch and
Circuit Breaker Combo
La garantia de $5,000,000 de protecci n de
Instalacion (CA):
equipo conectado de Panamax es nula si
cualquier alambre entrando o saliendo del
1. Apague todo el equipo que va a ser
conectado a la unidad.
equipo no est correctamente conectado al
protector(es) contra sobrecargas de tensi n
2. Aseg rese que el protector est apagado
indicado. El protector contra sobrecargas de
y que est» en la posici n OFF (vea el dibu-
tensi n tambian debe ser enchufado a un
jo). Enchufe la unidad al enchufe en la
tomacorriente alambrado correctamente y
pared y encienda.
puesto a tierra. Favor de leer la garantia para
detalles o si tiene preguntas llame al depar-
tamento de atenci n del cliente de Panamax.
Puntos importantes de seguridad
Los protectores contra sobrecargas de ten-
si n y el equipo conectado deben estar
adentro en un local seco y en el mismo edi-
3. Verifique que el LED verde Ground OK
ficio. Aunque su protector Panamax es
est prendido, esto indica que el enchufe en
duradero, sus componentes internos no
la pared est correctamente alambrado y
est n aislados del ambiente. No instale
puesto a tierra.
ning n producto de Panamax cerca de
aparatos que emitan calor tal como un radi-
ador o contador rmico. No instale este
producto donde haya humedad excessiva tal
como una tina, fregadero, piscina, en el piso
de un s tano, pescera, etc.
Es comunique un edificio no est correcta-
4. Enchufe el equipo que va a proteger a la
mente conectado a tierra. Para proteger su
unidad Panamax y uno por uno, encienda
equipo, los productos de Panamax deber n
cada una de las piezas de equipo conecta-
ser directamente enchufados a un tomacor-
do y vea si est n operando correctamente.
riente CA de 3-alambres con conexi n a
tierra. Adicionalmente, el alambrado del
a. Equipo Audio/Video tales como recep-
edificio y conexi n a tierra deber n confor-
tores, lectores DVD, Televisores, etc, deben
marse a los c digos NEC (EEUU) o CEC
ser enchufados a los tomacorrientes enu-
(Canada) para que la p liza de protecci n
merados 1-4. Este banco de tomacorri-
de Panamax sea v lida.
entes provee electricidad de un circuito de
filtraci n Ï equilibrador doble L para que el
No use adaptadores de 2-cuchillas o
ruido de interferencia electrom gnetica/
cualquier otro cintas de energia con este
interferencia radioel ctrica (EMI/RFI) no
producto. S lo use cables de extensi n de
interfiera con su equipo de visualisaci n/
Panamax si requiere un cable m s largo.
fuente.
Una nota para instaladores de ante-
nas de television, sat lite, y cable:
Art culos 810.21 y 820.40 del c digo NEC
provee gu as especif as a como conectar a
tierra correctamente, y en particular, especi-
fica quel cable de tierra ser conectado al
sistema de tierra del edificio, lo m s cer-
b. Equipo de alta corriente tales como
cano a la entrada del cable que sea posible.
amplificadores y altavoces deben ser ench-
ufados en los tomacorrientes ennumerados
5-8. El banco de circuitos de filtros capac-
itativos (sin inductores) limpian la corriente
sin limitar el consumo de corriente a sus
amplificadores.
Advertisement
Table of Contents

Related Manuals for Panamax M8-AV-PRO


Summary of Contents for Panamax M8-AV-PRO
- Page 1 OFF = No signal from source component 5. Mark the location for the two lower controladas por la combinación cortacir- El M8-AV-PRO ha sido dise“ ada, teniendo en ser directamente enchufados a un tomacor- ment floor, fish tank, etc. the Panamax unit and one at a time, turn uses pins 4 &...
- Page 2 à tête tronconique n∞6 et d’entretoises d’e- todo el equipo conectado esté apagado. Panamax (ya sea por el sitio web o el depar- marche/arrêt et disjoncteur) doit être réen- en la pared y marque la posición para el...
Need help?
Do you have a question about the M8-AV-PRO and is the answer not in the manual?
Questions and answers