
Subscribe to Our Youtube Channel
Related Manuals for GE 21028GE3-A


Summary of Contents for GE 21028GE3-A
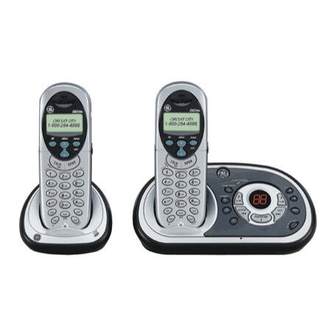
- Page 1 21028 2.4 GHz Dual Cordless Handset Call Waiting Caller ID Phone System User’s Guide We bring good things to life.
-
Page 2: Interference Information
QUIPMENT PPROVAL NFORMATION Your telephone equipment is approved for connection to the Public Switched Telephone Network and is in compliance with parts 15 and 68, FCC Rules and Regulations and the Technical Requirements for Telephone Terminal Equipment published by ACTA. 1 Notification to the Local Telephone Company On the bottom of this equipment is a label indicating, among other information, the US number and Ringer Equivalence Number (REN) for the equipment. -
Page 3: Table Of Contents
ABLE OF ONTENTS ....... 17 ....2 RASING ESSAGES QUIPMENT PPROVAL NFORMATION ........18 ......2 EAVING A NTERFERENCE NFORMATION ........18 (HAC) ....2 ELEPHONE EARING OMPATIBILITY ....18 ........3 ROGRAMMING THE ELEPHONE ABLE OF ONTENTS ........18 FCC RF R .. - Page 4 ..29 ....38 AKING A ALL WITH PEAKERPHONE HAIN IALING FROM EMORY .......... 30 ID (CID) ........39 IMER ALLER ........30 CID E ........ 39 TANDBY RROR ODES HI/LOW/OFF S ... 30 CID R ......39 INGER HORTCUT ECEIVING ECORDS ......
-
Page 5: Fcc Rf Radiation
SAFETY INSTRUCTIONS provided with this product and save them for future reference. Congratulations on purchasing the GE Dual Cordless Handset Telephone System. This system operates in the 2.4 GHz frequency range, and is unique to conventional cordless telephones. When the base is connected to electrical power and a telephone line, you can place a fully-featured cordless handset anywhere electrical power is available. - Page 6 This telephone has been designed to be simple to use, however, you can reach its full potential more quickly by taking a few minutes to read this Instruction Book. This telephone is a multifunction product for use with Call Waiting and Caller ID services available from your local telephone company. Your Caller ID Call Waiting phone allows you to: •...
-
Page 7: Handset Layout
ANDSET AYOUT display Speaker format/conf (format/conference button) (delete button) SPKR (speaker button) cid/vol (caller ID/volume button) skip (button) TALK/END/callback (button) review (button) # pause/ringer play/stop (button) (button) erase button *exit (button) (memory button) redial (button) flash/answerer (button) mute/prog page/int (mute/program button) (page/intercom button) -
Page 8: Base Layout
AYOUT Message counter LANGUAGE (button) SPEAKER DAY/CHECK PLAY/STOP 3 MINUTE HOUR (button/indicator) vol (buttons) in use/charging (indicator) memo PAGE (button) (button) answer on/off (button) PLAY/STOP 2 (button/indicator) DO NOT DISTURB (button) announce 1 (button) announce 2 SKIP (button) (button) Microphone PLAY/STOP 1 REVIEW (button) -
Page 9: Parts Checklist
ARTS HECKLIST Make sure your package includes the items shown here. Dual Handsets Belt clips Batteries and battery Base compartment doors Telephone line Handset Charge Cradle AC power supply cord ELEPHONE EQUIREMENTS Wall plate To use this phone, you need an RJ11C type modular phone telephone jack, which might look like the one Modular pictured here, installed in your home. -
Page 10: Installation
NSTALLATION INSTALLATION NOTE: Some cordless telephones operate at frequencies that may cause or receive interference with nearby TVs and VCRs. To minimize or prevent such interference, the base of the cordless telephone should not be placed near or on top of a TV or VCR. If such interference continues, move the cordless telephone farther away from these appliances. -
Page 11: Nstalling The Andset
NSTALLING THE ANDSET ATTERY NOTE: You must connect the handset battery before use. 1. Connect battery pack plug to jack inside compartment on base. NOTE: It is important to maintain the polarity (black and red wires) to the jack inside the compartment as shown in the illustration. To ensure proper battery installation, the connector is keyed and can be inserted only one way. -
Page 12: Onnecting The Ac
AC (E ONNECTING THE LECTRICAL OWER 1. On the base, plug one end of the power supply cord into the power jack on the back of the base and the other end into an electrical outlet. CAUTION: Use only the ATLINKS USA, Inc. power supply 5-2596 that came with this unit. -
Page 13: Answering System Setup
NOTE: To change to "English", press the language button again. NOTE: In remote access mode, the system follows the selected language. The voice prompt language cannot be switched remotely. NSWERING YSTEM ETUP This section shows you how to set up your answering system to receive incoming calls. -
Page 14: Voice Instruction
OICE NSTRUCTION If you need additional assistance, press the REVIEW button in standby mode and follow the voice instructions. ECORDING THE UTGOING NNOUNCEMENT For best results when recording, you should be about nine inches from the microphone, and eliminate as much background noise as possible. You may record 2 outgoing announcements in the answerer or choose the default for your current outgoing announcement. -
Page 15: Reviewing And Choosing The Announcement
EVIEWING AND HOOSING THE NNOUNCEMENT Press and release the announce 1 button to review and select this one as your outgoing announcement. Or, press and release the announce 2 button to review and select this one as your outgoing announcement. NSWERING YSTEM PERATION... -
Page 16: Leaving Message
l) Message counter has " SP " on the display - Spanish is selected as the current voice prompt during language selection. NOTE: While the messages are playing, the message counter will display the messages in the order they were received. NOTE: The maximum recording time for each message is 3 minutes and the total recording time of this unit is 20 minutes. - Page 17 While a message is playing, you may do the following: • Press the corresponding play/stop 1, 2, or 3 button to stop the message playback. • Press and release the review button to restart the current message. • Press and release the review button twice to go to the previous message. •...
-
Page 18: Set U P
3. Press the erase (key 0) on the handset to erase a message during playback. NOTE: Erased messages cannot be restored. EAVING A Use the memo feature to leave a message. 1. Press the memo button and it will announce “ TO RECORD, PRESS AND HOLD MAILBOX ”... -
Page 19: Andset Etup
3. Press CID/VOL ( ) button to scroll to ROOM MONITOR. 4. Press MUTE/PROG button and ROOM MONITOR EXTENSION? shows in the display. ROOM MONITOR EXTENSION ? 5. Press the handset number of the handset being monitored. 6. If handset 1 is the room monitoring initiator, the following displays will be shown. -
Page 20: Language
ANGUAGE 1. Make sure your phone is OFF (not in talk mode). 2. Press the MUTE/PROG button to go to the main menu. 3. Press CID/VOL ( ) button to scroll to HANDSET SETUP. 4. Press MUTE/PROG button to confirm. 5. -
Page 21: Ringer Tone
NOTE: If you make a mistake, use the DEL button to backspace and delete one character at a time. 8. Press the MUTE/PROG button to save your name. You will hear a confirmation tone and the handset name shows in the display. INGER You may choose from ten different ringer tones and ten different melodies. -
Page 22: Vip Melody
7. Use the touch tone pad on the handset to select 1, 2 or 3, or use the CID/ VOL ( ) button to scroll to your selection. HI is the default setting. 8. Press the MUTE/PROG button to save your selection. You will hear a confirmation tone and the new volume setting shows in the display. -
Page 23: Tored Vip Melody
NOTE: If the memory dialing storage is empty, “NO USER MEMORY” shows in the display. 9. Press the CID/VOL ( ) button to select the desired memory record. 10. Press the MUTE/PROG button to confirm your selection. The display shows VIP MELODY . NOTE: If the desired number was previously stored in one of 10 VIP melody records, “DUPLICATE NUMBER”... -
Page 24: Message Alert
4. Press MUTE/PROG button to confirm. 5. Press the CID/VOL ( ) button to scroll to the KEY TONE menu. 6. Press MUTE/PROG button to enter the menu. SET KEY TONE 1ON 2OFF shows in the display. 7. Use the touch tone pad on the handset to select 1 or 2, or use the CID/VOL ) button to scroll to your selection. - Page 25 5. Press the CID/VOL ( ) button to scroll to the RING SELECT menu. 6. Press MUTE/PROG button to enter the menu. RING SELECT 3 4 5 6 TS shows in the display. 7. Use the CID/VOL ( ) button to scroll to the your selection. The default setting is 5 .
-
Page 26: Area Code
1. Make sure your phone is OFF (not in talk mode). 2. Press the MUTE/PROG button to go to the main menu. 3. Press CID/VOL ( ) button to scroll to HANDSET SETUP. 4. Press MUTE/PROG button to confirm. 5. Press the CID/VOL ( ) button to scroll to the AREA CODE menu. -
Page 27: D E -Registration
8. Press and hold the page button on the base unit until you hear a long tone at the handset. HANDSET X REGISTERED shows in the handset display, where X is the handset number. You will hear a confirmation tone. NOTE: After you have registered one handset, wait 10 seconds before registering another handset to ensure successful registration. -
Page 28: Global D E - Registration
NOTE: When you complete the deregistration process, “HANDSET NEEDS REGISTRATION” shows in the display. To use the handset, you must register the handset. LOBAL REGISTRATION If one or more handsets becomes lost, you should de-register all handsets to ensure proper system operation. Follow the steps below to deregister both handsets at the same time. -
Page 29: Elephone Operation
7. Use the touch-tone pad to select 1YES or 2NO , or use the CID/VOL ( button to move the cursor to 1YES or 2NO . 2NO is the default setting. NOTE: If you choose “YES” all the settings in the programmable menu are returned to factory default setting. -
Page 30: Call Timer
2. Dial the desired number Press the CID/VOL ( ) button to select the desired record, Press MEM button and then use CID/VOL ( ) button to scroll to desired memory record. 3. Press SPKR to dial number 4. When finished, press the SPKR button again to hang up. NOTE: If you are using the handset earpiece and want to switch to the speakerphone, press the SPKR button, you can then press SPKR again to end conversation. -
Page 31: Flash /Call Waiting
1. Press the #PAUSE/RINGER button to go to RINGER VOLUME menu. SET RINGER 1HI 2LOW 3OFF shows in the display. 2. Use the touch tone pad on the handset to select 1HI, 2LOW or 3OFF, or use the CID/VOl ( ) button to scroll to your selection. -
Page 32: Exit
If you get a busy signal and want to keep dialing the number, press the REDIAL button to quickly redial the number. Press the *EXIT button to exit a menu function and return to the standby screen. The page feature helps you locate a misplaced handset. To send and receive pages, all handsets must be registered. -
Page 33: Receiver Volume Control
ECEIVER OLUME ONTROL When the handset is ON (in talk mode) you may adjust the receiver volume by pressing the CID/VOL ( ) button. There are four volume levels to choose from. When the maximum or minimum volume level is reached, the phone beeps twice. -
Page 34: Eceiving An
5. When finished, press the *EXIT button or PAGE/INT button on either handset to deactivate the intercom. ECEIVING AN NTERCOM When you receive an intercom call, your handset beeps. To answer the call press the PAGE/INT button or TALK/END/CALLBACK button. DVANCED NTERCOM EATURES... -
Page 35: Alls To
2. Use the touch-tone pad to select Handset 1 or Handset 2. You will hear a paging tone and PAGING shows in the originating handset’s display. NOTE: “PAGING FROM...” shows in the display on the receiving handset, and the receiving handset presses the PAGE/INT or TALK/END/CALLBACK button to answer the intercom. -
Page 36: Umber In
TORING A AME AND UMBER IN EMORY 1. Make sure the phone is OFF (not in talk mode). 2. Press the MEM button to display SELECT MEMORY 01-50 . 3. Press the desired memory location button (01 through 50) or use the CID/VOL ( ) button to scroll to desired the memory location. -
Page 37: Tored In Tored In
2. Press the Redial button. 3. Press MEM button again to confirm. You will hear a confirmation tone. NOTE: If the redial number is longer than 20 digits, the redial number cannot be stored in memory. NSERTING A AUSE IN THE IALING EQUENCE OF A... -
Page 38: Hain Dialing From Memory
IALING A UMBER FROM EMORY 1. Make sure the phone is ON (in talk mode) by pressing the TALK/END/ CALLBACK or SPKR buttons. 2. Press the MEM button to display memo # - -. 3. Use the touch tone pad to enter the memory location number (01-50). The number dials automatically. -
Page 39: Id (Cid)
ID (CID) ALLER Caller ID (CID) is a service available from your local telephone company. For Caller ID to work on this system, you must subscribe to Caller ID service. To receive Caller ID information for a Call Waiting call, you must subscribe to the combined Call Waiting Caller ID service. -
Page 40: Toring Cid Records Emory )
CID R EVIEWING ECORDS As calls are received and stored, the display is updated to let you know how many calls have been received. To scroll CID records: 1. Make sure the phone is OFF (not in talk mode). 2. Press the CID/VOL ( ) button to review the newest CID record. 3. -
Page 41: Ialing Acid Number
4. Use the touch-tone pad to enter a memory location number (for example, press 01 to store the record in memory location one). NOTE: If the memory location is occupied, “REPLACE MEMO?” is displayed, and you must confirm replacement by pressing the MEM button. NOTE: Press the *EXIT button once to keep the previous setting and return to the sub-menu. -
Page 42: Eleting Acid Record
4. Press the TALK/END/CALLBACK button on the handset. The number dials automatically. NOTE: If the telephone number is corrupted, such as a number in a name field or an alphabetical character in a number field, you will hear an error tone and the number is not dialed. -
Page 43: Ndicator
• Press the FLASH/answerer button. The display shows ANSWERER REMOTE ACCESS . • Press 2 (play/stop) followed by the mailbox number to play the message in that mailbox. For example, press 2 and 3 to play the message in mailbox 3. •... -
Page 44: Emory Full
Stop message playback Erase message 0 (during message playback) Skip message Turn off/on answerer Review voice menu options EMORY When answering system memory is full, the system answers after 10 rings, beeps and waits for you to enter the 3-digit security code. If you don’t enter the security code within 8 seconds, the phone hangs up. -
Page 45: Attery Safety Precautions
NOTE: If the battery is not properly installed in the handset, or if the battery pack is not properly connected to the jack inside the battery compartment. “NO BATTERY” shows in the display when the handset is placed in the charging cradle. -
Page 46: Isplay Essages
ISPLAY ESSAGES The following messages shows the status of the phone, provides Caller ID information, or helps you set up and use your phone. INCOMPLETE DATA CID information is interrupted during transmission or the phone line is excessively noisy. HANDSET NAME Prompt telling you to enter the user name for the registered handset. - Page 47 ANSWERER REMOTE Indicates the answering system is being ACCESS accessed remotely. HANDSET NEEDS Indicates you must register a non-registered REGISTRATION handset prior to use SEARCHING Indicates handset is searching for the base. OUT OF RANGE Indicates handset is too far away from the base. Move closer to the base.
-
Page 48: Andset Sound Signals
ANDSET OUND IGNALS Signal Meaning A long warbling tone (with ringer on) Signals an incoming call Three short beeps Page signal One long beep Confirmation tone for the completion of a function One short beep (every 7 seconds) Low battery warning One short beep (during room monitoring) Ring alert tone ROUBLESHOOTING UIDE... - Page 49 • The handset may be out of range of the base. Move closer to the base. • You may have enabled Do Not Disturb (DND). Make sure the DND is off. • You may have too many extension phones on your line. Try unplugging some extension phones.
- Page 50 • Disconnect the power supply and plug it in again. Then place the handset on the cradle for at least 2 to 3 minutes. Handset displays “HANDSET NEEDS REGISTRATION” • Follow the programming in the telephone procedures to re-register the handset to the base.
-
Page 51: Eneral Product Care
ENERAL RODUCT To keep your unit working and looking good, follow these guidelines: • Avoid dropping the handset, as well as other rough treatment to the phone. • Clean the phone with a soft cloth. • Never use strong cleaning agents, paint thinner, abrasive powder, alcohol, or other chemical products to clean the unit. -
Page 52: H Earing A Id C Ompatibility (Hac)
NDEX Deleting All CID Records 42 Deleting Records Stored in Memory 37 Accessing the Answering System from Dialing a CID Number 41 Another Location 43 Dialing a Number from Memory 38 Accessory Order Form 54 Display Messages 46 Advanced Intercom Features 34 Do Not Disturb (DND) 33 Answering a Call with Speakerphone 29 Answering Calls 29... -
Page 53: P Rogramming The T Elephone
Reviewing Records Stored in Memory 37 Ring Select (for answering machine) 24 Language 20 Ringer HI/LOW/OFF Shortcut 30 Leaving a Memo 18 Ringer Tone 21 Leaving Message 16 Ringer Volume 21 Limited Warranty 55 Room Monitor 18 Mailbox Indicator 16 Screening Calls from the Base 16 Making a Call with Speakerphone 29 Screening Calls from the Handset 43... -
Page 54: Ervice
ERVICE If trouble is experienced with this equipment, for repair or warranty information, please contact customer service at 1-800-448-0329. If the equipment is causing harm to the telephone network, the telephone company may request that you disconnect the equipment until the problem is resolved. This product may be serviced only by the manufacturer or its authorized service agents. - Page 55 IMITED ARRANTY What your warranty covers: • Defects in materials or workmanship. For how long after your purchase: • One year, from date of purchase. (The warranty period for rental units begins with the first rental or 45 days from date of shipment to the rental firm, whichever comes first.) What we will do: •...
- Page 56 ATLINKS USA, Inc. 101 West 103rd Street Model 21028 Indianapolis, IN 46290 00001086 (Rev 1 E/S ) © 2004 ATLINKS USA, Inc. 04-52 Trademark(s) ® Registered Printed in China Marca(s) Registrada(s)
- Page 57 21028 Sistema Telefónico de 2.4. GHz con Auricular Inalámbrico Doble e Identificador de Llamada en Espera Guía del Usuario Creamos cosas buenas para la vida.
- Page 58 NFORMACIÓN SOBRE LA PROBACIÓN DE QUIPO El equipo de su teléfono esta aprobado para la conexión con la red Telefónica Pública (Public Switched Telephone Network) y cumple con los requisitos establecidos en las secciones 15 y 68 de las Reglas y Regulaciones de la FCC y con los Requerimientos Técnicos para Equipos de Terminales Telefónicas (Technical Requirements for Telephone Terminal Equipment), publicado por ACTA.
- Page 59 ABLA DE ONTENIDO ..... 17 ROGRAMACIÓN DEL ELÉFONO NFORMACIÓN SOBRE LA PROBACIÓN DE QUIPO ........17 ANTALLA DE LERTA ....2 NFORMACIÓN DE NTERFERENCIAS ......17 UNCIONES DE ROGRAMACIÓN (CCA) ..2 OMPATIBILIDAD CON UDÍFONOS ......17 ONITOREO EN ABITACIÓN ........
- Page 60 ..........30 OCALIZADOR ARCAR UN ÚMERO DEL DENTIFICADOR DE ..30 ............39 LAMAR DE UN URICULAR A LAMADAS OCALIZAR DESDE LA OCALIZADOR DE ORRAR UN RCHIVO DEL DENTIFICADOR DE ............30 ............40 RUPO LAMADAS ..........30 NMUDECEDOR ORRAR ODOS LOS RCHIVOS DEL ....
-
Page 61: Estatuto Sobre La Exposición A La
STATUTO SOBRE LA XPOSICIÓN A LA ADIACIÓN DE LA FCC RF Este equipo cumple con los límites expresos por la FCC RF para la exposición de radiación en un ambiente no controlado. Este equipo debe ser instalado y operado a una distancia mínima de 20 centímetros entre el radiador y su cuerpo. - Page 62 Este teléfono ha sido está diseñado para ser de fácil operación; sin embargo, usted puede aprovechar al máximo su potencial más rápidamente si se toma unos minutos para leer esta Guía del Usuario. Este teléfono es un producto de múltiples funciones para ser usado junto con los servicios de Identificador de Llamadas y Llamada en Espera que le son disponibles a través de su compañía telefónica local.
-
Page 63: Formato Del Auricular
ORMATO DEL URICULAR pantalla Altavoz format/conf (botón de formato/ conferencia) (botón para borrar) SPKR cid/vol (botón de altavoz) (botones del identificador/volumen) skip TALK/END/callback (botón para saltar (botón para hablar/ mensajes) terminar/ devolver el llamado) review (botón para revisar ) # pause/ringer (botón para play/stop pausa/timbre) -
Page 64: Ormato De La Ase
ORMATO DE LA DAY/CHECK Message counter (botón dia/ (indicador de conteo de mensajes) checar) HOUR PLAY/STOP 3 in use/charging indicator (botón de hora) button/indicator MINUTE (indicador en uso/cargando (botón/indicador (botón de reproducir/detener 3) minuto) Altavoz PAGE (botón buscar) (botones para answer on/off button volumen) (botón para activar la... -
Page 65: Lista De Partes
ISTA DE ARTES Asegúrese que su paquete incluye los artículos mostrados aquí. Puertas del Dos auriculares Gancho del Base compartimento de Cinturón batería y baterías Cable de línea Base para carga del Cable de telefónica auricular corriente AC Placa de pared EQUERIMIENTOS NCHUFE ELEFÓNICO... -
Page 66: Instalación
NSTALACIÓN NOTA SOBRE LA INSTALACIÓN: Algunos teléfonos inalámbricos operan en frecuencias que pueden causar o recibir interferencia con Televisiones, hornos de microondas, y videograbadoras cercanos. Para minimizar o prevenir tal interferencia, la base del teléfono inalámbrico no debería ser colocada cerca de una TV, horno de microondas, o videograbadora. -
Page 67: Ara Nstalar La Atería Del
NSTALAR LA ATERÍA DEL URICULAR NOTA: Usted debe conectar la batería del auricular antes de usarlo. 1. Conecte la clavija de la batería al receptáculo dentro del compartimento en la base. NOTA: Es importante mantener la polaridad (los cables negro y rojo) en el enchufe dentro del compartimiento como se muestra en la ilustración. -
Page 68: Para Conectar La Corriente
AC (E ONECTAR LA ORRIENTE LÉCTRICA 1. En la base, conecte un extremo del cable de corriente dentro del enchufe en la parte posterior de la base y conecte el otro extremo en un enchufe de corriente eléctrica. CUIDADO: Utilice únicamente el cable de corriente ATLINKS USA , Inc. 5-2596 que es compatible con esta unidad. -
Page 69: Peración Del
NOTA: Para cambiar a “English”, presione el botón language otra vez. NOTA: En el modo de acceso remoto, el sistema sigue el idioma seleccionado. El idioma voice prompt no se puede cambiar vía remota. PERACIÓN DEL ISTEMA ONTESTADOR Esta sección le muestra cómo programar su sistema contestador para recibir llamadas entrantes. -
Page 70: Ara Rabar El Nuncio
RABAR EL NUNCIO ALIENTE Para mejores resultados cuando grabe su anuncio personal, usted debe estar a aproximadamente 9 pulgadas del micrófono y debe tratar de eliminar tanto ruido de fondo como le sea posible. Usted puede grabar 2 anuncios de saludo en la contestadora o elegir la opción de fábrica para su anuncio de saludo actual. -
Page 71: Peración Del
PERACIÓN DEL ISTEMA ONTESTADOR Esta sección habla sobre los botones y funciones del sistema contestador. El contador de mensajes le proporciona una visualización numérica de cuántos mensajes tiene usted. Vea a continuación los detalles a) El contador de mensajes tiene un número que se muestra sin parpadear -No hay mensajes nuevos. -
Page 72: Para Dejar Mensaje
EJAR ENSAJE 1. Después de que la contestadora esté en línea y reproduzca el mensaje de saludo, el que llama puede ingresar el número de buzón (1, 2 ó 3) durante la reproducción del mensaje de saludo o en 2 segundos posteriores al fin del mensaje de saludo y luego dejar un mensaje en ese buzón específico. -
Page 73: Memoria Llena
EMORIA LENA Cuando la memoria del sistema contestador está llena, el sistema contesta después de 10 timbres. Usted debe borrar algunos de los mensajes viejos para que el sistema pueda grabar nuevos mensajes. ORRAR ENSAJES Usted puede borrar mensajes en las tres formas siguientes: Para borrar un mensaje mientras está... -
Page 74: Rogramación Del
2. Presione y sostenga el botón play/stop 1, 2, ó 3. Usted debe sostener el botón hasta que termine de grabar el memo. 3. Comience a hablar después de que anuncie “GRABE MENSAJE” . 4. Suelte el botón mailbox cuando termine. ROGRAMACIÓN DEL ELÉFONO ANTALLA DE... -
Page 75: Rogramación Del
MONITOR CUARTO MONITOR CUARTO AVICULAR 2 AVICULAR 1 Llamando al teléfono 1 Se llamó al teléfono 2 NOTA: Si los teléfonos han sido nombrados, entonces el nombre será mostrado en el LCD en lugar de los números del teléfono. NOTA: Durante el monitoreo de la habitación, emitirá un tono de bip si hay llamadas entrantes, usted puede presionar el botón “TALK/END/CALLBACK”... -
Page 76: Nombre Del Auricular
OMBRE DEL URICULAR 1. Asegúrese de que su teléfono esté en OFF (no en modo hablar). 2. Presione el botón “MUTE/PROG” para ir al menú principal. 3. Presione “CID/VOL ” ( ó ) para desplazarse a PROG ARICULAR. 4. Presione el botón “MUTE/PROG” para confirmar. 5. -
Page 77: Volumen Del Timbre
OLUMEN DEL IMBRE 1. Asegúrese de que su teléfono esté en OFF (no en modo hablar). 2. Presione el botón “MUTE/PROG” para ir al menú principal. 3. Presione “CID/VOL ” ( ó ) para desplazarse a PROG ARICULAR. 4. Presione el botón “MUTE/PROG” para confirmar. 5. -
Page 78: Ambio De Un Egistro De
NOTA: Si la ubicación de memoria está ocupada, la ubicación de memoria y la melodía almacenada y el número aparecen en la pantalla. Si la ubicación de memoria está vacía, “VACIO” se muestra en la pantalla. 8. Presione el botón “MUTE/PROG”. SELEC MEMORIA se muestra en la pantalla por 2 segundos y luego visualiza el registro en memoria del usuario para que el usuario seleccione. -
Page 79: Tono De Tecla
ONO DE ECLA Esta modalidad le permite desactivar el tono de tecla por la noche o en un ambiente silencioso. 1. Asegúrese de que su teléfono esté en OFF (no en modo hablar). 2. Presione el botón “MUTE/PROG” para ir al menú principal. 3. -
Page 80: Ódigo De
3. Presione “CID/VOL ” ( ó ) para desplazarse a PROG ARICULAR. 4. Presione el botón “MUTE/PROG” para confirmar. 5. Presione el botón “CID/VOL” ( ó ) para desplazarse al menú SELECCN TIMBRC. 6. Presione el botón “MUTE/PROG” para entrar al menú. SELECCN TIMBRC 3 4 5 6 TS se muestra en la pantalla. -
Page 81: Código De Area
ÓDIGO DE 1. Asegúrese de que su teléfono esté en OFF (no en modo hablar). 2. Presione el botón “MUTE/PROG” para ir al menú principal. 3. Presione “CID/VOL ” ( ó ) para desplazarse a PROG ARICULAR. 4. Presione el botón “MUTE/PROG” para confirmar. 5. -
Page 82: Para Cancelar El Registro
NOTA: Después de que haya registrado un teléfono, espere 10 segundos antes de registrar otro teléfono para asegurar un registro exitoso. ANCELAR EL EGISTRO Esta función cancela el registro. Durante el proceso de cancelación del registro, mantenga el auricular cerca de la base. 1. -
Page 83: Programación De Fábrica
ANCELAR EL EGISTRO LOBALMENTE Si uno o más auriculares se pierde, usted debe cancelar el registro de todos los auriculares para asegurar la operación adecuada del sistema. Siga los pasos a continuación para cancelar los registros de ambos auriculares a la vez. ADVERTENCIA: No es recomendable que se cancele el registro de un auricular a menos que sea absolutamente necesario porque una vez que la cancelación ha sido llevada a cabo, las funciones del teléfono no pueden usarse hasta que el auricular vuelva... -
Page 84: Ásica Del
PERACIÓN ÁSICA DEL ELÉFONO NDICADOR DE ARGA Cuando el indicador in use / charging en la base o el indicador de carga en el cargador extra se iluminan, el teléfono está colocado correctamente en la base y está cargando. ACER UNA LAMADA 1. -
Page 85: Emporizador De Lamadas
NOTA: Si usted está usando el auricular del teléfono y quiere cambiar al altavoz, presione el botón “SPKR”, usted puede presionar “SPKR” otra vez para terminar la conversación. Si usted está usando el altavoz y quiere cambiar al auricular del teléfono, presione el botón “TALK/END/CALLBACK”, usted puede luego presionar “TALK/ END/CALLBACK”... -
Page 86: Spera
ERVICIOS LAMADA EN SPERA Si usted se suscribe a los servicios combinados de Llamada en Espera e Identificador de Llamada a través de su compañía telefónica, usted recibirá la información del identificador de Llamadas (si ésta es disponible) en Llamadas en Espera. Durante una llamada telefónica, usted escuchará... -
Page 87: Localizador
OCALIZADOR Esta función le ayuda a localizar un auricular extraviado Para enviar y recibir señales del localizador, todos los auriculares deben estar registrados. Si sus auriculares no están registrados, siga las instrucciones para registrarlos en la sección Para Registrar el Auricular en este manual. -
Page 88: Ontrol Dev
ONTROL DE OLUMEN DEL URICULAR Cuando el teléfono está activado (ON) (en modalidad para hablar) usted puede ajustar el volumen oprimiendo los botones del identificador “CID/VOL ” ( ó ). Escoja entre los cuatro niveles de volumen. Cuando el nivel máximo o mínimo de volumen ha sido alcanzado, el teléfono emite dos tonos. -
Page 89: Ara Tilizar El
ECIBIR UNA LAMADA DEL NTERFONO Cuando usted recibe una llamada por el interfono, su auricular emite un tono. Para contestar la llamada, oprima el botón de interfono “PAGE/ INT” o el botón para hablar “TALK/END/CALLBACK” . UNCIONES VANZADAS DEL NTERFONO ECIBIR UNA LAMADA ELEFÓNICA... -
Page 90: Úmero En La
2. Utilice el teclado numérico para seleccionar Auricular 1 o Auricular 2. Usted escuchará un tono del localizador y la indicación del localizador “LOCALIZANDO” aparece en la pantalla del auricular que original la llamada. NOTA: La indicación de localizar “LOCALIZAR DESDE...” aparece en la pantalla del auricular que recibe, y el auricular que recibe oprime el botón localizador “PAGE/ INT”... -
Page 91: Olver Aarcar
3. Oprima el botón de la localización de memoria deseada (01 al 50) o utilice los botones “CID/VOL ” ( ó ) para llegar a la localización de memoria deseada. NOTA: Si la localización de memoria está ocupada, el número de esa localización de memoria y lo que contiene aparecerán en la pantalla. -
Page 92: Ausa En La Ecuencia De
NTRODUCIR UNA AUSA EN LA ECUENCIA DE ARCADO E UN ÚMERO LMACENADO Presione el botón “#PAUSE” en el teclado de marcación del teléfono para insertar una demora en la secuencia de marcación de un número almacenado cuando es necesaria una pausa para esperar un tono de marcación (por ejemplo, después de que usted marca 9 para obtener línea externa, o para esperar e tono de acceso en una computadora). - Page 93 3. Utilice el teclado numérico para inscribir el número de la localización de memoria (01-50). El número se marcará automáticamente. 1. Asegúrese de que su teléfono esté en OFF (no en modo hablar). 2. Oprima el botón de memoria “MEM” para mostrar la localización “...
-
Page 94: Dentificador De Llamadas
Este sistema telefónico recibe y muestra información transmitida desde su compañía telefónica local. Esta información puede incluir el número telefónico, fecha y hora; o el nombre, número telefónico, fecha y hora. Fecha en que se recibió la llamada Hora en que se recibió la llamada Número de secuencia de REPT... -
Page 95: Nterna
1. Asegúrese de que su teléfono esté en OFF (no en modo hablar). 2. Oprima el botón para revisar “CID/VOL ” ( ó ) para revisar el archivo más nuevo del Identificador de Llamadas. 3. Oprima el botón para revisar “CID/VOL ” ( ó... -
Page 96: Arcar Un
NOTA: Si esa localización de memoria está ocupada, el aparato le pregunta si reemplaza el archivo (“REMPLAZAR MEMO?”), y usted debe confirmar el reemplazo oprimiendo el botón de memoria “MEM”. NOTA: Oprima el botón de”*EXIT”( salida) una vez para mantener la programación previa y volver al otro menú. -
Page 97: Orrar Un
ORRAR UN RCHIVO DEL DENTIFICADOR DE LAMADAS 1. Asegúrese de que su teléfono esté en OFF (no en modo hablar). 2. Utilice el botón “CID/VOL ” ( ó ) para mostrar el archivo deseado. 3. Oprima la tecla suave para borrar “DEL ” . La pantalla pregunta si borra el archivo “... -
Page 98: Ndicador Del
NDICADOR DEL ISTEMA ONTESTADOR El sistema contestador está activado cuando el indicador en la base está iluminado. ILTRAR LAMADAS DESDE EL URICULAR Utilice el auricular para filtrar llamadas, incluso cuando usted no pueda escuchar el sistema contestador. Cuando el sistema contestador contesta: 1. -
Page 99: Memoria Llena
EMORIA LENA Cuando la memoria del sistema contestador está llena, el sistema contesta después de 10 timbres, emite un tono y espera a que usted inscriba su código de seguridad de 3 dígitos. Usted tiene 8 segundos para inscribir su código de seguridad antes de que el teléfono le desconecte. -
Page 100: Recauciones De
RECAUCIONES DE EGURIDAD PARA LA ATERÍA • No queme, desarme, mutile, o agujere. Igual que otras baterías de este tipo, materiales tóxicos pueden escaparse y causarle daño. • Mantenga las baterías fuera del alcance de los niños. • Quite las baterías si va a guardar el aparato durante más de 30 días. ONECTAR EL ANCHO DEL INTURÓN Y... - Page 101 HANDSET NAME Indicación pidiéndole que inscriba su nombre de usuario (NOMBRE DEL AURICULAR) para el auricular registrado. ENTER NAME Indicación para pedirle que inscriba el nombre en (INSCRIBA EL NOMBRE) una de las 50 localizaciones de memoria. LINE IN USE Aparece en la pantalla del auricular mientras la línea está...
- Page 102 SEARCHING Indica que el auricular está buscando a la base. (BUSCANDO) OUT OF RANGE El auricular está demasiado lejos de la base. Acérquelo a (FUERA DE RANGO) la base. PAGING or Alguien ha oprimido el botón localizador en la base PAGING FROM o auricular.
-
Page 103: Onoras Del
EÑALES ONORAS DEL URICULAR Señal Significado Un tono de gorgeo largo (con timbre encendido) Señala que una llamada está entrando Tres ton cortos Señal del localizador Un bip largo Tono de confirmación para terminar una función Un “bip” corto (cada 7 segundos) Advertencia de baja batería Un corto sonido de bip Tono de alerta de timbre. - Page 104 • El auricular puede estar fuera del rango de la base. Acérquese a la base. • Usted puede haber habilitado No Molestar - Do Not Disturb (DND). Asegúrese de que DND esté inactivo. • Usted puede tener demasiados aparatos o extensiones en su línea. Intente desconectar algunos teléfonos.
- Page 105 El teléfono muestra HANDSET NEEDS REGISTRATION • Siga la programación en los procedimientos del teléfono para volver a registrar el teléfono con la base. • Presione la tecla “MUTE/PROG” para iniciar el registro y siga el procedimiento. OLUCIONES PARA EL DENTIFICADOR DE LAMADAS Nada aparece en la pantalla...
- Page 106 UIDADO ENERAL DEL RODUCTO Para mantener su aparato funcionando adecuadamente y en buenas condiciones, siga las siguientes pautas: • Evite poner el teléfono cerca de calentadores (calefactores) de ambiente y dispositivos que generen interferencia eléctrica ejemplo, motores o lámparas fluorescentes). •...
- Page 107 ÓMO BTENER ERVICIOS DE ANTENIMIENTO Si usted experimenta problemas con este equipo, para reparaciones o para información de garantía, comuníquese con el departamento de servicio al cliente al 1-800-448-0329. Si el equipo está causando daños a la red telefónica, la compañía telefónica puede pedirle que desconecte su equipo hasta que el problema haya sido resuelto.
- Page 108 Í NDICE Acceso Remoto 40 Garantía Limitada 52 Auricular Inalámbrico 40 Auto Alerta 28 Idioma 19 Indicaciones para la Instalación 10 Batería 48 Indicador de Buzón 15 Indicador de Carga 27 Indicador del Sistema Contestador 41 Causas de una Mala Recepción 49 Indicadores de Mensajes 43 Claves de Error del Identificador de Llamadas Información de Interferencias 2...
- Page 109 Para Recibir Archivos del Identificador de Para Almacenar Archivos del Identificador de Llamada 37 Llama 37, 38 Para Recibir una Llamada del Interfono 32 Para Almacenar un Nombre y Número en la Para Recibir una Llamada Telefónica Entrante Memoria 33 Duran 32 Para Almacenar un Número de Volver a Marcar Para Revisar Archivos Almacenados en la...
- Page 110 ARANTÍA IMITADA Lo que cubre su garantía: • Defectos de materiales o de trabajo. Por cuánto tiempo después de la compra: • Un año, a partir de la fecha de compra. (El periodo de garantía para unidades arrendadas se inicia con la primera renta o 45 días de la fecha del embarque a la firma de arrendamiento, lo que ocurra primero).
- Page 111 NFORMACIÓN DE CCESORIOS DESCRIPCIÓN NÚMERO DE CATÁLOGO Cable de corriente AC 5-2596 Broche de cinturón (negro plata ) 5-2649 Audífonos 5-2425 Batería de Repuesto del Auricular 5-2522 1-800-338-0376 Para ordenar, tenga lista su tarjeta Visa, Mastercard o Discover y llame al Se aplicará...
- Page 112 ATLINKS USA, Inc. Modelo 21028 101 West 103rd Street 00001086 (Rev 1 E/S ) Indianapolis, IN 46290 04-52 © 2004 ATLINKS USA, Inc. Impreso en China Trademark(s) ® Registered Marca(s) Registrada(s)
Need help?
Do you have a question about the 21028GE3-A and is the answer not in the manual?
Questions and answers