Table of Contents
Advertisement
Quick Links
Advertisement
Table of Contents

Related Manuals for Lexicon OMEGA - MANUAL 2


Summary of Contents for Lexicon OMEGA - MANUAL 2
- Page 1 Owner’s Manual And ApplicAtion guide Complete reCording solution...
- Page 2 IMPORTANT SAFETY INSTRUCTIONS WARNING FOR YOUR PROTECTION PLEASE READ THE FOLLOWING: KEEP THESE INSTRUCTIONS HEED ALL WARNINGS FOLLOW ALL INSTRUCTIONS the symbols shown above are internationally accepted symbols DO NOT USE THIS APPARATUS NEAR WATER that warn of potential hazards with electrical products. the lightning flash with arrowpoint in an equilateral triangle means CLEAN ONLY WITH A DRY CLOTH.
- Page 3 CIRCUMSTANCES SHOULD YOU date: September 2003 INSERT A DAMAGED OR CUT MAINS PLUG INTO A 13 AMP european contact: Your local lexicon professional Sales POWER SOCKET. and Service office or do not use the mains plug without the fuse harman music group cover in place.
- Page 4 5. The foregoing is in lieu of all other warranties, expressed or implied, and Lexicon Professional neither assumes nor authorizes any person to assume on its behalf any obligation or liability in connection with the sale of this product.
-
Page 5: Table Of Contents
Software Setup ..........16 USING THE LEXICON ®... -
Page 6: Introduction
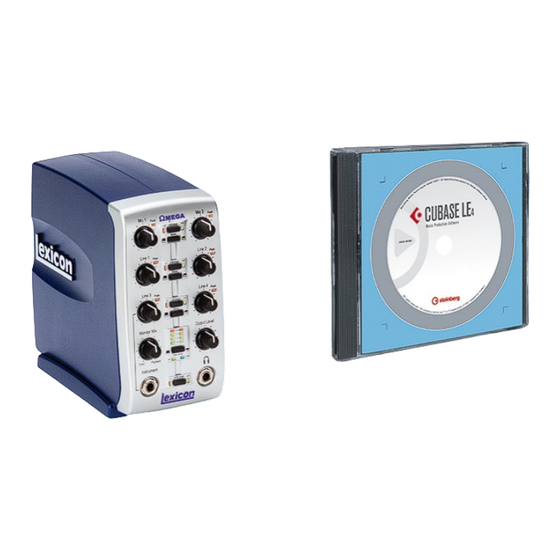
Congratulations on your purchase of the Lexicon Omega desktop recording studio. The Lexicon Omega is a complete package of hardware and software that turns your USB-connected computer into a professional multitrack recording workstation. Whether you use it for high-quality stereo location recording with a laptop computer,... -
Page 7: Unpacking The Omega™ Studio
Lexicon Omega Desktop Recording Studio. As with all such systems, adding more RAM than the minimum will allow you to do more processing and improve performance, and more disk space will allow you to record more tracks for a longer time. -
Page 8: The Front Panel
The Front Panel ThE FRONT PANEl For the cleanest The Omega’s front panel offers the following features: recording, adjust the Gain knob so MIC 1-2 GAIN the microphone These knobs adjust the input gain levels of the Mic 1 and Mic 2 inputs. level reaches at least “-6”... - Page 9 OMEGA The Front Panel ™ When a Monitor switch is in Mono, it does not change the signal going to the comput- er via the USB bus in any way—they will still be separate and stereo in the computer. MONITOR MIX CONTROL The Omega gives you the ability to hear your analog input signals directly and imme- diately while recording without having to adjust levels in software and before the delay caused by digital converters and computer recording latency.
-
Page 10: The Rear Panel
The Front Panel S/PDIF ASSIGN LED This LED lights when the S/PDIF input is assigned to the USB 1-2 bus. S/PDIF LOCK LED The LED lights when the S/PDIF input has locked in with the Omega. If this LED is not lit, digital signal can not be received from external devices via the S/PDIF input, and the hookup or setting of the external device, or the computer software’s clock source, must be changed. - Page 11 OMEGA The Rear Panel ™ MIC 1-2 INPUTS IMPORTANT: ® These balanced XLR inputs feature high quality dbx Silver Series™ mic preamps Do not plug a line designed specifically for low-impedance professional microphones. The input gain is output into the MIC adjusted using the Mic 1-2 knobs on the front panel respectively, with 50 dB of gain at IN jacks unless the the maximum setting.
-
Page 12: Making Connections
Making Connections MAkING CONNECTIONS The Omega Studio is both an 8 x 4 x 2 mixer and a USB audio interface that can be used in a variety of audio setups. This section describes how to make basic connections for the following applications: •... -
Page 13: Connecting A Recorder For Mixdown
OMEGA Recording Audio ™ TO CONNECT AN ANALOG AUDIO SOURCE: 1. Plug an XLR or TRS 1/4" phone cable directly into the desired Mic/Line Input on the Omega Studio. The Mic Inputs accept XLR connectors, the Line Inputs accept TS or TRS connectors. TO ACTIvATE PHANTOM POWER: If your microphone requires phantom power, first make sure the microphone is connected, then press the Phantom Power switch (labeled +48V). -
Page 14: Connections Diagram
CD-ROM inside the Omega Studio box to ensure the successful installation of the recording software and USB drivers. If you haven’t already installed the Cubase LE4 and Lexicon Pantheon plug-in soft- ware, please do so before continuing on to the next section. Also, consider the following information as it pertains to your computer’s operating system prior to installing... -
Page 15: Windows ® Vista And Xp Software Setup
OMEGA Using Cubase LE4 with the Lexicon Omega Studio ™ USING CUbASE lE4 WITh ThE lExICON OMEGA STUdIO ® WINdOWS vISTA ANd xP SOFTWARE SETUP 1. Start Cubase LE4. The first time you use Cubase LE4 with the Lexicon Omega Studio you may be asked to run the Multimedia test as shown below. -
Page 16: Macintosh ® Software Setup
Omega box to ensure the successful installation of the recording software and USB setup. If you haven’t already installed the Cubase LE4 and Lexicon Pantheon plug-in soft- ware, please do so before continuing on to the next section. -
Page 17: Using The Lexicon Omega
OMEGA Recording With The Omega - Section 1 ™ USING ThE lExICON OMEGA™ STUdIO SECTION I – RECORDING WITH THE OMEGA Now that we’ve covered the operation of the Omega hardware, let’s see how to use the Omega Studio in some typical recording situations. The diagram below shows how the Omega Studio is connected for this particular setup. - Page 18 Recording A Microphone Input - Section 1 3. Now we will setup our software to record. Open Cubase, go to and select FILE , then select NEW PROJECT DEFAULT Select a location to store the project and click on . To add an audio track, right click in the dark gray column and select Add Audio Track.
- Page 19 OMEGA Recording A Microphone Input - Section 1 ™ 6. Now let’s overdub a second track. Right click in the dark gray column and select Add Audio Track. In the Add Audio Track dialog, set the configuration to Mono and click OK. Under the Track Inspector select STEREO IN >...
- Page 20 Recording Guitar Into The Instrument Jack - Section I 3. Open Cubase, go to and select FILE , and a project location. PROJECT DEFAULT To add an audio track, right click in the dark gray column and select Add Audio Track. In the Add Audio Track dialog, set the configura- tion to Mono and click OK.
- Page 21 OMEGA Recording Multiple Channels At One Time - Section I ™ 1. Plug one microphone into each of the two microphone jacks on the back of the Omega. Plug the line output of the keyboard into the Line In 4 jack on the back of the Omega.
- Page 22 Cubase’s Mixer window. D. RECORDING FROM S/PDIF One of the key features of the Lexicon Omega Studio is its ability to monitor S/PDIF in real time with no latency. This allows you to record directly from a device with the S/PDIF digital output and listen while you are recording.
-
Page 23: Section Ii - Submixing On The Omega
S/PDIF input. SECTION II - SUBMIXING ON THE OMEGA The Lexicon Omega Studio has a total of 9 inputs (2 mic, 4 line, 1 instrument and 2 digital) and 6 channels of USB audio (4 in and 2 out). This allows you to record 4 separate simultaneous tracks at one time. -
Page 24: Section Iv - Using Software Input Monitoring
1. Here is an example of using a MIDI keyboard. To record MIDI data into the computer, connect the MIDI output of the keyboard to the MIDI input of the Lexicon Omega. Connect the MIDI output of the Omega to the MIDI input of the keyboard. -
Page 25: Section V - Adjusting The Buffer Settings
50% (see the Pantheon man- ual for more details). Change the level to about -52dB. Now you will record with the Lexicon Pantheon Reverb on your track. SECTION v - ADJUSTING THE BUFFER SETTINGS The buffers were automatically set at safe setting for your computer when you installed the software. -
Page 26: Specifications
18W at 120 V Dimensions: 4.625”W x 7.25”H x 7.75” D (118mm x 184mm x 197mm) Weight: 2.65 lbs. Lexicon engineers are constantly working to improve the quality of our products. Specifications are, therefore subject to change without notice. -
Page 27: Signal Routing Diagram
OMEGA Omega Signal Routing Diagram ™... - Page 28 Questions or comments? 8760 South Sandy Parkway | Sandy, Utah 84070 U.S.A. Email us at: customer@lexiconpro.com Phone: (801)-568-7660 | Fax: (801)-568-7662 or visit our World Wide Web home page at: www.lexiconpro.com Copyright 2007 Lexicon Professional ® Part Number: 18-0233V-E Printed in China...
Need help?
Do you have a question about the OMEGA - MANUAL 2 and is the answer not in the manual?
Questions and answers