Table of Contents
Advertisement
Instructions for use
GB
English, 1
FDYB 10011
FDYB 11011
STYLE
Contents
Installation, 5-6-7
Connecting the electricity and water supplies
Loading the racks, 9-10
Adjusting the upper rack
Start-up and use, 11
Wash cycles, 12
Table of wash cycles
Cutting off the water and electricity supplies
Troubleshooting, 15
Guarantee, 17
DISHWASHER
Advertisement
Table of Contents

Related Manuals for Hotpoint Style FDYB 11011


Summarization of Contents
Precautions and safety advice
General safety
Covers user safety, child supervision, and appliance limitations for domestic use.
Disposal of old electrical appliances
Instructions for disposing of old appliances in compliance with WEEE directive.
Saving energy and respecting the environment
Tips for water/energy saving, eco-friendly detergents, and environmental protection.
Recycling & Disposal Information
Information on recycling packaging and proper disposal of old appliances.
Installation
Positioning and levelling
Guide to correctly positioning and levelling the dishwasher for stability and optimal performance.
Electrical Connection
Instructions for safely connecting the appliance to the electrical power supply.
Connecting the water supplies
Steps for connecting the water inlet and drain hoses to the appliance.
Sink Waste System
Guidance on connecting the drain hose to a suitable waste pipe or sink.
Anti-flooding protection*
Details on the appliance's anti-flooding systems and safety features.
Advice regarding the first wash cycle
Instructions for preparing and running the initial wash cycle after installation.
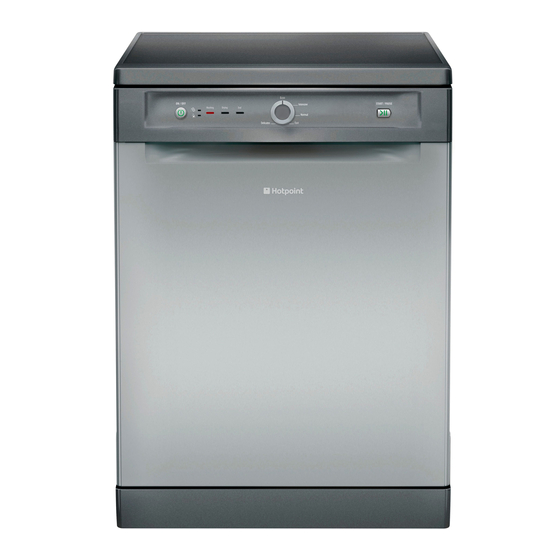
Description of the appliance
Overall view
Diagram and identification of the main external components of the dishwasher.
Control panel
Explanation of the buttons, indicators, and controls on the appliance's front panel.
Loading the racks
Tips
General advice on loading crockery efficiently for optimal washing and drying results.
Lower rack
Guidance on loading larger items like pans, lids, and dishes into the lower rack.
Cutlery basket
Instructions for arranging cutlery and small items in the dedicated basket.
Upper rack
Recommendations for loading delicate items like glasses and cups into the upper rack.
Tip-up compartments with adjustable position
How to adjust side compartments for better crockery arrangement, especially for wine glasses.
Adjusting the height of the upper rack
Instructions on how to raise or lower the upper rack to accommodate different crockery sizes.
Unsuitable crockery
List of items that should not be washed in the dishwasher due to material or decoration.
Damage to glass and crockery
Factors that can cause damage to glassware and crockery during the wash cycle.
Start-up and use
Starting the dishwasher
Step-by-step guide to initiating a wash cycle, including water tap, detergent, and program selection.
Measuring out the detergent
How to correctly dose detergent for effective cleaning and to prevent environmental impact.
Wash cycles
Wash-cycle data
Table detailing different wash cycles, their duration, water, and energy consumption.
Instructions on wash-cycle selection and detergent dosage
Guidance on choosing the right cycle and appropriate detergent amounts for various soiling levels.
Rinse aid and refined salt
Measuring out the rinse aid
How to fill the rinse aid dispenser and adjust its setting for optimal drying.
Rinse-aid dispenser setting
How to adjust the rinse aid dosage level based on drying performance.
Setting the water hardness
How to set the water softener based on local water hardness for better results.
Measuring out the refined salt
Instructions for filling the salt dispenser and its importance for limescale prevention.
Care and maintenance
Shutting off the water and electricity supplies
Procedures for safely disconnecting power and water before cleaning or maintenance.
Cleaning the dishwasher
How to clean the external and internal surfaces of the appliance.
Preventing unpleasant odours
Tips to prevent bad smells by keeping the door ajar and cleaning seals.
Cleaning the sprayer arms
How to remove and clean the upper and lower sprayer arms to ensure proper water distribution.
Cleaning the water inlet filter*
Instructions on cleaning the filter located at the water tap connection.
Cleaning the filters
Detailed steps for cleaning the three-part filter assembly inside the dishwasher.
Leaving the machine unused for extended periods
Advice on preparing the dishwasher for long periods of non-use.
Troubleshooting
The dishwasher does not start or cannot be controlled
Solutions for issues where the appliance fails to start or respond to controls.
The door won't close
Troubleshooting steps if the dishwasher door cannot be shut properly.
No water drains out from the dishwasher
Causes and solutions for problems related to water not draining from the appliance.
The dishwasher makes excessive noise
Identifying and fixing causes of unusual noise during operation.
The dishes and glasses are covered in a white film or limescale deposits
How to resolve issues with white film or limescale on washed items.
The dishes and glasses are streaked or have a bluish tinge
Solutions for streaks or bluish marks appearing on crockery after washing.
The crockery has not been dried properly
Reasons and fixes for poor drying performance of dishes and glasses.
The dishes are not clean
Troubleshooting steps when dishes are not adequately cleaned after a wash cycle.
The dishwasher does not take any water in - Tap shut-off alarm
Addressing issues where the appliance fails to fill with water, indicated by alarms.
Water inlet hose alarm / Water inlet filter blocked
Solutions for alarms related to water inlet issues or a blocked filter.
After-Sales Service
Essential Contact Information
Contact details for Hotpoint service, including phone numbers and website.
Appliance Registration
Information on registering the appliance for additional benefits like a parts guarantee.
Recycling and Disposal Information
Reiterates information on proper disposal and recycling of the appliance.
Parts and Accessories
Information on obtaining genuine replacement parts and accessories for the appliance.
Guarantee
12 months Parts and Labour Guarantee
Details of the standard manufacturer's guarantee covering parts and labour for twelve months.
5 Year Parts Guarantee
Information about an additional free 5-year parts guarantee upon registration.
Extended Guarantees
Options for purchasing extended protection plans for the appliance.
Free Helpdesk Service
Details of a free helpdesk service for technical assistance within the first 90 days.
Need help?
Do you have a question about the Style FDYB 11011 and is the answer not in the manual?
Questions and answers