
Related Manuals for Hotpoint Aquarius FDW60


Summary of Contents for Hotpoint Aquarius FDW60
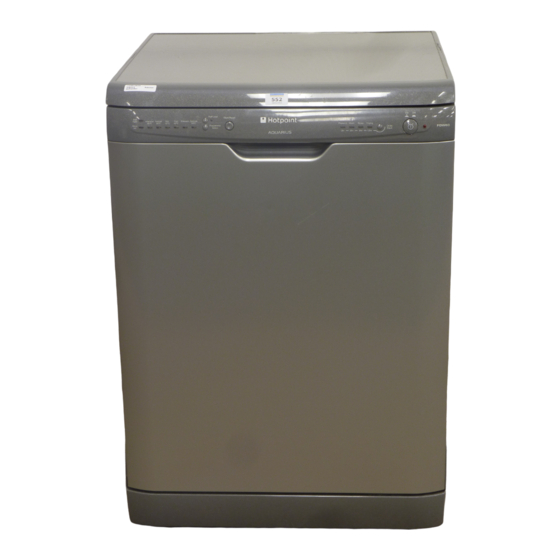
- Page 1 Instructions for Installation and Use Aquarius FDW60 & FDW65 60cm free standing Dishwasher...
-
Page 3: Table Of Contents
Care and Cleaning Troubleshooting Information for Test Labs After Sales Service Hotpoint Guarantee Notes Key Contacts Retention of this Instruction Book This Instruction Book must be kept handy for reference as it contains important details on the safe and proper use of the appliance. -
Page 4: Electrical Connection
‘N’ LIVE ‘L’ Changing the Mains Lead A lead can be ordered from Hotpoint Service UK: 08709 066 066 or Republic of Ireland: 1850 302 220 If you have damaged the existing lead or require a longer one a charge will be made. It is strongly advised that this work is carried out by a qualified electrician. -
Page 5: For Your Safety
2. DO NOT load dishes to wash that are soiled with ash, wax or paints 3. DO NOT lean, sit or stand on any part of the dishwasher - this could cause injury and/or damage the appliance. -
Page 6: Installation
Installation Choose where you want to install your dishwasher, you can place it so that its sides or back panel are side by side with furniture or up against the wall. The dishwasher is provided with water supply and drain... - Page 7 Warning: The dishwasher plug must be within access once the appliance has been built in, in order to allow for maintenance to be carried out safely. The structure of your dishwasher makes it impossible to fit it under a hob.
-
Page 8: Before Using Your Dishwasher
We recommend Glist 3 in 1 for use in all Hotpoint dishwashers... Brilliant cleaning is guaranteed with Glist 3 in 1. Hotpoint only recommends Glist 3 in 1 Dishwasher tablets to give outstanding cleaning and care. It is important to use detergent specially designed for domestic dishwashers. (Always follow the manufacturers instructions.) -
Page 9: Before Using Your Dishwasher
IMPORTANT NOTICE: 3 in 1 dishwasher tablets are now available. These combine detergent, salt and rinse aid ALL IN ONE. If the water in your area is hard or very hard, we still recommend you add salt to the salt container to prevent white streaks on your dishes and in the dishwashers interior. -
Page 10: Loading Your Dishwasher
• Some types of glass can become opaque in appearance after they have been washed too many times in a dishwasher. • Highly absorbent materials such as sponges and towels should never be placed in a dishwasher. • If in any doubt, check with the manufacturer on items suitability for dishwasher’s. -
Page 11: Getting To Know Your Dishwasher
This light warns you that it is time to add more salt. T. Low Rinse Aid indicator light This light warns you that it is time to add more rinse aid. This dishwasher conforms to the following European Community Directives: cm . 60 cm . 60... -
Page 12: How To Use Your Dishwasher
Delaying the start of a Half load. programme. Your dishwasher also allows you to When you have loaded the dishes, wash half a load, to save water , you can choose when to start your... -
Page 13: Programme Chart
Run cycle immediately after use. To optimise wash performance and save on energy, try to use the dishwasher with a full wash load. If it takes some time to fill your dishwasher, use the pre-wash to avoid caked on food and build up of bad odours. -
Page 14: Care And Cleaning
DO NOT use solvents or Going away abrasives to clean the exterior and If the dishwasher is not going to be rubber parts of your appliance, do used for some time, carry out the not use solvents or abrasive following: cleaning products. -
Page 15: Troubleshooting
(See “Cycle Phase Indicator Lights Flashing”below). The Salt refill light will flash when your dishwasher is switched on for the first time and again when the salt levels become low - follow the instructions on “Before Using Your Dishwasher” page on how to add salt to your dishwasher. - Page 16 Possible Incorrect Fitment of Water Leaking From Rear Of Inlet Hose Machine Your dishwasher is designed so that if a fault occurs, an error message indicated by one Cycle Indicator Lights or two wash cycle indicator lights flashing rapidly. Flashing...
- Page 17 Area A (Fig.2). Step 4: Locate filters back into the filter housing and firmly press downwards. Step 5: Turn the dishwasher on by pressing the “On/Off” button, and select required programme. Fig.1 For additional advice on Cleaning your filter see “Care and Cleaning”section of the instruction book.
- Page 18 Cycle Complete. Issue If indicator light 4 (Fast) flashes rapidly, TURN the dishwasher OFF AND BACK ON again after one minute. If the alarm persists, first turn off the water tap to avoid any flooding and then cut off the electricity supply and call for technical assistance.
- Page 19 Step 1: Push the white stoppers at the front of the basket shelves outwards and remove the basket (See fig.1 & Fig. 2). Step 2: Push the basket runners back into the dishwasher with the stoppers still pointing outward (See Fig.3) Step 3: Select required position, if lower position selected top wheel would glide into the basket runners (See Fig.4) and if upper position required...
- Page 20 Fault Area Poor Drying Results Is Rinse Aid being used or is the Rinse Aid level set too low? Possible Installation Fault The Dishwasher Will Not (Particularly if the machine is being Drain used for the first time) Issue Using rinse aid in your wash will improve the drying performance.
- Page 21 If you have completed all of the above checks and your appliances is still not operating, then please call your See “Key Contacts” on the back page of the instruction book. Has the correct detergent been used? (Use only Dishwasher powder or tablets).
-
Page 22: Information For Test Labs
Press the “extra dry” button (depending on Model). Don’t press the “extra dry” button only, for free-standing dishwashers with “turbo-dry” fan, see features in the ‘Getting to Know Your Dishwasher’ section of this instruction book. L o w e r b a s k e t... -
Page 23: After Sales Service
Hotpoint appliance than us - the manufacturer" As part of our commitment to you, all Hotpoint appliances have the added benefit of a fully inclusive parts and labour guarantee for the first 12 months. In addition to this you also have the advantage of free replacement parts for the first 5 years when fitted by a Hotpoint engineer. -
Page 24: Recycling & Disposal Information
All Hotpoint appliances carry a fully inclusive 12 month parts and labour guarantee as well as free replacement parts for the first 5 years (except microwaves, selected integrated appliances and cooker hoods, which have a one year guarantee) provided that they are fitted by a Hotpoint engineer. -
Page 28: Key Contacts
Over 900 trained specialists, directly employed by us, ensure that you can have complete confidence in (Open 8 to 8 Mon - Fri, 8 to 6 Sat, 10 to 4 Sun & Bank Holidays) Note: Our operators will require the following information: Merloni Elettrodomestici UK Ltd.
Need help?
Do you have a question about the Aquarius FDW60 and is the answer not in the manual?
Questions and answers
Why is this happening