Table of Contents
Advertisement
Quick Links
Advertisement
Table of Contents

Related Manuals for Baofeng UV-17M Series


Summary of Contents for Baofeng UV-17M Series
- Page 1 Amateur Radio UV-17M SERIES USER‘S MANUAL...
- Page 2 PREFACE Thank you for purchasing this product. which is a dual band/dual display/dual watch. This easy-to-use radio will deliver you secure, instant and reliable communications at peak efficiency. Please read this manual carefully before use. The information presented herein will help you to derive maximum performance from your radio. WARNING!...
-
Page 3: Table Of Contents
Table of Contents Chapter1. Getting Started 5.2 Adjusting the volume 1.1 Regulations and Safety Warnings 5.3 Making a call 1.2 Main features 5.4 Channel selection 1.3 Content of the packaging 5.5 Frequency (VFO) mode Chapter2. Charging the Battery 5.6 Channel (MR) mode 2.1 Charging the Battery Pack Chapter6. -
Page 4: Chapter1. Getting Started
Chapter1. Getting Started 1.1 Regulations and Safety Warnings ■EU Regulatory Conformance As certified by the qualified laboratory, the product is in compliance with the essential requirements and other relevant provisions of the Directive 1999/5/EC (2014/53/EU). All applicable EU regulations are regarded (2006/66/EC, 2011/65/EU, 2012/19/EU). - Page 5 that interference will not occur in a particular installation. If this equipment does cause harmful interference to radio or television reception, which can be determined by turning the equipment off and on, the user is encouraged to try to correct the interference by one or more of the following measures: —Reorient or relocate the receiving antenna.
-
Page 6: Important Tips
the FCC/ISEDC. Tests for each product are performed in positions and locations as required by the FCC/ISEDC. For body worn operation, this device has been tested and meets the FCC/ISEDC RF exposure guidelines when used with and accessory designated for this product or when used with and accessory that contains no metal. To maintain compliance with FCC/ISEDC RF exposure guidelines hold the transmitter and antenna at least 1 inch (2.5 centimeters) from your face and speak in a normal voice, with the antenna pointed up and away from the face. -
Page 7: Maintenance Instructions
1. Do not use any unauthorized or damaged accessory. 2. Keep the product at least 2.5 centimeters away from your body during transmission. 3. Do not keep the product receiving at high volume for a long time. 4. For vehicles with an air bag, do not place the product in the area over the air bag or in the air bag deployment area. 5. -
Page 8: Transportation Instructions
7. Do not squeeze and penetrate the battery, nor remove its housing. Transportation Instructions 1. Damaged batteries must not be transported. 2. To avoid short circuit, separate the battery from metal pars or from each other if two or more batteries are transported in one packaging. - Page 9 • Channel scan, frequency scan, and three scan and recovery methods: TO, CO, and SE • Up to 999 memory channels. • Broadcast FM radio receiver 76-108 MHz • Power-on password management function • Dual watch / Dual reception/ Dual-band handheld transceiver •...
-
Page 10: Content Of The Packaging
1.3 Content of the packaging • 1 Radio • 1 Li-Ion battery pack • 1 USB Cable • 1 Belt clip •1 Antenna If any item is missing, please verify with your dealer. Chapter2. Charging the Battery 2.1 Charging the Battery Pack The Li-ion battery pack is not charged at the factory;... -
Page 11: How To Charge
When keys, ornamental chain or other electric metals contact the battery terminal, the battery may become damage or injure a human. If the battery terminals are short circuited it will generate a lot of heat. Take care when carrying and using the battery. - Page 12 3. An empty battery will be fully charged in 4 hours. 4. The battery meter on LCD will move to indicate the battery is charging. Note: • It is recommended to power OFF your radio while charging. However, if power is turned on while charging, you may not be able to transmit a message if the battery is completely empty.
-
Page 13: Chapter3. Installation Of Accessories
Chapter3. Installation of Accessories Before the radio is ready for use we need to attach the battery pack, as well as charge the battery. 3.1 Installing/ Removing the Antenna a. Installing the Antenna: Screw the antenna into the connector on the top of the transceiver by holding the antenna at its base and turning it clockwise until secure. -
Page 14: Chapter4. Radio Overview
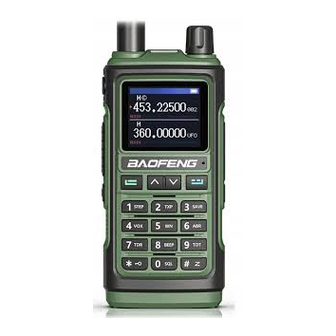
Chapter4. Radio Overview 4.1 Buttons and controls of the radio 1. Antenna 2.Flashlight/ Emergency Alert key 3. PTT key 4. FM broadcast/Monitor key Key (MENU) 6. Numeric keypad 7 .Power/Volume knob 8. Color LCD 9. Accessory jack 12. or navigation keys 10. -
Page 15: Lcd Display
4.2 LCD Display Icon Description RSSI Squelch Open/ Close Indicator Transmit power level indicator Make sure you can hear the DTMF side tone from the radio speaker, set to DT-ST, ANI-ST, DT+ANI. DCS enabled CTCSS enabled Enables access of repeaters in VFO/Frequency Mode. TX will be shifted higher in frequency than RX。 Enables access of repeaters in VFO/Frequency Mode. -
Page 16: Main Keypad Controls
LED Indicator Radio Status Constant Red Transmitting. Constant Green Receiving. 4.4 Main keypad controls • Side key 1 (Flashlight and Alarm) Press [SK1] key momentarily to turn on the LED flashlight. Another momentary press will flash the LED. Another momentary press turns the flashlight off. -
Page 17: Chapter5. Basic Operations
• Numeric keypad With these keys you can input the information or your selections on the radio. In tx mode, press the number keys to send a corresponding DTMF code. • Star * Key A short momentary press of the key enables the reverse function. If you press this key for more than 2 seconds you will lock/unlock the keypad. -
Page 18: Vfo/Channel Switch
By using the monitor function, enabled from the [FM broadcast/Monitor] key below the PTT, you can more easily adjust your volume by adjusting it to the un-squelched static. 5.3 Main Band/Sub Band Select In standby mode, press the key to switches between A (upper) and B (lower) displays. The frequency or channel on the selected display becomes the active listening and transmit frequency or channel. -
Page 19: Channel (Mr) Mode
5.6 Channel (MR) mode and Channel selection There are two modes of operation: Frequency (VFO) mode, and Channel or Memory (MR) mode. For everyday use, Channel (MR) mode is going to be a whole lot more practical than Frequency (VFO) mode. However, Frequency (VFO) mode is very handy for experimentation out in the field. -
Page 20: Emergency Alert
You can use this radio in an emergency. If you press [ ] key, the radio turns on the high-intensity LED flashlight on your radio. • Your radio operates normally when the emergency strobe is activated. (1) Press [ ] key once, it will turn on continuously (Always On mode). (2) And then, press [ ] key once, the Strobe Light emits the emergency signal (Strobe emergency mode). - Page 21 » If no signal, it will emit noise when press the [SK2] Key.
-
Page 22: Keypad Lock
5.12 Keypad lock The radio features a keypad lock that locks out all keys except for the three side keys. To enable or disable the keypad lock, press and hold the key for about two seconds. You can also enable so that the radio automatically locks the keypad after ten seconds from the menu. 5.13 Frequency reversal A short momentary press of the key enables the reverse function If you for some reason want to listen to the repeater's input frequency instead, press... -
Page 23: Chapter6. Advanced Features
stations. Your radio also has a NOAA Weather Scan function, to enable the user to scan all 10 channels of the NOAA Weather Radio. (1) To turn the NOAA Weather Scan on, press and hold the key for 3 seconds , icon appears. -
Page 24: Using Shortcuts
1. Press the key to enter the menu. 2. Use the UP and DOWN keys to navigate between menu items. 3. Once you find the desired menu item, press again to select that menu item. 4. Use the UP and DOWN keys to select the desired parameter. 5. -
Page 25: Scanning Modes
6.2 Scanning The Radios features a built in scanner for the VHF and UHF bands. When in Frequency (VFO) mode it will scan in steps according to your set frequency step. In Channel (MR) mode it will scan your channels. At approximately three frequencies per second, it's not the fastest scanner in the world, but it is nonetheless a useful feature to have at times. -
Page 26: Frequency Scanning
6.2.2 Frequency scanning This function can scan the frequency. a. In frequency mode, press key for more than 2 seconds. The radio will start scanning the frequency according to the set frequency step. b. You can change the scanning direction with the / keys. c. - Page 27 6.3 Manual Programming (Channels Memory) Memory channels are an easy way to store commonly used frequencies so that they can easily be retrieved at a later date. The radios features 999 memory channels that each can hold: Receive and transmit frequencies, transmit power, group signaling information, bandwidth, ANI/ PTT-ID settings and a six character alphanumeric identifier or channel name Frequency Mode vs.
-
Page 28: Repeaters Programming
i. Press and hold the key to return to the MR mode and the channel number will reappear. Ex 2. Programming a Simplex Channel with CTCSS tone EXAMPLE New memory in Channel 10: RX = 432.6625 MHz TX CTCSS tone 123.0 a. - Page 29 i. Use the / keys to select + (positive) or - (negative) offset. j. Press key to confirm and save. k. Optional: a). Save to memory, see the section called “Manual programming” for details. b). Set up CTCSS; see the section called “CTCSS” for details. l.
-
Page 30: Dual Watch
6.6 Dual Watch In certain situations, the ability to monitor two channels at once can be a valuable asset. This can be achieved in one of two ways. You can either have one receiver in your radio and flip-flop between two frequencies at a fixed interval (known as Dual Watch), or you can equip a radio with two receivers (known as Dual Receive or Dual VFO). - Page 31 In standby mode, Press + 45. The screen displays “SCRAMBLE”. / Press to enter the function. Press the keys to select the scramble mode (between MODE1 and MODE3) to activate the scramble function. “SCR” icon will appear on the display. 6.9 DTMF DTMF is an in-band signaling method using dual sinusoidal signals for any given code.
- Page 32 6.10 Customization The radio allows you to define visual and audible features such as Display Illumination Time, MR/Channel Mode Display Format, Power On Message, Power On password, Keypad Beep, Roger Beep, Voice Prompt, etc. to suit your usage habits. 6.10.1 Display backlight (ABR) - MENU 7 In standby mode, press + 7.
- Page 33 • Channel mode (CH) • Channel name (NAME) To shift from one mode to another one: / In Standby mode press + 24; select the desired working mode with the keys. Press key again to confirm your selection. 6.10.6 Roger Beep, end Transmission Tone (ROGER) - MENU 36 Roger Beep can be enabled/disabled: •...
- Page 34 key to enter the function. Press the / keys to enable/disable (ON/OFF) the power on password and confirm Press with MENU. To return to standby mode, press key. Enable the power on password function. Each time the radio is turned on, it will display "Input Password" to prompt for the correct password.
-
Page 35: Appendix A. - Trouble Shooting Guide
Appendix A. – Trouble shooting guide Phenomena Analysis Solution The battery may be installed improperly. Remove and reattach the battery. The battery power may run out. Recharge or replace the battery. You cannot turn on the radio. The battery may suffer from poor contact caused by dirty Clean the battery contacts or replace the battery. -
Page 36: Appendix B. - Shortcut Menu Operations
Appendix B. - Shortcut Menu operations Name Description MENU Settings (Full Name) Squelch silences the receiver when there is no [0 - 9] signal. - Sensitivity can be varied from .1 to .3 mV on Setting the squelch to 0 will open up the - Squelch Level squelch entirely. - Page 37 *This feature provides a safety switch that limits transmission time to a programmed value. This will promote battery conservation by not TOT- Transmission OFF [0] 15[1] - 180[12] in 15 second steps allowing you to make excessively long Time-out-Timer (TIMEOUT-15)/15=[n] transmissions, and in the event of a stuck PTT switch it can prevent interference to other users as well as battery depletion...
- Page 38 Set the language type of menu and prompt voice. LANGUAGE ENGLISH: Display as an English menu with • ENGLISH [0] | 中文 [1] - Language selection English prompts for operation. Chinese: Display as a Chinese menu and • prompt for operation in Chinese. OFF [0]: No DTMF Side Tones are heard •...
- Page 39 - Channel Mode B NAME [1]: Displays the channel name. Note: Names must be entered using software. • Display FREQ [2]: Displays programmed Frequency • Disables the [PTT] key on a channel that is already in use. The transceiver will sound a beep - Busy Channel OFF [0] | ON [1] tone and will not transmit if the [PTT] key is...
- Page 40 This function is used eliminate squelch tail noise between BaoFeng handhelds that are communicating directly (no repeater). - Squelch Tail OFF [0] | ON [1] Reception of a 55 Hz or 134.4 Hz tone burst Elimination mutes the audio long enough to prevent hearing any squelch tail noise.
- Page 41 Scramble is a voice inversion function that enables private communication by scramble SCRAMBLE OFF [0] | ON [1] voice signals. The SCR icon is displayed when scramble is enabled. VERSION Access hardware and firmware information for - Version information the radio...
-
Page 42: Appendix C. - Technical Specifications
Appendix C. - Technical Specifications General Receiver Frequency VHF 136-174MHz, 200-260MHz, UHF 350-390MHz, 400-520MHz 144-148 & 420-450MHz (America version) Transmission Frequency 144-148 & 430-450MHz (Canadian version) FM Receive Frequency FM 76-108 MHz; 25.0KHz(Wide)/12.5KHz(Narr) Channel Spacing Memory Channel 999 Groups Operation Voltage DC 7.4 V ±10% Transmission current ≤1600mA... - Page 43 Disclaimer The Company endeavors to achieve the accuracy and completeness of this manual, but no warranty of accuracy or reliability is given. All the specifications and designs are subject to change without notice due to continuous technological development. No part of this manual may be copied, modified, translated, or distributed in any manner without the prior written consent of the Company.
Need help?
Do you have a question about the UV-17M Series and is the answer not in the manual?
Questions and answers