
Related Manuals for FUTABA GY520


Summary of Contents for FUTABA GY520
- Page 1 NSTRUCTION ANUAL YAW-AXIS STABILIZER FOR MODEL HELICOPTER (RATE GYRO) 1M23N21902 Y520 Mnl.indd 1 Y520 Mnl.indd 1 4/7/2009 7:54:59 AM 4/7/2009 7:54:59 AM...
-
Page 2: Table Of Contents
• Introduction ---------------------------------------------------11 • Mechanics Preparation ------------------------------------- 12 • GY520 Installation ------------------------------------------ 13 • Connecting the GY520 to your Receiver ---------------- 15 • GY520 Programming --------------------------------------- 16 • Tail Rotor Servo Installation and Setup ------------------ 25 • Before Flight Checklist ------------------------------------- 28 •... -
Page 3: Precautions
• The servo type parameter within the GY520 must match the type of servo you are using. Incorrect setting may damage the GY520 or the servo, possibly resulting in a loss of control during fl ight. Y520 Mnl.indd 3 Y520 Mnl.indd 3... - Page 4 RECAUTIONS • Only use the GY520 with a 2.4GHz system such as the ™ Futaba FASST system, or a PCM system. Use with a FM system is strongly discouraged since interference can cause serious operational problems. In addition to this...
- Page 5 • Do not drop the GY520 onto a hard surface or subject the GY520 to a strong shock as this may damage the sensor. Always use the supplied mounting pads or the Futaba replacement mounting pads available from your local hobby dealer.
-
Page 6: Warranty And Repair Service (In U.s.a.)
If any diffi culties are encountered while setting up or operating your GY520, please consult the instruction manual fi rst. For further assistance you may also refer to your hobby dealer, or contact the Futaba Service Center at the web site, fax or telephone number listed below: www.futaba-rc.com or www.hobbyservices.com... -
Page 7: Contents
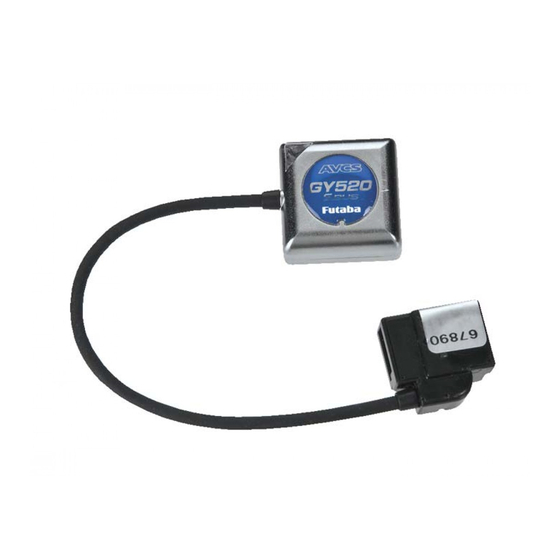
ONTENTS Mounting Pads GY520 Gyro GY520 Gyro 2mm Thick (two) 3mm Thick (two) Damping and Adjustment Screwdriver Shield Plate Extensions Tail Rotor Extension (Black) Gain Extension (Red) Y520 Mnl.indd 7 Y520 Mnl.indd 7 4/7/2009 7:55:00 AM 4/7/2009 7:55:00 AM... -
Page 8: Specifi Cations
Sensor: MEMS vibrating structure gyro Angular Velocity Range: ±800 Degrees Per Second *The maximum operating voltage listed only applies to the GY520. Always verify that your receiver, servos, tail rotor servo, governor, switch and any other electronic components used in your installation are capable of operating at the voltage you plan to use. -
Page 9: Recommended Servos
FSH66 GY520 Extension 55 mm (2): FUTM4666 FSH67 GY520 Extension 80 mm (2): FUTM4667 FSH68 GY520 Extension 130 mm (2): FUTM4668 FSH69 GY520 Mounting Pad 2x22x22 mm (10): FUTM4669 FSH70 GY520 Mounting Pad 3x22x22 mm (10): FUTM4670 FSH71 GY520 Shield Plate 1x22x22 mm (3): FUTM4671 Y520 Mnl.indd 9... -
Page 10: Function And Connection Diagram
UNCTIONS & ONNECTIONS LED Indicator Button Gain Tail Rotor Channel Channel Tail Rotor Servo Y520 Mnl.indd 10 Y520 Mnl.indd 10 4/7/2009 7:55:02 AM 4/7/2009 7:55:02 AM... -
Page 11: Led Indicator Description
PID control algorithm put it a quantum leap ahead of all other heading hold gyros in size, weight and performance. The GY520 has been optimized to work with small electric models and larger nitro (.30 through .91) sized helicopters. -
Page 12: Mechanics Preparation
• Even though the GY520 is a high performance gyro it will be necessary to ensure that the helicopter mechanics are also in optimum operating condition. -
Page 13: Gy520 Installation
2mm mounting pad to mount the gyro onto the Gyro Mount. If the GY520 is mounted near the ESC, near a servo, or near the tail rotor belt we highly recommend using two 2mm Mounting Pads and the steel Damping/Shield Plate to help prevent electromagnetic interference from reaching the gyro. - Page 14 GY520 I NSTALLATION Recommended Installation for Larger Electric Helicopters and All Nitro Helicopters Damping and 2mm or 3mm Shield Plate Mounting Pads Gyro Mount On smaller electric helicopters it is best to mount the gyro using one 2mm mounting pad. When mounting the gyro in a larger electric or .50 through .91 size nitro helicopter we recommend...
-
Page 15: Connecting The Gy520 To Your Receiver
Tail Rotor Servo Channel Channel Connect the supplied extensions to the GY520 connecter block as indicated. Route the wires through the helicopter mechanics and connect them to the appropriate receiver channels. To determine the appropriate receiver channels please check your transmitter’s instruction manual. -
Page 16: Gy520 Programming
LED. Moving to the next Parameter Press and continue to hold the button on the side of the GY520. After 2 seconds the LED indicator will momentarily change to violet. Release the button and the gyro will move to the next parameter. - Page 17 GY520 P ROGRAMMING GY520 Parameters and Settings Table PARAMETER SETTING LED INDICATION Digital 1520μS Servo* Blue, 1 Flash 1. Servo Selection 1. S Digital 760μS Servo Red, 1 Flash Analog Servo Violet, 1 Flash Normal* Blue, 2 Flashes 2. Gyro Compensation 2.
- Page 18 The servo type parameter within the GY520 must match the type of servo you are using. Incorrect setting may damage the GY520 or the servo, possibly resulting in a loss of control of the model during fl ight. Y520 Mnl.indd 18 Y520 Mnl.indd 18...
- Page 19 GY520 P ROGRAMMING Parameter 2: Gyro Compensation Direction [2 FLASHES] LED INDICATOR DESCRIPTION Red, 2 Flashes Normal Compensation* Blue, 2 Flashes Reverse Compensation * Default Setting WARNING! Verify that the gyro compensates the correct direction before fl ight. If the compensation direction is incorrect the model will pirouette uncontrollably at a very high rate.
- Page 20 GY520 P ROGRAMMING Parameter 3: Servo Limits [3 FLASHES] LED INDICATOR DESCRIPTION Red, 3 Flashes Limit Testing Mode Blue, 3 Flashes Set limit using tail rotor stick. The Servo Limit parameter is used to set the mechanical limits for the tail rotor servo.
- Page 21 GY520 P ROGRAMMING WARNING! If one of the servo limits is set to a position less than 50% of the total throw, the LED on the gyro will turn red. When the LED is red, you will not be able to move to the next limit setting or exit the limit setting parameter.
- Page 22 GY520 P ROGRAMMING Parameter 4: Flight Mode [4 FLASHES] WARNING! Always make small (1%) adjustments to the tail rotor D/R or EPA once the value exceeds 100%. Over 100%, it is possible to exceed the sensor’s Angular Velocity Sensing Range (+/- 800°...
- Page 23 GY520 P ROGRAMMING Parameter 5: Gyro Response Rate [5 FLASHES] LED INDICATOR DESCRIPTION Blue, 5 Flashes Standard Response* Red, 5 Flashes Fast Response Violet, 5 Flashes Slow Response * Default Setting Sets the gyros response rate. The standard setting is acceptable for most helicopters.
- Page 24 GY520 P ROGRAMMING Parameter 6: Data Reset [6 FLASHES] Restores the gyro to the factory default settings. It will be necessary to reprogram all parameters again before fl ying the model. PARAMETER DEFAULT SETTING 1. Servo Type Digital 1520μS 2. Gyro Compensation Direction Normal 3.
-
Page 25: Tail Rotor Servo Installation And Setup
Do not connect the tail rotor servo to the gyro until the servo type has been selected. Operating the servo using the incorrect setting may damage the GY520 or the servo. Once these steps are completed, turn the receiver power on and allow the gyro to initialize. - Page 26 OTOR ERVO NSTALLATION AND ETUP ❏ Install the tail rotor servo into the mechanics and connect the servo to the gyro. Remove the servo arm screw from the servo. Turn the receiver power on and allow the gyro to initialize. Enter programming mode and go to parameter 3 –...
- Page 27 7.5mm Larger Electric and All Nitro Helis ❏ Follow the instructions within the GY520 programming section and set the servo limits for the tail rotor servo. Hold the tail rotor linkage over the linkage ball to avoid damaging the servo.
-
Page 28: Before Flight Checklist
❏ Power on the transmitter and receiver. Allow the gyro to initialize. ❏ The GY520 servo type parameter matches the servo you are using. ❏ The Tail rotor servo arm is perpendicular to the pushrod and the pitch slider is centered. -
Page 29: Adjustments During The Test Flight
DJUSTMENTS URING THE LIGHT WARNING! Always make small (1%) adjustments to the tail rotor D/R or EPA once the value exceeds 100%. Over 100%, it is possible to exceed the sensor’s Angular Velocity Sensing Range (+/- 800° per second). The gyro will then no longer control the pirouette rate or consistency. -
Page 30: Using Normal Mode
GY520 N SING ORMAL Most pilots today are using AVCS Mode. If you are just starting out, it is recommended that you use AVCS Mode exclusively from the start. Normal Mode is rarely used today due to the performance benefi ts of AVCS mode. When using AVCS mode all trimming of the tail is automatically handled by the gyro. -
Page 31: Setting The Gain
ETTING THE Most modern computer transmitters will have a gyro function built into them. If this is the case, please refer to your transmitter’s instruction manual. Most modern gyro functions will allow you to set the mode of operation and the gains for several fl ight conditions. The use of these functions is strongly encouraged. - Page 32 Entire Contents Copyright © 2009 Y520 Mnl.indd 32 Y520 Mnl.indd 32 4/7/2009 7:55:08 AM 4/7/2009 7:55:08 AM...
Need help?
Do you have a question about the GY520 and is the answer not in the manual?
Questions and answers