Advertisement
Quick Links
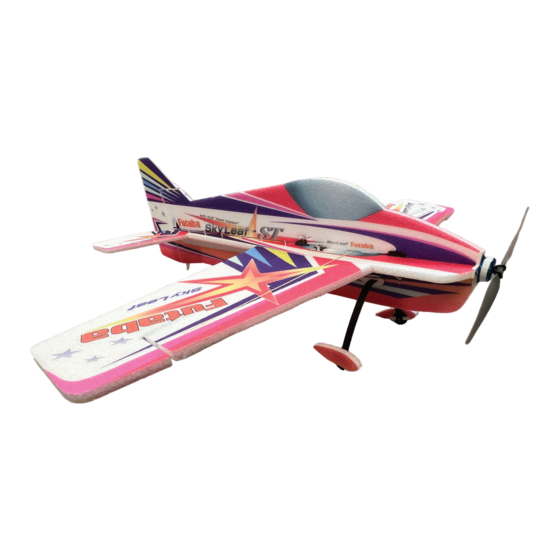
Advertisement

Related Manuals for FUTABA SkyLeaf-ST


Summary of Contents for FUTABA SkyLeaf-ST
- Page 1 INSTRUCTION MANUAL...
- Page 2 Skyleaf ST Manual Locate all of your hinged surfaces. Place them in a folded position with the seam facing the inside of the fold and place weights on top of them for 30-60 min. Major components laid out flat on table This will free up the hinge and allow the surface to move freely.
- Page 3 Skyleaf ST Manual Join the wing and the horizontal fuse and allow to dry. Take medium CA and put a consistent bead along the rear mating portion of the right wing Now apply another bead on the front mating portion of the same wing Spray the front horizontal fuse with accelerator Page 2 of 21...
- Page 4 Skyleaf ST Manual Locate your balsa wing spar, also locate the pre-cut slot for the wing spar Place the front portion of the wing together with the front portion of the horizontal fuse and allow to dry. Now you have completed one side of the wing attachment.
- Page 5 Skyleaf ST Manual Test fit the wood spar in the wing slot Ensure that the spar fits completely down in the slot and the wing stays flush with the table Use thin CA to glue the spar into place on the On the top side of the wing use medium CA to fill in bottom of the airplane.
- Page 6 Skyleaf ST Manual Now locate the horizontal tail section. You will notice Take your accelerator and spray it on the horizontal stabilizer. like the wing it has a dome on one side that corresponds with an indention on the horizontal fuse to ensure proper alignment.
- Page 7 Skyleaf ST Manual Next we will mount your Futaba PS-10 Servo for Once you have the servo arm centered you can power elevator. Before we glue this in place please take the down the servo and rotate the arm out of the way like longest single sided arm and power the servo up and you see above.
- Page 8 Skyleaf ST Manual Slide servo completely in slot and glue in with medium CA. Make sure the servo lead is routed back Now find your aileron servo, and test fit in the correct slot, towards the bottom of the plane which in the photo as shown below above is the visible side.
- Page 9 Skyleaf ST Manual Join the two pieces together ensuring the nose is square. Take your medium CA and liberally apply a bead all the way down the horizontal fuse piece. Next we will setup the ailerons. First we want to Now the the bottom fuse is attached lets grab one of locate the aileron differential arm along with he two our 45 stiffeners.
- Page 10 Skyleaf ST Manual Test fit the horns in their slots. If needed you can trim the foam to open up the slots some. Press the horn into the slot and you can apply accelerator. You will repeat this step on both ailerons. Next apply medium CA to the horn In the package with your aileron servo locate the long double sided arm.
- Page 11 Skyleaf ST Manual The ball link ends have a small groove molded into them. This is the side you will glue to the pushrod. Using medium CA is easier on this step but thin also works well. *be sure to sand the rod ends so that there is a rough surface for the CA to bond to.
- Page 12 Skyleaf ST Manual Once you have one pushrod connected to the control horn, power up your aileron servo and center it. Then attach your servo arm and differential arm to the servo.Ensure the the differential arm is angled forward towards the nose of the aircraft.
- Page 13 Skyleaf ST Manual Put a bead of medium CA all the way down your top fuse as you begin prepping it to join to the assembled fuse. Once glued into place power up the servo and make sure that it is centered and mount the bigger single side arm.
- Page 14 Skyleaf ST Manual Locate the rudder piece. Attach to the fuse while making sure your servo leads come forward out of the front exit of the stiffener. Spray the vertical fin area on the aircraft with accelerator. Use medium CA to put a bead of glue down the hinged portion of the rudder Next locate your rudder and elevator control horns, two ball link ends, two micro ez link connectors and...
- Page 15 Skyleaf ST Manual Next apply medium CA to the horn. Test fit the horns in their slots. If needed you can use a hobby knife to open up the slots some. *Press the horn into the slot and you can apply accelerator.
- Page 16 Skyleaf ST Manual Attach a micro ez link connector to both rudder and elevator servos The ball link ends have a small groove molded into them. This is the side you will glue to the pushrod. Next up locate both your rudder and elevator Using medium CA is easier on this step but thin can pushrod.
- Page 17 Skyleaf ST Manual For the rudder press the ball link in from the top side of the control For the elevator press the ball link into the control horn horn coming from the fuse going towards the tip of the tail. Align the 6 pushrod guides for the rudder &...
- Page 18 Skyleaf ST Manual Use Medium CA to glue all the pushrod guides into their slots. With the servo powered verified you have the control surface centered and tighten the set screw. With the servo powered on and centered make sure that both elevator and rudder are flush with their surfaces and tighten the center screw.
- Page 19 Skyleaf ST Manual Now locate the PSC15 Esc and the PSM2305 motor Press fit the the motor mount on to the front of the along with your motor mounting screws. fuse and allow it to set while making sure that the mount has no up or down thrust as well as no left or right thrust.
- Page 20 Skyleaf ST Manual Connect your receiver of choice, set throws (page 20) clean up your wiring and you are ready to fly. Page 19 of 21...
-
Page 21: Required To Complete
Required to complete: -CA Medium -CA Thin -Zap Goo (optional replacement for CA) -4ch radio (min) -4ch receiver (R3004SB,R3104SB, R2106GF) -2S-3S Lipo 250mah-400mah (XT30 connector if using PSC-15) -Phillips screwdriver/Flathead Screwdriver -Heat gun -Hobby blade/xacto -1/32 drill bit (optional) Dual rate/Expo Aileron Elevator Rudder...
Need help?
Do you have a question about the SkyLeaf-ST and is the answer not in the manual?
Questions and answers