Table of Contents
Advertisement
Available languages
Available languages
MVD4544
User's Guide
Guía del usuario
Reproductor de discos
DVD/CD/VCD/MP3/IMÁGENES y
Videograbadora
DVD/CD/VCD/MP3/PHOTO CD Player
and Video Cassette Recorder
Before operating this product, please read these instructions completely.
Antes de operar este producto, lea este instructivo en su totalidad.
Advertisement
Chapters
Table of Contents
Troubleshooting

Related Manuals for Memorex MVD4544 - DVD/VCR


Summary of Contents for Memorex MVD4544 - DVD/VCR
- Page 1 MVD4544 User’s Guide Guía del usuario Reproductor de discos DVD/CD/VCD/MP3/IMÁGENES y Videograbadora DVD/CD/VCD/MP3/PHOTO CD Player and Video Cassette Recorder Before operating this product, please read these instructions completely. Antes de operar este producto, lea este instructivo en su totalidad.
-
Page 2: Table Of Contents
CONTENTS Contents..............1 • Tracking .............32 Important Safety Instructions ........2 • Recording from the External A/V Input....33 Precautions..............5 • To Stop Recording Temporarily ......34 Power Source ............6 To Stop Recording ..........34 Location of Controls..........6 • One-Touch Recording (OTR)......34 • Display ..............6 •... -
Page 3: Important Safety Instructions
IMPORTANT SAFETY INSTRUCTIONS The lightning flash with arrowhead symbol CAUTION within an equilateral triangle is intended to alert the user to the presence of uninsulated RISK OF ELECTRIC SHOCK dangerous voltage within the product’s DO NOT OPEN enclosure that may be of sufficient magnitude to constitute a risk of electric shock to persons. - Page 4 PLEASE KEEP ALL PACKAGING MATERIAL FOR AT LEAST 90 DAYS IN CASE YOU NEED TO RETURN THIS PRODUCT TO YOUR PLACE OF PURCHASE OR TO MEMOREX. Before using the unit, be sure to read all operating instructions carefully. Please note that these are general precautions and may not pertain to your unit.
- Page 5 IMPORTANT SAFETY INSTRUCTIONS (CONTINUED) 15. OVERLOADING Do not overload wall outlets and extension cords as this can result in a risk of fire or electric shock. 16. OBJECT AND LIQUID ENTRY Never push objects of any kind into this product through openings as they may touch dangerous voltage points or short out parts that could result in fire or electric shock.
-
Page 6: Precautions
PRECAUTIONS NOTES ON HANDLING: TO OBTAIN A CLEAR PICTURE: DVD: The DVD player is a high technology, precision • When shipping the player, always use the original device. If the optical pick-up lens and disc drive parts are shipping carton and packing materials. For maximum dirty or worn down, the picture quality becomes poor. -
Page 7: Power Source
POWER SOURCE Insert the AC plug (with the 2 blades) into a conveniently located AC outlet having 120V, 60Hz. NOTE: The AC plug supplied with the unit is polarized to help minimize the possibility of electric shock. If the AC plug does not fit into a nonpolarized AC outlet, do not file or cut the wide blade. -
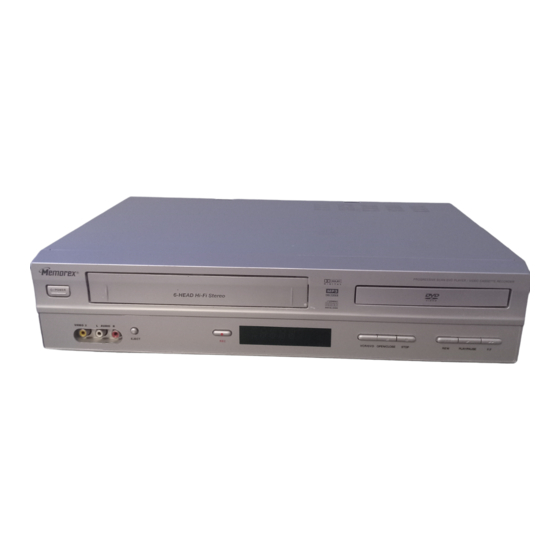
Page 8: Front
LOCATION OF CONTROLS (CONTINUED) FRONT 1. POWER (STANDBY/ON) Button 8. Disc Tray Open/Close Button 2. Cassette Compartment 9. VCR/DVD Button 3. Disc Tray 10. Remote Sensor 11. Display 4. Disc Skip Up n/Tape Fast Forward Button 12. RECORD Button 5. PLAY/PAUSE (® ® p p ) Button 13. -
Page 9: Remote
LOCATION OF CONTROLS (CONTINUED) REMOTE 1. TVG (TV Guardian ) Button ® 2. POWER Button 3. TITLE Button 4. SUBTITLE Button 5. ZOOM Button 6. STEP Button 7. REC Button (VCR) 8. PLAY/PAUSE (® ® P P ) Button 9. VCR Button 10. -
Page 10: Remote Control
REMOTE CONTROL BATTERY INSTALLATION 1. Open the Battery Compartment cover by pushing in on the tab and lifting it out. 2. Install two (2) “AA” batteries (not included), paying attention to the polarity diagram in the Battery Compartment. 3. Replace the Battery Compartment cover. –... -
Page 11: Connection To Output Dvd
CONNECTION TO OUTPUT DVD CONNECTING THE UNIT TO A TV USING THE AUDIO/VIDEO OUTPUT JACKS (FOR DVD AND VCR) CONNECTING THE UNIT TO A TV USING THE S-VIDEO OUTPUT JACK (FOR DVD ONLY) If your TV has separate AUDIO IN jacks for Composite Video and S- Video Inputs, connect to these jacks. -
Page 12: Connecting The Unit To A Tv Using The Y, Pb/Cb, Pr/Cr Jacks
CONNECTION TO OUTPUT DVD (CONTINUED) CONNECTING THE UNIT TO A TV USING THE Y, Pb/Cb, Pr/Cr JACKS If your TV has separate AUDIO IN jacks for Composite Video and Y, Pb/Cb, Pr/Cr Inputs, connect to these jacks. If your TV has one set of AUDIO IN jacks for Composite Video and Y, Pb/Cb, Pr/Cr Inputs, connect to these jacks. -
Page 13: Connecting The Unit To A Home Theater System
CONNECTION TO OUTPUT DVD (CONTINUED) CONNECTING THE UNIT TO A HOME THEATER SYSTEM Place the subwoofer, front, rear and center speakers in locations as shown/described here. After correctly positioning the speakers, perform the Tone Test on the AV Amplifier and adjust the volume controls until the desired sound is achieved. -
Page 14: Connections
CONNECTIONS CONNECTING THE UNIT TO A TV USING THE AUDIO/VIDEO OUTPUT JACKS NOTES: • Set the TV’s TV/VIDEO button or switch to the VIDEO setting when connecting using the A/V jacks. • When connecting, refer to the owner’s manual of the TV, as well as this manual. •... -
Page 15: Connecting An External Unit To This Player (Using The Rear A/V Jacks)
CONNECTIONS (CONTINUED) CONNECTING AN EXTERNAL UNIT TO THIS PLAYER (USING THE REAR A/V JACKS) CONNECTING AN EXTERNAL UNIT TO THIS PLAYER (USING THE FRONT A/V JACKS) NOTES: • When connecting, refer to the owner’s manual of the external unit, as well as this manual. •... -
Page 16: About Discs
ABOUT DISCS The region number for this player is: See the following page for information regarding region numbers. PLAYABLE DISCS: The following discs can be played back on this player: KODAK PICTURE CD When playing an MP3, the selected file will appear in the display and will list the folders/tracks. MP3 is the abbreviation of “MPEG1 Audio Layer 3”. - Page 17 ABOUT DISCS (CONTINUED) Notes on Copyright: It is forbidden by law to copy, broadcast, show, broadcast on cable, play in public and rent copyrighted material without permission. DVD video discs are copy protected, and any recordings made from these discs will be distorted. This product incorporates copyright protection technology that is protected by method claims of certain U.S.
-
Page 18: Dvd Setup Menu
DVD SETUP MENU The SETUP MENU lets you customize the DVD section by allowing you to select various language preferences, turn captions and screen saver on and off, adjust what type of television screen you have and more. While in the DVD mode (DVD button pressed first), enter the SETUP MENU by pressing the SETUP button 1. -
Page 19: General Setup Menu
DVD SETUP MENU (CONTINUED) GENERAL SETUP MENU: Select General and then select the desired option using the Navigation (√,®,π,†) buttons to navigate through the menus/screens and press the OK button to select. TV DISPLAY TV TYPE NORMAL/PS: Pan Scan. Select when the unit is connected to a NTSC: Select when using a NTSC TV. -
Page 20: Speaker Setup Menu
DVD SETUP MENU (CONTINUED) SPEAKER SETUP MENU: Select Audio and then select the desired option using the Navigation (√,®,π,†) buttons to navigate through the menus/screens and press the OK button to select. DOWNMIX Sets the Audio Output mode. LT/RT: Select to hear the sound in theatrical downmix mode. -
Page 21: Preference Menu
DVD SETUP MENU (CONTINUED) PREFERENCE MENU (this menu cannot be accessed if a disc is inserted): Select Preference and then select the desired option using the Navigation (√,®,π,†) buttons to navigate through the menus/screens and press the OK button to select. AUDIO SUBTITLE Select the language the DVD will be played back in... -
Page 22: Tvguardian Feature
DVD SETUP MENU (CONTINUED) TVG (TV GUARDIAN) ® TVGuardian Feature This product supports TVGuardian Foul Language Filtering Technology, offering your family the very best control of ® objectionable language in your home. ® This product supports TVGuardian Foul Language Filtering Technology, offering your family the very best control of objectionable language in your home. - Page 23 DVD SETUP MENU (CONTINUED) Word Subset Filtering TVGuardian Setup Menu ® In addition to the main TVG modes listed above, you ® can turn certain word subsets on or off according to Modes ® your preferences. Off..............No filtering Damn and Hell ..Filters out variations of “Damn”/“Hell” Tolerant ..Filters only the most offensive foul language Religious .....Filters out references to deities Moderate ..Increased standards for language filtering...
-
Page 24: Vcr Setup Menu
VCR SETUP MENU The SETUP MENU lets you customize the VCR section by allowing you to set various options, such as the clock, language and more. While in the VCR mode (VCR button pressed first) enter the SETUP MENU by pressing the SETUP button 1. -
Page 25: Language
VCR SETUP MENU (CONTINUED) SETTING THE LANGUAGE Enter the VCR mode and the Setup screen as described on Press the Navigation (†) button to select the desired page 23; the Setup menu will appear. Scroll to Language language the On-Screen Display will be in (English, Spanish or French). -
Page 26: Go To Zero Search
VCR SETUP MENU (CONTINUED) SETTING THE GO TO ZERO SEARCH With a prerecorded video cassette tape inserted, enter the Press the Navigation (†) button 1 to select Go To Zero VCR mode and the Setup screen as described on page 23; Search, then press the OK button 2;... -
Page 27: Index Search
VCR SETUP MENU (CONTINUED) INDEX SEARCH + With a prerecorded video cassette tape inserted, enter the Press the Navigation (†) button 1 to select Index Search +, VCR mode and the Setup screen as described on page 23; then press the OK button 2; the unit will then fast forward to the Setup menu will appear. -
Page 28: Index Number Search
VCR SETUP MENU (CONTINUED) INDEX NUMBER SEARCH With a prerecorded video cassette tape inserted, enter the Press the Navigation (†) button 1 to select Index Number VCR mode and the Setup screen as described on page 23; Search, then press the OK button 2; the Index Number the Setup menu will appear. -
Page 29: Vcr Options
VCR SETUP MENU (CONTINUED) SETTING THE VCR OPTIONS Enter the VCR mode and the Setup screen as described on Press the Navigation (†) button 1 to select OSD Display. page 23; the Setup menu will appear. Scroll to OPTION Press the OK button 2 to turn the OSD On or Off. using the Navigation (†) button 1. -
Page 30: Vcr Operation
VCR OPERATION LOADING Push the center of the tape until it is automatically When loading a cassette tape without the erase prevention tab retracted into the VCR. intact, press the PLAY/PAUSE ®P button to begin playback. An inverted video cassette cannot be inserted. AUTOMATIC POWER ON The VCR will turn on automatically. -
Page 31: To Select The External Input
VCR OPERATION (CONTINUED) TO START PLAYBACK If the unit is in DVD mode, press the VCR/DVD button (on the main unit) or VCR Button (on the remote) to change the unit to VCR mode. Press the POWER button to turn on the unit and load a Press the PLAY/PAUSE ®P button to begin playback. -
Page 32: Pause/Step
VCR OPERATION (CONTINUED) TO REWIND THE TAPE RAPIDLY TO FAST FORWARD THE TAPE RAPIDLY Press the Reverse Search √√ (Rewind) button 1 while in Press the Forward Search ®® (Fast Forward) button 1 the Stop mode; ”REW” will appear in the display. Press the while in the Stop mode;... -
Page 33: Display
VCR OPERATION (CONTINUED) DISPLAY If you set the OSD Display to OFF (see page 28, Setting the VCR Option): While in the VCR mode, press the DISPLAY button to view the VCR mode, counter, speed, and Audio Setting/Video Source. After 5 seconds, the display will disappear on the screen. -
Page 34: Recording From The External Av Input
VCR OPERATION (CONTINUED) RECORDING FROM THE EXTERNAL AV INPUT If the unit is in DVD mode, press the VCR/DVD button (on the main unit) or VCR Button (on the remote) to change the unit to VCR mode. Press the POWER button to turn on the unit and load a Press the SP/SLP button to select the desired tape speed. -
Page 35: To Stop Recording Temporarily
VCR OPERATION (CONTINUED) TO STOP RECORDING TEMPORARILY TO STOP RECORDING Press the PLAY/PAUSE ®P button to avoid recording To stop recording, press the STOP X button. unwanted material. Press the PLAY/PAUSE ®P button again to continue recording. The Pause mode will be released after 5 minutes to prevent damage to the tape, the unit will then be in the Stop mode. -
Page 36: Recording From Dvd To A Cassette
VCR OPERATION (CONTINUED) RECORDING FROM A DVD TO A CASSETTE IMPORTANT: Many commercial DVDs have copyright protection that will not enable them to be recorded. In this case, you will not be able to copy it. Press the POWER button to turn on the unit and load a Press the SP/SLP button to select the desired tape speed. -
Page 37: Basic Operation
BASIC OPERATION (GENERAL) IMPORTANT: When “ ” appears while pressing a button, this means that the corresponding function cannot be performed either on the disc inserted, or in the selected mode. AUDIO While playing a disc, you can cycle between the audio modes as follows: DVD Disc: Press the Audio button to cycle through the audio modes. -
Page 38: Dvd Basic Operation
DVD BASIC OPERATION IMPORTANT NOTES: • “ ” will appear on the TV screen during operation if you try to access a function that is not available on the disc. • Some discs may take a few seconds to load. •... -
Page 39: Skip
DVD BASIC OPERATION (CONTINUED) SKIP SEARCH Press the NEXT n button 1 to advance the DVD to the During playback, press either the Forward ®® 1 or Reverse beginning of the next chapter. √√ 2 Search button to move the DVD forward or backward at double (x2) speed to locate a specific section. -
Page 40: Title/Chapter Search
DVD BASIC OPERATION (CONTINUED) TITLE/CHAPTER/TIME SEARCH TITLE/CHAPTER SEARCH Use this feature to directly go to a specific title and/or time. Use this feature to directly go to a specific title and/or chapter. Press the SEARCH button 1 twice. Press the Navigation (√,®) buttons 2 to select the Title (“TT”), then use the Number buttons 3 Press the SEARCH button 1 once. -
Page 41: Dvd Menu
DVD BASIC OPERATION (CONTINUED) DVD MENU TITLE MENU Press the DVD MENU button 1, and the Main Menu of the Press the TITLE button 1, and the Title Menu of the disc will disc will appear. Use the Navigation (√,®,π,†) buttons 2 appear. -
Page 42: Mp3 Basic Operation
MP3 BASIC OPERATION PLAYBACK OF A MP3 DISC Press the POWER button to turn on the unit. While in the DVD mode (DVD button pressed first), press the OPEN/CLOSE button to open the disc tray, “OPEN” will appear on the screen. Insert an MP3 disc with the label side facing up on the disc tray. -
Page 43: Selecting Folders/Tracks Using The Number Buttons
MP3 BASIC OPERATION (CONTINUED) SELECTING FOLDERS/TRACKS USING THE SELECTING FOLDERS/TRACKS USING THE ) OR ( ) BUTTON NUMBER BUTTONS During playback, simply press the NEXT n 1 or During playback, press the Number buttons corresponding to the track numbers to select your desired track, and the PREVIOUS o 2 button to select a track to be played. -
Page 44: Cd/Vcd Basic Operation
CD/VCD BASIC OPERATION PLAYBACK OF A CD/VCD Press the POWER button to turn on the unit. While in the DVD mode (DVD button pressed first), press the OPEN/CLOSE button to open the disc tray, “OPEN” will appear on the screen. Insert a disc with the label side facing up on the disc tray. -
Page 45: Repeat One/All Play
CD/VCD BASIC OPERATION (CONTINUED) REPEAT ONE/ALL PLAY FORWARD®®/REVERSE √√ Each press of the Forward ®® 1 or Reverse √√ 2 To Repeat play a track, simply select the track as described on Search button will increase the search as follows: the previous page, then press the REPEAT button 1 once;... -
Page 46: Pbc (Vcd Only)
CD/VCD BASIC OPERATION (CONTINUED) PBC (VCD ONLY) When playing a VCD with PBC function, you can enjoy simple interactive software on your TV. The PBC Function will activate automatically if the VCD has this function. To turn off the PBC, press the PBC button 1 once. Press the NEXT n button 2 to go to the Track Selection Menu. -
Page 47: Picture Cd Basic Operation
PICTURE CD BASIC OPERATION Press the POWER button to turn on the unit. While in the DVD mode (DVD button pressed first), press the OPEN/CLOSE button to open the disc tray, “OPEN” will appear on the screen. Insert a picture disc with the label side facing up on the disc tray. -
Page 48: Troubleshooting Guide (Dvd)
TROUBLESHOOTING GUIDE (DVD SIDE) Check the following before requesting service: SYMPTOM POSSIBLE CAUSE POSSIBLE SOLUTION GENERAL No power. AC cord unplugged. Plug in the AC cord to an AC outlet. Power on, but unit not functioning Condensation has formed. Unplug the unit and wait about one to properly. -
Page 49: Troubleshooting Guide (Vcr)
TROUBLESHOOTING GUIDE (DVD SIDE) (CONTINUED) SYMPTOM POSSIBLE CAUSE POSSIBLE SOLUTION The unit does not start playback. DVD not inserted, or inserted upside-down. Insert DVD correctly. A non-playback disc is inserted. Make sure to insert a DVD; “DVD VIDEO” will appear in the display. The disc is not placed in the guide. - Page 50 WWW.MEMOREXELECTRONICS.COM OR CONTACT CUSTOMER SERVICE AT (954) 660-7100. PLEASE KEEP ALL PACKAGING MATERIAL FOR AT LEAST 90 DAYS IN CASE YOU NEED TO RETURN THIS PRODUCT TO YOUR PLACE OF PURCHASE OR MEMOREX. FOR CONSUMER REPLACEABLE PART(S), SEE PART NUMBER(S) ON THE LOCATION OF...
-
Page 51: Care And Maintenance
CARE AND MAINTENANCE Caring for Discs • Treat the disc carefully. Handle the disc only by its edges. Never allow your fingers to come in contact with the shiny, unprinted side of the disc. • Do not attach adhesive tape, stickers, etc. to the disc label. •... -
Page 52: Video Head Clogging/Cleaning
VIDEO HEAD CLOGGING/CLEANING VIDEO HEAD CLOGGING The video heads are the means by which the VCR reads pictures from the tape during playback. In the unlikely event that the heads become dirty enough to be clogged, no picture will be played back. This can easily be determined if, during playback of a known good tape, there is good sound, but no picture (picture is extremely snowy). -
Page 53: Specifications
SPECIFICATIONS Power Requirements ........................AC120V, 60Hz Power Consumption............................25W Weight.................................7.75 Lbs Dimensions ......................17 (W) x 10.5 (D) x 4 (H) inches Weight and dimensions are approximate. Signal System ............................NTSC/PAL Operating Temperature .........................41° to 95° F Operating Humidity Range ..................5% to 90% (no condensation) Discs Played: DVD-VIDEO Disc 12cm single-sided, single layer... - Page 54 CONTENIDO Contenido ..............1 Detener/Reproducir ...........31 Importantes medidas de seguridad ......2 • Pausa/Paso ............31 Precauciones............5 • Display ...............32 Fuente de energía ...........6 • Audio..............32 Ubicación de los controles ........6 • Alineación ............32 • Display ..............6 • Grabar desde un aparato de A/V externo..33 •...
-
Page 55: Importantes Medidas De Seguridad
IMPORTANTES MEDIDAS DE SEGURIDAD El símbolo de la flecha con forma de rayo adentro PRECAUCIÓN de un triángulo está hecho para alertar al usuario de la presencia de cables sin aislar de “voltaje RIESGO DE DESCARGA peligroso” en el interior del gabinete, el cual puede ser de magnitud suficiente para constituir un riesgo ELÉCTRICA. - Page 56 CONSERVE EL EMPAQUE AL MENOS 90 DÍAS POR SI ACASO NECESITARA REGRESAR EL PRODUCTO A SU DISTRIBUIDOR O A MEMOREX. Antes de usar este aparato asegúrese de leer bien todos los puntos de este manual de operaciones. Una vez leído, consérvelo a la mano para usarlo como referencia en el futuro.
- Page 57 IMPORTANTES MEDIDAS DE SEGURIDAD La unidad no deberá ser instalada en un mueble empotrado, como una repisa para libros, un estante o donde la presencia de cortinas o mobiliario obstruya las aberturas de ventilación. 17.Conexión a tierra de la antena exterior Si se conecta una antena al receptor, asegúrese de que el sistema de antena tenga una conexión a tierra a fin de proveer cierta protección contra sobrecargas de electricidad y acumulación de estática.
-
Page 58: Precauciones
PRECAUCIONES NOTAS SOBRE EL MANEJO: PARA OBTENER UNA IMAGEN CLARA: DVD: El reproductor de DVD es un aparato de alta • Al enviar el reproductor, use siempre la caja de cartón tecnología y precisión. Si los lentes de captación óptica y y los materiales de empaque originales. -
Page 59: Fuente De Energía
FUENTE DE ENERGÍA Inserte la clavija (de 2 cuchillas) en un contacto eléctrico de 120VCA de 60Hz, ubicado en un lugar conveniente. NOTA: El enchufe de CA incluido con la unidad está polarizado para ayudar a minimizar la posibilidad de una descarga eléctrica. Si el enchufe de CA no entra en el contacto eléctrico no polarizado, no lime ni corte el lado ancho. -
Page 60: Parte Frontal
UBICACIÓN DE LOS CONTROLES PARTE FRONTAL Botón de ENCENDIDO (ESPERA) Botón Abrir/Cerrar bandeja del disco Compartimiento del casete Botón de VCR/DVD Bandeja del disco 10. Sensor del remoto 11. Display Botón de Brincar Disco Arriba /Avanzar cinta 12. Botón de GRABAR Botón de REPRODUCIR/PAUSA (®... -
Page 61: Control Remoto
UBICACIÓN DE LOS CONTROLES CONTROL REMOTO 1. Botón de TVG (TV Guardian®) 2. Botón de ENCENDIDO 3. Botón de TÍTULO 4. Botón de SUBTÍTULO 5. Botón de ZOOM 6. Botón de PASO 7. Botón de GRABAR (VCR) 8. Botón de REPRODUCIR/PAUSA (® ® P P ) 9. -
Page 62: Control Remoto
CONTROL REMOTO INSTALACIÓN DE LAS BATERÍAS 1. Abra el compartimiento de la batería ejerciendo presión sobre la pestaña y levantándola. 2. Introduzca dos (2) baterías “AA” (no incluidas), prestando atención al diagrama de polaridad en el compartimiento de baterías. 3. Coloque nuevamente la tapa del compartimiento de baterías. –... -
Page 63: Conexión Del Reproductor De Dvd
CONEXIÓN DEL REPRODUCTOR DE DVD CONECTAR LA UNIDAD A UN TELEVISOR USANDO LOS CONECTORES DE SALIDA DE AUDIO/VIDEO (PARA DVD Y VCR) Televisor Cables de audio izq. y der. Cable de video compuesto Cable de S-video CONECTAR LA UNIDAD A UN TELEVISOR USANDO LOS CONECTORES DE SALIDA DE S-VIDEO (SÓLO PARA DVD) Si su televisor tiene conectores de entrada de audio separados para las... -
Page 64: Conectar La Unidad A Un Televisor Usando Conectores Y, Pb/Cb, Pr/Cr
CONEXIÓN DEL REPRODUCTOR DE DVD (CONTINÚA) CONECTAR LA UNIDAD A UN TELEVISOR USANDO LOS CONECTORES Y, Pb/Cb, Pr/Cr Si su televisor tiene conectores de entrada de audio separados para las entradas de Video compuesto e Y, Pb/Cb, Pr/Cr, conecte aquí los conectores. -
Page 65: Conectar La Unidad A Un Sistema "Home Theater
CONEXIÓN DEL REPRODUCTOR DE DVD (CONTINÚA) CONECTAR LA UNIDAD A UN SISTEMA “HOME THEATER” Coloque las bocinas de ultragraves, frontales, traseras y centrales en los lugares como se muestra o describe aquí. Después de colocar correctamente las bocinas, ejecute la Prueba Cable de de tono en el Amplificador AV y ajuste los Cable de video... -
Page 66: Conexiones
CONEXIONES CONECTAR LA UNIDAD AL TELEVISOR USANDO LOS CONECTORES DE SALIDA DE AUDIO/VIDEO Cable de salida de AV NOTAS: • Ponga el botón o interruptor de TV/VIDEO del televisor en VIDEO cuando conecte los conectores de A/V. • Cuando conecte la unidad, consulte el manual del propietario del televisor, así como este manual. •... -
Page 67: Conectar Una Unidad Externa A Este Reproductor (Usando Conectores De A/V En La Parte Posterior)
CONEXIONES (CONTINÚA) CONECTAR UNA UNIDAD EXTERNA A ESTE REPRODUCTOR (USANDO LOS CONECTORES DE A/V EN LA PARTE POSTERIOR) Cable de entrada de AV Cable de salida de AV CONECTAR UNA UNIDAD EXTERNA A ESTE REPRODUCTOR (USANDO LOS CONECTORES DE A/V EN LA PARTE FRONTAL) Cable de entrada de AV Cable de salida de AV De los conectores... -
Page 68: Acerca De Los Discos
ACERCA DE LOS DISCOS El número de región para este reproductor es: Vea la siguiente página para obtener Información sobre el número de región. DISCOS REPRODUCIBLES: Los siguientes discos pueden reproducirse en este reproductor: CD DE IMÁGENES KODAK Cuando se reproduce un disco MP3, el archivo seleccionado aparecerá en el display y enumerará las carpetas y pistas. MP3 es la abreviatura para “MPEG1 Audio Layer 3”. - Page 69 ACERCA DE LOS DISCOS (CONTINÚA) Notas sobre los derechos de propiedad literaria: Queda prohibido por ley copiar, transmitir, mostrar, transmitir por cable, reproducir en público y rentar sin premiso los materiales con derechos de propiedad literaria. Los discos DVD están protegidos por esta ley y cualquier grabación que se haga de estos discos se distorsionará.
-
Page 70: Menú De Configuración De Dvd
MENÚ DE CONFIGURACIÓN DEL DVD El menú de configuración le permite personalizar la sección del DVD, permitiéndole seleccionar varias preferencias de idioma, activar y desactivar los subtítulos y el protector de pantalla, ajustar el tipo de pantalla del televisor que tiene y otras cosas. -
Page 71: Menú De Configuración General
MENÚ DE CONFIGURACIÓN DEL DVD (CONTINÚA) MENÚ DE CONFIGURACIÓN GENERAL: Seleccione General y luego seleccione la opción deseada usando los botones de Navegación (√,®,π,†) para o navegar por los menús o pantallas y presione el botón de ACEPTAR para seleccionar la opción. DISPLAY DEL TELEVISOR TIPO DE TELEVISOR NORMAL/PS: Pan Scan. -
Page 72: Menú De Configuración De Bocinas
MENÚ DE CONFIGURACIÓN DEL DVD (CONTINÚA) MENÚ DE CONFIGURACIÓN DE BOCINA: Seleccione Audio y luego seleccione la opción deseada usando los botones de Navegación (√,®,π,†) para o navegar por los menús o pantallas y presione el botón de ACEPTAR para seleccionar la opción. DOWNMIX Establece el modo de Salida de audio. -
Page 73: Menú De Preferencias
MENÚ DE CONFIGURACIÓN DEL DVD (CONTINÚA) MENÚ DE PREFERENCIAS (este menú no se puede acceder si no introdujo antes un disco): Seleccione Preference [preferencia] y luego seleccione la opción deseada usando los botones de Navegación (√,®,π,†) para o navegar por los menús o pantallas y presione el botón de ACEPTAR para seleccionar la opción. AUDIO SUBTÍTULO Seleccione el idioma en que se escuchará... -
Page 74: Función De Tv Guardian
MENÚ DE CONFIGURACIÓN DEL DVD (CONTINÚA) TVG (TV GUARDIAN) ® TVGuardian Feature Este producto cuenta con la Tecnología de filtrado de lenguaje obsceno TVGuardian®, que le brinda a su familia la mejor manera de controlar el lenguaje ofensivo en su hogar. ®... - Page 75 MENÚ DE CONFIGURACIÓN DEL DVD (CONTINÚA) Menú de configuración de TVGuardian® Filtrado de subgrupo de palabras Además de los modos principales de TVG® indicados Modos de TVG® anteriormente, usted puede activar o desactivar ciertos Desactivado....No hay filtrado subgrupos de palabras según sus preferencias. ToleranteSólo filtra el lenguaje obsceno más insultante.
-
Page 76: Menú De Configuración De Videograbadora
MENÚ DE CONFIGURACIÓN DE LA VIDEOGRABADORA El menú de configuración le permite personalizar la sección de la videograbadora permitiéndole configurar diversas opciones, como son el reloj, el idioma y otros. Mientras está en modo de VCR (presione primero el botón de VCR), entre al menú de configuración presionando el botón de CONFIGURACIÓN 1. -
Page 77: Idioma
MENÚ DE CONFIGURACIÓN DEL VCR (CONTINÚA) CONFIGURAR EL IDIOMA Entre al modo de VCR y a la pantalla de configuración Presione el botón de Navegación (†) para seleccionar el como se describe en la página 23; el menú de idioma deseado en que estará la Presentación en pantalla configuración aparecerá. -
Page 78: Búsqueda "Ir A Cero
MENÚ DE CONFIGURACIÓN DEL VCR (CONTINÚA) CONFIGURAR LA BÚSQUEDA “IR A CERO” Con un videocasete previamente grabado en el interior, Presione el botón de Navegación (†) 1 para seleccionar entre al modo de VCR y a la pantalla de configuración Go To Zero Search [búsqueda “ir a cero”], luego presione el como se describe en la página 23;... -
Page 79: Búsqueda Con Índice
MENÚ DE CONFIGURACIÓN DEL VCR (CONTINÚA) BÚSQUEDA CON ÍNDICE + Con un videocasete previamente grabado en el interior, Presione el botón de Navegación (†) 1 para seleccionar entre al modo de VCR y a la pantalla de configuración Index Search + [búsqueda con índice +], luego presione el como se describe en la página 23;... -
Page 80: Búsqueda Con Número De Índice
MENÚ DE CONFIGURACIÓN DEL VCR (CONTINÚA) BÚSQUEDA CON NÚMERO DE ÍNDICE Con un videocasete previamente grabado en el interior, Presione el botón de Navegación (†) 1 para seleccionar entre al modo de VCR y a la pantalla de configuración Index Number Search [búsqueda con número de índice], como se describe en la página 23;... - Page 81 MENÚ DE CONFIGURACIÓN DEL VCR (CONTINÚA) CONFIGURAR LAS OPCIONES DE LA VIDEOGRABADORA Entre al modo de VCR y a la pantalla de configuración Presione el botón de Navegación (†) 1 para seleccionar como se describe en la página 23; el menú de OSD Display [visualización en pantalla].
-
Page 82: Operación De La Videograbadora
OPERACIÓN DE LA VIDEOGRABADORA INTRODUCIR UN VIDEOCASETE Empuje la parte intermedia de la cinta hasta que la Cuando introduzca un videocasete con la pestaña de videograbadora la tome automáticamente. prevención de borrado intacta, presione el botón de REPRODUCIR/PAUSA ®P para empezar la reproducción. ENCENDIDO AUTOMÁTICO No puede introducir el videocasete de modo invertido. -
Page 83: Iniciar Y Detener La Reproducción
OPERACIÓN DE LA VIDEOGRABADORA (CONTINÚA) PARA INICIAR LA REPRODUCCIÓN Si la unidad está en modo de DVD, presione el botón de VCR/DVD (en la unidad principal) o el botón de VCR (en el control remoto) para cambiar la unidad al modo de VCR. Presione el botón de ENCENDIDO para encender la Presione el botón de REPRODUCIR/PAUSA ®P para unidad e introduzca una cita previamente grabada. -
Page 84: Pausa/Paso
OPERACIÓN DE LA VIDEOGRABADORA (CONTINÚA) PARA REBOBINAR LA CINTA RÁPIDAMENTE PARA ADELANTAR LA CINTA RÁPIDAMENTE Presione el botón de Búsqueda Atrás √√ (rebobinar) 1 Presione el botón de Búsqueda Adelante√√ (avanzar) 1 mientras está en modo de Paro; ”REW” aparecerá en el mientras está... -
Page 85: Display
OPERACIÓN DE LA VIDEOGRABADORA (CONTINÚA) DISPLAY Si desactiva la visualización en pantalla (vea la página 28, Configurar la opción de la videograbadora): Mientras está en modo de VCR, presione el botón de DISPLAY para ver el modo de VCR, el contador, la velocidad y la Configuración de audio/Fuente de video. - Page 86 OPERACIÓN DE LA VIDEOGRABADORA (CONTINÚA) GRABAR DESDE UNA ENTRADA DE AV EXTERNA Si la unidad está en modo de DVD, presione el botón de VCR/DVD (en la unidad principal) o el botón de VCR (en el control remoto) para cambiar la unidad al modo de VCR. Presione el botón de ENCENDIDO para encender la Presione el botón de SP/SLP para seleccionar la velocidad unidad e introduzca una cita con la pestaña de prevención...
-
Page 87: Para Detener La Grabación Temporalmente
OPERACIÓN DE LA VIDEOGRABADORA (CONTINÚA) PARA DETENER LA GRABACIÓN TEMPORALMENTE PARA DETENER LA GRABACIÓN Presione el botón de REPRODUCIR/PAUSA ®P para evitar grabar algún material no deseado. Presione nuevamente el botón Para detener la grabación, presione el botón de de REPRODUCIR/PAUSA ®P para continuar con la grabación. DETENER X. - Page 88 OPERACIÓN DE LA VIDEOGRABADORA (CONTINÚA) GRABAR DESDE UN DVD A UN CASETE IMPORTANTE: Muchos DVD comerciales tienen protección de copyright que les impide ser grabados. En este caso, no podrá copiarlo. Presione el botón de ENCENDIDO para encender la Presione el botón de SP/SLP para seleccionar la velocidad unidad e introduzca una cita con la pestaña de prevención deseada de la cinta.
-
Page 89: Operación Básica
OPERACIÓN BÁSICA (GENERAL) IMPORTANTE: Cuando aparece “ ” mientras presiona un botón, eso significa que la función correspondiente no puede ser ejecutada ya sea en el disco insertado o en el modo seleccionado. AUDIO Mientras se reproduce un disco, usted puede alternar entre los modos de audio del siguiente modo: Disco DVD: Presione el botón de AUDIO para alternar entre los modos de audio. -
Page 90: Operación Básica Del Dvd
OPERACIÓN BÁSICA DEL DVD NOTAS IMPORTANTES: • Durante la operación, aparecerá “ ” en la pantalla si intenta acceder una función que no está disponible en el disco. • Algunos discos pueden tardarse unos segundos en cargar. • Si introdujo incorrectamente el disco, si el disco está sucio o dañado o si no hay un disco, “NO DISC” [no hay disco] aparecerá... -
Page 91: Brincar
OPERACIÓN BÁSICA DEL DVD (CONTINÚA) BRINCAR BUSCAR Durante la reproducción, presione el botón de Búsqueda Presione el botón de SIGUIENTE n 1 para avanzar el DVD al inicio del próximo capítulo. Adelante ®® 1 o Atrás √√ 2 para mover el DVD hacia adelante o atrás al doble (x2) de velocidad para encontrar una sección específica. -
Page 92: Búsqueda De Título/Capítulo
OPERACIÓN BÁSICA DEL DVD (CONTINÚA) BÚSQUEDA DE TÍTULO/CAPÍTULO/HORA BÚSQUEDA DE TÍTULO/CAPÍTULO Use esta función para ir directo a un título o capítulo específico. Use esta función para ir directo a un título u hora específica. Presione dos veces el botón de BUSCAR 1. Para seleccionar el Título (“TT”), presione los botones de Navegación (√,®) 2 seguido de los Presione una vez el botón de BUSCAR 1 . -
Page 93: Menú Del Dvd
OPERACIÓN BÁSICA DEL DVD (CONTINÚA) MENÚ DE DVD MENÚ DE TÍTULOS Presione el botón MENÚ DEL DVD 1 y aparecerá el menú Presione el botón de TÍTULO 1 y aparecerá el menú de principal del disco. Use los botones de Navegación Títulos del disco. -
Page 94: Operación Básica De Un Disco Mp3
OPERACIÓN BÁSICA DE UN DISCO MP3 REPRODUCCIÓN DE UN DISCO MP3 Presione el botón de ENCENDIDO para encender la Mientras está en modo de DVD (presione primero el botón de DVD), presione el botón de ABRIR/CERRAR para abrir unidad. la bandeja del disco, “OPEN” [abierto] aparecerá en la pantalla. -
Page 95: Seleccionar Carpetas O Pistas Usando Los Botones De Números
OPERACIÓN BÁSICA DE UN DISCO MP3 (CONTINÚA) SELECCIONAR CARPETAS O PISTAS SELECCIONAR CARPETAS O PISTAS USANDO LOS BOTONES DE NÚMEROS USANDO EL BOTÓN DE ( ) O (O) Durante la reproducción, simplemente presione el botón de Durante la reproducción, presione los botones de Número que correspondan con los números de pista para seleccionar la SIGUIENTE n 1 o ANTERIOR ooo 2 para seleccionar la pista deseada, y la unidad reproducirá... -
Page 96: Operación Básica De Un Disco Cd/Vcd
OPERACIÓN BÁSICA DE UN DISCO CD/VCD REPRODUCCIÓN DE UN DISCO CD O VCD Presione el botón de ENCENDIDO para encender la Mientras está en modo de DVD (presione primero el botón unidad. de DVD), presione el botón de ABRIR/CERRAR para abrir la bandeja del disco, “OPEN”... -
Page 97: Reproducción Repetida De A-B (Sólo Vcd)
OPERACIÓN BÁSICA DE UN DISCO CD/VCD (CONTINÚA) REPETIR UNA/TODAS ADELANTE®®/ATRÁS √√ Cada vez que presione el botón de Búsqueda Adelante ®® Para reproducir una pista repetidamente, simplemente seleccione la pista como se describió en la página anterior, luego presione 1 o Atrás √√ 2 se incrementará la búsqueda del siguiente modo: una vez el botón de REPETIR 1;... -
Page 98: Pbc (Sólo Vcd)
OPERACIÓN BÁSICA DE UN DISCO CD/VCD (CONTINÚA) PBC (SÓLO VCD) Cuando se reproduce un disco VCD con la función PBC, usted puede disfrutar de un software interactivo sencillo en su televisor. La función PBC se activará automáticamente si el VCD cuenta con esta función. -
Page 99: Operación Básica De Disco Con Imágenes
OPERACIÓN BÁSICA DEL DISCO CON IMÁGENES Presione el botón de ENCENDIDO para encender la Mientras está en modo de DVD (presione primero el botón unidad. de DVD), presione el botón de ABRIR/CERRAR para abrir la bandeja del disco, “OPEN” [abierto] aparecerá en la pantalla. -
Page 100: Guía De Diagnóstico (Dvd)
GUÍA DE DIAGNÓSTICO (DVD) Verifique primero los siguientes puntos antes de pedir ayuda a servicio: SÍNTOMA CAUSA POSIBLE SOLUCIÓN POSIBLE GENERAL No hay energía. Cable eléctrico desconectado. Conecte el cable al contacto eléctrico. Unidad encendida, pero unidad no Se formó condensación. Desconecte la unidad y espere 1 ó... - Page 101 GUÍA DE DIAGNÓSTICO (DVD) (CONTINÚA) SÍNTOMA CAUSA POSIBLE SOLUCIÓN POSIBLE La unidad no inicia la No hay DVD o fue introducido al revés. Introduzca el DVD correctamente. reproducción. Se introdujo un disco no reproducible. Asegúrese de introducir un DVD; “DVD VIDEO”...
-
Page 102: Guía De Diagnóstico (Vcr)
(954) 660-7100 CONSERVE EL EMPAQUE AL MENOS DURANTE 90 DÍAS POR SI ACASO NECESITARA REGRESAR EL PRODUCTO A SU DISTRIBUIDOR O A MEMOREX. CONSULTE EL NÚMERO DE PIEZAS REMPLAZABLES EN LA PÁGINAS 7-8 Y LUEGO COMUNÍQUESE CON FOX INTERNATIONAL AL 1-800-321-6993. -
Page 103: Cuidado Y Mantenimiento
CUIDADO Y MANTENIMIENTO Cuidado de los discos • Trate el disco con cuidado. Maneje el disco sólo por sus orillas. Nunca permita que sus dedos toquen el lado brilloso y sin impresión del disco. • No pegue cinta adhesiva, calcomanías u otra cosa en la etiqueta del disco. •... -
Page 104: Obstrucción Y Limpieza De La Cabeza De Video
OBSTRUCCIÓN Y LIMPIEZA DE LA CABEZA DE VIDEO OBSTRUCCIÓN DE LA CABEZA DE VIDEO Las cabezas de video son el medio que usa la videograbadora para leer las imágenes en la cinta durante la reproducción. En el caso improbable de que las cabezas se ensucien lo suficiente como para obstruirse, la imagen no se reproducirá. Eso se puede determinar fácilmente si, durante la reproducción de una cinta que sabe está... -
Page 105: Especificaciones
ESPECIFICACIONES Requisitos de energía........................120VCA, 60Hz Consumo de energía ............................25W Peso ................................7.75 libras Dimensiones ..................17 (ancho) x 10.5 (largo) x 4 (alto) pulgadas El peso y las dimensiones son aproximados. Sistema de señal.............................NTSC/PAL Temperatura de operación......................Entre 41° y 95° F Rango de humedad de operación ..............Entre 5% y 90% (sin condensación) Discos que se reproducen: Disco de video DVD 12cm lado sencillo, capa sencilla... - Page 106 Memcorp, Inc. Weston, FL Printed in / Impreso en Hong Kong Visit our website at / Visite nuestro sitio web en www.memorexelectronics.com 152-06690-0320...
Need help?
Do you have a question about the MVD4544 - DVD/VCR and is the answer not in the manual?
Questions and answers