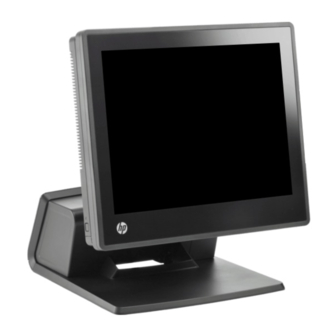
HP RP7 Getting Started Manual
Retail systems
Hide thumbs
Also See for RP7:
- Maintenance and service manual (174 pages) ,
- Hardware reference manual (77 pages) ,
- Illustrated parts and service map (3 pages)
Table of Contents
Advertisement
Quick Links
Advertisement
Table of Contents

Summary of Contents for HP RP7
-
Page 1: Getting Started
Getting Started HP Retail Systems... - Page 2 No part of this document may be photocopied, reproduced, or translated to another language without the prior written consent of Hewlett-Packard Company. Getting Started HP RP7 Retail Systems First Edition (May 2012) Document Part Number: 697963-001...
- Page 3 About This Book WARNING! Text set off in this manner indicates that failure to follow directions could result in bodily harm or loss of life. CAUTION: Text set off in this manner indicates that failure to follow directions could result in damage to equipment or loss of information.
- Page 4 About This Book...
-
Page 5: Table Of Contents
Table of contents Getting Started ..............................1 Installing and Customizing the Software ....................1 Installing the Windows Operating System ................1 Downloading Microsoft Windows Updates ................1 Installing or Upgrading Device Drivers (Windows systems) ..........1 Customizing the Monitor Display (Windows systems) ............2 Accessing Disk Image (ISO) Files .................. -
Page 7: Getting Started
Getting Started Installing and Customizing the Software If your computer was not shipped with a Microsoft operating system, some portions of this documentation do not apply. Additional information is available in online help after you install the operating system. CAUTION: Do not add optional hardware or third-party devices to the computer until the operating system is successfully installed. -
Page 8: Customizing The Monitor Display (Windows Systems)
If prompted for the i386 directory, replace the path specification with C:\i386, or use the Browse button in the dialog box to locate the i386 folder. This action points the operating system to the appropriate drivers. Obtain the latest support software, including support software for the operating system from http://www.hp.com/support. -
Page 9: Accessing Vision Diagnostics (Windows Systems)
NOTE: Third party devices may not be detected by Vision Diagnostics. Accessing Vision Diagnostics (Windows systems) To access Vision Diagnostics, you must copy the utility onto a USB flash drive then boot to the USB flash drive. It can also be downloaded from http://www.hp.com. See Downloading the Latest Version of Vision Diagnostics on page 3 for more information. -
Page 10: Turning Off The Computer
Turning Off the Computer To properly turn off the computer, first shut down the operating system software. In Windows 7, POSReady 7, and Windows XP Professional, click Start > Shut Down. Depending on the operating system, pressing the power button may cause the computer to enter a low-power or “standby”... - Page 11 If you are having problems with the computer, try the appropriate solutions below to try to isolate the exact problem before calling for technical support. ● Run the diagnostics utility. Refer to Vision Diagnostics (Windows systems) on page 2 for more information.
-
Page 12: Helpful Hints
NOTE: For sales information and warranty upgrades (HP Care Pack), call your local authorized service provider or dealer. Helpful Hints If you encounter problems with the computer, monitor, or software, see the following list of general suggestions before taking further action: ●... -
Page 13: Restore And Recovery
Restore and Recovery Microsoft System Restore If you have a problem that might be due to software that was installed on your computer, use System Restore to return the computer to a previous restore point. You can also set restore points manually. NOTE: Always use this System Restore procedure before you use the System Recovery program. -
Page 14: System Recovery Options
System Recovery Options You should attempt a System Recovery in the following order: Through the hard disk drive, from the Windows 7 or POSReady 7 Start menu. Through the hard disk drive, by pressing the key on the keyboard during system startup. Through recovery media that you create. -
Page 15: System Recovery From Recovery Media
Press the Power button to turn on the computer. As soon as you see the initial company logo screen appear, repeatedly press the key on your keyboard until the Windows is Loading Files… message appears on the screen. Under I need help immediately, click System Recovery. If you are prompted to back up your files, and you have not done so, select Back up your files first (recommended), and then click Next. -
Page 16: Recovery Media
Recovery Media You should create a set of recovery discs or a recovery USB flash drive from the recovery image stored on your hard disk drive. This image contains the operating system and software program files that were originally installed on your computer at the factory. You can create only one set of recovery discs, or one recovery USB flash drive, for your computer. -
Page 17: Using, Updating, And Maintaining Your Pc (Windows 7 And Posready 7 Systems)
Select the USB flash drive from the list of media. The program will let you know how much storage is required to create the recovery drive. If the USB flash drive does not have enough storage capacity (8 GB is the minimum), it will be grayed out on the screen. Click Next. NOTE: Recovery Media Creation formats the flash drive and deletes all files on it.


Need help?
Do you have a question about the RP7 and is the answer not in the manual?
Questions and answers