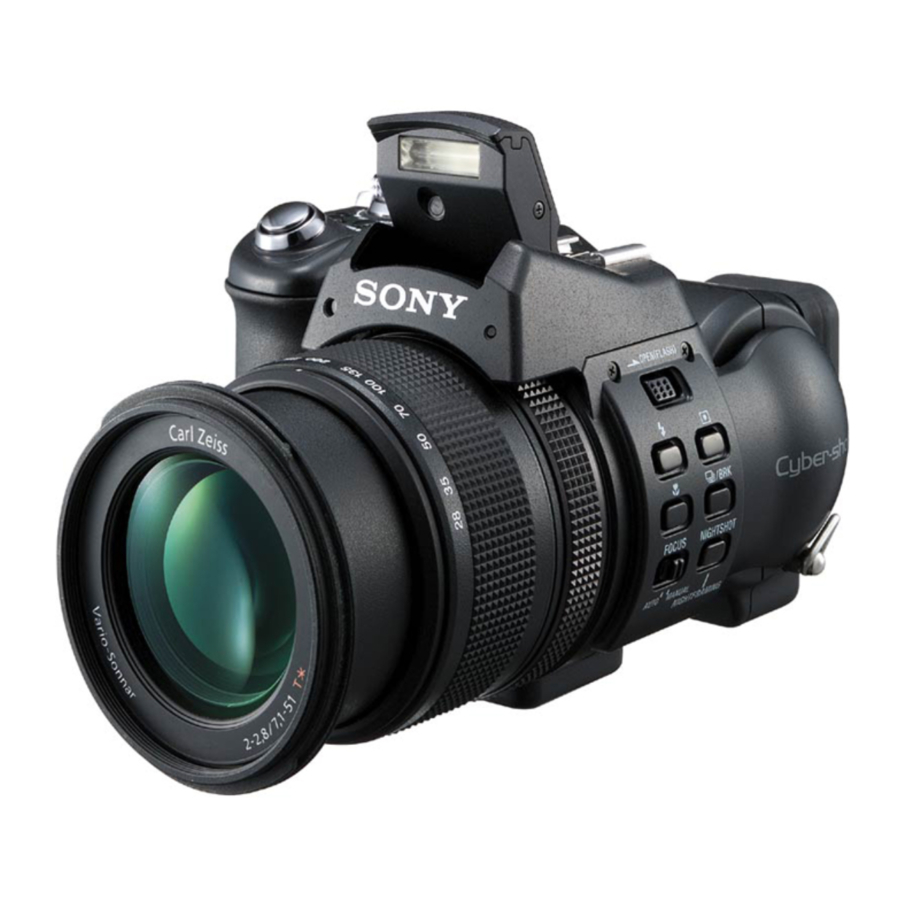
Sony DSC-F828 Manual
- Service manual (287 pages) ,
- Operating instructions manual (160 pages) ,
- Adjustment (85 pages)
Advertisement
ADJUSTMENTS
- Before starting adjustment
EVR Data Re-writing Procedure When Replacing Board
The data that is stored in the repair board, is not necessarily correct. Perform either procedure 1 or procedure 2 or procedure 3 when replacing board.
Procedure 1
Save the EVR data of the machine in which a board is going to be replaced. Download the saved data after a board is replaced.

Procedure 2
Remove the flash memory from the board of the machine that is going to be repaired. Install the removed flash memory to the replaced board.

Procedure 3
When the data cannot be saved due to defective flash memory, or when the flash memory cannot be removed or installed, save the data from the same model of the same destination, and download it.

After the EVR data is saved and downloaded, check the respective items of the EVR data.
Adjusting items when replacing main parts and boards
When replacing main parts and boards, adjust the items indicated by  in the following table.
 Note 1: The automatic Adjustment Program does not support the "Initialization of data". Perform it manually.
Note 2: Use the DSC-F828 C1 MATRIX ADJ (F828C1MATRIX.exe) when performing "Color Shade Check", "Linear Matrix Adj." and "AWB 3200K/5800K Standard Data Input" of Camera System Adjustment.

Table 6-1-1
CAMERA SECTION ADJUSTMENTS
PREPARATIONS BEFORE ADJUSTMENTS
List of Service Tools
- Oscilloscope
- Color monitor
- Vectorscope
- AC power adapter
- Calculating machine capable of calculating hexadecimal numbers.

Note: Personal computer
OS: Windows98/98SE/Me/2000/XP Home/XP Pro
RAM: 256MB or more recommended
USB: 2.0 recommended (also compatible with 1.1) Two connectors are required.
Fig. 6-1-1
Preparations
- Connect the equipment for adjustments according to Fig. 6-1-3.
- Start up the application for adjustment (SEUS).


Precaution
- Setting the Switch
Unless otherwise specified, set the switches as follows and perform adjustments.
- Mode dial -STILL (P AUTO) (P)
- ZOOM -WIDE end
- MS/CF- MS (Memory stick)
- MACRO (
![]() ) - ON
) - ON - WHITE BALANCE - AUTO
- EV - 0EV
- FOCUS - AUTO
- USB CONNECT (SET UP setting) - NORMAL
- VIDEO OUT (SET UP setting) - NTSC
- Order of Adjustments
Basically carry out adjustments in the order given.

- Subjects
- Color bar chart (Standard picture frame) (PTB-450) When performing adjustments using the color bar chart, adjust the picture frame as shown in Fig. 6-1-4. (Standard picture frame)
- 9 colors chart (Standard picture frame) (PTB-1450) When performing adjustments using the 9 colors chart, adjust the picture frame as shown in Fig. 6-1-4. (Standard picture frame)
- Clear chart (Standard picture frame) (PTB-450/PTB-1450) Remove the color bar chart (PTB-450) or 9 colors chart (PTB1450) from the pattern box and insert a clear chart in its place. (Do not perform zoom operations during this time.)
- Preparing the Flash Adjustment Box
A dark room is required to provide an accurate flash adjustment. If it is not available, prepare the flash adjustment box as given below;
- Provide woody board A, B and C of 15 mm thickness.
Dimensions without brackets are for a box of 1 m in depth.
Dimensions in brackets are for a box of 50 cm in depth.

Fig. 6-1-5 - Apply black mat paint to one side of woody board A and B.
- Attach background paper (J-2501-130-A) to woody board C.
- Assemble so that the black sides and the background paper side of woody board A, B and C are internal. (Fig 6-1-6)

Fig. 6-1-6


Using Method of SEUS
The application for adjustment (SEUS) is used to change the coefficient for calculating the signal processing or EVR data. The SEUS performs two-way communication between PC and set through the USB terminal. The two-way communication result data can be written to the nonvolatile memory.
- Connection
- Connect the HASP key to the USB terminal of the PC.
- Connect the PC and set with the USB cable.
- Confirm that the set starts in the USB mode.
- Start the SEUS on the PC.
- Click [Connect] on the SEUS screen. If the connection is normal, the SEUS screen will be as shown in Fig. 6-1-7, indicating the "connected" state.


Note: The SEUS will go in "disconnect" state, if the set is turned off (for instance, by resetting the set). In such a case, click [Connect] on the SEUS screen to restore the "connected" state.
- Operation
- Page change
To change the page, click [Page] on the SEUS screen and enter the page to be changed. The page is displayed in hexadecimal notation. - Address change
To change the address, click [Address] on the SEUS screen and enter the address to be changed. The address is displayed in hexadecimal notation. - Data change
To change the data, click [Set] on the SEUS screen and enter the data. The data is displayed in hexadecimal notation.
This operation does not write the data to the nonvolatile memory. - Data saving
To write the all changed data to the nonvolatile memory, click [Save] on the SEUS screen and wait for more than 3 sec. - Data reading
The data displayed on the SEUS screen are the data values at the time when the pages and addresses were set, and they are not updated automatically. To check the data change, click [Read] on the SEUS screen and update the displayed data.
Precaution on Use of SEUS
Wrong SEUS operation could clear correct adjustment data. To prevent the data clear by mistake, it is recommended to save all adjustment data by clicking [Page Edit] on the SEUS screen before starting the adjustment.
Saving Method:
- Click [Page Edit] on the SEUS screen to display the SEUS PAGE EDIT screen.
- Click [Page], and enter the page number to be saved.
- Click [Page] to read the data to be saved from the camera.
- Click [File] and save the data to PC.
Loading Method:
- Select page: 00, address: 01 and set data: 01.
- Click [Page Edit] on the SEUS screen to display the SEUS PAGE EDIT screen.
- Click [File] and load the data from PC.
- Click [Write] on the SEUS PAGE EDIT screen.
- Click [Close] to close the SEUS PAGE EDIT screen.
- Click [Save] on the SEUS screen.
- Wait for more than 3 sec.
- Select page: 00, address: 01 and set data: 00.
ADJUSTMENT PROGRAMS
The DSC-F828 is adjusted with the Automatic Adjustment Program and the DSC-F828 C1 MATRIX ADJ.
The Automatic Adjustment Program automatically controls the adjustment operations that were formerly entered manually on the operation screen of the SEUS (some adjustments may be manually operated on the SEUS operation screen).
The DSC-F828 C1 MATRIX ADJ automatically performs "Color Shade Check" and "Linear Matrix and AWB Adjustment" of Camera System Adjustment.
Automatic Adjustment Program
- Precautions When Using Automatic Adjustment Program
- The Automatic Adjustment Program writes the adjustment results such as EVR data to the set through two-way communication with the camera via the SEUS. Accordingly, the Automatic Adjustment Program must be used in the environment where the SEUS operates.
- The program run time may vary depending on the environment of the personal computer used.
- Even if the Automatic Adjustment Program is used without starting the SEUS, the SEUS will start automatically when the adjustment is executed. However, it may take time for the SEUS to start, and therefore the Automatic Adjustment Program should be used with the SEUS started in order to reduce the program run time.
- Start of Automatic Adjustment Program
Double-click the application file (DSC-F828 Auto-Adj
Ver_1.[]r[][].exe), and the Automatic Adjustment Program will start.
![information]() Note: [] (numeric value) of the file name varies depending on the version of Automatic Adjustment Program.
Note: [] (numeric value) of the file name varies depending on the version of Automatic Adjustment Program. - Function of Each Button on Main Menu Screen When the Automatic Adjustment Program started, the Main Menu screen in Fig. 6-1-8 will appear. On this screen, select each adjustment section.
![]()
- [VIDEO SYSTEM ADJUSTMENT] button
The "VIDEO SYSTEM ADJUSTMENT" screen appears. - [CAMERA SYSTEM ADJUSTMENT] button
The "CAMERA SYSTEM ADJUSTMENT" screen appears. - [EVF SYSTEM ADJUSTMENT] button
The "EVF SYSTEM ADJUSTMENT" screen appears. - [LCD SYSTEM ADJUSTMENT] button
The "LCD SYSTEM ADJUSTMENT" screen appears. - [END] button
The Automatic Adjustment Program finishes.

DSC-F828 C1 MATRIX ADJ
- Application Environment
OS: Windows 98/98SE/Me/2000/XP
RAM: 256MB or more recommended
USB: 2.0 recommended (also compatible with 1.1) Two connectors are required. - Installation Method
Extract the file compressed in the ZIP format (828matrix.zip). Execute the extracted file (setup.exe), and the installer will start. Install the program following the instructions given on the installer screen. - Notes When Using the DSC-F828 C1 MATRIX ADJ
- The SEUS must be installed in the PC.
- The HASP Key for SEUS must be connected to the USB connector. The program will not start unless the HASP Key is connected.
- Starting Method of DSC-F828 C1 MATRIX ADJ
Click the [Start] button on the task bar, and click the [DSC-F828 C1 MATRIX ADJ] from the [Programs], and the program will start.
- Screen and Function of Each Button of DSC-F828 C1 MATRIX ADJ

- [Connect] button
Makes connection to the camera and switches the camera to the adjustment mode. In the case of successful connection to the camera, the indication at the part A changes to "Connected" and the [Color Shading Adjustment] button, [Linear Matrix and AWB Adjustment] button and the [Disconnect] button become active. - [Color Shading Adjustment] button
Starts the Color Shading Adjustment. - [Linear Matrix and AWB Adjustment] button
Starts the Linear Matrix and AWB Adjustment. - [Disconnect] button
Cancels the connection to the camera.
- [Connect] button

VIDEO SYSTEM ADJUSTMENTS
Function of Each Button on Video System Adjustment Screen
Click the [VIDEO SYSTEM ADJUSTMENT] button on the Main
Menu screen, and the "VIDEO SYSTEM ADJUSTMENT" screen in Fig. 6-1-10 will appear.

Fig. 6-1-10
- [To Menu] button
The Main Menu screen comes back. - [VIDEO Adjustment Start] button
"Video Adjustment" starts. - [Reset] button
This button functions same as the Reset button of the camera. - [Release Data Setting] button
The data setting at the adjustment is cancelled.
During the data setting, the button color changes from "white" to "red". When the data setting is cancelled, the button color returns to "white".
(Use this button when an error occurred in the video adjustment. If the adjustment completed successfully, the data setting is automatically cancelled and the button color returns to "white".)
Adjustment Items of VIDEO System Adjustment
The adjustment items of video system adjustment are as listed in Table 6-1-2. The Automatic Adjustment Program executes the adjustment items if the VIDEO Adjustment Start button is clicked.
| Button Name | Adjustment | Signal | Page | Address |
| VIDEO Adjustment | VIDEO Output Level Adj. | Arbitrary | 8F | D0 |
Table 6-1-2
Adjusting Method
[Automatic Adjustment Program execution items and sequence]
- Data Setting during Video Adj.
- Video Output Level Adj.
- Release of Data Setting during Video Adj.
[Specified value of video output level adj.]
| Measurement Point | Video terminal of AV OUT jack (75 Ω terminated) |
| Measuring Instrument | Oscilloscope |
| Specified Value | Sync level: A = 286 ± 5 mV (NTSC mode) A = 300 ± 5 mV (PAL mode) Burst level: B = 286 ± 30 mV (NTSC mode) B = 300 ± 30 mV (PAL mode) |
[Adjusting method]
- Click the [VIDEO Adjustment Start] button.
- The Automatic Adjustment Program executes the "Data Setting during Video Adj.".
- If "Data Setting during Video Adj." completed successfully, the next message is displayed during the execution of " Video Output Level Adj.". Using the UP/DOWN key on the SEUS Operation screen, adjust so that the sync level of the video signals satisfies the specified value. After the adjustment, check that the burst level of the video signals satisfies the specified value, and click the [OK] button in the message.
![]()
Fig. 6-1-11 - If the [OK] button button is clicked, "Release of Data Setting during Video Adj." will be executed.
- Upon successful completion of all items of the VIDEO adjustment, the following message is displayed. Click the [OK] button.
![]()
Fig. 6-1-12


SEUS operation screen

Fig. 6-1-13
Check on the oscilloscope

Fig. 6-1-14
CAMERA SYSTEM ADJUSTMENTS
Function of Each Button on Camera System Adjustment Screen
Click the [CAMERA SYSTEM ADJUSTMENT] button on the Main
Menu screen, and the "CAMERA SYSTEM ADJUSTMENT" screen in Fig. 6-1-15 will appear.

- [To Menu] button
The Main Menu screen comes back. - Adjustment start buttons
- [CAMERA Adjustment 1 Start] button
"Camera Adjustment 1" starts. - [CAMERA Adjustment 2 Start] button
"Camera Adjustment 2" starts. - [CAMERA Adjustment 3 Start] button
"Camera Adjustment 3" starts. - [CAMERA Adjustment 4 Start] button
"Camera Adjustment 4" starts. - [CAMERA Adjustment 5 Start] button
"Camera Adjustment 5" starts. - [CAMERA Adjustment 6 Start] button
"Camera Adjustment 6" starts.
- [Reset] button
This button functions same as the Reset button of the camera. - [Release Data Setting] button
The data setting at the adjustment is cancelled.
During the data setting, the button color changes from "white" to "red". When the data setting is cancelled, the button color returns to "white".
(Use this button when an error occurred in the camera adjustment 1-6. If the adjustment completed successfully, the data setting is automatically cancelled and the button color returns to "white".)
Adjustment Items of Camera System Adjustment
The adjustment items of camera system adjustment are as listed in Table 6-1-3. The Automatic Adjustment Program divides the adjustment items into four, camera adjustment 1-6. Clicking either CAMERA Adjustment Start button allows the adjustment item which corresponds to that button to be executed. The adjustment conditions of the subject and filter vary depending on which item is adjusted. The Adjustment Program displays an instruction for the subject and filter as a message during the adjustment.
| Button Name | Adjustment | Subject | Adjustment Page | Adjustment Address |
| CAMERA Adjustment 1 | IRIS Reset Sensor Adj. | Clear chart (PTB-450/PTB-1450) (All white) | 6F | 5E, 5F |
| Flange Back Adj. | Arbitrary | 6F | 18 to 3E, 40 to 53 | |
| CAMERA Adjustment 2 | Flange Back Check | Siemens star(1.0m from front the lens) (Luminance: 200 to 400 lux) | ||
| (Note) | Color Shade Check | Clear chart (PTB-1450) (Standard picture frame) | 6F | 06, 07 |
| CAMERA Adjustment 3 | F No. Compensation | Clear chart (PTB-450/PTB-1450) (Standard picture frame) | 6F | 60 to 64, 6B to 6D |
| Mechanical Shutter Adj. | 6F | 6B to 6D, B8 to D7 | ||
| Light Value Adj. | 6F | 65 to 67 | ||
| (Note) | Linear Matrix Adj. | 9 colors chart (PTB-1450) (Standard picture frame) | 6E | 80 to 9F |
| AWB 3200K/5800K Standard Data Input | 6E | 04 to 21, 24 to 49 | ||
| CAMERA Adjustment 4 | Color Reproduction Check | Color bar chart (PTB-450) (Standard picture frame) 9 colors chart (PTB-1450) (Standard picture frame) | ||
| CCD Linearity Check | Clear chart (PTB-450/PTB-1450) (Standard picture frame) | |||
| CCD White Defect Compensation Check | ||||
| CCD Black Defect Compensation Check | ||||
| CAMERA Adjustment 5 | Strobe Adj. | Flash adjustment box (50 cm) | 6E | 72 to 75 |
| AF Laser Output Adj. | 6F | 10 to 16 | ||
| CAMERA Adjustment 6 | AF Laser Axis Check | Flash adjustment box (1 m) |
Note: Use the DSC-F828 C1 MATRIX ADJ (F828C1MATRIX.exe) when performing "Color Shade Check", "Linear Matrix Adj." and "AWB 3200K/5800K Standard Data Input" of Camera System Adjustment.
Table 6-1-3
Adjusting Method
- CAMERA Adjustment 1
[Automatic Adjustment Program execution items and sequence]- Data Setting during Camera Adj.
- IRIS Reset Sensor Adj.
- Reset the Camera
- Flange Back Adj.
- Release of Data Setting during Camera Adj.
[Adjusting method]
- Click the [CAMERA Adjustment 1 Start] button.
- The Automatic Adjustment Program executes "Data Setting during Camera Adj.".
- Upon successful completion of the "Data Setting during Camera Adj.", the following message is displayed. Set the subject in accordance with the message.
![]()

- If the [OK] button is clicked, "IRIS Reset Sensor Adj." will be executed.
- Upon successful completion "IRIS Reset Sensor Adj.", "Reset the Camera" is executed.
- Upon successful completion of the "Reset the Camera", the following message is displayed during execution in "Flange Back Adj.". Set the ZOOM to the TELE end and click the button.
![]()

- Upon completion of "Flange Back Adj.", " Release of Data Setting during Camera Adj." is executed.
- Upon successful completion of all items of the CAMERA Adjustment 1, the following message is displayed. Click the OK button.
![]()

- CAMERA Adjustment 2
[Automatic Adjustment Program execution items and sequence]
- Data Setting during Camera Adj.
- Flange Back Check
- Release of Data Setting during Camera Adj.
[Adjusting method]
- Click the [CAMERA Adjustment 2 Start] button.
- The Automatic Adjustment Program executes " Data Setting during Camera Adj.".
- Upon successful completion of the " Data Setting during Camera Adj.", the following message is displayed. Set the subject in accordance with the message.
![]()
Fig. 6-1-19 - If the [OK] button is clicked, "Flange Back Check" is executed. The following messages are displayed, and then operate the camera to make a check in accordance with the messages.
![]()
Fig. 6-1-20 - Upon completion of " Flange Back Check", "Release of Data Setting during Camera Adj." is executed.
- Upon successful completion of all items of the CAMERA Adjustment 2, the following message is displayed. Click the [OK] button.
![]()
Fig. 6-1-21


- Picture Frame Setting (PTB-450) (Standard Picture Frame)
In the "CAMERA Adjustment 3" and "CAMERA Adjustment 4", set the picture frame so as to attain the positions shown in the following figure when shooting the color bar chart.
Check on the oscilloscope
Measurement Point: Video terminal of A/V OUT jack (75Ω terminated)
- Horizontal period
![]()
Fig. 6-1-22 - Vertical period
![]()
Fig. 6-1-23


Check on the monitor TV

Fig. 6-1-24
- Picture Frame Setting (PTB-1450) (Standard Picture Frame)
In the "Color Shade Check", "CAMERA Adjustment 3", "Linear Matrix and AWB Adjustment" and "CAMERA Adjustment 4", set the picture frame so as to attain the positions shown in the following figure when shooting the 9 colors chart.
Check on the oscilloscope
Measurement Point: Video terminal of A/V OUT jack (75Ω terminated)
- Horizontal period
![]()
Fig. 6-1-25 - Vertical period
![]()
Fig. 6-1-26


Check on the monitor TV

Fig. 6-1-27
- Color Shade Check
Compensate the color shade.
| Mode | STILL (P AUTO) ( P ) |
| Subject | Clear chart (PTB-1450) (Standard picture frame) About 6cm from the front of the lens |
| Adjustment Page | 6F |
| Adjustment Address | 06, 07 |
Note 1: Check that there are no reflections on the clear chart.
Switch setting:
Mode dial - STILL (P AUTO) ( P )
ZOOM - WIDE end (Turn the zoom ring to "28")
MACRO - ON
FOCUS - MANUAL
Adjusting method:
- Start the DSC-F828 C1 MATRIX ADJ on the PC.
- Click [Connect] on the DSC-F828 C1 MATRIX Adjustment screen. If the connection is normal, the DSC-F828 C1 MATRIX Adjustment screen will be as shown in bellow, indicating the "connected" state
- Set up the switches of camera as above-mentioned.
- Check that the picture frame is the standard picture frame.
- Click [Color Shading Adjustment] on the DSC-F828 C1 MATRIX Adjustment screen.
![]()
Fig. 6-1-28 - Color shading adjustment is performed automatically.
![]()
Fig. 6-1-29 - When the "Completion of adjustment" message is displayed. Click the [OK] button.
![]()
Fig. 6-1-30


- CAMERA Adjustment 3
[Automatic Adjustment Program execution items and sequence]
- Data Setting during Camera Adj.
- Picture Frame Setting
- F No. Compensation
- Mechanical Shutter Adj.
- Light Value Adj.
- Release of Data Setting during Camera Adj.
[Adjusting method]
- Click the [CAMERA Adjustment 3 Start] button.
- The Automatic Adjustment Program executes the "Data Setting during Camera Adj.".
- Upon successful completion of "Data Setting during Camera Adj.", "Picture Frame Setting" is executed. The following message is displayed, and then referring to "Picture Frame Setting", set the subject and click the [OK] button.
![]()
Fig. 6-1-31 - After that, the next message is displayed. Using manual focus ring, adjust the focus.
![]()
Fig. 6-1-32 - If the [OK] button is clicked, the following message is displayed. Set the subject in accordance with the message.
![]()
Fig. 6-1-33 - Click the [OK] button, and the items from " F No. Compensation" to "Release of Data Setting during Camera Adj." will be executed.
- Upon successful completion of all items of the CAMERA Adjustment 3, the following message is displayed. Click the [OK] button.
![]()
Fig. 6-1-34


- Linear Matrix and AWB Adjustment
Preparation (Get Reference Data)
In this work, acquire a reference data for the liner matrix adjustment using a DSC-F828 camera that operates normally. And saves the data in the inside of the PC. Therefore, if the same pattern box and the same 9 colors chart are used, it is not necessary to perform "Get Reference Data" again. The reference data (GodRawData. CSV) is saved in the ProgramFiles\Sony\
| Mode | STILL (P AUTO) ( P ) |
| Subject | 9 colors chart (PTB-1450) (Standard picture frame) About 6cm from the front of the lens |
Note 1: When the reference data is acquired using a non-adjusted camera. The linear matrix adjustment cannot be performed correctly.
Switch setting:
Mode dial - STILL (P AUTO) ( P )
ZOOM - WIDE end (Turn the zoom ring to "28")
MACRO - ON
FOCUS - MANUAL
Adjusting method:
- Prepare a DSC-F828 camera that operates normally, and this camera is named a reference camera.
- Remove the camera under adjustment and installed the reference camera instead.
- Start the DSC-F828 C1 MATRIX ADJ on the PC.
- Click [Connect] on the DSC-F828 C1 MATRIX Adjustment screen.
- Set up the switches of the reference camera as above-mentioned.
- Shoot the 9 colors chart with the standard picture frame. (Refer to "Picture Frame Setting (PTB-1450)".
- Adjust the focus..
- Click [Get Reference Data] of the file menu of the DSC-F828 C1 MATRIX Adjustment screen.
Note 2: When the "File over write" message is displayed, a reference data file (GodRawData. CSV) exists already in the Program Files\Sony\F828C1MATRIX holder of the C drive. If you want to save this file, rename it or move it to other folder.

Fig. 6-1-35
- Acquisition of the reference data is performed automatically.
![information]() Note 3: When the "Framing check" message is displayed, correct the picture frame, and repeat from step 8).
Note 3: When the "Framing check" message is displayed, correct the picture frame, and repeat from step 8).
![]()
Fig. 6-1-36 - When the "Completion of get reference data" message is displayed. Click the [OK] button.
![]()
Fig. 6-1-37 - Remove the reference camera and installed the camera under adjustment instead.


Linear Matrix and AWB Adjustment
This adjustment does the following adjustment items automatically.
Linear matrix adjustment
Compensate the dispersion of the linear matrix vale of the CCD imager.
AWB 3200K/5800K (Mon) standard data input Acquire the white balance standard data at 3200K and 5800K in monitoring mode.
AWB 3200K/5800K (Cap) standard data input Acquire the white balance standard data at 3200K and 5800K in capture mode.
| Mode | STILL (P AUTO) ( P ) |
| Subject | 9 colors chart (PTB-1450) (Standard picture frame) About 6cm from the front of the lens |
| Adjustment Page | 6E |
| Adjustment Address | 80 to 9F (Linear matrix adjustment) 04 to 21, 24 to 49 (AWB 3200K/ 5800K standard data input) |
Switch setting:
Mode dial - STILL (P AUTO) ( P )
ZOOM - WIDE end (Turn the zoom ring to "28")
MACRO - ON
FOCUS- MANUAL
Adjusting method:
- Install the camera for adjustment.
- Start the DSC-F828 C1 MATRIX ADJ on the PC.
- Click [Connect] on the DSC-F828 C1 MATRIX Adjustment screen.
- Set up the switches of the camera as above-mentioned.
- Shoot the 9 colors chart with the standard picture frame. (Refer to "Picture Frame Setting (PTB-1450)".
- Adjust the focus..
- Click [Linear Matrix and AWB Adjustment] on the DSC-F828 C1 MATRIX Adjustment screen.
![]()
Fig. 6-1-38 - The following adjustments are performed automatically.
Linear matrix adjustment
AWB 3200K/5800K (Mon) standard data input
AWB 3200K/5800K (Cap) standard data input

Note: When the "Framing check" message is displayed, correct the picture frame, and repeat from step 7).
When the "File C:\ProgramFiles\Sony\F828C1MATRIX\ GodRawData. CSV can not be open" message is displayed, the reference data file (GodRawData. CSV) for the liner matrix adjustment is not in the inside of the PC. Therefore, perform "Preparation (Get Reference Data)".

Fig. 6-1-39

Fig. 6-1-40
- When the "Completion of adjustment" message is displayed. Click the [OK] button.
![]()
Fig. 6-1-41

- CAMERA Adjustment 4
[Automatic Adjustment Program execution items and sequence]
- Data Setting during Camera Adj.
- Picture Frame Setting
- Color Reproduction Check
- CCD Linearity Check
- CCD White Defect Compensation Check
- CCD Black Defect Compensation Check
- Release of Data Setting during Camera Adj.
[Adjusting method]
- Click the [CAMERA Adjustment 4 Start] button.
- The Automatic Adjustment Program executes the "Data Setting during Camera Adj.".
- Upon successful completion of " Data Setting during Camera Adj.", " Picture Frame Setting" is executed. The following message is displayed, and then referring to "Picture Frame Setting", set the subject and click the [OK] button.
![]()
Fig. 6-1-42 - After that, the next message is displayed. Using manual focus ring, adjust the focus.
![]()
Fig. 6-1-43 - Click the [OK] button, and "Color Reproduction Check" will be executed. The following messages are displayed in order, and then operate the vectorscope to make a check with the color reproduction frame in accordance with the message.
![]()
![]()
Fig. 6-1-44


Fig. 6-1-45
- Upon successful completion of "Color Reproduction Check", the following message is displayed. Change the chart in accordance with the message.
![]()
Fig. 6-1-46 - Click the [OK] button, and the "CCD Linearity Check", " CCD White Defect Compensation Check" will be executed.
- Upon successful completion of "CCD White Defect Compensation Check", the following message is displayed. Set the ZOOM in accordance with the message.
![]()
Fig. 6-1-47 - Click the [OK] button, and the "CCD Black Defect Compensation Check", " Release of Data Setting during Camera Adj." will be executed.
- Upon successful completion of all items of the CAMERA Adjustment 4, the following message is displayed. Click the [OK] button.
![]()
Fig. 6-1-48


- CAMERA Adjustment 5
![information]() Note: "CAMERA Adjustment 5" is available only once after the power is turned on. If the adjustment is retried, turn off the power and turn on again.
Note: "CAMERA Adjustment 5" is available only once after the power is turned on. If the adjustment is retried, turn off the power and turn on again.
[Automatic Adjustment Program execution items and sequence]
- Data Setting during Camera Adj.
- Strobe Adj.
- AF Laser Output Adj.
- Release of Data Setting during Camera Adj.
[Adjusting method]
- Click the [CAMERA Adjustment 5 Start] button.
- The Automatic Adjustment Program executes the "Data Setting during Camera Adj.".
- Upon successful completion of the "Data Setting during Camera Adj.", the following message is displayed. Set the subject in accordance with the message. (For the Flash adjustment box, refer to "Preparing the Flash Adjustment Box" )
![]()
Fig. 6-1-49 - Press the [OK] button, and the "Strobe Adj." will be executed.
- During execution of "Strobe Adj.", the following message is displayed. After checking the flashing of strobe light, click the [OK] button. (This message is displayed 2 times during execution of adjustment.)
![]()
Fig. 6-1-50 - Upon successful completion of " Strobe Adj.", "AF Laser Output Adj." is executed.
- Upon successful completion of the "AF Laser Output Adj.", the "Release of Data Setting during Camera Adj." will be executed successively.
- Upon successful completion of all items of the CAMERA Adjustment 5, the following message is displayed. Click the [OK] button.
![]()
Fig. 6-1-51


- CAMERA Adjustment 6
[Automatic Adjustment Program execution items and sequence]- Data Setting during Camera Adj.
- AF Laser Axis Check
- Release of Data Setting during Camera Adj.
[Adjusting method]
- Click the [CAMERA Adjustment 6 Start] button.
- The Automatic Adjustment Program executes the "Data Setting during Camera Adj.".
- Upon successful completion of the "Data Setting during Camera Adj.", the following message is displayed. Set the subject in accordance with the message. (For the Flash adjustment box, refer to "Preparing the Flash Adjustment Box"
![]()

- Click the [OK] button, and the "AF Laser Axis Check" will be executed. The following message is displayed. Attach the AF Laser axis frame on the monitor TV screen in accordance with the message.
![]()

- If the [OK] button is clicked, the following message is displayed. Set the ZOOM to the WIDE end and click the button.
![]()

- After that, the next message is displayed. Check that all hologram patterns are within the inspection frame.
![]()

- If the [OK] button is clicked, the following message is displayed. Set the ZOOM to the TELE end and click the button.
![]()

- After that, the next message is displayed. Check that all hologram patterns are not unfocused.
![]()

- Upon completion of " AF Laser Axis Check", "Release of Data Setting during Camera Adj." is executed.
- Upon successful completion of all items of the CAMERA Adjustment 6, the following message is displayed. Click the [OK] button.
![]()

EVF SYSTEM ADJUSTMENTS
Function of Each Button on EVF System Adjustment Screen
Click the [EVF SYSTEM ADJUSTMENT] button on the Main Menu screen, and the "EVF SYSTEM ADJUSTMENT" screen in Fig. 6-1-60 will appear.

Fig. 6-1-60
- [To Menu] button
The Main Menu screen comes back. - [EVF Adjustment Start] button
"EVF Adjustment" starts. - [Reset] button
This button functions same as the Reset button of the camera. - [Release Data Setting] button
The data setting at the adjustment is cancelled.
During the data setting, the button color changes from "white" to "red". When the data setting is cancelled, the button color returns to "white". (Use this button when an error occurred in the EVF adjustment. If the adjustment completed successfully, the data setting is automatically cancelled and the button color returns to "white".)
Adjustment Items of EVF System Adjustment
The adjustment items of EVF system adjustment are as listed in Table 6-1-4. The Automatic Adjustment Program executes the adjustment items if the EVF Adjustment Start button is clicked.
| Button Name | Adjustment | Signal | Page | Address |
| EVF Adjustment | EVF Initial Data Input | Arbitrary | 8F | 70, 71, 73 to 78, 7A, 7C |
| VCO adj. | 8F | 73 | ||
| Bright adj. | 8F | 75 | ||
| Contrast adj. | 8F | 7C | ||
| V-COM adj. | 8F | 74 | ||
| White Balance adj. | 8F | 78, 7A |
Table 6-1-4
Adjusting Method
[Automatic Adjustment Program execution items and sequence]
- Data Setting during EVF Adj.
- EVF Initial Data Input
- VCO Adj.
- Bright Adj.
- Contrast Adj.
- V-COM Adj.
- White Balance Adj.
- Release of Data Setting during EVF Adj.
[Adjusting method]
- Click the [EVF Adjustment Start] button.
- The Automatic Adjustment Program executes the items from "Data Setting during EVF Adj." to " V-COM Adj.".
- Upon completion of "V-COM Adj.", " White Balance Adj." is executed. The following message is displayed, and then check that EVF screen is not colored.
If colored, change the data of page: 8F, address: 78 and 7A on the SEUS Operation screen to adjust so that the EVF screen is not colored.
![]()
Fig. 6-1-61 - If the [OK] button is clicked, " Release of Data Setting during EVF Adj." will be executed.
- Upon successful completion of all items the EVF adjustment, the following message is displayed. Click the [OK] button.
![]()
Fig. 6-1-62


LCD SYSTEM ADJUSTMENTS
Function of Each Button on LCD System Adjustment Screen
Click the [LCD SYSTEM ADJUSTMENT] button on the Main Menu screen, and the "LCD SYSTEM ADJUSTMENT" screen in Fig. 6-1-63 will appear.

Fig. 6-1-63
- [To Menu] button The Main Menu screen comes back.
- [LCD Adjustment Start] button "LCD Adjustment" starts.
- [Reset] button This button functions same as the Reset button of the camera.
- [Release Data Setting] button
The data setting at the adjustment is cancelled.
During the data setting, the button color changes from "white" to "red". When the data setting is cancelled, the button color returns to "white".
(Use this button when an error occurred in the LCD adjustment. If the adjustment completed successfully, the data setting is automatically cancelled and the button color returns to "white".)
Adjustment Items of LCD System Adjustment
The adjustment items of LCD system adjustment are as listed in Table 6-1-5. The Automatic Adjustment Program executes the adjustment items if the LCD Adjustment Start button is clicked.
| Button Name | Adjustment | Signal | Page | Address |
| LCD Adjustment | LCD Initial Data Input | Arbitrary | 8F | 20, 21, 23 to 28, 2A, 2C |
| VCO adj. | 8F | 23 | ||
| Contrast adj. | 8F | 2C | ||
| V-COM adj. | 8F | 24 | ||
| White Balance adj. | 8F | 28, 2A |
Table 6-1-5
Adjusting Method
[Automatic Adjustment Program execution items and sequence]
- Data Setting during LCD Adj.
- LCD Initial Data Input
- VCO Adj.
- Contrast Adj.
- V-COM Adj.
- White Balance Adj.
- Release of Data Setting during LCD Adj.
[Adjusting method]
- Click the [LCD Adjustment Start] button.
- The Automatic Adjustment Program executes the items from " Data Setting during LCD Adj." to "Contrast Adj.".
- Upon successful completion of the "Contrast Adj.", the following message is displayed during execution in "V-COM Adj.". On the SEUS screen, operate the UP/DOWN key so that the brightness of portions A and B on the LCD panel is equal. After the adjustment, click the [OK] button.
![]()
Fig. 6-1-64 - Upon completion of " V-COM Adj.", "White Balance Adj." is executed. The following message is displayed, and then check that LCD screen is not colored.
If colored, change the data of page: 8F, address: 28 and 2A on the SEUS Operation screen to adjust so that the LCD screen is not colored.
![]()
Fig. 6-1-65 - If the [OK] button is clicked, "Release of Data Setting during LCD Adj." will be executed.
- Upon successful completion of all items the LCD adjustment, the following message is displayed. Click the [OK] button.
![]()
Fig. 6-1-66


SEUS operation screen

Fig. 6-1-67
Check on the LCD screen (V-COM Adj.)

Fig. 6-1-68
ERROR
In case of an error during the execution of adjustment, the Automatic Adjustment Program interrupts the processing at that point, and displays an error message, and then terminates the program execution there.
Error Message
When an error message is displayed, perform the remedy given below, and then retry adjustment. If the error message is displayed though the remedy was performed, the circuits will be faulty.
- Connect Error
![]()
Fig. 6-1-69

| Symptom | USB communication with the set is abnormal. |
| Cause |
|
| Remedy |
|
- RESET the CAMERA and Try Again
![]()
Fig. 6-1-70

| Symptom | The camera is not ready for adjustment. |
| Cause |
|
| Remedy |
|
- Adjustment Time Out
![]()

| Symptom | Adjustment does not finish within the specified time. |
| Cause |
|
| Remedy |
|
- Adjustment NG
![]()

| Symptom | The adjusted data does not become the specified value. |
| Cause |
|
| Remedy |
|
Fig. 6-1-72
- Data Save Error


| Symptom | data cannot be saved normally. (The data setting during adjustment cannot be cancelled) |
| Cause |
|
| Remedy |
|
Precautions When an Error Occurred
The Automatic Adjustment Program sets the data for adjustment before the adjustment starts. Accordingly, if the adjustment terminates by an error, the data during the adjustment may be left in the camera.
Note 1: With this data left in the camera, the camera will not operate normally. In this case, the [Release Data Setting] button is displayed in "red" on the screen as shown in Fig. 6-1-74 to Fig. 6-1-77. Click the [Release Data Setting] button to cancel the data setting. When the data setting is cancelled, the button color becomes "white".
Note 2: When "Data Save Error" occurred, the [Release Data Setting] button is displayed in "white". To cancel the data setting, perform it on the SEUS Operation screen. How to cancel the data setting is displayed in the error message.
Video System Adjustment screen

Camera System Adjustment screen

EVF System Adjustment screen

LCD System Adjustment screen

INITIALIZATION OF DATA
- Initializing All Page Data
By performing the following procedure, data of all pages will be initialized.
Note: If all page data have been initialized, all adjustments need to be performed again.
Initializing Method:
- Select page: 00, address: 01 and set data: 01.
- Click [Sector Write] on the SEUS screen to display the SEUS SECTOR WRITE screen.
- Check that the SET ID is "03".
- Click [All] of the ALL SELECT buttons to select all pages. (Fig. 6-1-78 A)
- Click [Write] to write the initializing data to the flash memory of the camera.
- Wait for 3 sec.
- Click [Close] to close the SEUS SECTOR WRITE screen.
- Select page: 8E, address: 00 and set data: 20.
- Click [Save] on the SEUS screen.
- Wait for more than 3 sec.
Processing after Completing Initializing
| Order | Page | Address | Data | Procedure |
| 1 | 20 | 00 | 29 [Set] | |
| 2 | 20 | 01 | 29 [Set] | (Note) |
Note: At this time, the camera is reset and the power is turns off once and then on again. Accordingly, the message "Receive Packet Error" is displayed on the SEUS screen, and the SEUS goes in "disconnect" state, but this is not a trouble. Click [Connect] on the SEUS screen to restore the "connected" state. (In case that the power does not turn on again, press the power button.)

Fig. 6-1-78
- Initializing Single Page Data
By performing the following procedure, data of the page that you want to initialize will be initialized.
![information]() Note 1: If the 6E or 6F page data have been initialized, the following adjustment needs to be performed again.
Note 1: If the 6E or 6F page data have been initialized, the following adjustment needs to be performed again. - Camera system adjustments
Note 2: If the 8F page data have been initialized, the following adjustment needs to be performed again.
- Video system adjustments
- LCD system adjustments
Initializing Method:
- Select page: 00, address: 01 and set data: 01.
- Click [Sector Write] on the SEUS screen to display the SEUS SECTOR WRITE screen.
- Check that the SET ID is "03".
- Click "All" of the option buttons of target page. (Fig. 6-1-78 B)
- Click [Write] to write the initializing data to the flash memory of the camera.
- Wait for 3 sec.
- Click [Close] to close the SEUS SECTOR WRITE screen.
- When 8E page is initialized, select page: 8E, address: 00 and set data: 20.
- Click [Save] on the SEUS screen.
- Wait for more than 3 sec.
Processing after Completing Initializing
| Order | Page | Address | Data | Procedure |
| 1 | 20 | 00 | 29 [Set] | |
| 2 | 20 | 01 | 29 [Set] | (Note) |
Note: At this time, the camera is reset and the power is turns off once and then on again. Accordingly, the message "Receive Packet Error" is displayed on the SEUS screen, and the SEUS goes in "disconnect" state, but this is not a trouble. Click [Connect] on the SEUS screen to restore the "connected" state. (In case that the power does not turn on again, press the power button.)
SERVICE MODE
- Setting the Test Mode
| Page 2F | Address 23 | |
| Data | Function | |
| 80 | Normal | |
| 11 | Forced STILL mode power ON | |
| 12 | Forced PLAY mode power ON | |
| 04 | Forced MOVIE mode power ON | |
- Before setting the data, select page: 00, address: 01, and set data: 01.
- For p. 2F, the data set is recorded in the non-volatile memory by saving data. In this case, take note that the test mode will not be exited even when the main power is turned off.
- After completing adjustments/repairs, release the data setting.
- Select page: 00, address: 01, and set data: 01.
- Select page: 2F, address: 23, and set data: 80.
- Save the data.
- Wait for more than 3 sec.
- Select page: 00, address: 01, and set data: 00.
- Bit value discrimination
Bit values must be discriminated using the hexadecimal data for following items. Use the table below to discriminate if the bit value is "1" or "0".

| Display on the adjustment remote commander | Bit values | ||||
| bit3 or bit7 | bit2 or bit6 | bit1 or bit5 | bit0 or bit4 | ||
| A | 0 | 0 | 0 | 0 | 0 |
| 1 | 0 | 0 | 0 | 1 | |
| 2 | 0 | 0 | 1 | 0 | |
| 3 | 0 | 0 | 1 | 1 | |
| 4 | 0 | 1 | 0 | 0 | |
| 5 | 0 | 1 | 0 | 1 | |
| 6 | 0 | 1 | 1 | 0 | |
| 7 | 0 | 1 | 1 | 1 | |
| 8 | 1 | 0 | 0 | 0 | |
| 9 | 1 | 0 | 0 | 1 | |
A ( ) ) | 1 | 0 | 1 | 0 | |
B ( ) ) | 1 | 0 | 1 | 1 | |
C ( ) ) | 1 | 1 | 0 | 0 | |
| B | D ( ) ) | 1 | 1 | 0 | 1 |
E ( ) ) | 1 | 1 | 1 | 0 | |
F ( ) ) | 1 | 1 | 1 | 1 | |
Examples: If the hexadecimal data is "8E", the bit values for bit7 to bit4 are shown in the A column, and the bit values for bit3 to bit0 are shown in the B column.
- Switch check (1)
| Page 20 | Address 80 | ||||
| Bit | Function | When bit value=1 | When bit value=0 | ||
| 0 | POWER switch (XPWER ON) (Control switch block (TOP)) | OFF | ON | ||
Using method:
- Select page: 20, address: 80.
- Read the data. By discriminating the bit value of the data, the state of the switch can be discriminated.
- Switch check (2)
| Page 20 | Address 90 to 96 |
Using method:
- Select page: 20, address: 90 to 96.
- Read the data. By discriminating the data, the pressed key can be discriminated.
![]()

- Switch check (3)
| Page 60 | Address B9 | |||
| Function | When data = 11 | When data = 01 | ||
| FLASH OPEN DETECT switch (LS-067 board S001) | Close | Open | ||
Using method:
- Select page: 60, address: B9.
- Read the data. By discriminating the data, the state of the switch can be discriminated.
- Switch check (4)
| Page 80 | Address 13 | ||||
| Function | When data = 00 | When data = 01 | When data = 02 | ||
| Shutter button (XAE LOCK SW) (Control switch block (TOP)) | OFF | ON | ON | ||
| Shutter button (XSHTR ON SW) (Control switch block (TOP)) | OFF | OFF | ON | ||
Using method:
- Select page: 80, address: 13.
- Read the data. By discriminating the data, the state of the switches can be discriminated.
- Switch check (5)
| Page 80 | Address 14 | |||
| Function | When data = 00 | When data = 01 | ||
| CF COVER switch (Control switch block (CENTER)) | Open | Close | ||
Using method:
- Select page: 80, address: 14.
- Read the data. By discriminating the data, the state of the switch can be discriminated.
- Switch check (6)
| Page 80 | Address 15 |
Using method:
- Select page: 80, address: 15.
- By discriminating the data, the rotation of the control dial can be discriminated.
| Control dial (Control switch block (CENTER)) | Data |
| When rotated in the left direction. | 01 |
| When rotated in the right direction. | 02 |
- LED, Segment LCD check
| Page 20 | Address 04 |
| Page 80 | Address 12 |
| Page 8E | Address FE |
Using method:
- Select page: 00, address: 01, set data: 01.
- Select page: 20, address: 04, set data: 02.
- Select page: 8E, address: FE, set data: 20.
- Select page: 80, address: 12, set data: 01.
- Check that all LED (Power, Charge, Tally, Access, Segment LCD back light) are lit.
- Select page: 20, address: 04, set data: 08.
- Check that all segment of the segment LCD are lit.
- Select page: 20, address: 04, set data: 00.
- Select page: 80, address: 12, set data: 00.
- Select page: 8E, address: FE, set data: 00.
- Select page: 00, address: 01, set data: 00.
- Record of Use check
| Page 4F | Address 94 to 97 | |
| Address | Function | Remarks |
| 94 | Recording counter (Hexadecimal) | 1000000-digit and 1000000-digit |
| 95 | 1000000-digit and 10000-digit | |
| 96 | 1000-digit and 100-digit | |
| 97 | 10-digit and 1-digit |
Using method:
- The recording counter data is displayed at page: 4F, addresses: 94 to 97. These data are named D 94, D 95, D 96 and D 97 respectively.
- Calculate the recording counter (N) using following equation. (Hexadecimal calculation) N = D 97 + D 96 × 100 + D 95 × 10000 + D 94 × 1000000
- Self Diagnostics Log check
| Page 20 | Address B0 to B8 | |
| Address | Initial value | Function |
| B0 | 00 | "Repaired by" code (Occurred 1st time) *1 |
| B1 | 00 | "Block function" code (Occurred 1st time) |
| B2 | 00 | "Detailed" code (Occurred 1st time) |
| B3 | 00 | "Repaired by" code (Occurred 2nd time) *1 |
| B4 | 00 | "Block function" code (Occurred 2nd time) |
| B5 | 00 | "Detailed" code (Occurred 2nd time) |
| B6 | 00 | "Repaired by" code (Occurred 3rd time) *1 |
| B7 | 00 | "Block function" code (Occurred 3rd time) |
| B8 | 00 | "Detailed" code (Occurred 3rd time) |
*1: "C"→ 01", "E" → "03"
Using method:
- The self diagnostics log is displayed at page: 20, addresses: B0 to B5.
![information]() Note: These data will be erased when the lithium battery (LR-018 board) is removed.
Note: These data will be erased when the lithium battery (LR-018 board) is removed.
Take a copy of CAMERA COLOR REPRODUCTION FRAME with a clear sheet for use.
⟨ FOR CAMERA COLOR REPRODUCTION CHECK)

Take a copy of AF LASER AXIS FRAME with a clear sheet for use.
⟨ AF LASER AXIS FRAME )

Documents / ResourcesDownload manual
Here you can download full pdf version of manual, it may contain additional safety instructions, warranty information, FCC rules, etc.
Advertisement


Need help?
Do you have a question about the DSC-F828 and is the answer not in the manual?
Questions and answers