Advertisement
- 1 Package Contents
- 2 Definition
- 3 Getting Started
- 4 Charging
- 5 Turning ON the Power
- 6 Connecting with Ultra Low Latency
- 7 Disconnecting from Ultra Low Latency Wireless Connection
- 8 Pairing with Bluetooth
- 9 Touch Control
- 10 Single Ear Mode
- 11 Factory Reset
- 12 Noise Control Mode
- 13 Dedicated App "final CONNECT"
- 14 About Ear Tips
- 15 Safety Precautions
-
16
Troubleshooting: When You Think, "Is It Broken?"
- 16.1 Earbuds will not turn ON
- 16.2 Earbuds will not turn OFF
- 16.3 Earbuds cannot be charged
- 16.4 Touch control is not functioning
- 16.5 Noise cancelling is not effective enough
- 16.6 Earbuds cannot be detected / paired
- 16.7 In case it takes time to charge
- 16.8 Sound only comes out from one side
- 16.9 The ear tips come off easily
- 16.10 Buzzer noise from the earbuds
- 17 Maintenance
- 18 Contacting Us
- 19 Documents / Resources
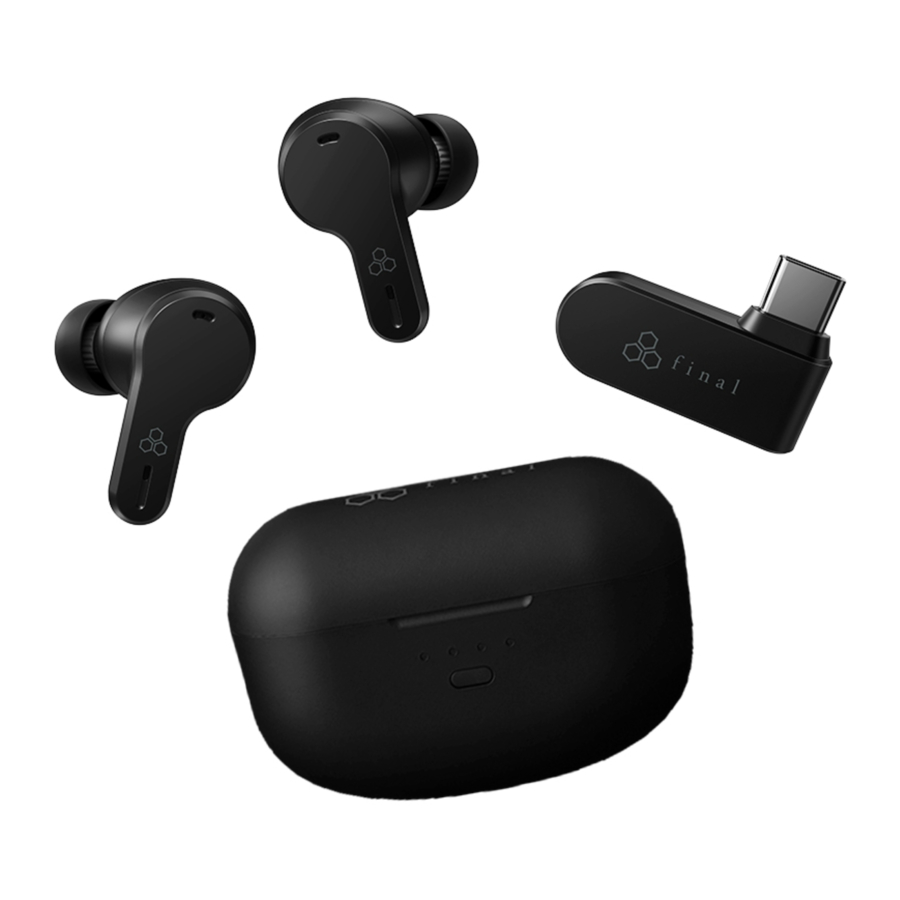
Package Contents

Definition

Getting Started

Remove the left and right earbuds from the charging case and peel off the insulation stickers attached to them.
Charging
Charging the charging case:
Please charge the charging case according to the recommended USB charging specification below. While charging, the LED indicator on the charging case will light up according to the battery level, as shown in the table below.
| Charging Case Battery Level | LED Indicator of the Charging Case |
| 0~25% |  |
| 26~50% |  |
| 51~75% |  |
| 76~99% |  |
| 100% |  |
 ON
ON
 Blinking
 OFF
OFF
* The charging cable is not included.
Recommended USB Charging Specification
USB Charger: Capable of supplying an output current of 0.5A (500mA) or higher
USB Cable: USB Type-C cable that compliants with USB standards
Charging the earbuds:
When you place the earbuds back into the charging case, one of the four LED indicators on the side where the earbud was placed will light up, and charging will begin*1. When the lid of the charging case is closed, the power of the earbuds will turn OFF, and the LED indicators on the charging case will light up for approximately 3 seconds according to the charging case battery level, as shown in the table below.
| Charging Case Battery Level | LED Indicator of the Charging Case |
| 0~1% | |
| 1~25% |  |
| 26~50% |  |
| 51~75% |  |
| 76~100% | |
ON
Blinking
OFF
*1: If the leftmost LED indicator on the charging case is flashing rapidly, the battery level of the charging case is low, so please charge it promptly. If the LED indicator does not blink even when the lid is closed, this means the charging case battery level is 0%, and charging of the earbuds will not occur. In this case, even if the lid is opened, the earbuds will not turn ON automatically, so please charge the charging case as soon as possible.
* When only one earbud is placed back into the charging case, only the earbud that was placed will be charged.
Turning ON the Power

When you open the lid of the charging case, the power of the earbuds will automatically turn ON.
For approximately 3 seconds after opening the lid, the charging case will show its battery level. Please refer to the table for details on the charging case' s battery level indication.
* If the LED indicator on the charging case does not light up when the lid is opened, the charging case is out of battery, and the earbuds will not turn on automatically. In this case, please charge the charging case promptly.
*The battery level of the earbuds can be checked using the dedicated app "final CONNECT" while paired with a smartphone or other device. Please refer to for details on the "final CONNECT" app.

When the battery level of the charging case is sufficient, placing the earbuds back into the charging case and closing the lid will turn the power OFF. For approximately 3 seconds after closing the lid, the charging case will show its battery level. Please refer to the table for details on the charging case's battery level indication.
* If the LED Indicator on the charging case does not light up when the lid is closed, the charging case is out of battery, and the power of the earbuds will not turn off automatically. In this case, please charge the charging case promptly.
Connecting with Ultra Low Latency
When playing games via Bluetooth connection, there may be delays in audio, video, and actions, which can negatively impact your gaming experience. By using the included Ultra Low Latency USB-C
Transceiver, you can significantly reduce latency and enjoy a more comfortable gaming experience.
When the Transceiver is connected to a gaming device or PC with a USB-C port, the power will turn ON, and the transceiver' s indicator will flash Purple. When you turn ON the power of the earbuds in this state, the earbuds and the transceiver will connect automatically, and the transceiver' s indicator will turn OFF.
- If you are using the Bluetooth connection with another device, that connection will take priority. To use the included transceiver, please stop the playback or disconnect the Bluetooth connection before connecting the transceiver to the compatible PC or gaming device.
- Bluetooth connection and ultra low latency wireless connection cannot be used simultaneously.
- To switch from ultra low latency wireless connection to Bluetooth connection mode, remove the transceiver and the earbuds will automatically switch to Bluetooth mode.
- Depending on the gaming device or PC, you may need to change the audio output settings to this product in the device settings.
- The operation for volume control and other functions may vary depending on the device the Transceiver is connected to.
- Connecting the transceiver through a USB hub may cause the device to function incorrectly.
Audio Mixer:
This feature allows you to set the volume for game audio and third-party voice chat software separately when using a Windows PC.
Setup Instructions:
- Plug the transceiver into the USB-C port of the PC.
- When connected to the PC, the following two audio devices will appear:
- VR3000 Wireless - Game
- VR3000 Wireless - Chat
- In the game' s audio output settings, select "VR3000 Wireless - Game."
- For third-party voice chat software, select "VR3000 Wireless - Chat" for both audio output and microphone input. For in-game chat, select "VR3000 Wireless - Chat" for the microphone input.
- Adjust the volume for the game and chat separately using the "Volume Mixer" on the Windows PC.
Disconnecting from Ultra Low Latency Wireless Connection
When the Ultra Low Latency USB-C Transceiver is removed from the connected device, the ultra low latency wireless connection will be disconnected.
Please refer to "Pairing with Bluetooth" for detailed instructions on pairing the earbuds via Bluetooth.
To reconnect the transceiver with the earbuds, ensure that the earbuds are not currently connected via Bluetooth and plug the transceiver back into the compatible gaming device or PC. This will restart the transceiver and put it into pairing mode. With the earbuds powered ON, they will automatically connect to the transceiver, enabling ultra low latency wireless connection.
Pairing with Bluetooth
To connect the earbuds to your smartphone or other devices initially, it is necessary to perform device pairing. For devices which have been performed with the device pairing, the Bluetooth connection will automatically be established the next time the power is switched ON if they are in close distance.

First-time pairing:
- Open the lid of the charging case, and the power of the earbuds will turn ON automatically and switch to pairing mode. At this point, when you remove the earbuds from the charging case, one of the LED Indicators will blink alternately in Blue and Red.
- Turn ON the Bluetooth function on your smartphone or other device, and select "final_VR3000 Wireless" when it appears on the screen. When the screen on the connecting device displays "final_VR3000 Wireless Connected *1," pairing is complete.
For re-pairing or pairing with a second or other device:
- Open the lid of the charging case and ensure the earbuds are inside. Press the pairing button on the charging case twice to enter pairing mode. When you remove the earbuds from the charging case, one of the LED indicators will blink alternately in Blue and Red.
- Turn on the Bluetooth function on your smartphone or other device, and select "final_VR3000 Wireless" when it appears on the screen. When the connecting device' s screen displays "final_VR3000 Wireless Connected *1," the pairing is complete.
*1: The display may vary depending on the smartphone or device being used.
- This product supports multi-pairing and can register up to 8 devices. Once paired, switching between connections and Bluetooth playback will be seamless.
- When using the Ultra Low Latency USB-C Transceiver, Bluetooth pairing and connection are not possible. Please disconnect the transceiver before pairing or connecting via Bluetooth.
Touch Control
| L | R | ||
| Music | Play / Pause | - | Single Tap |
| Raise Volume | - | Double Tap | |
| Lower Volume | Double Tap | - | |
| Next Track | - | Triple Tap | |
| Beginning of the Current Track / Previous Track *1 | Triple Tap | - | |
| Cycle between ANC / Ambient / Off | Single Tap | - | |
| Phone | Answer Call *2 | Single Tap | |
| End Call *2 | Double Tap | ||
| Refuse Call *2 | Triple Tap | ||
| Voice Assistant | Initiate *3 | Tap 5 Times | |
*1: Performing at the start of a track will return the playback to the previous track. Performing in the middle of a track will return the playback to the beginning of the current track. While the playback is in the middle of a track, please perform the control twice in succession to return to the previous track.
*2: This feature is not supported during ultra low latency wireless connection.
*3: Depending on the device to which connected, this function may not be available.

Single Ear Mode
This earbuds supports Single Ear Mode. Once the earbuds are being paired to a device, Single Ear Mode is automatically activated when only 1 side of the earbuds is on use with another side being kept inside the charging case. In this mode, you can hear mixed stereo signals from both left and right channels even when using only one earbud.
Factory Reset
If Bluetooth pairing is unsuccessful or an unexpected error occurs during low latency wireless connection, follow these steps to reset the earbuds. After resetting, try pairing or other operations again:
- Place both earbuds in a fully charged charging case with the lid open. Press and hold the pairing button on the charging case for about 10 seconds until the four LED indicators start flashing rapidly. Release the button once this happens.
- After the rapid flashing stops, remove the earbuds from the charging case. One of the earbud's LED indicators will start flashing alternately in Blue and Red, indicating that it has entered pairing mode.
- This process completes the reset and returns the earbuds to their factory default state. All Bluetooth pairing information stored in the earbuds will be erased, so make sure to remove the pairing information from your smartphone or other device as well, and pair the earbuds again.
- The connection between the earbuds and the Ultra Low Latency USB-C Transceiver will be reset after performing the factory reset. To reestablish a new connection, please disconnect the currently connected Transceiver and reconnect it to the gaming device.
Noise Control Mode
3 Noise Control Modes are available, which can also be switched using the dedicated "final CONNECT" app:
- Noise-Canceling Mode: Reduces surrounding noise, making it easier to hear playback audio.
- Ambient Mode: Maintains playback volume while allowing ambient sounds to be heard.
- Noise Control OFF: Disables both of the above modes.
Factory default setting: Noise-Canceling Mode.
Dedicated App "final CONNECT"
"final CONNECT" is a dedicated app designed to enhance your experience with the VR3000 Wireless by allowing customization. By downloading the app on the device paired with the VR3000 Wireless, you can access the following features.

- Switch between Noise Cancelling, Ambient Mode, and OFF
- 10-Band Equalizer that allows customization of sound quality
- Firmware updates
- General Settings allows switching the voice guidance language (Japanese/English), toggling voice guidance, electronic tones, and the touch control panel
- News notifications
- Battery status display
About Ear Tips
When bass is hardly audible and high range sound jars the ear, there is a possibility that the sealing of ear tip is not appropriate. In order to enjoy music in accordance with the design of the earbuds, it is important that the ear tip fits properly and there is a means of sealing the ear canal. In order to achieve the proper fit, please try the following methods:
- Instead of only using the M size attached by default, please try out all the sizes provided.
- Sometimes bigger ear tips might fit better for smaller ears.
- Some users might have different ear canal sizes for the left and right ears. To achieve perfect fitting on both ears, please also try pairing ear tips with different sizes for left and right.
Safety Precautions
The following descriptions are provided to explain matters that must be observed in order to prevent harm to the user as well as other people, along with damages to property. Please be sure to observe this before using the product.
 | Failure to observe the precautions indicated by this label will result in death or serious injury to the user. |
 | Failure to observe the precautions indicated by this label may result in death or serious injury to the user. |
 | Failure to observe the precautions indicated by this label may result in personal injury or property damage. |

 Fire, electric shock, overheat, ignition, leakage, rupture, or accidental ingestion may cause death, blindness, or serious injury.

Do not use, store, or leave the product in a humid or dusty place, or in a car where it will be exposed to high temperatures, or places exposed to direct sunlight. Doing so may cause overheat, leakage, or rupture of the product.
Do not charge the battery when the charging case or USB cable is wet. Doing so may cause abnormal heating or malfunction due to short circuit.
Do not put it in a fire. Doing so may cause leakage or rupture and consequently result in injury or burn mark.

Do not disassemble the product. Doing so may cause product malfunctions.
If you find that liquid is leaking from the earphones or charging case, or if there is an unusual odor or overheat, do not touch the liquid and stop using the earphones immediately. Besides that, move all combustible materials nearby away from the earphones or charging case.

Fire, electric shock, overheat, ignition may cause burn or serious injury.
Do not use the product while driving a car, motorcycle, bicycle, etc. Doing so may cause a traffic accident.
Do not use the product in places where it would be dangerous if the surrounding sound is not audible such as railroad crossings, pedestrian crossings, station platforms, etc. Listening at high volume makes it difficult to hear surrounding sounds. The product is equipped with noise cancellation, it is difficult to hear warning tones and other sounds, which may cause accidents or injuries.
Do not allow water or foreign matter to get inside the charging case and transceiver. They are not waterproof. Water or foreign matter may cause fire or electric shock. If water or foreign matter should enter the charging case, stop using it immediately. Regularly check and ensure that no foreign matter adheres to the terminals of the charging case as it may cause overheat or fire.
Do not charge the charging case while it is covered by bedding or other covering. The heat buildup may cause abnormal overheat, which may result in a fire.
May cause injury or damage to surrounding property.
Keep out of reach of children or persons requiring supervision. The product uses magnets and batteries. Swallowing small parts may cause serious symptoms such as choking hazard or internal organ damage.
Do not use in medical institutions or around people using medical equipment. It may cause malfuntion to medical devices such as pacemakers.
Do not listen at high volume for long periods of time. Prolonged use at excessive volume may result in permanent hearing loss. Do not exceed 40 hours/week at 80 dB (A) and 5 hours/week at 89 dB (A).
 When using the earphones on board an aircraft, follow the instructions of the flight MANDA- TORY crew. Radio wave effects may cause an accident.
Troubleshooting: When You Think, "Is It Broken?"
| Problem | Cause | Remedy |
Earbuds will not turn ON | (Immediately after purchasing) Battery level is low | For safety of transportation from overseas, laws and regulations do not allow the internal battery to be fully charged at the time of shipping. For that reason, voltage may fall below the level required for operation at the time the customer opens the package. Fully charging the battery before use may relieve this inconvenience. Please refer to "Charging" regarding the method for charging. |
| Earbud batteries are depleted | Please return the earbuds into the charging case to charge them. (In case the charge in the charging case has run out, please charge the charging case first.) Please refer to "Charging" regarding the method for charging. | |
| Charging case battery is depleted | If the LED Indicator on the charging case does not light up while opening or closing the case, this indicates that the charging case battery might have depleted. Please charge the charging case. Please refer to "Charging" regarding the method for charging. | |
Earbuds will not turn OFF | An error has occurred due to improper operation | In some cases, performing a reset operation may fix the problem. Please refer to "Factory Reset" regarding the reset method. |
| Charging case (battery level is low LED Indicator does not light up while opening or closing the case) | Normally, if the earbuds are returned to an adequately charged case, the earbuds will automatically turn OFF. If the earbuds do not turn OFF, the battery power level of the charging case might be too low. Please try again after charging the charging case. Please refer to "Charging" regarding the method for charging. | |
| Using ear tips other than those included as accessories preventing the case from fully closed | Normally, if the earbuds are returned to an adequately charged case, the earbuds will automatically turn OFF. However, if ear tips other than provided are used, there are cases in which they may interfere with the charging case and cause the earbuds could not be turned OFF. Please check to see whether the earbuds turn OFF by using original ear tips. | |
Earbuds cannot be charged | Metal contacts on earbud are not touching the pins on the charging case | Please ensure that the metal contacts are touching the pins on the charging case. In addition, if the golden terminal on the earbud or the charging case is dirty with sebum, etc., it may not be able to be charged. Dirt is hardly visible to the naked eye, so please wipe it off gently with a dry cotton swab. |
| Charging case battery level is low (LED indicator does not light up while opening or closing the case) | Normally, if the earbuds are returned to an adequately charged case, the earbuds will automatically turn OFF and start being charged. If the charging does not start, the battery power level of the charging case might be too low. Please try again after charging the charging case. Please refer to "Power/Charging" regarding the method for charging. | |
| The lid of the charging case is not properly closed | Normally, if the earbuds are returned to an adequately charged case, the earbuds will automatically turn OFF and start charging. If the lid of the charging case is closed and re-opened, the earbuds will turn ON and keep consuming power and lead to longer charging time. Please make sure the lid is properly closed while charging. | |
| Using ear tips other than an accessory | Normally, if the earbuds are returned to an adequately charged case, the earbuds will automatically turn OFF and start being charged. However, if ear tips other than provided are used, there are cases in which they may interfere with the charging case and cause the earbuds could not be charged. Please check to see whether the earbuds start charging (LED lights up in Red) by using original ear tips. | |
Touch control is not functioning | The touch control panel has become soiled or wet | In case the touch control panel has become soiled or wet, the touch control panel may not function properly, and it may not be possible to operate the earbuds. Please wipe the touch control panel section with a soft, dry cloth to remove stains or moisture. |
Noise cancelling is not effective enough | Inappropriate ear tips size | If the the size of ear tips are not proper, noise cancellation will not adequately work. Please try various sizes other than the standard M size and use the most appropriate size. For more information, please check "Ear Tips". |
Earbuds cannot be detected / paired | Earbuds are not in the pairing mode | In some cases, performing a reset operation may fix the problem. Please refer to "Factory Reset". |
| Connected to a previously connected device | Please try performing the pairing operation again after having deleted the pairing information from the previously paired device. | |
| Ultra low latency USB-C transceiver is connected | When ultra low latency USB-C transceiver is connected to s device, the earbuds will prioritize ultra low latency wireless connection. If you would like to switch to Bluetooth connection, please remove the ultra low latency USB-C transceiver from the device. | |
In case it takes time to charge | The output of the USB adapter being used for charging is low | When using a USB port on a PC or similar device, the output may be low, resulting in longer charging times than the rated value. Therefore, when charging this product, please use a USB charger capable of supplying 0.5A (500mA) or more. |
| While playing music, sound (connection) is interrupted | Unstable connection caused by interference from external factor | Bluetooth and Ultra Low Latency communicates using the 2.4GHz band. This band is used by other wireless standards such as Wi-Fi, etc., and so there is a possibility of receiving interference. Moreover, this 2.4GHz band does not penetrate liquids. There is impact from humidity and rain, and the human body also contains liquid, so there are individual differences in connectivity. Furthermore, it depends on the specifications of smartphones and other devices. For that reason, switching OFF unused Wi-Fi / Bluetooth settings on surrounding devices, etc. is a countermeasure. While outside, there is a possibility that moving a smartphone from inside a bag to a breast pocket, etc. or otherwise reducing the distance between devices may improve the connection status. |
Sound only comes out from one side | The left /right earbud pairing has been released | In some cases, performing a reset operation may fix the problem. Please refer to "Factory Reset". |
| The battery of one side of the earbuds has depleted | Please return the earbud into the adequately charged charging case to charge it. Please refer to "Charging" regarding the method for charging. | |
| Battery consumption is fast for one side of the earbuds only | The burden between left and right is different | Earbuds Bluetooth communication generally takes place with one side as the parent and the other as the child. The child only communicates with the parent, but the parent communicates with the smartphone and with the child as well, and so a difference in the battery consumption between the left and right may occur. |
| Fast battery consumption while using ultr low latency connection | Battery consumption may vary due to difference in design | Since low-latency wireless communication operates differently from Bluetooth communication, there may be differences in battery consumption between the two. |
The ear tips come off easily | Non dedicated ear tips are used | Use of ear tips other than the dedicated ones may cause them to come off or remain in the ear canal during use. Be sure to use the dedicated ear tips. |
| Lower volume on both sides o on a single side | Dust filter at the nozzle opening is clogged with build-up | Dirt on the filter can cause a decrease in sound pressure. Before wearing the earbuds, please clean your ears and take care to avoid getting the filter dirty. If dirt does accumulate on the filter, gently clean it by lifting the dirt with a small brush or a cotton bud. |
Buzzer noise from the earbuds | Microphone howling effect occurs when microphones are half-covered | Howling effect is a common issue and it is not malfunction. Try to avoid using the earphones by having the microphones half-covered. If howling effect is occuring inside the charging case, please remove the earphones from the case or close the lid completely. |
Maintenance
Please take adequate safety precautions and gently remove the dirt from the mesh filter by attaching it to the tip of a cotton swab. Be careful not to let any dirt fall inside the device during the cleaning process.

Contacting Us
Please contact us by visiting our official "CONTACT" page by scanning the QR code below.

https://final-inc.com/pages/lang-contact ;
Manufacturer: final Inc.
Documents / Resources
References
Download manual
Here you can download full pdf version of manual, it may contain additional safety instructions, warranty information, FCC rules, etc.
Advertisement


Need help?
Do you have a question about the VR3000 Wireless and is the answer not in the manual?
Questions and answers