Table of Contents
Advertisement
Available languages
Available languages
Quick Links
Wäschespinne
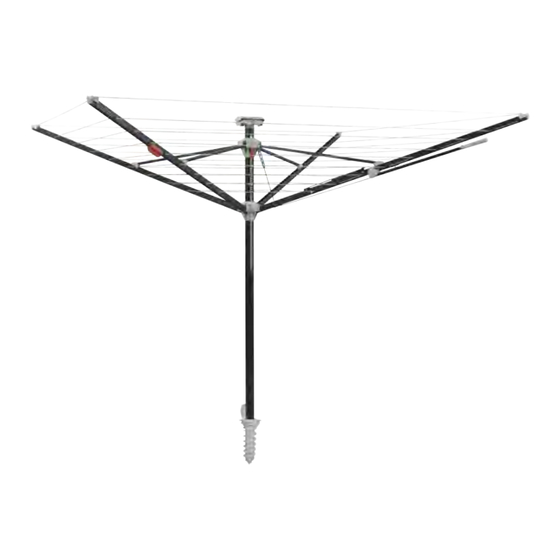
Futura Elegant XXL
Montageanleitung
GB Assembly instructions
FR Instructions de montage
IT Istruzioni di montaggio
JUWEL H. Wüster GmbH · A-6460 Imst, Industriezone 19 oder
D-82467 Garmisch-Partenkirchen, Rießerkopfstraße 21 · office@juwel.com · www.juwel.com
Gedruckt auf 100 % Recyclingpapier
Art.-Nr. 30319
Litho-Nr. 969-06-25
Anl.-Nr. 0125 2431
10
Jahre
Garantie
Advertisement
Table of Contents

Related Manuals for juwel Futura Elegant XXL


Summary of Contents for juwel Futura Elegant XXL
- Page 1 Anl.-Nr. 0125 2431 Montageanleitung GB Assembly instructions FR Instructions de montage Jahre IT Istruzioni di montaggio Garantie JUWEL H. Wüster GmbH · A-6460 Imst, Industriezone 19 oder D-82467 Garmisch-Partenkirchen, Rießerkopfstraße 21 · office@juwel.com · www.juwel.com Gedruckt auf 100 % Recyclingpapier...
- Page 2 Klappen Sie vor dem Lesen die Seite mit den Abbildungen aus und machen Sie sich anschließend mit allen Funktionen des Gerätes vertraut. Before reading, unfold the page containing the illustrations and familiarise yourself with all functions of the device. Avant de lire le mode d’emploi, ouvrez la page contenant les illustrations et familiarisez-vous ensuite avec toutes les fonctions de l’appareil.
- Page 3 Lieferumfang/Teile...
- Page 4 Gebrauchsanleitung Ø ~ 40 cm / 1.3 ft ~ 4 cm / 0.1 ft Erde Beton Soil Concrete Terre Béton Kies Terra Cemento Gravel Gravier Ghiaia...
-
Page 5: Table Of Contents
1. Inhaltsverzeichnis Einleitung; Bestimmungsgemäßer Gebrauch ............. Seite 6 Wäschespinne und Lieferumfang prüfen; Lieferumfang/Teile ........Seite 7 Technische Daten; Sicherheitshinweise ..............Seite 8 Montage des Eindreh-Bodenankers ................Seite 9 Wäschespinne verwenden ..................Seite 10 Pflegehinweise; Entsorgung; Garantie ............... Seite 12 Warnung! Dieses Signalsymbol bezeichnet eine Gefährdung mit einem mittleren Risikograd, die, wenn sie nicht vermieden wird, den Tod oder eine schwere Verletzung zur Folge haben kann. -
Page 6: Herzlichen Glückwunsch
Diese Gebrauchsanleitung gehört zu dieser hochwertigen Wäschespinne. Sie enthält wichtige Informationen zum Zusammenbau und zum Gebrauch. Um die Verständlichkeit zu erhöhen, wird die Wäschespinne Futura Elegant XXL im Folgenden nur „Wäschespinne“ genannt. Lesen Sie die Gebrauchsanleitung, insbesondere die Sicherheitshinweise, sorgfältig durch, bevor Sie die Wäschespinne einsetzen. -
Page 7: Wäschespinne Und Lieferumfang Prüfen; Lieferumfang/Teile
4. Wäschespinne und Lieferumfang prüfen Hinweis! Beschädigungsgefahr! Wenn Sie die Verpackung unvorsichtig öffnen, kann die Wäschespinne beschädigt werden. Verwenden Sie beim Auspacken keine spitzen Gegenstände. 1. Nehmen Sie die Wäschespinne aus der Verpackung. 2. Entfernen Sie das Verpackungsmaterial und sämtliche Schutzfolien. 3. -
Page 8: Technische Daten; Sicherheitshinweise
6. Technische Daten Modell: Futura Elegant XXL Lift Gewicht: ca. 8,9 kg Durchmesser Standrohr: 55 mm Abmessungen Wäschespinne (geöffnet): ca. 237 × 237 × 165–190 cm Tragkraft: ca. 100 kg (Sternteile) Artikelnummer: 30319 7. Sicherheitshinweise VORSICHT: Vor jeder Benutzung muss die Wäschespinne auf Beschädigungen überprüft werden. -
Page 9: Montage Des Eindreh-Bodenankers
Eine defekte Aufspannschnur kann bei Benutzung plötzlich reißen, wobei Sie im schlimmsten Fall bei Benutzung das Gleichgewicht verlieren können – Verletzungsgefahr. 7.2 Verschleiß am Standrohr Je nach Bodenverhältnissen ist das sich in dem Eindreh-Bodenanker drehende Stand rohr einem Verschleiß ausgesetzt. Kontrollieren Sie mindestens einmal jährlich das Standrohr an der Stelle, wo es am Boden aus dem Eindreh-Bodenanker austritt, auf Verschleiß. -
Page 10: Wäschespinne Verwenden
5. Entfernen Sie das Eindreh-Werkzeug sowie eingedrungene Erde aus dem Eindreh- Bodenanker. 6. Stellen Sie die Wäschespinne mit dem Standrohr bis zur Pfeilmarkierung am Standrohr in den Eindreh-Bodenanker und kontrollieren mit einer Wasserwaage den senkrechten Stand der Wäschespinne (siehe Abb. G). Sie können die Wäschespinne jetzt verwenden. - Page 11 9.2 Öffnen der Wäschespinne Hinweis! Beschädigungsgefahr! Wenn Sie die Wäscheleinen zu stark spannen oder den Leichtspannhebel mit Gewalt öffnen, können Sie die Wäschespinne beschädigen. Bewegen Sie den Leichtspannhebel nie mit Gewalt. Achten Sie darauf, dass die Wäscheleinen der Wäschespinne nicht zu stark gespannt sind. 1.
-
Page 12: Pflegehinweise; Entsorgung; Garantie
9.5 Schutzhülle überziehen 1. Zum Herunterziehen der Schutzhülle muss die Wäschespinne geschlossen sein. Führen Sie das obere Sternteil durch Ziehen an der oberen, roten Grifftaste wieder in die oberste Position. Die Arme müssen im oberen Sternteil eingerastet sein. 2. Nun kann die Schutzhülle leicht aus dem Trichter über die Arme gleiten – mit leichtem Zug, niemals Gewalt anwenden. -
Page 13: Garantiezeit Und Gesetzliche Mängelansprüche
übermitteln Sie uns bitte die Beschreibung und Nummer des gewünschten Teils (den Typ Ihrer Wäschespinne finden Sie oben am Standrohr). Montageanleitungen und Teileliste können Sie von unserer Homepage www.juwel.com unter der jeweiligen Artikelgruppe – Montageanleitungen – herunterladen. Gedruckt auf 100 % Recyclingpapier... - Page 14 12.5 Ersatzteile Die verfügbaren Ersatzteile können über die oben stehende Serviceadresse bezogen werden. Bezeichnung Art.-Nr. Wäscheleine ( 30024 Schutzhülle ( 30338 Eindreh-Bodenanker ( 30026...
- Page 15 1. Table of contents Introduction; Intended use; Check contents and clothes dryer ........Page 16 Scope of delivery / parts; Technical data ..............Page 17 Safety instructions ......................Page 18 Installation of the ground anchor ................Page 19 Use the clothes dryer....................Page 20 Care instructions; Disposal ..................Page 21 Warranty ........................Page 22 Warning! This signal draws attention to the risk of a medium-degree danger which if not avoided can lead to a fatal or serious injury.
-
Page 16: Introduction; Intended Use; Check Contents And Clothes Dryer
This operating manual belongs to this rotary clothes dryer. It contains important information for assembly and use. To increase the clarity, the Futura Elegant XXL will here after just be called “clothes dryer”. Please read the instructions, especially the safety instructions, through carefully before you start using the clothes dryer. -
Page 17: Scope Of Delivery / Parts; Technical Data
Ground anchor Ring (fig. I) Handle Weight (fig. I) 6. Technical data Type: Futura Elegant XXL Lift Weight: approx. 19.62 lb | 8.9 kg Dimensions of the main standard (ø): 2.16” | 55 mm Dimensions of the clothes dryer (opened): approx. -
Page 18: Safety Instructions
7. Safety instructions CAUTION: The clothes dryer must be checked for damage before each use. A damaged clothes dryer may no longer be used. Make sure you hang up your laundry evenly. Do not hang up laundry in strong wind! Place the clothes dryer so that it can rotate freely. -
Page 19: Installation Of The Ground Anchor
8. Installation of the ground anchor Choose a location where the clothes dryer can rotate freely. Depending on the soil you can either screw-in the ground anchor or fix it in concrete. 1. Remove the transport protection from the tip of the screw-in ground anchor (see fig. E). 2. -
Page 20: Use The Clothes Dryer
9. Use the clothes dryer 9.1 Height adjustment The height adjustment may only be operated when the dryer is closed! 1. By releasing the upper red handle button for height adjustment you can adjust the height of the clothes dryer on the main standard . -
Page 21: Care Instructions; Disposal
3. Slide the arms in the latching mechanism at the top collar , until they lock into place (see fig. B). 4. Pull the protection cover over the clothes dryer, as described in the chapter “storage” if you wish to no longer use the clothes dryer or store it. 9.5 Put on the protection cover 1. -
Page 22: Warranty
12. Warranty Dear customer! You will receive 10 years warranty on this device, starting from the date of purchase. You are entitled legal rights against the seller in case of defects of this product. These legal rights are not limited by our following represented warranty. 12.1 Warranty terms and conditions The warranty period begins with the date of purchase. - Page 23 You can download assembly instructions and parts lists from our homepage www.juwel.com under the respective item group, assembly instructions – please change to English. 12.5 Spare parts The spare parts available can be obtained from the service address above.
- Page 24 1. Table des matières Introduction; Utilisation prévue; Vérifier le séchoir parapluie et le contenu de la livraison ...........Page 25 Étendue de livraison / Pièces; Données techniques ..........Page 26 Consignes de sécurité ....................Page 27 Montage de la douille de sol à vis ................Page 28 Utiliser le séchoir parapluie ..................Page 29 Conseils d’entretien ....................Page 30 Élimination;...
-
Page 25: Utilisation Prévue
Ce mode d’emploi appartient à ce séchoir parapluie aluminium. Il contient des informations importantes pour l’assemblage et l’utilisation. Pour plus de compréhensibilité, le séchoir parapluie Futura Elegant XXL n’est appelé que séchoir parapluie par la suite. Lisez attentivement le mode d’emploi, en particulier les consignes de sécurité, avant d’utiliser le séchoir parapluie. -
Page 26: Étendue De Livraison / Pièces; Données Techniques
Poids (figure I) Poignée de main Bras, 3 × 6. Données techniques Type : Futura Elegant XXL Lift Poids : env. 8,9 kg Dimensions du mât (ø) : 55 mm Dimensions du séchoir parapluie (ø) : env. 237 × 237 × 165–190 cm Capacité... -
Page 27: Consignes De Sécurité
7. Consignes de sécurité ATTENTION : Le séchoir parapluie doit être vérifié pour dommages avant chaque utilisation. Un séchoir parapluie endommagé ne peut plus être utilisée. Veillez à répartir votre linge uniformément sur le séchoir-parapluie. N’étendez pas votre linge par vent fort ! Placez le séchoir-parapluie de façon à ce qu’il puisse tourner librement. Pour éviter d’endommager le mât, veuillez retirer toutes les pinces à... -
Page 28: Montage De La Douille De Sol À Vis
Vous obtenez un nouveau mât directement chez nous en mentionnant le type de séchoir parapluie. Remplacez de même d’autres pièces de construction comme par ex. les poulies et les rivets toujours par des pièces de rechange originales contrôlées. Seules celles-ci assurent le fonctionnement sûr de votre séchoir parapluie. -
Page 29: Utiliser Le Séchoir Parapluie
5. Avant que le béton soir dur, placez le séchoir parapluie avec le mât jusqu’à la flèche au mât dans la douille de sol. Avec un niveau à bulle, vérifiez la position verticale du séchoir parapluie (voir figure H). 6. Retirez à nouveau le séchoir parapluie de la douille de sol. Attendez que le béton soit entièrement durci. -
Page 30: Conseils D'entretien
3. Accrochez la ficelle de serrage en réalisant un nœud dans un trou du haut au niveau de l’élément de resserrage. Veillez à ce que l’étendoir ne soit pas trop tendu. Si nécessaire, déplacez le nœud en conséquence (voir figure C). Si possible, n’ouvrez JAMAIS les pinces serre-corde à... -
Page 31: Élimination; Garantie
11. Élimination 11.1 Élimination de l’emballage Éliminez l’emballage en fonction des matières. Amenez le papier et le carton conteneur de vieux papiers et les plastiques au conteneur de matières plastiques. 11.2 Élimination du séchoir parapluie Éliminez le séchoir parapluie conformément aux directives en vigueur dans votre pays. 12. - Page 32 (le type de votre sèche-linge rotatif se trouve sur le dessus de la colonne montante). Vous pouvez télécharger les instructions de montage et les listes de pièces sur notre page d’accueil www.juwel.com sous le groupe d’articles correspondant – instructions de montage.
- Page 33 1. Indice Introduzione; Utilizzo secondo le disposizioni ............Pagina 34 Ambito della fornitura / componenti; Controlla lo stendibiancheria ad ombrello e l’ambito della fornitura ......Pagina 35 Dati tecnici; Indicazioni di sicurezza ................ Pagina 36 Manicotto filettato di fondo, completo di distanziale ..........Pagina 37 Uso dello stendibiancheria ad ombrello..............
-
Page 34: Introduzione; Utilizzo Secondo Le Disposizioni
2. Introduzione 2.1 Congratulazioni! Con questo acquisto avete optato per un prodotto di elevato valore. Prima di procedere al montaggio ed al primo uso è bene prendere confidenza con il prodotto. Le presenti istruzioni per l’uso fanno parte dello stendibiancheria ad ombrello in alluminio e contiene informazioni importanti per il montaggio e l’uso. -
Page 35: Ambito Della Fornitura / Componenti
4. Controlla lo stendibiancheria ad ombrello e l’ambito della fornitura AVVERTENZA: Pericolo di danneggiamento! Se l’imballo viene aperto con poca cautela, lo stendibiancheria può essere danneggiato. Non usare oggetti appuntiti per togliere l’imballo. 1. Estrarre lo stendibiancheria ad ombrello dal confezionamento. 2. -
Page 36: Dati Tecnici; Indicazioni Di Sicurezza
6. Dati tecnici Tipo: Futura Elegant XXL Lift Peso: ca. 8,9 kg Dimensioni del montante (diam.): 55 mm Dimensioni dello stendibiancheria ad ombrello (diam.): ca. 237 × 237 × 165–190 cm Carico massimo dell’elemento a stella: 100 kg Codice articolo: 30319 7. -
Page 37: Manicotto Filettato Di Fondo, Completo Di Distanziale
7.2 Usura presso la colonna montante A seconda delle condizioni del terreno, la colonna montante che ruota entro l’ancoraggio di fondo oppure entro la guaina di fondo è soggetta ad una certa usura. Si prega di controllare quanto meno una volta l’anno l’usura della colonna montante nel punto del suolo in cui essa esce dalla guaina/dall’ancoraggio di fondo. -
Page 38: Uso Dello Stendibiancheria Ad Ombrello
5. Togliere l’utensile di avvitamento come pure la terra inseritasi nell’ancora. 6. Posizionare lo stendibiancheria ad ombrello, con il montante, inserendolo fino alla marcatura della freccia sul montante nell’ancora. Verificare con una bolla la posizione verticale dello stendibiancheria ad ombrello (vedi fig. G). Ora è... - Page 39 9.2 Apertura dello stendibiancheria Nota! Pericolo di danneggiamento! Tendendo troppo i fili o forzando la leva di serraggio a presa rapida, è possibile danneggiare accidentalmente lo stendibiancheria ad ombrello. Non forzare mai il movimento della leva di serraggio a presa rapida. Assicurarsi che i fili dello stendibiancheria ad ombrello non siano troppo tesi.
-
Page 40: Note Di Preservazione; Smaltimento; Garanzia
9.5 Infilare la custodia 1. Per poter infilare correttamente la custodia lo stendibiancheria ad ombrello deve essere chiuso. Tirando l’elemento a stella superiore , avvicinarlo al pulsante a maniglia superiore rosso portandolo nella posizione più alta possibile. I bracci devono essere saldamenti agganciati nell’elemento a stella superiore 2. -
Page 41: Condizioni Di Garanzia
(il modello dello stendibiancheria ad ombrello è riportato nella parte superiore del tubo montante). Le istruzioni di montaggio e l’elenco dei componenti sono disponibili per il download sulla nostra homepage www.juwel.com nel rispettivo gruppo di articoli o istruzioni di montaggio. -
Page 42: Pezzi Di Ricambio
12.5 Pezzi di ricambio I pezzi di ricambio disponibili possono essere richiesti all’indirizzo di assistenza sopra indicato. Denominazione N. art. Filo ( 30024 Copertura di protezione ( 30338 Ancoraggio ad avvitamento ( 30026... - Page 43 1. Inhoudsopgave Inleiding; Doelmatig gebruik; Controleer droogmolen en inhoud van de levering..........Pagina 44 Levering / Onderdelen; Technische gegevens ............Pagina 45 Veiligheidsinstructies ....................Pagina 46 Montage van het grondanker................... Pagina 47 Droogmolen gebruiken .................... Pagina 48 Verzorging ....................... Pagina 49 Afvalverwijdering;...
-
Page 44: Doelmatig Gebruik
2. Inleiding 2.1 Gefeliciteerd! Met uw aankoop heeft U zich besloten een kwaliteitsproduct te kopen. Gelieve zich met het product vertrouwd te maken voor de installatie en inbedrijfstelling. Deze gebruiksaanwijzing behoort tot deze aluminium droogmolen. Ze bevat belangrijke informatie in verband met montage en gebruik. Om de duidelijkheid te verhogen wordt de aluminium droogmolen hieronder gewoon “droogmolen”... -
Page 45: Levering / Onderdelen; Technische Gegevens
Ring (fig. I) Indraai-grondanker Gewicht (fig. I) Handvat Arm, 3 × 6. Technische gegevens Type: Futura Elegant XXL Lift Gewicht: ong. 8,9 kg Afmetingen van de standbuis (ø): 55 mm Afmetingen van de droogmolen (ø): ong. 237 × 237 × 165–190 cm... -
Page 46: Veiligheidsinstructies
7. Veiligheidsinstructies OPGEPAST: De droogmolen moet voor elk gebruik op schade gecontroleerd worden. Een beschadigde droogmolen mag niet meer gebruikt worden. Let erop dat de was gelijkmatig opgehangen wordt. Niet bij heftige wind was ophangen! De droogmolen zo plaatsen dat hij vrij kan draaien. Voor het sluiten of opruimen a.u.b. alle knijpers verwijderen, omdat anders de standbuis kan worden beschadigd. -
Page 47: Montage Van Het Grondanker
Een nieuwe standbuis is onder vermelding van het droogmolentype verkrijgbaar rechtstreeks bij ons. U wordt verzocht om ook andere constructieonderdelen zoals bv. katrollen enz. altijd te vervangen door gekeurde originele onderdelen – alleen deze garanderen dat uw droger zonder gevaar functioneert. 8. -
Page 48: Droogmolen Gebruiken
5. De droogmolen met de standbuis, tot de pijlmarkering op de standbuis , in het grondanker steken en controleer met een waterpas de loodrechte stand van de droogmolen (zie fig. H). 6. Neem de droogmolen uit het grondanker en wacht totdat het beton volledig is uitgehard. -
Page 49: Verzorging
Open NOOIT kabelklemmen aan het uiteinde van arm – alleen bij het wisselen van de waslijn! 9.4 Droogmolen sluiten 1. Verwijder alle voorwerpen van de waslijn 2. Druk de klemhendel langzaam naar beneden, zodat het onderste stergedeelte naar beneden kan schuiven zonder de klemhendel los te laten tot deze in verticale positie staat. -
Page 50: Afvalverwijdering; Garantie
11. Afvalverwijdering 11.1 Verpakking weggooien Gooi de verpakking weg volgens verpakkingstype . Gelieve hiervoor de plaatselijke regels van afval te respecteren. 11.1 Droogmolen weggooien Gooi de droogmolen weg in overeenstemming met de regelgeving in uw land. 12. Garantie Beste klant! U krijgt 10 jaar garantie op deze droogmolen, vanaf aankoopdatum. - Page 51 (het type van uw droogmolen vindt u bovenaan de standpijp). Montagehandleidingen en stuklijsten kunt u downloaden van onze homepage www.juwel.com onder de betreffende artikelgroep – montagehandleiding. 12.5 Reserveonderdelen De beschikbare reserveonderdelen zijn verkrijgbaar bij bovenstaand serviceadres.
- Page 52 1. Vsebina Uvod; Uporaba skladno z namenom; Pregled sušilnika za perilo in obsega dobave ............Stran 53 Obseg dobave / deli; Tehnični podatki .................Stran 54 Varnostni napotki ......................Stran 55 Montaža talnega sidra ....................Stran 56 Uporaba sušilnika za perilo ..................Stran 57 Navodila Za Nego; Odstranjevanje................Stran 58 Garancijski list ......................Stran 59 Pozor! Ta signalni simbol označuje nevarnost srednje stopnje tveganja, ki ima lahko za posledico smrt ali težko poškodbo, če se ne prepreči.
-
Page 53: Pregled Sušilnika Za Perilo In Obsega Dobave
1. Vsebina Uvod; Uporaba skladno z namenom; Pregled sušilnika za perilo in obsega dobave ............Stran 53 Obseg dobave / deli; Tehnični podatki .................Stran 54 Varnostni napotki ......................Stran 55 Montaža talnega sidra ....................Stran 56 Uporaba sušilnika za perilo ..................Stran 57 Navodila Za Nego; Odstranjevanje................Stran 58 Garancijski list ......................Stran 59 Pozor! Ta signalni simbol označuje nevarnost srednje stopnje tveganja, ki ima lahko za posledico smrt ali težko poškodbo, če se ne prepreči. -
Page 54: Obseg Dobave / Deli; Tehnični Podatki
Vijačno talno sidro Utež (prikaz I) Oprijem ročice Roka, 3 × 6. Tehnični podatki Tip: Futura Elegant XXL Lift Teža: ca. 8,9 kg Izmere stoječe cevi (ø): 55 mm Izmere sušilnika za perilo (ø): ca. 237 × 237 × 165–190 cm Maksimalna obremenitev zvezdastih delov: 100 kg Številka artikla:... -
Page 55: Varnostni Napotki
7. Varnostni napotki POZOR: Pred vsako uporabo sušilni stroj preverite za morebitne poškodbe. Poškodovanega sušilnega stroja ne smete uporabljati. Pazite na enakomerno porazdelitev. Pri močnem vetru ne smete obesiti perila! Vrtni sušilnik morate tako namestiti, da je omogočeno prosto obračanje. Pred zložitvijo ali pospravljenjem prosimo, odstranite vse ščipalke, saj se pokončna cev lahko poškoduje. -
Page 56: Montaža Talnega Sidra
8. Montaža talnega sidra Izberite mesto postavitve, na katerem se lahko sušilnik perila prosto vrti. Talno sidro lahko glade na stanje tal vanje privijete ali zabetonirate. 1. Odstranite transportno zaščito iz konice privojnega talnega sidra (glej prikaz E). 2. Odstranite zaščitne kape iz pokrova , dokler ne zaskoči (glej prikaz F). -
Page 57: Uporaba Sušilnika Za Perilo
9. Uporaba sušilnika za perilo 9.1 Nastavitev višine Prestavitev višine se lahko izvaja zgolj v zaprtem stanju! 1. S sprostitvijo zgornje, rdeče oprijemalne tipke za nastavitev višine lahko sušilnik perila po višini prestavljate na postavitveni cevi . Pri tem se roki do neke mere odpreta, brž... -
Page 58: Navodila Za Nego; Odstranjevanje
9.4 Zapiranje sušilnika za perilo 1. Odstranite vse predmete iz vrvice za sušenje 2. Počasi pritisnite napenjalno ročico navzdol tako, da lahko spodnji zvezdasti drsi navzdol, ne da bi pri tem izpustili napenjalno ročico, dokler ta ni v navpičnem položaju. POZOR! Vzvod v nepritrjenem položaju se nahaja pod veliko napetostjo ter se ga zato ne sme enostavno odpustiti. -
Page 59: Garancijski List
12. Garancijski list Spoštovani kupec! Na to napravo prejmete 10 let garancije od datuma nakupa. V primeru pomanjkljivosti tega proizvoda vam pripadajo nasproti prodajalcu tega proizvoda zakonske pravice. Te zakonske pravice z našo v nadaljevanju predstavljeno garancijo niso omejene. 12.1 Garancijski pogoji Garancijski rok prične z datumom nakupa. -
Page 60: Nadomestni Deli
številko želenega dela (Tip vašega sušilnika za perilo najdete zgoraj na stoječi cevi). Navodila za montažo in seznam delov si lahko naložite iz naše domače strani www.juwel.com pod vsakokratno skupino artikla – navodila za montažo – prenesi. - Page 62 JUWEL H. Wüster GmbH A-6460 Imst, Industriezone 19, Tel. 0043-5412-69400, Fax 64838 oder D-82467 Garmisch-Partenkirchen, Rießerkopfstraße 21, Tel. 0049-8821-1679, Fax 78545 office@juwel.com · www.juwel.com Gedruckt auf 100 % Recyclingpapier...
Need help?
Do you have a question about the Futura Elegant XXL and is the answer not in the manual?
Questions and answers