Table of Contents
Advertisement
Quick Links
Operating Instructions
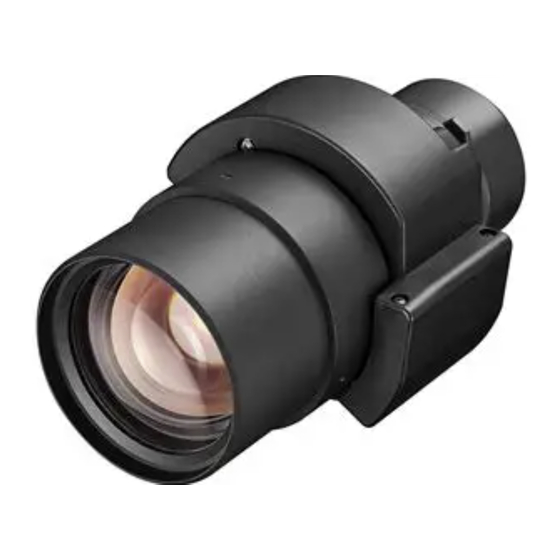
Zoom Lens
Commercial Use
ET-C1T800
Model No.
ENGLISH
FRANÇAIS
日本語
Thank you for purchasing this Panasonic product.
■ To ensure correct use of this lens, please read the operating instructions supplied
with the lens and the projector carefully.
■ Before using this product, be sure to read "Read this first!" (
Page 3 to 5).
■ Please save this manual for future use.
DPQX1794ZA/X1
Advertisement
Table of Contents

Related Manuals for Panasonic ET-C1T800


Summary of Contents for Panasonic ET-C1T800
- Page 1 ENGLISH FRANÇAIS 日本語 Thank you for purchasing this Panasonic product. ■ To ensure correct use of this lens, please read the operating instructions supplied with the lens and the projector carefully. ■ Before using this product, be sure to read “Read this first!” ( Page 3 to 5).
-
Page 2: Table Of Contents
█ Contents Read this first! ..................3 Before Use.....................6 Preparation....................7 Before replacing the projection lens ............7 Attaching the Lens................... 8 Detaching the Lens ................. 8 Projection relationships...............9 Lens shift ranges ................12 Specifications ..................13 Dimensions ..................13 Projected image size and Projection distance..Appendix / Annexe / 付録 1 The “Appendix”... -
Page 3: Read This First
Read this first! Always follow these precautions WARNING: Do not look at or place your skin into the light emitted from the lens while the projector is being used. Doing so can cause burns or loss of sight. z Strong light is emitted from the projector’s lens. Do not look at or place your hands directly into this light. - Page 4 Read this first! (continued) r Hazard distance (IEC/EN 62471-5:2015) The distance from the projection lens surface, at which the emission reaches the Accessible Emission Limit (AEL) of risk group 2, is known as the hazard distance (HD) or safety distance. The area where the emission exceeds the Accessible Emission Limit of risk group 2 is called the hazard zone (HZ).
- Page 5 The projectors compatible with each projection lens may be added or changed without notice. For the latest information, refer to the following website. https://docs.connect.panasonic.com/projector Attention z If the light projected from the projector directly enters the eyes while you are inside the hazard zone, the retinas may be damaged.
-
Page 6: Before Use
This manual omits the alphabets at the end of projector model numbers. z Models other than the above may also be supported. Refer to the operating instructions for your projector or the following website. https://docs.connect.panasonic.com/projector ■ Supplied Accessories Make sure that the following has been provided. -
Page 7: Preparation
Preparation Before replacing the projection lens Return the projection lens to the home position before replacing or removing it. For details on how to return the lens to the home position, refer to the operating instructions of the projector. Attention z Make sure that the projector power supply is switched off before attaching or detaching the projection lens. -
Page 8: Attaching The Lens
Preparation (continued) Attaching the Lens Attention z Before attaching the Projection Lens, remove the two lens covers attached to the Projection Lens. The illustrations in this procedure depict use of the PT-REQ15 as an example. 1) Align the protrusion mark on the projection lens with the protrusion mark on the main unit and insert it all the way (Fig. -
Page 9: Projection Relationships
Projection relationships The dimensional relationship between the screen and the projector is shown below. ■ Dimensional relationship diagram Projected image L (LW/LT) Screen L (LW/LT) Note z This diagram assumes that the size and position of the projected image will be adjusted so that the image fills the entire screen. - Page 10 Projection relationships (continued) ■ Dimensional relationship For details on the projection distance (L), refer to “Projected image size and Projection distance” and “Projection distance formulas” in the Appendix. Note z For details on “Projected image size and Projection distance” for projector models other than the following, refer to “Setting up”...
- Page 11 Projection relationships (continued) Only [KEYSTONE] [KEYSTONE] and [CURVED CORRECTION] Only [CURVED used used together CORRECTION] used Vertical Horizontal Vertical Horizontal Projector keystone keystone keystone keystone Min. Min. Min. Min. model correction correction correction correction value of value of value of value of angle α...
-
Page 12: Lens Shift Ranges
Lens shift ranges Perform the lens position shift within the adjustment range. Perform lens shift adjustment within the ranges shown in the following illustrations. The focus may change when the lens position is shifted out of the adjustment range. This is because the movement of the lens is restricted to protect the optical parts. Projection position can be adjusted with the optical axis shift based on the home position in the respective range. -
Page 13: Specifications
Specifications F Number 1.94 - 2.52 Focal Length (f) 58.3 mm (2-9/32”) - 115.6 mm (4-9/16”) Width 135 mm (5-5/16”) Dimensions Height 148 mm (5-13/16”) Depth 254 mm (10”) Net Weight Approx. 2.4 k g (5.3 lb) Dimensions (Unit: mm) 254 (10") ENGLISH-13... - Page 14 4-1-62 Minoshima, Hakata-ku, Fukuoka 812-8531, Japan Importer: Panasonic Connect Europe GmbH English Hagenauer Strasse 43, 65203 Wiesbaden, Germany Authorized Representative in EU: Panasonic Connect Europe GmbH Panasonic Testing Centre Winsbergring 15, 22525 Hamburg, Germany Производител: Panasonic Connect Co., Ltd. 4-1-62 Minoshima, Hakata-ku, Fukuoka 812-8531, Япония...
- Page 15 4-1-62 Minoshima, Hakata-ku, Fukuoka 812-8531, Japón Importador: Panasonic Connect Europe GmbH Español Hagenauer Strasse 43, 65203 Wiesbaden, Alemania Representante Autorizado para la UE: Panasonic Connect Europe GmbH Panasonic Testing Centre Winsbergring 15, 22525 Hamburgo, Alemania Fabriqué par : Panasonic Connect Co., Ltd.
- Page 16 4-1-62 Minoshima, Hakata-ku, Fukuoka 812-8531, Japan Importeur: Panasonic Connect Europe GmbH Nederlands Hagenauer Strasse 43, 65203 Wiesbaden, Duitsland Bevoegde vertegenwoordiger in de EU: Panasonic Connect Europe GmbH Panasonic Testing Centre Winsbergring 15, 22525 Hamburg, Duitsland Produsert av: Panasonic Connect Co., Ltd.
- Page 17 4-1-62 Minoshima, Hakata-ku, Fukuoka 812-8531, Japão Importador: Panasonic Connect Europe GmbH Português Hagenauer Strasse 43, 65203 Wiesbaden, Alemanha Representante Autorizado na UE: Panasonic Connect Europe GmbH Panasonic Testing Centre Winsbergring 15, 22525 Hamburgo, Alemanha Fabricat de: Panasonic Connect Co., Ltd.
- Page 18 Manufactured by: Panasonic Connect Co., Ltd. 4-1-62 Minoshima, Hakata-ku, Fukuoka 812-8531, Japan Importer: Panasonic Connect Europe GmbH Hagenauer Strasse 43, 65203 Wiesbaden, Germany Authorized Representative in EU: Panasonic Connect Europe GmbH Panasonic Testing Centre Winsbergring 15, 22525 Hamburg, Germany Importer for UK:...
-
Page 19: Projected Image Size And Projection Distance
Appendix / Annexe / 付録 ■ Projected image size and Projection distance ■ Taille de l’image projetée et distance de projection ■ 投写画面サイズと投写距離 Note z When using projector models other than the following, refer to “Setting up” in the operating instructions of the projector. - Page 20 Appendix / Annexe / 付録 (continued / suite / つづき) z When the screen aspect ratio is 16:10 z Lorsque le rapport d’aspect de l’écran est 16:10 (Unit / Unités / 単位 : m) z 画面アスペクト比 16:10 のとき Throw ratio / Rapport de projection / スローレシオ : [3.30 - 6.60:1] 1.78 (70") 0.942 1.508...
- Page 21 Appendix / Annexe / 付録 (continued / suite / つづき) z When the screen aspect ratio is 4:3 z Lorsque le rapport d’aspect de l’écran est 4:3 (Unit / Unités / 単位 : m) z 画面アスペクト比 4:3 のとき Throw ratio / Rapport de projection / スローレシオ : [3.98 - 8.01:1] 1.78 (70") 1.067 1.422...
- Page 22 Appendix / Annexe / 付録 (continued / suite / つづき) Note z A ±5 % error in listed projection distances may occur. When [GEOMETRY] is used, distance is corrected to become smaller than the specified image size. z The throw ratio is based on the value during projection with the projected image size of 2.54 m (100"). Remarque z Une erreur de ±5 % dans des distances de projection énumérées peut se produire.
- Page 23 Appendix / Annexe / 付録 (continued / suite / つづき) z Projection distance formulas z Formules de distance de projection z 投写距離計算式 Values obtained by the following calculation formulae contain a slight error. Periods are used to represent decimal points in the calculation formulas in the following table. Les valeurs obtenues par les formules de calcul suivantes contiennent une légère erreur.
- Page 24 Two Riverfront Plaza, Newark, NJ 07102 TEL: (877) 803 - 8492 Panasonic Canada Inc. 5770 Ambler Drive, Mississauga, Ontario L4W 2T3 TEL: (905) 624 - 5010 パナソニック コネクト株式会社 〒 571-8503 大阪府門真市松葉町2番 15 号 電話 0120-872-601 SS0225AM0 -PS © Panasonic Connect Co., Ltd. 2025 Printed in Japan...
Need help?
Do you have a question about the ET-C1T800 and is the answer not in the manual?
Questions and answers