Table of Contents
Advertisement
Quick Links
TOP MOUNT REFRIGERATOR
INSTRUCTION MANUAL
CATALOG NUMBER
BR1810HIMB, BR1810HIMH,
BR1810HIMS, BR2020HIMB,
BR2020HIMH, BR2020HIMS
Thank you for choosing BLACK+DECKER!
PLEASE READ BEFORE RETURNING THIS PRODUCT FOR ANY REASON.
If you have a question or experience a problem with your BLACK+DECKER purchase,
go to www.blackanddecker.com/instantanswers
If you can't find the answer or do not have access to the Internet, call 844-299-0879 from
10:30 a.m. to 6:30 p.m. EST Mon. - Fri. to speak with an agent. Please have the catalog number
available when you call.
SAVE THIS MANUAL FOR FUTURE REFERENCE.
ACTIVATE
WARRANTY
Advertisement
Table of Contents

Related Manuals for Black & Decker BR1810HIMB


Summary of Contents for Black & Decker BR1810HIMB
- Page 1 ACTIVATE WARRANTY TOP MOUNT REFRIGERATOR INSTRUCTION MANUAL CATALOG NUMBER BR1810HIMB, BR1810HIMH, BR1810HIMS, BR2020HIMB, BR2020HIMH, BR2020HIMS Thank you for choosing BLACK+DECKER! PLEASE READ BEFORE RETURNING THIS PRODUCT FOR ANY REASON. If you have a question or experience a problem with your BLACK+DECKER purchase, go to www.blackanddecker.com/instantanswers...
-
Page 2: Product Registration
PRODUCT REGISTRATION Thank you for purchasing our _____________________________ BLACK+DECKER product. This Model number easy-to-use manual will guide you _____________________________ in getting the best use of your Serial number refrigerator. _____________________________ Remember to record the model and Date of purchase serial numbers. They are on a label on the back of the product. -
Page 3: Safety Information
SAFETY INFORMATION DANGER WARNING CAUTION DANGER - Immediate hazards WARNING - Hazards or unsafe CAUTION - Hazards or unsafe which WILL result in severe practices which COULD result in practices which COULD result in personal injury or death severe personal injury or death minor personal injury IMPORTANT SAFETY INSTRUCTIONS WARNING... -
Page 4: Gas Warnings
SAFETY INFORMATION Keep ventilation openings, in the appliance or enclosure or in the built-in structure, clear of obstruction. 12. Do not use mechanical devices or other means to accelerate the defrosting process, other than those recommended by the manufacturer. 13. Do not use electrical appliances inside the food storage compartments unless they are recommended by the manufacturer. -
Page 5: Grounding Instructions
SAFETY INFORMATION GROUNDING INSTRUCTIONS ELECTRICAL REQUIREMENTS The electrical requirements are a 115 volt 60 Hz, AC only, 15 amp. It is recommended that a separate circuit serving only the product be provided. The product is equipped with a 3-wire cord having a 3-prong grounding plug. It must be plugged into a wall receptacle that is properly installed and grounded. - Page 6 SAFETY INFORMATION USE OF EXTENSION CORDS WITH REFRIGERATORS Only use a grounded extension cord that is rated at least 15 amps and has a third-wire ground. When a long extension cord is used to connect the refrigerator, a voltage drop occurs.
- Page 7 SET UP & USE INSTALLATION GUIDE Unpack your refrigerator by removing all packaging materials like carton, base, foams, adhesive tape, etc. 2. Remove all accessories, internal packaging material used to hold shelves, ice tray, etc. in place. 3. Clean the remains of all adhesive tape used and remove all printed material supplied. 4.
-
Page 8: Door Alignment
SET UP & USE PROTECTION FROM HEAT AND MOISTURE • Do not install your refrigerator in any location where heavy moisture is present or if the location is not properly insulated. This refrigerator is not designed to operate in temperature settings below 50°... -
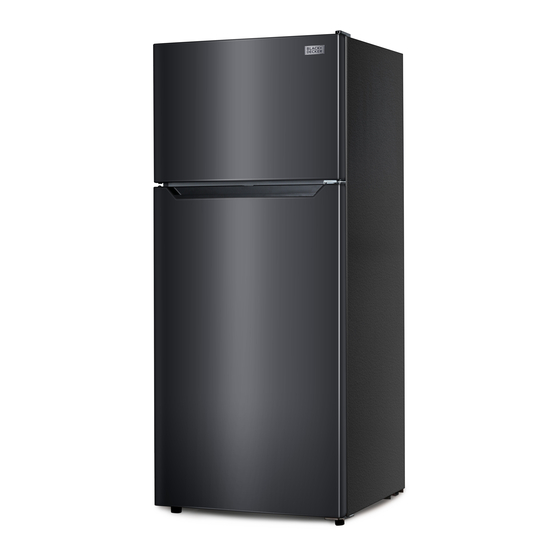
Page 9: Parts And Features
SET UP & USE PARTS & FEATURES MODELS BR1810HIM AND BR2020HIM Freezer Shelf Ice Maker Freezer Door Rails Freezer Temperature Control Light cover Refrigerator Temperature Control Refrigerator Door Bins Adjustable Tempered Glass Shelves Glass Crisper Cover Crisper Adjustable Feet NOTE: Figure is for illustration purpose only. Actual figure may vary. Please refer to the actual product. -
Page 10: Starting Your New Refrigerator
SET UP & USE OPERATION INSTRUCTIONS STARTING YOUR NEW REFRIGERATOR After cleaning your refrigerator thoroughly. Wipe the outside with a soft dry cloth, the interior with a clean moist cloth. 1. Insert the power supply cord into the socket. 2. Adjust refrigerator compartment temperature to “coldest” setting. Let the unit run for 15-20 minutes. NOTE: As the door gets pressed in during shipping, the gasket may have to be reset. -
Page 11: Refrigerator Temperature Control
SET UP & USE REFRIGERATOR TEMPERATURE CONTROL NOTE: If the refrigerator/freezer has been placed in a horizontal or tilted position for any period of time, wait 24 hours before plugging the unit in. • The settings of the temperature control are “1, 2, 3, 4, 5.” “1” being the warmest, to “5” the coldest setting. -
Page 12: Reverse Door
SET UP & USE • The ice maker will fill up (and start making ice) between 12 and 24 hours after the refrigerator is turned on. • Throw away the first batch of ice. Make sure that nothing interferes with the sensor. •... - Page 13 SET UP & USE 5. Move the middle hinge hole covers from the 6. Unscrew bottom hinge. Then remove the left side to the right side. adjustable feet from both sides. 7. Remove the washer and nut that secure the 8.
-
Page 14: Food Storage
SET UP & USE 11. Place the upper door back on. Ensure the door 12. Move the hole cover from the left side to the is aligned horizontally and vertically so that it right side and tighten it with a screw. seals properly. -
Page 15: Cleaning And Care
CLEANING & CARE CLEANING AND CLEANING METHOD MAINTAINING Prepare a cleaning solution of 3-4 tablespoons of baking soda mixed with warm water. Use The refrigerator should be cleaned and sponge or soft cloth, dampened with the cleaning maintained once a month. Before doing so, you solution to wipe down your refrigerator. -
Page 16: Energy Saving Tips
CLEANING & CARE ENERGY SAVING TIPS • The refrigerator should be located in the coolest area of the room, away from heat-producing appliances or heating ducts, and out of direct sunlight. • Let hot foods cool to room temperature before placing in the refrigerator. Overloading the refrigerator forces the compressor to run longer and thus increase energy consumption. -
Page 17: Troubleshooting & Warranty
TROUBLESHOOTING & WARRANTY BEFORE YOU CALL FOR SERVICE IF THE REFRIGERATOR FAILS TO OPERATE: A) Check to make sure that the refrigerator is plugged in securely. If it is not, remove the plug from the outlet, wait 10 seconds and plug it in again securely. B) Check for a blown circuit fuse or a tripped main circuit breaker. - Page 18 TROUBLESHOOTING & WARRANTY TROUBLESHOOTING Troubleshoot your problem by using the chart below. If the refrigerator still does not work properly, contact W Appliance Co. customer service center or the nearest authorized service center. Customers must never troubleshoot internal components. TROUBLE POSSIBLE CAUSE POSSIBLE REMEDY Refrigerator does not work.
-
Page 19: Limited Warranty
LIMITED WARRANTY ACTIVATE WARRANTY Any repair, replacement, or warranty service, and all questions about this product should be directed to W Appliance Co. at 844-299-0879 from the US, including Puerto Rico, or Canada. Some issues can be addressed without service. Before contacting regarding your warranty, please visit the “Troubleshooting”... - Page 20 LIMITED WARRANTY WHAT IS NOT COVERED / EXCLUSIONS 1. Commercial, non-residential or multiple family use or use 12. Travel or transportation expenses for service in remote inconsistent with the product instructions and manuals. locations where an authorized servicer is not available. 2.
- Page 21 EXTENDED WARRANTY COVERAGE Protect Your Appliance with Extended Warranty Coverage Thank you for purchasing your new appliance! Your product comes with our one-year limited warranty, but why stop there? With our Extended Warranty and Accidental Damage Protection Plan, provided by Mulberry, you can ensure your appliances are covered for longer—without worrying about unexpected breakdowns or accidents.
- Page 22 BLACK & DECKER, BLACK+DECKER, the BLACK & DECKER and BLACK+DECKER logos and product names are trademarks of The Black & Decker Corporation, used under license. All rights reserved. BLACK & DECKER, BLACK+DECKER, les logos et noms de produits BLACK & DECKER et BLACK+DECKER sont des marques commerciales de The Black &...
Need help?
Do you have a question about the BR1810HIMB and is the answer not in the manual?
Questions and answers