Medline EVENCARE G2 Manual
- User manual (107 pages) ,
- Operator's manual (32 pages)
Advertisement
- 1 G2 Meter Overview
- 2 Meter Display Screen
- 3 System Specifications
- 4 EvenCare G2 Control Solution Testing
- 5 Blood Glucose Testing
- 6 Understanding Test Results
- 7 Using the Meter Memory
- 8 Cleaning and Disinfecting
- 9 Changing the Batteries
- 10 Storage and Precautions
- 11 Troubleshooting
- 12 In-Service Training
- 13 Operator Certification Checklist
- 14 Self Test
- 15 Self Test — Answer Key
- 16 EvenCare G2 Blood Glucose Monitoring System: Nurse In-service Training Record
- 17 Certified Instructor Record
- 18 Certified Instructor Record — Competency Checklist
- 19 Review of Nurse's Technique
- 20 EvenCare G2 Quality Control Log
- 21 Performing a Control Solution Test
- 22 Documents / Resources
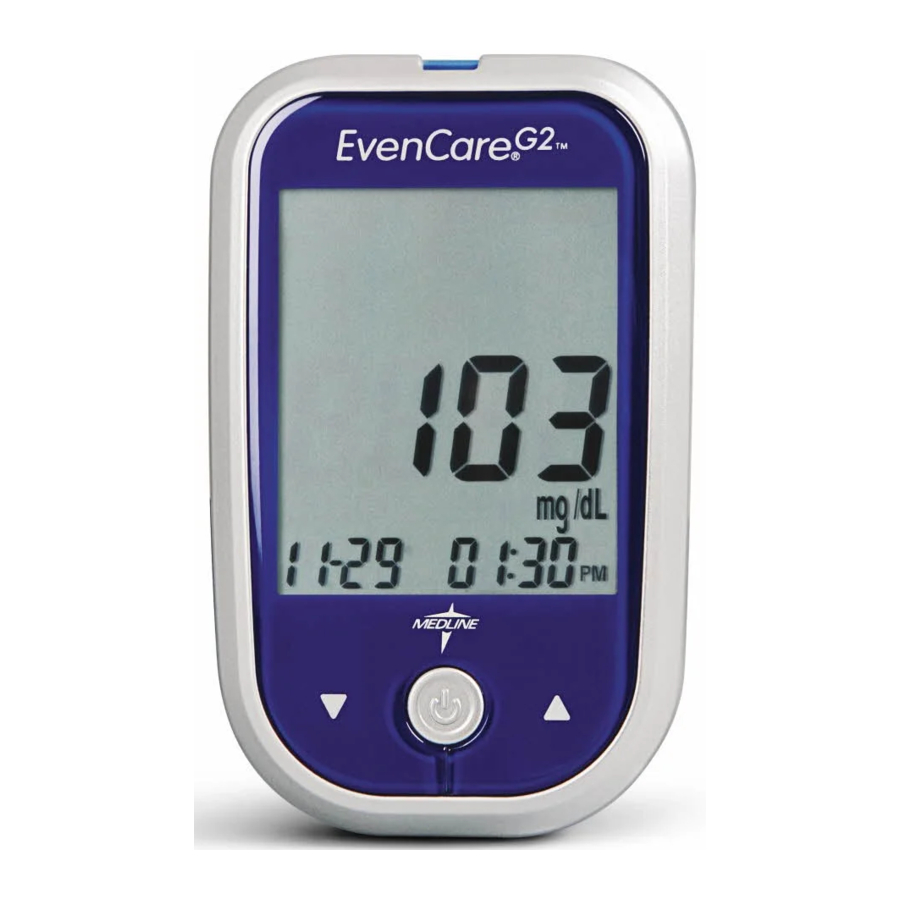
G2 Meter Overview

Meter Display Screen

Displays the date, time (AM/PM) or type of day averages (7, 14 or 30).
| 1 | Control | Indicates a control solution test or the stored value is a control solution result |
| 2 | Alarm | Indicates alarm has been set |
| 3 | Memory | Indicates the number in the meter display is a stored test value |
| 4 | Battery | Appears when batteries need to be changed |
| 5 | Cable | Indicates the meter is in data transfer mode to PC |
| 6 | Beeper | Set sound volume |
| 7 | Temperature | Appears when it is either too hot or too cold to test (outside the ranges of 50˚F–104˚F) |
| 8 | Clock | Indicates the meter is ready to set up time and date |
| 9 | Voice | Indicates the voice feature is on |
| 10 | End | Will appear on the display screen after the last recorded test result if less than 300 readings are stored |
| 11 | Units | Unit of measurement for your blood glucose is mg/dL |
| 12 | Blood Drop and Arrow | Indicates the meter is ready for testing |
System Specifications
| Test Strips | EvenCare G2 Blood Glucose Test Strips |
| Test Range | 20–600 mg/dL |
| Calibration | Plasma |
| Test Time | 6 seconds |
| Sample Size | Larger than 1µL |
| Hematocrit Range | 30%–55% |
| Display Type | Large LCD screen |
| Memory | 300 blood test results with date and time |
| Result Averaging | 7-, 14- and 30-day averaging |
| Battery | 2 Alkaline AAA Batteries |
| Battery Life | 1,000 tests of continuous use or 1 year |
| Automatic Power-Off | After 2 minutes of non-use |
| Operating Temperature | 50°F–104°F |
| Operating Humidity | Less than 85% |
| Storage Condition | Meter at 39°F–122°F, Test Strips at 39°F–86°F |
| Dimensions (L x W x H) | 93 x 58 x 20.5 mm |
| Weight (including battery) | 79g |
EvenCare G2 Control Solution Testing
Make sure the EvenCare G2 Meter and the EvenCare G2 Test Strips are working properly.
Perform a control solution test when:
- Using the meter for the first time
- Making sure the meter and test strips are working properly at least once per week
- Using a new bottle of EvenCare G2 Blood Glucose Test Strips
- You left the test strip bottle cap open for awhile
- You dropped the meter
- You suspect your meter and test strips are not working properly
- The blood glucose test results do not reflect how you feel
- You want to practice the testing procedure

- Use only the EvenCare G2 Glucose Control Solutions with the EvenCare G2 Test Strips — Other brands of control solution will produce inaccurate results
![]()
- Always check the expiration date — DO NOT use control solutions if they're expired
- DO NOT freeze — Store the control solutions at room temperature

Materials needed
- EvenCare G2 Control Solution (Low and High)
- Your EvenCare G2 Meter
- A new EvenCare G2 Blood Glucose Test Strip
- Take out an EvenCare G2 Test Strip from the test strip bottle and close the bottle immediately. Insert the test strip to turn on the meter.
![]()
![]()
- Check the expiration date printed on the test strip bottle
- DO NOT use expired, wet or damaged test strips
- Use each test strip immediately after removing it from the bottle
- Keep test strips away from direct sunlight and heat
- Store the test strip bottle in a dry, cool place
- Record the "date opened" on the bottle label. Discard the bottle and any remaining test strip after 6 months from date of opening
- Test within the temperature range of 50˚F to 104˚F; your meter will not work.
- Insert the test strip properly
- The flashing blood drop icon will appear once the test strip has been fully inserted
- Wait until the flashing blood drop and arrow icons appear on the meter display screen. The meter will also announce, "Please apply blood onto the test strip" if you have the voice feature turned on. Press
![]() one time to enter L1 (LOW) control solution testing.
one time to enter L1 (LOW) control solution testing.
![]()
- The ctl icon will appear next to the test strip icon and L1 will appear on the meter display screen. The meter will also announce "L1 control solution test, please apply control solution onto the test strip." If you decide not to do a control solution test, press
![]() two times and ctl will disappear from the meter display.
two times and ctl will disappear from the meter display.
![]()
- Squeeze a drop of Low control solution onto a clean, dry, non-absorbent surface. Do not apply control solution to the test strip directly from the control solution bottle. Replace the bottle cap on the control solution bottle immediately after use.
![]()
![]()
DO NOT touch the sampling end of the test strip with the bottle of control solution. - Gently touch the tip of the test strip to the drop of control solution. The meter will beep indicating it has received the control solution. The screen will start to count down. After 6 seconds, the control solution test result will appear on the meter display screen.
![]()
- Compare the reading on the screen to the Low range printed on the test strip bottle. If the reading falls outside the Low range, see Control Solution Troubleshooting section in User's Guide.
![]()
Note- Control solution test results will be stored in meter memory and indicated by ctl icon
- Control solution test results will not be used for calculating averages
- Remove the used test strip. The meter will automatically turn off. Discard the used test strip. Follow steps 8 through 14 to perform the High control solution testing.
![]()
![]()
DO NOT reuse test strips. - Take out an EvenCare G2 Test Strip from the test strip bottle and close the bottle immediately. Insert the test strip to turn on the meter.
![]()
- Wait until the flashing blood drop and arrow icons appear on the meter display screen. The meter will also announce, "Please apply blood onto the test strip" if you have the voice feature turned on. Press
![]() two times to enter L2 (HIGH) control solution testing.
two times to enter L2 (HIGH) control solution testing.
![]()
- The ctl icon will appear next to the test strip icon and L2 will appear on the meter display screen. The meter will also announce "L2 control solution test, please apply control solution onto the test strip." If you decide not to do a control solution test, press
![]() one time and ctl will disappear from the meter display.
one time and ctl will disappear from the meter display.
![]()
- Squeeze a drop of High control solution onto a clean, dry, non-absorbent surface. Do not apply control mg/dL solution to the test strip directly from the control solution bottle. Replace the bottle cap on the control solution bottle immediately after use.
![]()
![]()
DO NOT touch the sampling end of the test strip with the bottle of control solution. - Gently touch the tip of the test strip to the drop of control solution. The meter will beep indicating it has received the control solution. The screen will start to count down. After 6 seconds, the control solution test result will appear on the meter display screen.
![]()
- Compare the reading on the screen to the High range printed on the test strip bottle. If the reading falls outside the High range printed on the test strip bottle, see Control Solution Troubleshooting in the User's Guide.
![]()
- Remove the used test strip. The meter will automatically turn off. Discard the used strip.

 one time to enter L1 (LOW) control solution testing.


Blood Glucose Testing
Materials needed
- EvenCare G2 Meter
- A new EvenCare G2 Blood Glucose Test Strip
- Auto-disabling single use lancing device — use an auto-disabling single use lancing device to take the blood sample. Follow the manufacturer's instructions for how the lancing device should be used
Users need to adhere to standard precautions when handling or using this device. All parts of the glucose monitoring system should be considered potentially infectious and are capable of transmitting blood-borne pathogens between patients and healthcare professionals. A new pair of clean gloves should be worn by the user before testing each patient.
- Take out an EvenCare G2 Test Strip from the test strip bottle and close the bottle immediately. Insert the test strip to turn on the meter.
![]()
![]()
- Check the expiration date printed on the test strip bottle and its package
- DO NOT use expired, wet or damaged test strips
- Use each test strip immediately after removing it from the bottle
- Keep away from direct sunlight and heat
Store the test strip bottle in a dry, cool place - Record the "date opened" on the bottle label. Discard the bottle and any remaining test strip after 6 months from date of opening
- The flashing blood drop icon will appear once the test strip has been fully inserted
- Wait for a flashing blood drop and an arrow icon to appear on the meter display screen. The meter will also announce, "Please apply blood onto the test strip" if you have the voice feature turned on.
![]()
- Obtain blood sample.
![]()
- Gently bring the test strip and touch the drop of blood at a slight angle. The test strip acts like a straw to pull the blood in. Keep the test strip in the blood drop until the meter beeps to indicate the test strip has enough blood to test.
- The screen will start to count down. After 6 seconds, the blood glucose result will appear on the meter display screen and will be announced verbally if you have the voice feature turned on. The test result will be automatically stored into the meter memory.
![]()
![]()
If you see "HI" or "LO" displayed, the patient's blood glucose level may be above 600 mg/dL or below 20 mg/dL. Test again using fingertip testing, DO NOT test on the forearm. If you still receive the same result, call the patient's physician or healthcare professional immediately. - Properly discard the used test strip. The meter will automatically shut off.
![]()
![]()
Used lancets and strips are biohazardous materials and can transmit bloodborne diseases. Dispose of them according to local government regulation to avoid injury or contamination.


Understanding Test Results
Blood glucose values will vary depending on food intake, medication, health, stress, and exercise.
The ideal range for adults with and without diabetes should be1:
- 70 to 100 mg/dL before meals
- 70 to 140 mg/dL after meals
If the meter displays a result that is "HI" or "LO" or the patient gets a result that is more than 250 mg/dL or less than 50 mg/dL, and the patient feels ill:
- Treat their diabetes according to the instruction from their doctor and/or consult their healthcare provider
If the meter displays results that are "HI" or "LO," or the patient gets a result that is more than 250 mg/dL or below 50 mg/dL AND the patient DOES NOT feel ill:
- Test the meter with a control solution
- Test the patient again using fingertip
If the patient still gets a high or low reading, contact their healthcare professional.
Note
- Inaccurate results may occur in severely hypotensive individuals or if the patient is in shock
- Inaccurate low results may occur for individuals experiencing a hyperglycemic-hyperosmolar state, with or without ketosis
- Critically ill patients should not be tested with blood glucose meters
Reference:
- American Diabetes Association. Standards of Medical Care in Diabetes — 2008. Diabetes Care. 2008;31:S12–S54.
Using the Meter Memory
The EvenCare G2 Meter automatically stores up to 300 glucose test results together with the date and time. The meter also provides 7, 14 and 30 day averages to help track a patient's blood glucose trend. The time and date must be set in order to use the memory and day averaging function. The meter memory will not store test results if the date and time are not set.
You will need
- EvenCare G2 Meter
- Press and hold Enter (
![]() ) to turn on the meter.
) to turn on the meter.
![]()
- Press Enter (
![]() ) to enter setup screen.
) to enter setup screen. - Press
![]() or
or ![]() until MEM starts to flash. If the voice function is on, the meter will say "memory recall." Press Enter (
until MEM starts to flash. If the voice function is on, the meter will say "memory recall." Press Enter (![]() ) to enter.
) to enter.
MEM will appear at the upper left corner of the display screen together with your most recent testing result. Press![]() to see the next result, and the next, and so on. Holding
to see the next result, and the next, and so on. Holding ![]() will flash through the results.
will flash through the results.
END will appear on the display screen after the last recorded test result if less than 300 readings are stored. You can press![]() to go back viewing from the oldest to the most recent readings.
to go back viewing from the oldest to the most recent readings.
![]()
- When you reach the most recent result, continue to press
![]() to start viewing day averages. The meter will display the 7 day average, press
to start viewing day averages. The meter will display the 7 day average, press ![]() again to see 14 day average, and press
again to see 14 day average, and press ![]() again to see 30 day average.
again to see 30 day average.


Note
- Control test results are flagged by ctl on the bottom left corner of the display screen in addition to MEM
- When the meter memory is blank, the display screen will show nil
- When there are no day average results available, the display screen will show 4 dashes
- If the meter memory is full, adding a new test result will cause the oldest result to be deleted
- Meter memory test results and day averages will not be erased when changing batteries
- You can begin testing anytime by inserting a test strip
Cleaning and Disinfecting
- DO NOT get water inside the EvenCare G2 Meter
- Never immerse the meter or hold it under running water
- DO NOT use glass cleaners or household cleaners on the meter
- DO NOT try to clean the test strip holder
- DO NOT take the EvenCare G2 Meter apart. Doing so will void the warranty. If there are technical problems or questions in the use of the meter, contact Medline Technical Service Center at 1-866-274-2131 between 8:00 am and 5:00 pm (Central Time), Monday through Friday
- Handle the meter with care — severe shock, such as dropping the meter, could damage the electronics
Materials needed
- EvenCare G2 Meter
- Gloves
- A validated disinfecting wipe
Cleaning and disinfecting the meter and lancing device is very important in the prevention of infectious disease. Cleaning is the removal of dust and dirt from the meter and lancing device surface so no dust or dirt gets inside. Cleaning also allows for subsequent disinfection to ensure germs and disease causing agents are destroyed on the meter and lancing device surface.
The EvenCare G2 Meter is validated to withstand a cleaning and disinfection cycle of ten times per day for an average period of three years. The following products are validated for disinfecting the EvenCare G2 Meter:
- Dispatch® Hospital Cleaner Disinfectant Towels with Bleach (EPA Registration Number: 56392-8)
- Medline Micro-Kill+™ Disinfecting, Deodorizing, Cleaning Wipes with Alcohol (EPA Registration Number: 59894-10)
- Clorox Healthcare® Bleach Germicidal and Disinfectant Wipes (EPA Registration Number: 67619-12)
- Medline Micro-Kill™ Bleach Germicidal Bleach Wipes (EPA Registration Number: 37549-1)
These disinfecting wipes are available through major retailers online or call 1-866-274-2131 to purchase.
Other EPA Registered wipes may be used for disinfecting the EvenCare G2 system, however, these wipes have not been validated and could affect the performance of the meter. If you use an EPA Registered wipe not listed above and you notice any of the below signs after cleaning and disinfecting the meter, stop using the device and call Medline Technical Service at 1-866-274-2131.
- Control solution out of range
- Clouding meter LCD display
- Corrosion or erosion of plastic housing or buttons
- Cracking of plastic housing
- Malfunction of any meter button
- Wash hands with soap and water and dry thoroughly.
- Inspect for blood, debris, dust, or lint anywhere on the meter.
- To clean the meter, use a moist (not wet) lint-free cloth dampened with a mild detergent. Wipe all external areas of the meter including both front and back surfaces until visibly clean. Avoid wetting the meter test strip port.
Note- DO NOT get water inside the meter or immerse the meter in water or any other liquids
- DO NOT use glass or household cleaners on the meter
- Avoid using ammonia to clean the meter
- Avoid using ammonia to clean the meter
- Avoid wetting the test strip port of the meter
- To disinfect the meter, clean the meter with one of the validated disinfecting wipes listed below. Other EPA registered wipes may be used for disinfecting the EvenCare G2 system, however these other wipes have not been validated and could affect the performance of the meter.

- Dispatch® Hospital Cleaner Disinfectant Towels with Bleach (EPA Registration Number: 56392-8)
- Medline Micro-Kill+™ Disinfecting, Deodorizing, Cleaning Wipes with Alcohol (EPA Registration Number: 59894-10)
- Clorox Healthcare® Bleach Germicidal and Disinfectant Wipes (EPA Registration Number: 67619-12)
- Medline Micro-Kill™ Bleach Germicidal Bleach Wipes (EPA Registration Number: 37549-1)

Wipe all external areas of the meter including both front and back surfaces until visibly clean. Avoid wetting the meter test strip port. Allow the surface of the meter to remain wet at room temperature for the contact time listed on the wipe's directions for use.
- Wipe meter dry or allow to air dry.
- Wash hands with soap and water and dry thoroughly.
Note
- Keep disinfecting wipes out of reach of children and stored according to their instructions
- DO NOT flush disinfecting wipes down toilet
If you notice any of the below signs after cleaning and disinfecting the meter stop using the device and call Medline Technical Service immediately at 1-866-274-2131.
- Control solution out of range
- Clouding meter LCD display
- Corrosion or erosion of plastic housing or buttons
- Cracking of plastic housing
- Malfunction of any meter button
Changing the Batteries
Batteries need to be changed when the ![]() icon appears on the meter display.
icon appears on the meter display.
Materials you will need
- Two Alkaline AAA Batteries
- EvenCare G2 Meter
- Press firmly on the battery cover and slide in the direction of the arrow.
![]()
- Insert new batteries
![]() . Slide the battery cover back into the meter firmly.
. Slide the battery cover back into the meter firmly.

Note
The test results, alarm settings, volume setting, and language choice stay in memory when the batteries are changed.
Storage and Precautions
- Handle the meter with care — severe shock, such as dropping the meter, could damage the electronics
- The meter and test strips are designed to be used within the temperature ranges between 50˚F to 104˚F
- Avoid leaving the meter in extremely hot or cold places, such as near a heat source or in an extremely hot or cold car
- DO NOT store or use the meter or test strips in high humidity levels, such as bathroom or kitchen
- Always close bottle cap immediately after removing a test strip and make sure it's closed tightly
- DO NOT take the meter apart as doing so will void the warranty
Troubleshooting
This section details the significant display screen messages and error codes you will encounter when using your EvenCare G2 Meter and EvenCare G2 test strips.
| WHAT YOU SEE | WHAT THE METER SAYS | WHAT IT MEANS | WHAT YOU SHOULD DO | |||
 | "Error 1 Meter Failure" | The meter's electronics or test strip is damaged. | Remove the battery and turn on the meter again. Remove the test strip and insert a new test strip again. If the problem persists, please call 1-866-274-2131 Monday through Friday, 8:00 a.m.–5:00 p.m. (CST). | |||
 | "Error 3 used test strip" | Used or damaged test strip. | Repeat the test with a new test strip. Remember to add sample only when you see the prompt on the display screen or the meter verbally prompts you to add sample. | |||
 | Not Applicable | There are no results in the memory. | Check to see if the date and time on the meter are set up. Start testing glucose. | |||
 | "Low Battery" | Batteries are low | Change the batteries. | |||
 | "Temperature is out of range" | Used test strip. | Move the meter into an area that is between 50˚F–104˚F, and allow 10 to 15 minutes for it to reach the new temperature. | |||
 | "Your blood glucose reading is above 600 mg/dL." | Test result is higher than 600 mg/dL. | Wash and dry your hands and repeat the test on a different fingertip with a new test strip. If the result is still "HI," contact the patient's physician or healthcare professional immediately. | |||
 | "Your blood glucose reading is below 20 mg/dL." | Test result is lower than 20 mg/dL. | Wash and dry your hands and repeat the test on your fingertip with a new test strip. If the result is still "LO," contact the patient's physician or healthcare professional immediately. | |||
 | Not Applicable. | There are no results in the memory. | Check to see if the date and time on the meter are set up. Start testing glucose. | |||
In-Service Training
At the conclusion of an EvenCare G2 Meter in-service training session, attendees should be able to do the following:
- Identify and describe all components of the EvenCare G2 Blood Glucose Monitoring System including:
- Test strip port
- Battery compartment
- Serial number
- LCD screen
- EvenCare G2 test strips
- EvenCare G2 control solution
- EvenCare G2 User's Guide
- Toll-free customer service number
- Be familiar with the EvenCare G2 test strip bottle and location of the lot number, expiration date, and control solution ranges.
- Be familiar with the proper handling, insertion, and storage of the EvenCare G2 test strips.
- Check performance of the meter using control solutions.
- Record quality control results.
- Perform a blood glucose test.
- Understand test results.
- Clean and disinfect the meter.
- Change the batteries.
- Use memory function of the meter.
- Understand the meanings of the error messages.
- Understand the training certification process.
Operator Certification Checklist
Certified Instructor: Complete one checklist for each operator-trainee.
Before signing this checklist, the trainee must meet objectives as listed below.
- Familiarization with Components of the EvenCare G2 Blood Glucose Monitoring System
- EvenCare G2 Meter
- Features (test strip port, battery compartment and screen)
- Serial Number
- Toll-Free Customer Service Number
- Cleaning and Disinfecting
- Storage
- EvenCare G2 Blood Glucose Test Strips
- Expiration Date
- Lot Number
- Control Solution Ranges
- Handling of Strip
- Proper Insertion of Strip
- Storage
- EvenCare G2 Control Solution
- Expiration Date
- Lot Number
- Acceptable Range
- Test Procedure
- EvenCare G2 Meter
- Describe/Demonstrate
- Obtain a Blood Sample — Preparation, Obtaining Sample
- Perform a Blood Glucose Test
- Quality Control — Dropping Solution on Flat Surface, Marking Control Test in Meter,
- Perform Quality Control Test, Log Quality Control Result
- Explain
- Batteries — Replacement Procedure
- Memory Function — Describe Process
Self Test
- True or False:
EvenCare G2 Meter needs to be calibrated/coded. - What is the purpose of testing with Control Solutions?
- When performing a control solution test, you should:
- Apply the control solution direct from the bottle to the test strip
- Squeeze a drop of control solution to a flat surface, and touch the test strip to the control solution
- Apply control solution to the test strip before inserting it into the meter
- True or False:
You need to mark a control test as a control test, so that it shows as a control test in the memory of the meter. - True or False:
The test strip vial should be closed immediately after taking a test strip out of the vial to avoid any degrading or contamination of the strips. - How long is the test time on the EvenCare G2 Meter?
- Where can you find information to troubleshoot error messages?
- User's Guide
- EvenCare Technical Support Line
- All of the above
- What type of batteries are used in the EvenCare G2 Meter?
- What is the procedure for disinfecting the EvenCare G2 Meter?
Self Test — Answer Key
- True or False:
EvenCare G2 Meter needs to be calibrated/coded. - What is the purpose of testing with Control Solutions?
To validate that the EvenCare G2 Meter is working properly with the test strips. - When performing a control solution test, you should:
- Apply the control solution direct from the bottle to the test strip
- Squeeze a drop of control solution to a flat surface, and touch the test strip to the control solution
- Apply control solution to the test strip before inserting it into the meter
- True or False:
You need to mark a control test as a control test, so that it shows as a control test in the memory of the meter. - True or False:
The test strip vial should be closed immediately after taking a test strip out of the vial to avoid any degrading or contamination of the strips. - How long is the test time on the EvenCare G2 Meter?
6 seconds - Where can you find information to troubleshoot error messages?
- User's Guide
- EvenCare Technical Support Line
- All of the above
- What type of batteries are used in the EvenCare G2 Meter?
Two AAA - What is the procedure for disinfecting the EvenCare G2 Meter?
Clean the meter with a disinfecting wipe. Wipe all external areas of the meter including both front and back surfaces until visibly wet. Allow the surface of the meter to remain wet at room temperature for the contact time/kill time listed on the canister. Then, wipe meter dry or allow to air dry.
EvenCare G2 Blood Glucose Monitoring System: Nurse In-service Training Record
The healthcare professionals listed below have been trained to use the EvenCare G2 Blood Glucose Monitoring System:
Certified Trainer's Name

Certified Instructor Record
The following individuals have undergone the appropriate training on the EvenCare G2 Blood Glucose Monitoring System and are certified to serve as instructors in blood glucose monitoring using the EvenCare G2 Blood Glucose Monitoring System. They are qualified to perform initial training of Certified Operators, conduct performance reviews, and maintain records concerning Certified Operators.

Certified Instructor Record — Competency Checklist

Review of Nurse's Technique

EvenCare G2 Quality Control Log

Performing a Control Solution Test
- Insert test strip to turn on meter.
![]()
- Press
![]() or
or ![]() once to enter control solution mode for low or high. The "ctl" icon will display on lower left corner of the LCD, indicating the meter is in control mode.
once to enter control solution mode for low or high. The "ctl" icon will display on lower left corner of the LCD, indicating the meter is in control mode.
![]()
- Invert and gently shake the control solution bottle three times. Apply drop to top of test strip vial.
![]()
- Bring meter and strip onto the droplet. The meter will beep and start counting down after enough control solution is drawn into the test strip.
![]()
- Compare result to the low or high range printed on test strip vial.
![]()
- Remove and discard the used test strip. The meter will automatically turn off. Wipe clean the top of the strip vial.
![]()


Failure to follow instruction may cause out of range results.

Note
- Write down the date when the control solution is first opened. Discard three months after the date of the first opening
- For more information on performing a control solution test, see EvenCare G2 User's Guide or call Customer Support at 1-866-274-2131
If you need assistance, please call Medline's Technical Service Center at 1-866-274-2131 Monday through Friday between 8:00 am and 5:00 pm (Central Time).
1-800-MEDLINE (633-5463)
medline.com
Documents / ResourcesDownload manual
Here you can download full pdf version of manual, it may contain additional safety instructions, warranty information, FCC rules, etc.
Advertisement


Need help?
Do you have a question about the EVENCARE G2 and is the answer not in the manual?
Questions and answers