Dash Deluxe DSIM200 Manual and Recipe Guide
- Instruction manual and recipe manual (17 pages)
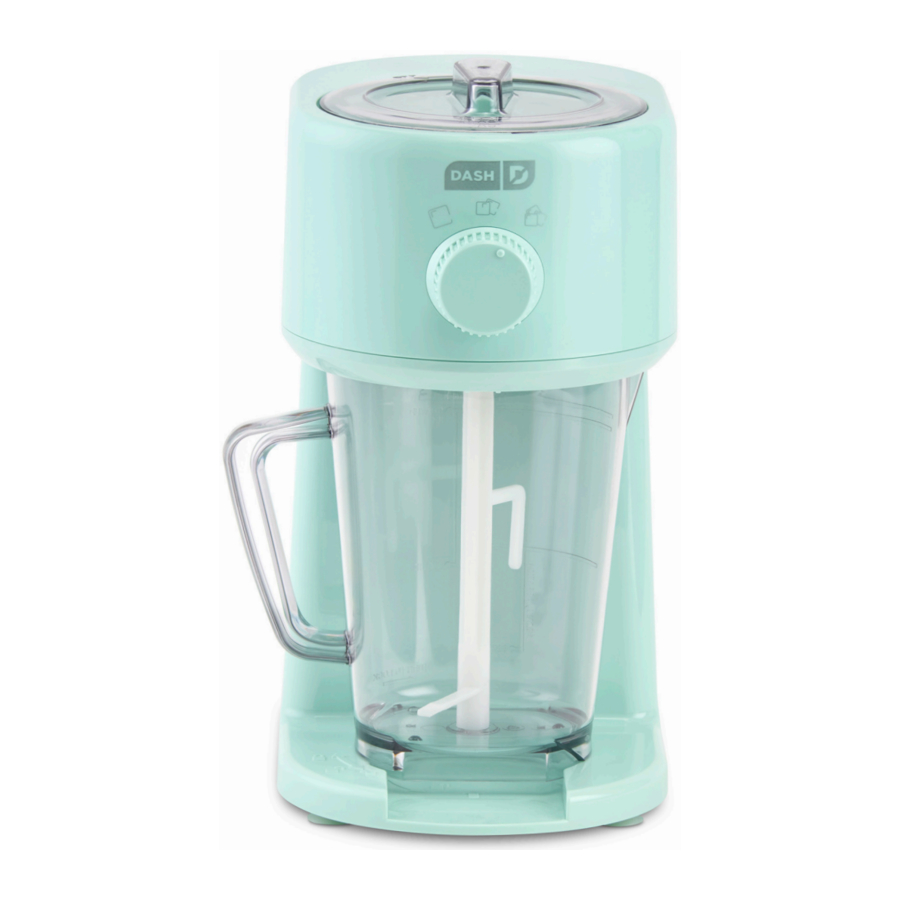
Advertisement
PARTS & FEATURES


ASSEMBLING THE SHAVED ICE MAKER
PRIOR TO ASSEMBLING:
- Remove all packaging from the inside and outside of the Shaved Ice Maker.
- Check that the Maker has no visible damage and that no parts are missing.
- Ensure all parts and pieces are out of the packaging before discarding it.
- Before using for the first time (or after prolonged storage without use), wash any parts that will come into contact with food. See "Cleaning & Maintenance."
- Prior to assembling the Shaved Ice Maker for use, ensure that the unit is NOT plugged into an electrical outlet. Do NOT assemble the Shaved Ice Maker when it is plugged into an electrical outlet.
USING THE SHAVED ICE MAKER
CONSISTENCY ADJUSTOR KNOB GUIDE:

| CONSISTENCY | SETTING |
| Snow Cones | Coarse |
| Slushies | Medium |
| Margaritas, Rosé, Shaved Ice | Fine |
- Place the Main Body on a stable and dry surface (Photo A).

- Insert the Removable Ice Shaving Cup into the Ice Shaving Chamber (Photo B).

- Attach the Stirring Paddle to the peg on the inside of the Serving Pitcher. Then slide the Serving Pitcher into the Main Body using the shape of the Base and directional arrows as a guide (Photo C).

- Once pushed in all the way, turn the Serving pitcher all the way to the side as per the directional arrows on the base (Photo D).

- Once the Serving Pitcher is locked in, plug in the Power Cord to an electrical outlet.
- Place ice cubes into the Removable Ice Shaving Cup. For best results, use only medium-sized frozen cubes directly from the freezer. Do not place more than 8 ice cubes inside the Cup at once. Overloading the Shaving Cup can cause the chute to clog and prevent shaving (Photo E).

- Choose desired consistency and turn Consistency Adjustor Knob according to chart (Photo F).

- Cover with Locking Lid and turn to lock as per directional arrows on the Lid. Once locked, the Shaved Ice Maker will begin shaving ice and depositing the ice into the Serving Pitcher. (Photo G).

For bigger batches, add ice cubes and shave in batches, taking care to add ONLY 8 medium-sized frozen cubes per batch. The Maker will shave one batch in about a minute.


 NOTE: There is no power button for the Shaved Ice Maker. It begins shaving once the clear plastic Locking Lid is locked into place. It will also stop shaving when the Lid is unlocked or the machine is unplugged.
DISASSEMBLING THE SHAVED MAKER
To prevent injury, always ensure that the Shaved Ice Maker is not plugged into an electrical outlet before assembling or disassembling.
TO DISASSEMBLE:
- Once the Shaved Ice Maker is unplugged, remove the Locking Lid. Then remove the Removable Ice Shaving Cup (Photo A).

- If you have not already, remove the Serving Pitcher by turning the Pitcher handle toward the front of the Maker to unlock and slide out. Then remove Stirring Paddle (Photo B).


The Shaving Blade in the Shaved Ice Maker is sharp! Handle the Shaved Ice Maker care. Do not put hands near the Shaving Blade while the Shaved Ice Maker is connected to the power outlet.
CLEANING & MAINTENANCE
PRIOR TO CLEANING
- Disassemble the Shaved Ice Maker as per instructions.
- When cleaning, exercise caution to avoid touching the Shaving Blade as the blade is very sharp and could cause injury.
- No part of the Shaved Ice Maker is dishwasher safe. You must hand wash all pieces.
- DO NOT submerge the Main Body of the Shaved Ice Maker in water or other liquids.
TO CLEAN
- To clean the Main Body of the Shaved Ice Maker including the Ice Shaving Chamber and Shaving Blade, wipe down with a damp cloth then dry thoroughly. When cleaning the Ice Shaving Chamber, exercise caution near the Shaving Blade as it is sharp and may cause injury.
- To clean all other parts besides the Main Body, hand wash with a sponge, warm water, and mild detergent.
- Avoid using abrasive cleaning agents to clean the appliance as they may damage it.
- Dry all parts thoroughly before storing.
 CLEANING TIP: Ice in the Ice Shaving Chamber will melt to some extent before being shaved. The water from this will drip down through the Maker and may pool on your countertop. To keep the counter clean and tidy, have a dish towel handy or place the Shaved Ice Maker on tray prior to shaving.
TROUBLESHOOTING
While Dash products are durable, you may encounter one or more of the problems listed below. If the issue is either not solved by the solutions recommended below or not included on this page, please contact our Customer Support Team at 1-800-898-6970 or support@bydash.com.
| ISSUE | SOLUTION |
| Ice is jamming in the Ice Shaving Chamber and the Maker is not shaving. | The Ice Shaving Chamber may be overloaded. Try using a smaller amount of ice at one time. For best results, it's recommended to use about 8 mediumsized ice cubes at once and to shave in batches. |
| The ice is not the consistency I want for what I'm making. | The Shaved Ice Maker has three settings that correspond to different levels of shaving to achieve different ice consistencies. Make sure you have chosen a setting appropriate for your recipe using the chart. |
RECIPE GUIDE

@bydash | recipes, videos, & inspiration
@unprocessyourfood | veg & vegan-friendly meals
Traditional Fruity Shaved Ice
Directions:
- Assemble the Dash Shaved Ice Maker.
- Before adding to the Shaved Ice Maker, blend or purée fruit in a food processor or blender.
- Then, pour the purée into a saucepan and add the rest of ingredients for the recipe and sugar or sweetener. Cook over medium heat, stirring occasionally until boiling. Turn heat to low and continue to simmer for five minutes then remove from heat. Strain if necessary and place in fridge to chill prior to adding to ice.
- Shave the ice using the Shaved Ice Maker. Pour a tablespoon or two of fully chilled syrup over the shaved ice and enjoy!
| COLOR | FLAVOR | INGREDIENTS |
| Red | Strawberry/ Raspberry | 1½ cups strawberries or raspberries 2 tablespoons lemon or lime juice ¾ cup water ¾ cup sugar |
| Orange | Mango-Pineapple | 1 cup pineapple, cubed 1 cup sliced mango ¼ cup sugar |
| Yellow | Lemon | 1½ cups lemon juice 1 cup water 1¼ cups sugar |
| Green | Coconut-Lime | ½ cup lime juice ¼ cup sugar ½ teaspoon green food coloring (add after the syrup has cooled) Toasted coconut, for topping |
| Blue | Blueberries | 1 cup blueberries 1 cup sugar 1 cup water |
| Purple | Concord Grapes | 2 pounds Concord grapes 1½ cups sugar |
Tropical Fruit Shaved Ice Dessert
Prep Time: 10-12 minutes
Serves: 3-4
Ingredients:
4 cups shaved ice
10-12 strawberries, trimmed and diced
1-2 mangos, peeled and diced
2 kiwis, peeled and sliced small
1 cup sweetened condensed milk
Directions:
- Adjust Shaved Ice Maker to the "Fine" setting. Shave ice by adding no more than 8 medium-sized ice cubes to the Chamber of the Maker, taking note that the Maker can only accommodate about 8 ice cubes at once for proper shaving. Shave in batches into the Serving Pitcher until there are 4 cups of shaved ice.
- When finished, use the Serving Pitcher to divide shaved ice into serving dishes. Distribute cut fruit onto ice evenly, then drizzle condensed milk evenly on top of each dish.
- Serve immediately and enjoy this fruity taste of the tropics!
Classic Margarita
Prep Time: 5-7 minutes
Serves: 1-2
Ingredients:
3 ounces Cointreau or Triple Sec liqueur
4-6 ounces freshly squeezed lime juice
5-6 ounces tequila of choice
1 ounce agave syrup
2½ cups shaved ice
Lime wedges, to garnish
Margarita salt for rim
1 teaspoon lime zest for rim
Directions:
- In a large pitcher, combine tequila, liqueur, 3-4 ounces of lime juice, and agave syrup. Stir then chill mixture in fridge until ready to serve.
- Gather serving/margarita glasses and prepare the rim mixture. On a small plate, mix salt and lime zest. On a separate small plate, pour out a bit of lime juice. Dip the rim of the serving glasses into the lime juice then immediately into the salt lime-zest mixture. Set aside prepared glasses
- Adjust Shaved Ice Maker to the "Fine" setting. Shave ice by adding no more than 8 medium-sized ice cubes to the Chamber of the Maker, taking note that the Maker can only accommodate about 8 ice cubes at once for proper shaving. Shave in batches into the Serving Pitcher until there are about 2½ cups of shaved ice.
- Use the Serving Pitcher to distribute ice into prepared glasses evenly.
- Pour chilled margarita mixture on top of ice and garnish with lime wedges
- Serve immediately and enjoy this frozen restaurant classic right at home!
Alcohol-Free Jalapeño Cilantro Margarita
Prep Time: 10-15 minutes
Serves: 1-2
Ingredients:
2 cups water 2 cups sugar
1 small bunch cilantro leaves
1 jalapeño, diced small
2½ cups shaved ice
4-6 ounces freshly squeezed lime juice
Lime wedges, to garnish
Margarita salt for rim
1 teaspoon lime zest for rim
Directions:
- Prepare the jalapeño cilantro simple syrup in a small saucepan. Add sugar, water, cilantro, and jalapeno and bring to a low simmer for about 5-10 minutes.
- Remove from heat and use a metal mesh strainer to remove the cilantro and jalapeño. Transfer syrup to an easy-pouring container.
- Gather serving/margarita glasses and prepare the rim mixture. On a small plate, mix salt and lime zest. On a separate small plate, pour out a bit of lime juice. Dip the rim of the serving glasses into the lime juice then immediately into the salt lime-zest mixture. Set aside prepared glasses.
- Adjust Shaved Ice Maker to the "Fine" setting. Shave ice by adding no more than 8 medium-sized ice cubes to the Chamber of the Maker, taking note that the Maker can only accommodate about 8 ice cubes at once for proper shaving. Shave in batches into the Serving Pitcher until there are about 2½ cups of shaved ice.
- Use the Serving Pitcher to distribute ice into prepared glasses evenly.
- To each glass, add 2 ounces of lime juice, 2 ounces of syrup, and tonic water to taste.
- Serve immediately and enjoy this N/A option that brings the heat!
Frosé
Prep Time: 5-7 minutes
Serves: 1-2
Ingredients:
½ bottle rosé wine
1½ cups shaved ice
2 tablespoons sugar
1½ cup frozen strawberries
Directions:
- Prepare rosé mixture in a blender by adding wine, frozen strawberries, and sugar and blend until smooth.
- Use a metal mesh strainer to remove strawberry seeds then transfer to a pitcher and place in the fridge to chill.
- Gather serving glasses.
- Adjust Shaved Ice Maker to the "Fine" setting. Shave ice by adding no more than 8 medium-sized ice cubes to the Chamber of the Maker, taking note that the Maker can only accommodate about 8 ice cubes at once for proper shaving. Shave in batches into the Serving Pitcher until there are about 1½ cups of shaved ice.
- Distribute ice evenly into serving glasses then top with the wine berry mixture.
- Serve immediately and enjoy rosé all day, all year!
Rainbow Snow Cone
Prep Time: 5-7 minutes
Cook Time: 15-20 minutes
Serves: 3-4
Ingredients:
1 packet powdered drink mix, er at least three colors/flavors
1 cup sugar
1 cup wat
4 cups shaved ice
Directions:
- Prepare rainbow syrups first and separately. For each color, cook water and sugar over medium-high heat until brought to a boil. Allow to boil for 3-4 minutes while whisking. Remove from heat and stir in drink mix until completely dissolved. Transfer to a heatsafe container that allows for easy pouring, cover, and let cool in the fridge. Repeat with other colors.
- Adjust Shaved Ice Maker to the "Coarse" setting. Shave ice by adding no more than 8 medium-sized ice cubes to the Chamber of the Maker, taking note that the Maker can only accommodate about 8 ice cubes at once for proper shaving. Shave in batches into the Serving Pitcher until there are about 4 cups of shaved ice.
- When finished, use the Serving Pitcher to distribute shaved ice evenly into serving dishes. Remove chilled rainbow syrups from the fridge. Pour one color at a time over each shaved ice portion to create three color stripes of syrup across the shaved ice.
- Serve immediately and enjoy all the flavors of the rainbow!
Italian Lemon & Basil Granita
Prep Time: 5-7 minutes
Cook Time: 5-10 minutes
Chill Time: 2+ hours
Serves: 4-6
Ingredients:
1 cup sugar 3 cups water
1-2 cups of loosely packed basil leaves, plus more to garnish
⅓ cup fresh lemon juice (about 2-3 lemons)
¼ cup vodka, optional
3 cups shaved ice
4-6 lemons, optional to serve in
Directions:
- In a saucepan on the stovetop, combine sugar and water in a medium saucepan and cook over medium-high heat, stirring until the sugar dissolves completely. Remove from heat and transfer to a heat-safe container and let cool to room temperature.
- Once cool, add basil leaves and muddle. Let steep for one hour.
- Strain to remove the basil leaves then stir in lemon juice and vodka.
- Adjust Shaved Ice Maker to the "Medium" setting. Shave ice by adding no more than 8 medium-sized ice cubes to the Chamber of the Maker, taking note that the Maker can only accommodate about 8 ice cubes at once for proper shaving. Shave in batches into the Serving Pitcher until there are about 3 cups of shaved ice.
- Use the Serving Pitcher to add shaved ice to lemon mixture. Transfer mixture to a freezer- safe container and freeze for 30 minutes.
- Remove from the freezer and stir thoroughly, especially from the sides. Return to freezer and freeze for a further 30 minutes, stir thoroughly, and repeat this process until the mixture has been in the freezer for at least 2 hours total. Once the entire mixture is the consistency of ice crystals, it's time to serve.
- Evenly distribute into small dessert dishes to serve, or serve in hollowed out lemons.
- To serve in lemons, cut the tops off of both sides of each lemon such that the lemon could stand upright. Use a sharp knife to hollow out the lemon, using a spoon as necessary to remove the citrus flesh.
- Chill the lemon vessels in the fridge while the granita chills in the freezer. When ready to serve, distribute the granita evenly between lemon vessels.
- Garnish with more basil, serve immediately and enjoy this Italian treat!
Hazelnut Iced Coffee Slushy
Prep Time: 5-10 minutes
Serves: 1-2
Ingredients:
2 cups brewed hazelnut coffee, divided (1 cup chilled, 1 cup frozen into ice)
¼ cup half-and-half
2 tablespoons sugar, more to taste
Whipped cream topping, optional
Caramel sauce, optional
Directions:
- Make or buy your favorite hazelnut coffee and chill in fridge.
- Pour 1 cup of coffee into an ice cube tray and freeze for a minimum of 4 hours. Store remaining cup of coffee in the fridge.
- Once coffee cubes have frozen, shave coffee ice. Adjust Shaved Ice Maker to the "Medium" setting. Shave ice by adding no more than 8 medium-sized cubes to the Chamber of the Maker, taking note that the Maker can only accommodate about 8 ice cubes at once for proper shaving. Shave in batches into the Serving Pitcher until all coffee cubes have been shaved.
- Distribute shaved coffee ice evenly into serving cups and pour the chilled liquid coffee over the ice. Add cream and sugar to taste and stir until combined.
- Make it a little more decadent with whipped cream and caramel sauce, grab a straw, and enjoy this chilled pick-me-up!
Watermelon Shaved Ice
Prep Time: 5-10 minutes
Serves: 2-4 Ingredients:
2 cups frozen watermelon chunks
2 teaspoons Tajin seasoning, optional
2-4 teaspoons sweetened condensed milk, optional
Slices of lime, optional to garnish
Sprigs of mint, optional to garnish
Directions:
- Treat the frozen watermelon chunks like ice cubes. Adjust Shaved Ice Maker to the "Fine" setting. Shave watermelon ice by adding no more than 8 mediumsized ice cubes to the Chamber of the Maker, taking note that the Maker can only accommodate about 8 ice cubes at once for proper shaving. Shave in batches into the Serving Pitcher until all watermelon chunks are shaved.
- Use the Serving Pitcher to distribute the watermelon ice evenly to serving dishes. Top each one with a drizzle of condensed milk and a sprinkle of Tajin. Garnish with fresh lime and mint.
- Serve immediately and enjoy this sweet summer cooler!
IMPORTANT SAFEGUARDS
IMPORTANT SAFEGUARDS: PLEASE READ AND SAVE THIS INSTRUCTION AND CARE MANUAL.
When using electrical appliances, basic safety precautions should always be followed, including:
- Read all instructions before use.
- Remove all bags and packaging from appliance before use.
- Never leave appliance unattended when in use.
- Make sure the appliance is cleaned thoroughly before using.
- Do not use appliance for other than intended use. For household use only. Do not use outdoors.
- Only use the appliance on a stable, dry surface.
- Do not place appliance on or near a hot gas burner, hot electric burner, or in a heated oven.
- This appliance can be used by persons with reduced physical, sensory, or mental capabilities or lack of experience of knowledge, if they have been given supervision or instruction concerning use of the appliance in a safe way and understand the hazards involved.
- This appliance is not a toy. Do not let children use this appliance. Close supervision is necessary when any kitchen appliance is used by or near children.
- To prevent the risk of fire, electric shock, or personal injury, do not put cord, plug, or appliance in or near water or other liquids. The Shaved Ice Maker is NOT dishwasher safe.
- Do not let the cord touch hot surfaces or hang over the edge of tables or counters.
- Refrain from using attachments that are not recommended by the appliance manufacturer, as this may result in fire, electric shock, or personal injury.
- Do not attempt to sharpen the blades.
- Do not operate the machine without ice. Do not use the appliance to shave or crush substances other than ice.
- Do not place your fingers in the appliance, as the blades are sharp and may cause injury.
- In order to prevent the Dash Shaved Ice Maker from overheating, do not operate this appliance for more than 5 minutes continuously. Allow the appliance to rest in between uses.
- Unplug the appliance prior to assembly/ disassembly, moving, cleaning, storage, and when not in use. To unplug, grasp the plug and pull from the outlet. Never pull from the power cord.
- Do not operate this appliance with a damaged cord [damaged charging cable], damaged plug, after the appliance malfunctions, is dropped, or damaged in any manner. Return appliance to the nearest authorized service facility for examination, repair, or adjustment.
- For maintenance other than cleaning, please contact StoreBound directly at 1-800-898-6970 Monday – Friday or by email at support@bydash.com.
- StoreBound shall not accept liability for damages caused by improper use of the appliance.
- Improper use of the appliance can result in property damage or even in personal injury.
- This appliance has a polarized plug (one blade is wider than the other). To reduce the risk of electric shock, this plug will fit in a polarized outlet only one way. If the plug does not completely fit in the outlet, reverse the plug. If it still does not fit, contact a qualified electrician. Do not attempt to modify the plug in any way.
- A short power supply cord is to be provided to reduce the risk resulting from becoming entangled in or tripping over a longer cord. An extension cord may be used if care is exercised in its use. If an extension cord is used, the marked electrical rating of the extension cord should be at least as great as the electrical rating of the appliance. If the appliance is of the grounded type, the extension cord should be a grounding 3-wire cord. The extension cord should be arranged so that it will not drape over the countertop or tabletop where it can be pulled on by children or tripped over unintentionally.
Documents / ResourcesDownload manual
Here you can download full pdf version of manual, it may contain additional safety instructions, warranty information, FCC rules, etc.
Advertisement


Need help?
Do you have a question about the Deluxe and is the answer not in the manual?
Questions and answers