Table of Contents
Advertisement
Quick Links
Advertisement
Table of Contents

Related Manuals for Britax DECATHLON


Summary of Contents for Britax DECATHLON
- Page 1 Decathlon User Guide...
-
Page 2: Table Of Contents
Warranty ..........38 This product and its components are subject to change without notice. © 2004 Britax Child Safety, Inc. All rights reserved. Printed in U.S.A. P250000 R1:11/04... - Page 3 • Use only in a rear-facing position when using restraint with an • This child restraint must not be used in the home, in boats, or infant weighing less than 20 pounds (9 kg). The American other non-certified applications. Academy of Pediatrics recommends rear facing until at least 1 •...
-
Page 4: Safety Information
Britax Child Safety, Inc. 13501 South Ridge Drive • Cover the restraint when the vehicle is parked in direct sunlight. -
Page 5: Features
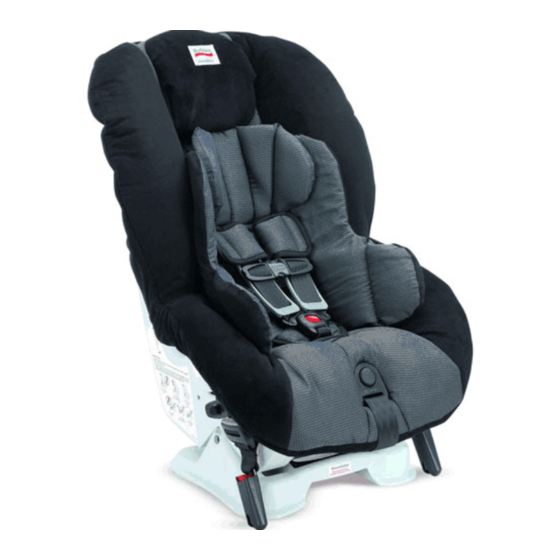
Features Features L A T C H Lower Anchors and Tethers for CHildren Cover Versa-Tether® 14 LATCH Adjuster 21 Chest Clip Shell Versa-Tether Pouch 15 LATCH Connector Release Button 22 HUGS™Shoulder Pads Forward Facing Lock-off 10 Harness Straps 16 LATCH Connector 23 Harness Buckle Rear Facing Belt Slot 11 Harness Yoke... -
Page 6: Vehicle Compatibility
Vehicle Compatibility Vehicle Compatiblity Vehicle Safety Belts Vehicle Buckle Position WARNING: The position of the vehicle belt IMPORTANT: buckle can affect the stability of the child • The information in this section only applies to installation with vehicle safety belts. restraint. -
Page 7: Installation: Rear Facing
Installation: Rear Facing Installation: Rear Facing LATCH Installation Push the child restraint firmly into the vehicle seat while pulling each LATCH • Figure A illustrates a typical rear facing harness tight (fig. E). LATCH installation. • Verify that your vehicle is equipped Verify that all connections are secure with LATCH anchors. -
Page 8: Lap-Shoulder Belt Installation
Installation: Rear Facing Installation: Rear Facing Lap-Shoulder Belt Installation Position both sections of vehicle belt through the rear facing lock-off • Figure A illustrates a typical rear facing farthest from vehicle buckle, then lap-shoulder belt installation. • When not in use, always store the close lock-off arm (fig. -
Page 9: Lap Belt Installation
Installation: Rear Facing Installation: Rear Facing Lap Belt Installation Position the vehicle belt through the rear facing lock-off farthest from the • Figure A illustrates a typical rear facing vehicle buckle, then close lock-off arm lap belt installation. • When not in use, always store the (fig. -
Page 10: Installation: Forward Facing
Installation: Forward Facing Installation: Forward Facing LATCH Installation Rotate seat into forward facing position. • Figure A illustrates a typical forward Verify that the LATCH harness is not facing LATCH installation. twisted, then attach the closest LATCH • Verify that your vehicle is equipped connector to the closest LATCH anchor with LATCH anchors. -
Page 11: Lap-Shoulder Belt Installation
Installation: Forward Facing Installation: Forward Facing Lap-Shoulder Belt Installation Rotate lever downward to open forward facing lock-off farthest from • Figure A illustrates a typical forward where the vehicle belt will be buckled. facing lap-shoulder belt installation. • When not in use, always store the Remove slack from the lap portion of LATCH connectors in storage slots. -
Page 12: Lap Belt Installation
If using Versa-Tether , remove from IMPORTANT: ® pouch and loosely attach to an approved Britax ® recommends that the tether be used at all times. Using • tether anchorage point (pg. 22). the tether will improve the stability of the child restraint and Pull the vehicle belt out then thread it reduce the risk of injury. -
Page 13: Using The Versa-Tether
Installation: Versa-Tether Installation: Versa-Tether ® ® Using the Versa-Tether Forward Facing Using the Versa-Tether Rear Facing Remove tether from pouch. Secure the child restraint in the vehicle. Press and hold the tether adjuster release button, then pull to fully Remove tether from pouch. extend tether strap into a V-shape. -
Page 14: Installation: Aircraft
(fig. B), follow Forward Facing Lap Belt (fig. E). Fold the LATCH adjuster and Installation instructions on page 20. connector, then slide each set into the adjacent slot. NOTE: Restraints are shipped from Britax with LATCH connectors in the Storage Slots. -
Page 15: Recline Adjustment
Restraint Functions Restraint Functions Recline Adjustment Fastening the Chest Clip Pull the recline handle, then slide the Fasten the chest clip by pushing the two restraint shell into the desired position. halves together until a positive click is Release the recline handle, then verify that heard (fig. -
Page 16: Harness Buckle
Restraint Functions Restraint Functions Fastening the Harness Buckle Adjusting Harness Buckle Position Buckle Hold the harness buckle with one This restraint allows the buckle to be hand. adjusted to one of three positions (fig. B), based on the size of the child. Adjusting Use the other hand to insert one buckle the buckle properly increases comfort and tongue at a time into the harness... -
Page 17: Harness Height
Restraint Functions Restraint Functions Harness Height Harness Height Adjustment Place child in restraint, then secure Loosen the harness by pressing the harness (see pgs. 28–29). harness adjuster button while pulling the shoulder straps forward as far as Observe where the shoulder harness possible (fig. -
Page 18: Securing Your Child
Securing Your Child Securing Your Child Once the child restraint has been Gently pull up on the harness straps to installed in the vehicle and adjustments tighten the lap section of the harness, have been made, follow these which should fit low on the child's instructions to secure the child. -
Page 19: Care And Maintenance
Care and Maintenance Care and Maintenance Cover Removal Cleaning the Cover and Pillows HAND WASH, using cold water and mild soap. Remove Toddler Pillow by unhooking each attachment clip. • LINE or LIE FLAT DRY, to prevent cover from shrinking. •... - Page 20 Care and Maintenance Care and Maintenance Harness Buckle Removal Cleaning the Harness Buckle Fully recline the child restraint. If a child eats and drinks while in the Locate the metal buckle strap retainer restraint, the harness buckle may need on bottom of the restraint. to be periodically checked and cleaned of any accumulated debris or dried Pull retainer away from child restraint...
-
Page 21: Warranty
The use of non-Britax Child Safety, Inc. covers, inserts, toys, accessories, or tightening devices is not approved by Britax. Their use could cause this restraint to fail Federal Safety Standards or perform worse in a crash. Their use automatically voids the Britax warranty.
Need help?
Do you have a question about the DECATHLON and is the answer not in the manual?
Questions and answers