Table of Contents
Advertisement
Quick Links
Service Literature
WARNING
Improper installation, adjustment, alteration, service
or maintenance can cause property damage, personal
injury or loss of life. Installation and service must be
performed by a licensed professional HVAC installer or
equivalent, service agency, or the gas supplier.
IMPORTANT
The Clean Air Act of 1990 bans the intentional venting of
refrigerant (CFCs, HCFCs and HFCs) as of July 1, 1992.
Approved methods of recovery, recycling or reclaiming
must be followed. Fines and/or incarceration may be
levied for noncompliance.
NOTICE
A thermostat is not included and must be ordered
separately.
• A Lennox communicating thermostat must be used in
communicating applications.
• In non-communicating applications, the Lennox
ComfortSense® thermostat may be used, as well as
other non-communicating thermostats.
In all cases, setup is critical to ensure proper system
operation.
Field wiring for both communicating and non-
communicating applications is illustrated in diagrams,
which begin on page 6.
CAUTION
As with any mechanical equipment, contact with sharp
sheet metal edges can result in personal injury. Take
care while handling this equipment and wear gloves and
protective clothing.
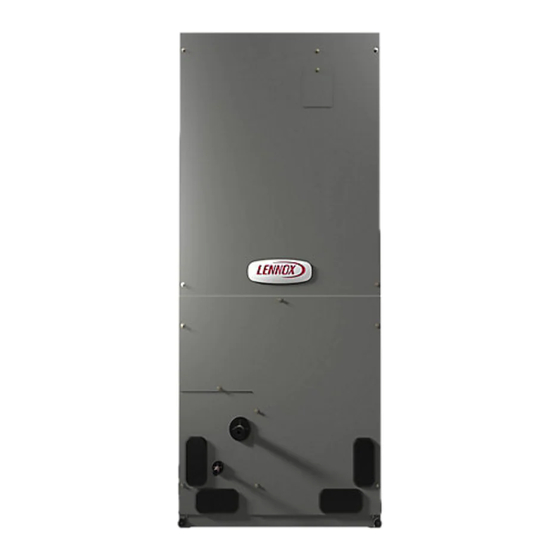
UNIT INFORMATION
100109
April 21, 2025
CBK45UHPT (R454B) SERIES UNITS
Page 1
Table of Contents
Wiring Diagrams .............................................................6
CBK45UHPT Unit Dimensions - Upflow .......................9
Specifications and Electrical Data ................................10
Model Number Identification ......................................... 11
Blower Data ..................................................................12
Unit Components ..........................................................12
ECB45 Electric Heat Data ............................................14
Heat Section Installation ...............................................18
Configuration Modification ...........................................20
Sensor / Bracket Installation .........................................23
Brazing Connections ...................................................25
Leak Testing, Evacuating and Charging .......................26
Installing the Condensate Drain ..................................29
Electrical Connections .................................................31
Inspecting and Replacing Filters .................................32
Professional Maintenance ...........................................32
Sensor Maintenance ....................................................32
Check-out Procedures .................................................33
Sequence of Operation ................................................34
Modes of Operation ......................................................34
Start Up Test Procedure ...............................................36
General Information
This indoor unit with all-aluminum coil is designed for
installation with optional field-installed electric heat and
a matched outdoor unit that is charged with R454B re-
frigerant. These units, designed for indoor installation in
multiple positions, are completely assembled for upflow
and horizontal right-hand discharge before being shipped
from the factory.
All CBK45UHPT air handlers are equipped with a facto-
ry-installed, internally mounted check / expansion valve,
which is suitable for use in R454B applications.
This air handler is compatible with non-communicating
thermostats and non-communicating outdoor units. In ad-
dition, this unit has the enhanced capability of communi-
cating with communicating thermostats and communicat-
ing outdoor units using the Lennox RSBus protocols.
NOTE - For downflow or horizontal left-hand air discharge,
certain field modifications are required.
IMPORTANT: Special procedures are required for clean-
ing the all-aluminum coil in this unit. See page 32 in this
instruction for information.
CBK45UHPT
Advertisement
Table of Contents

Related Manuals for Lennox CBK45UHPT Series


Summary of Contents for Lennox CBK45UHPT Series
-
Page 1: Table Of Contents
• A Lennox communicating thermostat must be used in communicating applications. All CBK45UHPT air handlers are equipped with a facto- • In non-communicating applications, the Lennox ry-installed, internally mounted check / expansion valve, ComfortSense®... - Page 2 WARNING CAUTION • Do not use means to accelerate the defrosting pro- Under no circumstances shall potential sources of cess or to clean, other than those recommended by ignition be used in the searching for or detection of the manufacturer. refrigerant leaks.
-
Page 3: Refrigerating System
IMPORTANT IMPORTANT When breaking into the refrigerant circuit to make When removing refrigerant from a system, either for repairs – or for any other purpose – conventional servicing or decommissioning, it is recommended good procedures shall be used. However, for flammable practice that all refrigerants are removed safely. - Page 4 IMPORTANT IMPORTANT Prior to beginning work on systems containing Where electrical components are being changed, they FLAMMABLE REFRIGERANTS, safety checks are shall be fit for the purpose and to the correct specification. necessary to ensure that the risk of ignition is minimized. At all times the manufacturer’s maintenance and service guidelines shall be followed.
- Page 5 WARNING CAUTION For duct connected appliances, false ceilings or Any service personnel installing, decommissioning, or drop ceilings may be used as a return air plenum if a performing maintenance on the unit must be properly REFRIGERANT DETECTION SYSTEM is provided in trained with A2L refrigerants the appliance and any external connections are also provided with a sensor immediately below the return air...
-
Page 6: Wiring Diagrams
Wiring Diagrams AIR HANDLER THERMOSTAT RDS CONTROL BOARD AIR HANDLER THERMOSTAT RDS CONTROL BOARD NOTE NOTE HEAT ONLY APPLICATION CONDITIONER THERMOSTAT HEAT PUMP AIR HANDLER UNIT UNIT RDS CONTROL BOARD COOLING ONLY APPLICATION AIR HANDLER THERMOSTAT RDS CONTROL BOARD CONNECT COMMON WIRE ONLY IF REQUIRED (REFER TO THE... -
Page 7: Air Handler
AIR HANDLER THERMOSTAT RDS CONTROL BOARD CONDENSING UNIT Air Handler THERMOSTAT HEAT PUMP UNIT AIR HANDLER CONNECT COMMON WIRE ONLY IF REQUIRED (REFER TO THE APPROPRIATE S23 OUTDOOR THERMOSTAT THERMOSTAT INSTALLATION (IF USED) INSTRUCTIONS) K22 EM HEAT RELAY Heat Pump Application With Electric Heat FIGURE 2. - Page 8 PART NO. 538437-01 WIRING DIAGRAM - ELECTRIC HEAT 20KW HTR 4 HTR 3 HTR 2 HTR 1 SEC L SEC L SEC L SEC L HTR 4 HTR 3 HTR 2 HTR 1 PRI LS PRI LS PRI LS PRI LS 12.5KW &...
-
Page 9: Cbk45Uhpt Unit Dimensions - Upflow
CBK45UHPT Unit Dimensions – Upflow 1 (25) DETAIL OF PIPING PLATE 4-3/4 3/4 (19) (121) SUCTION LINE SUPPLY AIR LIQUID OPENING CONDENSATE LINE 14-1/2 DRAINS (2) (368) 2-3/8 (Horizontal) (60) 1 (25) 1 (25) CONDENSATE DRAINS (2) 4-3/8 (Upflow and (111) 2-3/4 Downflow) -
Page 10: Specifications And Electrical Data
Specifications and Electrical Data Size Nominal Tonnage Refrigerant Type R-454B R-454B R-454B R-454B R-454B Factry Installed Expansion (TXV) 26Z70 26Z70 26Z70 26Z70 26Z71 Connections Liquid line (OD) sweat - in. Suction line (OD) sweat - in. Condensate drain (FPT) - in. (2) 3/4 (2) 3/4 (2) 3/4... -
Page 11: Model Number Identification
Model Number Identification CB K 45 UH P T - 036 - 230 - 71 Unit Type Revision Level CB = Air Handler 71 = R-454B TXV installed Voltage Refrigerant Type 230 = 208/230V-1 phase-60hz K = R-454B Nominal Cooling Capacity Series 018 = 1.5 tons 024 = 2 tons... -
Page 12: Blower Data
TRANSFORMER COIL All CBK45UHPT series units use a single line voltage to 24VAC transformer mounted in the control box. The EXPANSION VALVE transformer supplies power to the control circuits in the indoor and outdoor unit. -
Page 13: Blower Assembly
BLOWER MOTOR CAPACITOR 3 - Once demand is met, motor runs at 100% for 45 All CBK45UHPT series units use PSC motors with a run seconds. capacitor. The run capacitor is mounted on the blower housing. See figure 8. Capacitor ratings are shown on 4 - Motor ramps down to stop. -
Page 14: Ecb45 Electric Heat Data
ECB45 Electric Heat Data CB K4 5U HP T- 0 18 | S IN G LE P H A SE Blower Minimum Maximum Input Electric Heat Motor Circuit Overcurrent Full Load Model Number Ampacity Protection Volt Btuh Amps 4 kW ECB45-4 (27A08) 10,250 Terminal Block... - Page 15 E LE CT RIC H EAT D ATA CBK4 5 UHPT-0 3 0 | SIN GLE PHA SE Minimum Maximum Single Point Input Circuit Overcurrent Blower Power Source Ampacity Protection Electric Heat Motor Full Load Model Number Minimum Maximum Amps Volt Btuh Ckt 1...
- Page 16 EL ECTR IC HEAT D ATA C B K 4 5 U H P T- 0 3 6 | S I N GL E P H A SE Minimum Maximum Single Point Input Circuit Overcurrent Blower Power Source Ampacity Protection Electric Heat Motor Full Load...
- Page 17 EL ECTR IC HEAT D ATA C B K 4 5 U H P T- 0 4 2 | S I N GL E P H A SE Minimum Maximum Single Point Input Circuit Overcurrent Blower Power Source Ampacity Protection Electric Heat Motor Model Number...
-
Page 18: Heat Section Installation
6 - Secure the electric heater assembly into place Heat Section Installation with the screws that were removed from the heat element panel. Install two field-provided #8 SDST WARNING screws in the front of the electric heater assembly (see figure 10). Before installing or servicing unit, be sure ALL power to the unit is OFF. -
Page 19: Electrical Connections
IMPORTANT NOTE - There may be only one clip securing each circuit breaker. USE COPPER CONDUCTORS ONLY BREAKER(S) MOUNTING CIRCUIT BRACKET BREAKER NOTE – Refer to the nameplate on the air handler unit for minimum circuit ampacity and maximum overcurrent protection size. -
Page 20: Configuration Modification
1 - Set the thermostat above room temperature. CIRCUIT BREAKER COVER (BACKSIDE) 2 - Check the heat pump and the heat section for normal operation. 3 - Set the thermostat to desired setting. 4 - Affix the wiring diagram sticker to air handler scroll, aligned with circuit breaker unit wiring diagram sticker. -
Page 21: Horizontal Application
HORIZONTAL APPLICATION TOP CAP ROTATED TO IMPORTANT CORRECT POSITION TOP CAP SCREWS CABINET SUPPORT When removing the coil, there is possible danger of equipment damage and personal injury. Be careful when removing the coil assembly from a unit installed in right- or left-hand applications. -
Page 22: Downflow Application
NOTE – For horizontal applications in high humidity ar- DOWNFLOW APPLICATION eas, remove the downflow rail closest to the drain pan. To Use the following procedures to configure the unit for remove rail, remove screw from rail at back of unit and at downflow operations: cabinet support rail. -
Page 23: Sensor / Bracket Installation
8 - For downflow installation on combustible flooring, an additive base must be used as illustrated in figure 9. See CBK45UHPT Engineering Handbook for downflow combustible flooring base kits available for this air handler. 9 - Cut an opening appropriately sized for combustible base. - Page 24 FIGURE 25 (Detail) 5 - Loop any excess wire through the plastic “M” wire clip located on the inside of the center support bracket. FIGURE 26 Horizontal Left Configuration 2 - Follow instructions for right-hand discharge as 1 - Remove sensor bracket assembly from vertical outlined in previous section on page 22 position.
-
Page 25: Brazing Connections
3 - With air handler access panels removed, install Brazing Connections sensor bracket assembly to the side of the cabinet by lining up holes as shown in FIGURE 30. WARNING Polyol ester (POE) and Polyvinyl ether (PVE) oils used with refrigerants absorb moisture very quickly. It is very important that the refrigerant system be kept closed as much as possible. -
Page 26: Leak Testing, Evacuating And Charging
NOTE - When installing refrigerant lines longer than 50 feet, tion. At all times the manufacturer’s maintenance and see the Lennox Refrigerant Piping Design and Fabrication service guidelines shall be followed. If in doubt, consult Guidelines, CORP. 9351-L9, or contact Lennox Technical the manufacturer’s technical department for assistance. - Page 27 NOTE – All maintenance staff and others working in the IMPORTANT local area shall be instructed on the nature of work being carried out with work in confined spaces being avoided. In addition to conventional charging procedures, the • Under no circumstances shall potential sources following requirements shall be followed.
- Page 28 PLEASE READ IMPORTANT ISSUES CONCERNING BRAZING OPERATIONS ON PREVIOUS PAGES BEFORE PROCEEDING. NOTE - REFER TO OUTDOOR UNIT INSTALLATION INSTRUCTIONS FOR REFRIGERANT PIPING SIZE REQUIREMENTS. NOTE - Use silver alloy brazing rods with five or six percent minimum silver alloy for copper-to-copper brazing, 45 percent alloy for copper-to-brass and copper-to-steel brazing.
-
Page 29: Installing The Condensate Drain
METERS) LENNOX P-TRAP 49P66 REQUIRES A LARGER INSTALLATION SPACE THAN THE J-TRAP 91P90. PIPE NIPPLE PROVIDED IN BAG ASSEMBLY - SCH 80, 3/4” I. D. X 5” - 34K7401 (1): CUT THE PIPE IN HALF AND USE IT TO ROUTE THE MAIN DRAIN. - Page 30 6 - Plug and check any unused drain pan openings for DUCT SYSTEM tightness. Torque plugs to 30 in. lb. to prevent water The air handler is provided with flanges for the connection leaks or seepage from the drain pan. of the plenum and ducts.
-
Page 31: Sealing The Unit
4 - To avoid damaging the rubber grommets in the Electrical Connections cabinet while brazing, slide the rubber grommets over the refrigerant lines until they are away from WARNING the heat source. Electric Shock Hazard. Can cause injury or 5 - Braze using an alloy of silver or copper and death. -
Page 32: Inspecting And Replacing Filters
WARNING at a moderate pressure (less than 50psi). If the coil cannot be cleaned using water alone, Lennox Electrically ground air handler. Connect recommends use of a coil cleaner with a pH in the ground wire to ground terminal marked range of 5 to 9. -
Page 33: Check-Out Procedures
Use of Air Handler During Construction system start-up instructions and refrigerant charging in- structions. Lennox does not recommend the use of its air handler unit PRE-START-UP CHECKS during any phase of construction. Very low return air tem- • Is the air handler properly and securely installed? peratures, harmful vapors and operation of the unit with clogged or misplaced filters will damage the unit. -
Page 34: Sequence Of Operation
Normal Sequence of Operation The HVAC system is functioning normally. The RDS Non-Communicating Blower Control Board has not de- COOLING (COOLING ONLY OR HEAT PUMP) tected a refrigerant leak. When the thermostat calls for cooling, 24 volts is put on Leak Detected the blower time-delay relay coil and then the indoor blow- When the RDS Non-Communicating Blower Control Board... -
Page 35: Additional Applications
TABLE 5. Red LED Diagnostic Codes TABLE 7. Additional Button Functions Applies to Issue Action State Press Action Flash Individual Servicing Long Reset control Sensor(s) Reevaluate fault condition - if cleared Sensor indicates Replace the sensor Fault Short return to monitoring, otherwise update fault (Cat. -
Page 36: External Alarm
Zone HVAC System Cooling Demand 1 - Prompt a cooling demand at the thermostat. If the RDS Non-Communicating Blower Control Board is installed in a zone HVAC system, the RDS Non-Commu- 2 - Press the Test button on the RDS Non-Communicat- nicating Blower Control Board will open all zone dampers ing Blower Control Board. - Page 37 Diagnostic Codes and Troubleshooting TABLE 8. LED Diagnostic Codes State LED Diagnostic Code Action Required Initializing Flashing green None Solid green. Monitoring If a prior mitigation occurred, a blue flash None interrupts the solid green LED. Mitigating Check coil tubes for leak. Repair the issue and restart the equip- Flashing blue (Leak Detected) ment.
- Page 38 Installing Contractor’s Name_______________________ Installing Date_______________________________ Installing Contractor’s Phone_______________________ Air Handler Model #___________________________ Job Address____________________________________ Thermostat Line Voltage SUPPLY Disconnect Switch Temperature Integrated Control Duct Blower Motor Amps System Electric Heat Amps Duct Static RETURN Filter Drain Line DUCT SYSTEM TOTAL EXTERNAL STATIC (dry coil) dry coil wet coil SUPPLY AIR DUCT...
- Page 39 Installing Contractor’s Name_______________________ Installing Date_______________________________ Installing Contractor’s Phone_______________________ Air Handler Model #___________________________ Job Address____________________________________ Line Voltage Disconnect Switch Thermostat Integrated Control Duct System Duct System Filter RETURN SUPPLY Electric Heat Amps Blower motor Amps Drain Line Duct Static Temperature DUCT SYSTEM TOTAL EXTERNAL STATIC (dry coil) dry coil wet coil...
Need help?
Do you have a question about the CBK45UHPT Series and is the answer not in the manual?
Questions and answers