TallyGenicom LA550N User Manual
Tallygenicom la550n: user guide
Hide thumbs
Also See for LA550N:
- Product manual (12 pages) ,
- Specifications (2 pages) ,
- Quick start manual (156 pages)
Table of Contents
Advertisement
Quick Links
Advertisement
Table of Contents
Troubleshooting

Subscribe to Our Youtube Channel
Related Manuals for TallyGenicom LA550N


Summary of Contents for TallyGenicom LA550N
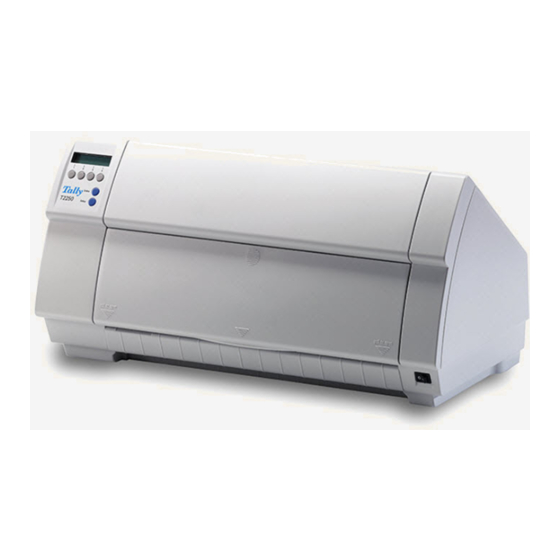
- Page 1 LA550N LA550W User guide Matrix printer...
-
Page 2: Table Of Contents
User guide Table of contents Table of contents Introduction Printer features Symbols used About this manual Printer at a glance Printer in fanfold paper mode Printer in single-sheet mode Paperway Installation Unpacking the printer Placing your printer Checking the printer voltage Connecting the printer Switching on the printer Changing the ribbon cassette... - Page 3 User guide Table of contents Paper handling Changing the paper path Changing the paper type in the setup menu Loading paper Fanfold paper Single sheets Paper transport Moving the paper to the tear position Removing paper Settings Setting the tear position Setting the first printing line (TOF) Setting the print head gap Selecting character density and font temporarily...
- Page 4 User guide Table of contents Serial interface (Serial) Data transmssion rate (Baud) Data format (Format) Buffer control (BuffCtrl) Signal Processing (DTR) Selecting interface (Interf.) Interface buffer (Buffer) Selecting interface timeout (Timeout) Automatic carriage return (Auto-CR) Automatic line feed (Auto-LF) Menu lock (MenLock) Language (Language) Paper parameters (Paper) Form length (Formlen)
- Page 5 User guide Table of contents Setting the DEC Mode (DECMode) Horizontal spacing of characters (CPI) Character set (CharSet) User preference character set (UserChr) Printer ID (Prn.ID) Deleting sequence or buffer (CAN Fkt.) Disconnection on end of transmission (Discnct) Initial Report (Report) Automatic answerback (Answbck) Answerback on ENQ (Answ_ENQ) Setting the IBM mode (IBMMode)
- Page 6 User guide Table of contents Troubleshooting General print problems The display remains dark The display is lit, but the printer does not print Problems with the paper feed Paper jam (fanfold paper) Paper jam (single sheets) Paper does not move to tear off position Problems with the print quality Print is too pale Smudged print...
- Page 7 User guide Table of contents Interfaces Parallel interface Connector assignment Serial interface V.24/RS232C Connector assignment Interface cable (serial interface) Input signals Output signals Interface-Adapter IF Adapter-Set RS232 (DB9M)/MMJ Protocols Memory mode XON/XOFF Memory mode Robust XON/XOFF Configuring the serial interface of the PC DOS mode Windows 95/98/ME Windows 2000/NT 4.0/XP...
-
Page 8: Introduction
It is designed for service-free PC, network and mini sy- stem operations. At top speeds of up to 500 cps the LA550N and LA550 keep pace with the bustling, demanding world where printing is time sensitive and cri- tical. -
Page 9: About This Manual
User guide Introduction About this manual The user guide contains a detailed description of the printer, its charac- teristic features and additional information. Chapter 1 Printer at a glance lists all the parts of the printer. Chapter 2 Installation contains start-up instructions and points to note. Chapter 3 Changing the ribbon cassette provides step-by-step instruc-... -
Page 10: Printer At A Glance
User guide Printer at a glance Printer at a glance Paper support Front cover Single sheet feeder closed Power switch ll t Bottom cover ll t Control panel Ribbon cassette Latches Top cover Print head Power cord inlet and fuse Tear edge Rear cover Interface connectors... -
Page 11: Printer In Fanfold Paper Mode
User guide Printer at a glance Printer in fanfold paper mode ll t Tractors Printer in single-sheet mode Paper support Single sheet feeder open... -
Page 12: Paperway
User guide Printer at a glance Paperway Standard printer: Tractor 1 Fanfold paper mode Single sheet Option: Tractor 2 Tractor 2... -
Page 13: Installation
User guide Installation Installation Unpacking the printer Place your printer on a solid surface (see Placing your printer, page 7). Make sure that the “Up” symbols point in the cor- rect direction. Open the packaging, take out the accessory cas- sette and unpack it. -
Page 14: Placing Your Printer
User guide Installation Placing your printer Place the printer on a solid, flat, surface, ensuring that the printer is positioned in such a way that it can not topple, and that there is easy access to the control panel and paper input devices. Also en- sure that there is sufficient space for the printed output. -
Page 15: Checking The Printer Voltage
User guide Installation Checking the printer Make sure that the device has been set to the correct voltage (e.g. 120 V in the USA, 230 V in Europe). To do this, check the type plate voltage above the power inlet at the back of the printer. Contact your dealer if the setting is incorrect. -
Page 16: Connecting The Printer
User guide Installation Connecting the printer Connect the power cable to the power inlet of the printer. Connect the power cable plug to a mains socket. Make sure that the printer and the computer are switched off and connect the data cable between the printer and the computer. -
Page 17: Switching On The Printer
User guide Installation Switching on the printer The power switch for switching on the printer is lo- cated at the bottom left at the front of the printer when viewed from the front. ll to ll to... -
Page 18: Changing The Ribbon Cassette
User guide Changing the ribbon cassette Changing the ribbon cassette The ribbon consists of a dense synthetic fabric saturated with ink. When printing, the needles hit the ribbon and transfer the ink parti- cles on to the paper. After printing several million characters, the ink is consumed and the fabric worn out. - Page 19 User guide Changing the ribbon cassette Raise the printer bar cover. Remove the used cassette. We recommend use of genuine ribbon cassettes only. Turn the coloured ribbon feed knob at the right of the new ribbon cassette in the direction of the ar- row in order to take up slack of the ribbon.
- Page 20 User guide Changing the ribbon cassette Slightly tilt the ribbon cassette forwards in such a way that it is parallel to the housing top and thread in the ribbon in front of the print head. Locate the two projections in the left and right guide rails of the printer and gently press down on both sides until it clicks into place.
-
Page 21: Printer Drivers
User guide Printer drivers Printer drivers You need to install a printer driver so that the printer can process the data from your application programs. An original driver offers the best conditions for optimal printing re- sults. All available printer drivers can be found on the CD-ROM en- closed with the printer, as well as on our Internet site, from which you... -
Page 22: Installing A Printer Driver In Windows 2000/Nt 4.0/Xp
User guide Printer drivers 12 If required, edit the name of the default printer and specify whether you wish to use the printer as a default printer by clicking on the rel- evant option. Then click on Next. 13 Specify whether you wish to print out a test page (recommended) by selecting the relevant option and click on Finish. -
Page 23: Other Operating Systems
User guide Printer drivers 11 Select the printer type. Click on OK, then on Next. 12 If required, edit the name of the default printer and specify whether you wish to use the printer as a default printer by clicking on the rel- evant option. -
Page 24: Changing Printer Settings
User guide Printer drivers Changing printer You can make permanent changes to the printer settings using the control panel of the printer (see Menu, page 41). Various printer settings settings can also be entered in the operating system of your PC, however. -
Page 25: Graphic Options
User guide Printer drivers Graphic options You can select different print qualities via the Windows printer driv- ers (see table). This selection will affect the printing speed: the high- er the print quality, the lower the speed (see Printer specifications, page 109). -
Page 26: Loading Optional Firmware
User guide Printer drivers Loading optional To load new firmware, proceed as follows. firmware The most current version of the firmware can be downloaded from our internet page. 1 Switch off the printer. Connect your DOS PC (LPT1:) to the par- allel port on the printer. -
Page 27: The Control Panel
User guide The control panel The control panel The control panel keys are used for controlling your work with the printer. The control panel is located on the front right side of your printer and consists of a two-line LC display and six keys. The functions of the keys depend on the printer’s current mode (sta- tus). -
Page 28: The Lc Display
User guide The control panel The LC display The LC display tells you all the important printer settings and informs you which functions are currently assigned to which keys. The upper line informs you that the printer is either in Online or Offline mode (in the example below the printer is in the Online mode), and the selected paperpath (below: Front1 = tractor mode). -
Page 29: Online Mode
User guide The control panel Online mode After switching on, the printer is automatically set to Online mode. Only in this mode can it receive data from the computer. MX (a message only; X = 1 to 4): Shows the selected menu Ready Front1 (Macro);... -
Page 30: Setup Mode
User guide The control panel Setup mode In this mode, the following settings are available: Setup key: Sets the printer to Setup mode, in which the following Adjust Paprpath settings can be selected: Online Menu Char Menu key (1): Other menu settings. Acces may be disabled by the manufacturer (see note below). -
Page 31: Messages In The Lc Display
User guide The control panel Messages in the LC If the printer detects an internal fault or user error or if it expects you to do something, a message will appear in the LC display. It also dis- display plays the status during an operation (e.g. Loading default). Below you will find a list of messages with brief descriptions of each mes- sage. -
Page 32: Key Functions When Turning On The Printer
User guide The control panel Key functions when If you keep one of the following keys pressed during power-on until the printer has completed initialisation, the corresponding function is turning on the printer activated: If you keep the Online key depressed while turning on the printer, you enter the printer’s advanced Menu mode. -
Page 33: Paper Handling
User guide Paper handling Paper handling This section describes how to set the paper type, load fanfold paper and single sheets, transport paper and move the paper to the tear position. Changing the paper You can change the paper type either from an application program, by means of the paper path quick selection feature or in the Setup path menu. -
Page 34: Changing The Paper Type In The Setup Menu
User guide Paper handling Changing the paper type in If you wish to change the paper type in the Setup menu, proceed as follows. the setup menu Press the Setup key followed by the Paprpath key (3). Select the desired paper type with the key < (2) or > (3). Press the Set (1) key to confirm your selection. -
Page 35: Loading Paper
User guide Paper handling Loading paper Your printer can process both fanfold paper and single sheets. For information on the supported paper sizes, please refer to section per specifications (page 113). Only use dust-free or low-dust paper. Many paper qualities are suitable for this printer. - Page 36 User guide Paper handling Insert fanfold paper into the left-hand tractor. Make sure that at least three paper transport holes are positioned on the tractor pins. Close the left tractor flap. Insert the fanfold paper in the left-hand tractor first, ensuring that at least three perforation holes engage with the tractor pins.
- Page 37 User guide Paper handling Close the tractor flap and slide the tractor to the right until the paper is slightly tensioned. Do not tension the paper excessively to avoid tearing the perforation ho- les; do not allow excessive slack since in this case the paper will bulge and there may be problems in the feeding process.
- Page 38 User guide Paper handling Make sure that the paper stack is aligned in parallel to the printer and that the paper supply cannot be obstructed. Lower the front cover. Ready Front1 Switch the printer on. The active paper source (Front1 = tractor 1) M1 EPS Load Online...
-
Page 39: Single Sheets
User guide Paper handling Single sheets If required, install the paper support. Make sure that the printer is set to single sheet mode. If necessary, change the paper type, see Changing the paper path (page 26). Press the latch at the middle of the front cover. The single sheet input tray opens downwards. - Page 40 User guide Paper handling Insert the single sheet into the input tray as far as possible. Press the Online key to set the printer to ready status. The sheet is automatically loaded when the printer is in Online mode (Ready) and recei- ves data from the computer.
-
Page 41: Paper Transport
User guide Paper handling Paper transport Loaded paper (fanfold paper/single sheets) can be transported in the printer in several ways. Make sure that the printer is in Offline mode (Pause); press the On- Pause Front1 line key, if necessary. Park LF/FF Online Key Park (1): If fanfold paper is loaded in the printer, it is fed to... -
Page 42: Moving The Paper To The Tear Position
User guide Paper handling Moving the paper to the Your printer by default moves the paper into tear position once pa- per is loaded. If you deactivate this feature in the printer’s menu (set- tear position ting: Manual) you can use the Tear key to move the paper to the tear position. -
Page 43: Removing Paper
User guide Paper handling Removing paper Never use force to remove the paper from the printer. Other- STOP wise the mechanical components may be damaged. Make sure that the printer is in Offline mode (Pause); press the On- Pause Front1 line key, if necessary. -
Page 44: Settings
User guide Settings Settings This section describes how to set the tear position, the first printing line, the print head gap as well as the font and the character density. Setting the tear If the tear position of the paper is not aligned with the tear edge of the printer, you can adjust it. -
Page 45: Setting The First Printing Line (Tof)
User guide Settings Setting the first printing You can use the TOF function for setting the position of the first prin- ting line for each paper source and each menu individually. line (TOF) Before using the TOF function (if fanfold paper is used), you should first set the tear position;... -
Page 46: Setting The Print Head Gap
User guide Settings Setting the print head The printer features automatic print head gap adjustment to the thickness of the paper used. In Setup mode, you can enter a correc- tion value to modify the head gap that is normally determined auto- matically. -
Page 47: Selecting Character Density And Font Temporarily
User guide Settings Selecting character You can use the CPI (Character Per Inch) key in Setup mode to sel- ect the number of characters per inch to be printed. density and font You can use the Font key to select resident fonts. temporarily Press the Setup key. -
Page 48: The Menu
User guide The Menu The Menu Programming via the Apart from being able to control your printer via the applications soft- ware you use, you can also program the printer directly. There are control panel two programming options you can use: Programming via the control panel. -
Page 49: Menu Configurations (Macros)
User guide The Menu Menu configurations Every printer is shipped with factory default settings. Basic settings such as emulation, character size, form length etc., which many ap- (Macros) plications make use of, are set. At the end of this chapter you will find a menu printout (Seite 89) which shows you the printer’s default set-... -
Page 50: Menu Handling
User guide The Menu Menu handling You can navigate in the current menu using the four function and se- lection keys arranged below the LC display field. Each function and parameter displayed in the LCD is executed or selected by the cor- responding key below, respectively. -
Page 51: Selecting The Lc Display Language
User guide The Menu Selecting the LC display This section describes how to make settings in the menu, using the language selection of the national language as an example. This example shows how to change from the English language to the German language. -
Page 52: Terminating Setup Mode
User guide The Menu You can exit Parameter mode without saving a setting by pressing Ges.Men Sprache the Exit key (4), the old setting is retained. Rück Online After saving your setting (Set), the display in our example indicates the following text: Setup This setting is retained even after switching off your printer. -
Page 53: Menu Structure
User guide The Menu Menu structure The menu structure of your printer may be slightly different from the example shown here, depending on the printer software. Next MENU Back IBMMode EPSMode Margin Print Macro DECMode Hvy Form Reset Quiet Font Wrap Sound Paphand... -
Page 54: Menu Parameters
User guide The Menu Menu parameters The following section introduces and explains all the possible menu settings. Press Setup key. Ready Front1 Online M1 EPS Setup Press Menu (1) key. Adjust Paprpath Setup mode and Menu mode may be disabled. Hold Menu Char Online... -
Page 55: Reset To Default Values (Reset)
User guide The Menu Reset to default values The current macro returns to the default values (factory settings). (Reset) Press Reset (2) key. Reset Quiet Back Next Online Setup Press the No (1) or Yes (2) key to select the desired setting. Reset Macro1 Online Setup... -
Page 56: Selecting Font (Font)
User guide The Menu This parameter selects the character style and its quality perma- Selecting font (Font) nently. Press Font (2) key. Font LPI Back Next Online Setup Use the < (2) or > (3) key to select the desired setting. Roman NLQ* Setting Options: see table below... -
Page 57: Setting Line Spacing (Lpi)
User guide The Menu Setting line spacing (LPI) Sets the lines per inch (line density). The higher the parameter the smaller the line spacing (random LPI can be selected via the ESC sequences). Press LPI (2) key. Font Back Next Online Setup Use the <... -
Page 58: Selecting Protocol (Emulation)
User guide The Menu Selecting Protocol Selects the emulation for the serial or parallel interface. When a (emulation) printer understands the control set written for another printer type, it is said to emulate the other printer. The selected emulation of the active interface is shown in on- line or Offline mode in the second line of the printers display. -
Page 59: Bidirectional Printing (Printdir)
User guide The Menu Bidirectional printing Selects if the printer prints in both directions (bidirectional) or only in (PrintDir) one direction (unidirectional from left to right). Press PrintDir (2) key. PrintDir I/O Online Back Next Setup Use the < (2) or > (3) key to select the desired setting. PrintDir=Bidir * Setting Options: Bidir/Unidir <... -
Page 60: Settings For Interfaces (I/O)
User guide The Menu Settings for interfaces (I/O) In this parameter group, you can choose various settings for the printer interfaces. See also Interfaces (page 122). Press I/O (3) key. PrintDir I/O Back Next Online Setup To ensure the proper functioning of serial data trans- Serial interface (Serial) STOP fers, the serial settings of the printer and computer... -
Page 61: Data Format (Format)
User guide The Menu Data format (Format) This parameter serves to define the number of data bits, the parity check for received data bytes and the number of stop bits per data byte. Press Format (3) key. Baud Format Back Next Online Setup... -
Page 62: Buffer Control (Buffctrl)
User guide The Menu Buffer control (BuffCtrl) This parameter serves to select the type of protocol, i.e. a certain set of rules and procedures for ensuring error-free data exchanges be- tween computer and printer. Details of the available protocols can be found in the section Protocols (page 127). -
Page 63: Selecting Interface (Interf.)
User guide The Menu Selecting interface (Interf.) Selects the interface. Printer is configured either for parallel or serial connection or in automatic change for both (Auto). Press Interf. (3) key. Serial Interf. Back Next Online Setup Use the < (2) or > (3) key to select the desired setting. Interf.= Auto* Setting Options: Auto, Parallel, Serial... -
Page 64: Selecting Interface Timeout (Timeout)
User guide The Menu Selecting interface timeout The Timout option allows you to define the duration after which the (Timeout) interface switches back to the Stand-by state, when the printer stops receiving data. Press Timeout (3) key. Buffer Timeout Back Next Online Setup... -
Page 65: Automatic Line Feed (Auto-Lf)
User guide The Menu Automatic line feed Switches the automatic line feed (LF) on or off after receiving the (Auto-LF) signal CR (carriage return). Press Auto-LF (3) key. Auto-CR Auto-LF Back Next Online Setup Use the < (2) or > (3) key to select the desired setting. Auto-LF=On Setting Options: Off/On <... -
Page 66: Language (Language)
User guide The Menu Language (Language) The menu can be shown in five languages on the LC display. Press Language (3) key. MenLock Language Back Next Online Setup Use the < (2) or > (3) key to select the desired setting. English Setting Options: English, German, French, Italian, <... -
Page 67: Form Length (Formlen)
User guide The Menu Form length (Formlen) You can define the form length in one of two ways: via the number of lines or via standard formats (e.g. Letter, Legal). Press Formlen (2) key. Formlen FormAdj Back Next Online Setup If you wish to define the form length via a line format, press Line (2) Lines Standard... -
Page 68: First Printing Position (Formadj)
User guide The Menu If you wish to define the form length via standard formats, press Lines Standard Standard (3) key. Online Back Next Setup Use the < (2) or > (3) key to select the desired setting. Fanfold " Setting Options: DIN A3, DIN A4, DIN A5, Online <... -
Page 69: Print Head Gap Manually (Head)
User guide The Menu Print head gap manually (Head) This parameter is ignored if the automatic gap adjustment (AGA) is activated; see Automatic gap adjustment (AGA) (page 68). Adjusts the print head gap manually; separately adjustable for each paper path. Press Head (2) key. -
Page 70: View And Tear Position (Tearview)
User guide The Menu View and tear position The auto tear or the auto view function can be selected as desired. (TearView) When auto view is switched on, the last printed text is visible. When auto tear is switched on, the perforation of the paper is posi- tioned at the tear off edge of the printer, when no data are pro- cessed. -
Page 71: Line Length (Width)
User guide The Menu Line length (Width) Selects the line length in inches. With the setting of 8 Inch, the prin- ter operates like a printer with a width of only 8 inches. Press Width (2) key. Width Back Next Online Setup Use the <... -
Page 72: Barcode (Barcode)
User guide The Menu Barcode (Barcode) With this function selected it is posible to print different barcodes and LCP (Large Character Printing). Press Barcode (2) key. Barcode Barmode Back Next Online Setup Use the < (2) or > (3) key to select the desired setting. Barcode=Off Setting Options: On/Off <... -
Page 73: Form Feed Mode (Ffmode)
User guide The Menu In unsecured mode, the required paper transport for printing bar- codes is carried out automatically, it is not possible to print more than one line of normal characters in the barcode line. All characters in the mixed line are printed such that their bottom edges are in a straight line. -
Page 74: Setting And Activating Options (Papopt)
User guide The Menu Setting and activating Selection of the optional tractor; see Paperway (page 5). If you set options (PapOpt) any of these options to Not installed, they will not be displayed in the paper path quick selection menu.For setting the tractor Press PapOpt (3) key. -
Page 75: Automatic Gap Adjustment (Aga)
User guide The Menu Automatic gap adjustment This function allows you to switch the Automatic Gap Adjustment (AGA) (AGA) off or on. Press the AGA key (3). Online Back Next Setup Setting options: Off/once/always AGA=On Default setting: always Online < >... -
Page 76: Paper Handling (Paphand)
User guide The Menu Paper handling (Paphand) The Paphand group of menus improves the possibilities for the trou- blefree printing of paper with properties likely to cause problems (perforations etc.) or paper of poor finish. Put the printer into Menu mode by pressing the Setup key. Press the Menu key. -
Page 77: Paper Width (Pagewid)
User guide The Menu Paper width (Pagewid) This parameter determines the actual paper width. Press the Pagewid key (3). Head up Pagewid Online Back Next Setup Setting options narrow printer: From 20 to 80 in 1/10 inch steps Pagewid=136/10“* Setting options wide printer: From 20 to 136 in 1/10 inch steps Online <... -
Page 78: Right-Hand Area (Rightzo)
User guide The Menu Right-hand area (Rightzo) If the parameter is On, the print head travels from the right-hand per- foration area ( ) towards the center of the paper while the paper is moving. The Pagewid option must be correctly set in this case, see Paper width (Pagewid) (page 70). -
Page 79: Line Wrap (Wrap)
User guide The Menu Line wrap (Wrap) Select the Wrap menu (2). Wrap Sound Back Next Online Setup Setting options: On/Off Wrap=On Default setting: < > Exit Online Wrap = On: If the number of transferred characters per print line ex- ceeds the maximum printing width, the supernumerary characters Setup are printed at the beginning of the next line. -
Page 80: Setting For Printing Copy Paper (Hvyform)
User guide The Menu Setting for printing copy If you set HvyForm = On, the printer prints the same line twice at paper (HvyForm) double strike. This setting ensures that copy paper produces opti- mum results. Select the HvyForm menu (3). HvyForm Back Next... -
Page 81: Setting The Page Margins (Margin)
User guide The Menu Setting the page margins This parameter group allows you to define the area for printing. You (Margin) can set the top, bottom and left margin. Press the Margin key (2). Margin DECMode Online Back Next Setup Setting the top margin (Topmrg) This option lets you set the top margin with the number of the line (numbered from the top paper edge) where the printing actually... -
Page 82: Setting The Bottom Margin (Botmrg)
User guide The Menu Setting the bottom margin The bottom margin option gives you the possibility to set the bottom (Botmrg) margin with the number of the line (numbered from the top paper edge) where the printing actually stops for a given page. Press the Botmrg key (2). -
Page 83: Setting The Dec Mode (Decmode)
User guide The Menu Setting the DEC Mode The DEC mode option sets the DEC protocol specific features. (DECMode) Press the DECMode key (3). Margin DECMode Back Next Online Setup Horizontal spacing of characters Sets the horizontal spacing of the printed characters used with the (CPI) DEC protocol. -
Page 84: Character Set (Charset)
User guide The Menu Character set (CharSet) Selects the G0 character set that will be used with the DEC protocol. Press the CharSet key (3). CPI CharSet Back Next Online Setup Setting options: see table below US ASCII Default setting: US ASCII <... -
Page 85: User Preference Character Set (Userchr)
User guide The Menu User preference character set This option sets the user character set for the DEC protocol. (UserChr) Press the UserChr key (2). UserChr Back Next Online Setup Setting options: see table below DEC Supplement Default setting: DEC supplement <... -
Page 86: Printer Id (Prn.id)
User guide The Menu Printer ID (Prn.ID) This option defines the DEC printer ID used by the printer when re- sponding to DA commands (DA = device attributes, see Program- mer’s Manual, Reports. from your host computer or application software (serial transmission only). Press the Prn.ID key (2). -
Page 87: Disconnection On End Of Transmission (Discnct)
User guide The Menu Disconnection on end of This option determines whether the communication disconnect oc- transmission (Discnct) curs at the end of the transmission. Press the Discnt key (2). Discnct Report Back Next Online Setup Setting options: Enable/Disable Disable Default setting: Disable <... -
Page 88: Automatic Answerback (Answbck)
User guide The Menu Automatic answerback This option determines whether the printer sends an answerback (Answbck) message to the printer during initialization or not. Press the Answbck key (2). Answbck Answ_ENQ Back Next Online Setup Setting options: Enable/Disable Disable Default setting: Disable <... -
Page 89: Setting The Ibm Mode (Ibmmode)
User guide The Menu Setting the IBM mode The IBM mode option sets the IBM specific features. (IBMMode) Press the IBMMode key (2). IBMMode EPSMode Back Next Online Setup Horizontal spacing of characters Sets the horizontal spacing of the printed characters used with the (CPI) IBM protocol. -
Page 90: Code Page (Codpage)
User guide The Menu Code page (CodPage) This option determines which code page the printer uses in IBM mode. Press the CodPage key (2). CodPage DblHigh Online Back Next Setup Setting options: see table below Code Page 437 Default setting: Code Page 437 Online <... -
Page 91: Ibm Double Height (Dblhigh)
User guide The Menu IBM Double Height (DblHigh) This option determines whether the IBM double height mode should be used (On) or not (Off). Press the DblHigh key (3). CodPage DblHigh Back Next Online Setup Setting options: On/Off DblHigh=Off Default setting: <... -
Page 92: Slashed Zero (Sl.zero)
User guide The Menu Slashed Zero (Sl.Zero) This option selects whether the zero character is printed with or with- out a slash. Press the Sl.Zero key (3). IBMComp Sl.Zero Back Next Online Setup Setting options: On/Off Sl.Zero=Off Default setting: < >... -
Page 93: Setting The Epson Mode (Epsmode)
User guide The Menu Setting the EPSON Mode The EPSON mode option sets the EPSON protocol specific fea- (EPSMode) tures. Press the EPSMode key (3). IBMMode EPSMode Back Next Online Setup Horizontal spacing of characters Sets the horizontal spacing of the printed characters used with the (CPI) EPSON protocol. -
Page 94: Code Page (Codpage)
User guide The Menu Code Page (CodPage) This option determines which code page the printer uses in EPSON mode. Press the CodPage key (3). CodPage Sl.Zero Online Back Next Setup Setting options: see table below Code Page 437 Default setting: Code Page 437 <... -
Page 95: Slashed Zero (Sl.zero)
User guide The Menu Slashed Zero (Sl.Zero) This option selects whether the zero character is printed with or with- out a slash. Press the Sl.Zero key (3). CodPage Sl.Zero Back Next Online Setup Setting options: On/Off Sl.Zero=Off Default setting: < >... -
Page 96: Menu Settings (Example)
User guide The Menu Menu settings (example) -
Page 97: Advanced Menu
User guide Advanced menu Advanced menu The advanced menu consists of test functions and advanced settings. Test functions Various tests to check proper operation of the printer are available at any time. With these tests it is possible to check the print quality, proper operation of the print head and the mechanics, as well as ef- ficient data transmission from the computer to the printer. -
Page 98: Printer Self-Test (Rolling Ascii)
User guide Advanced menu Printer self-test To check operational readiness, your printer contains a self-test rou- (Rolling ASCII) tine which allows testing of the printer configuration, the print quality and correct operation of your printer. Before performing a self-test, your printer must be switched off. En- Testmode sure that paper is inserted. -
Page 99: Exiting Rolling Ascii Test Mode
User guide Advanced menu Example of an ASCII test printout If you selected a proportional font (PS font) , the printed length of the lines varies. This test can also be used to determine and set the optimal print head gap (see the section Setting the print head gap (page 39). -
Page 100: Interface Test (H-Dump)
User guide Advanced menu Interface test With the interface test (Hex-Dump/H-Dump) you can test data trans- (H-Dump) mission from the computer to the printer. During this test, the data from the computer is printed out in two columns. The text in the left column is printed in hexadecimal format and in the right column in ASCII format. -
Page 101: Terminating Hex-Dump
User guide Advanced menu Terminating Hex-Dump Hex-Dump mode can only be terminated by switching off the printer. If you want to stop the Hex-Dump printout before switching off the printer, press the key Online and then the key LF/FF (4) once. -
Page 102: Advanced Settings
User guide Advanced menu Advanced settings In the advanced menu, there are two other settings available be- sides the test functions. The Single option can be used to deactivate the single sheet func- tion (for printers without single sheet feeder). The function Pap.back allows printing on paper with a dark back. -
Page 103: Settings For Paper With Dark Back (Pap.back)
User guide Advanced menu Settings for paper with dark back (Pap.back) Select the Pap.back (3) menu. Single Pap.back Back Next Online Setup Setting options: normal/dark Pap.back=normal* Default setting: normal Online < > Exit Pap.back = normal is the standard for normal paper. Setup Pap.back = dark can be set to process paper with a gray back. -
Page 104: Troubleshooting
User guide Troubleshooting Troubleshooting Many of the faults and problems which may occur while using the printer are minor problems which you can solve yourself. The follow- ing chapter should help you to distinguish between a simple operat- ing error and a major malfunction. This chapter provides information on the rectification of faults with- out the assistance of specially trained personnel. -
Page 105: General Print Problems
User guide Troubleshooting General print problems Problem Corrective action The display remains dark Switch off the printer and proceed as follows: The printer is switched on, but 1 Check that the power plug is correctly connected to the socket nothing happens (nothing is dis- on the printer. -
Page 106: Problems With The Paper Feed
User guide Troubleshooting Problem Corrective action Problems with the paper feed 1 Check that the display shows the correct paperway, if neces- sary select the correct paperway (single sheet or fanfold) with The paper is not fed in the key Park. See Changing the paper path (page 26). -
Page 107: Paper Jam (Single Sheets)
User guide Troubleshooting Problem Corrective action Paper jam (single sheets) Open the top cover and remove the paper manually or with the functions LF (line feed)/FF (form feed) in Offline mode from the printer. Before you replace the single sheet, refer to the instructions in the section Single sheets (page 32). -
Page 108: Problems With The Print Quality
User guide Troubleshooting Problems with the print quality Problem Corrective action Print is too pale 1 The ribbon is used up or the ribbon cassette is not correctly fit- ted. Refer to the section Changing the ribbon cassette (page 11). 2 The print head to platen gap is not correctly set, refer to the sec- tion Setting the print head gap... -
Page 109: Error Messages Via The Display
User guide Troubleshooting Error messages via the display Message Possible cause Corrective action The printer cannot eject the paper Check the following: Eject Error or cannot place the paper in the Whether the paper path is park position. blocked by a foreign object. Whether the paper is damaged. - Page 110 User guide Troubleshooting Message Possible cause Corrective action Paper jam. Eliminate the paper jam detect- Paper Jam ed by the paper motion sensor. For the procedure, see Paper jam (fanfold paper) (page 99) or Paper jam (single sheets) (page 100). Paper is too narrow.
- Page 111 User guide Troubleshooting Message Possible cause Corrective action Received data which has not yet Check that the correct busy pro- Overrun Error been printed is overwritten with tocol (e.g. XON XOFF) is set in new data. the menu Serial interface, pro- tocol, see Protocols (page 127).
-
Page 112: Additional Display Messages
User guide Troubleshooting Additional display messages These are not error messages, they give operating instructions and information from the printer to the user. Message Possible cause Corrective action — To proceed press any key. Press any key The factory-set parameters are No action required. -
Page 113: Care And Maintenance
User guide Care and maintenance Care and maintenance The printer is designed to operate with minimal maintenance. It is advisable to clean the inside of the printer from time to time with a vacuum cleaner. Before cleaning, turn off the printer, wait 5 to 10 seconds and STOP disconnect the power cable. -
Page 114: Cleaning The Housing
User guide Care and maintenance Cleaning the housing Clean the printer housing with mild detergent (use a dishwashing agent, if necessary, or a plastic cleaning agent) and a soft lint-free cloth. Do not use abrasive cleaners. Never use solvents. Cleaning the interior Remove paper and dust (ribbon deposits) with a soft brush. -
Page 115: Cleaning The Platen
User guide Care and maintenance Cleaning the platen Remove the ribbon. Carefully clean the platen with platen roller cleaner (available from dea- lers). Remove dust carefully from the platen. Avoid touching parts and compon- STOP ents in the printer interior. Ribbon Check whether the ribbon is worn or damaged. -
Page 116: Specifications
User guide Specifications Specifications Printer specifications Printer system Serial impact matrix printer Printhead with 24 needles ∅ 0.25 mm bidirectional printing Print speed and character matrices DPQ = Draft 500 cps / 10,0 cpi 12 x 12 (Data Print Quality) 600 cps / 12,0 cpi 12 x 10 750 cps / 15,0 cpi... - Page 117 User guide Specifications Character size Height 3,32 mm (incl. descenders) Width 2,19 mm, max. 2,43 mm Fonts Standard Print Qualities: DPQ (Draft), CPQ (Copy Draft) Near Let- ter Quality (NLQ), Letter Quality (LQ); Fonts: Courier, Roman, Sanserif, OCR A + B (all resident in NLQ und LQ);...
- Page 118 User guide Specifications Power consumption ≤40 W When Printing ≤10 W Stand by Main fuse T2,50AH/250V Approvals IEC 60950, CE, GOST, VDE/GS, , FCC/B Dimensions Narrow printer Wide printer Width 424 mm 600 mm Height 300 mm 300 mm Depth 399 mm 399 mm Weight...
-
Page 119: Interface Specifications
User guide Specifications Interface specifications Parallel interface bidirectional Type of data transmission 8-bit parallel interface (Centronics compatible) IEEE-1284; Nibble mode Transmission rate Max. 12 KHz Signal status Low: 0,0 V to +0,4 V High: +2,4 V to +5,0 V Connection cable Material: AWG 28 at least Length: up to 2,0 m Twisted-pair cable with double-shield,... -
Page 120: Paper Specifications
User guide Specifications Paper specifications Tractor 1 Continuous paper, single part forms Weight 60 to 120 g/m Width 76 to 254 mm (narrow printer) 76 to 420 mm (wide printer) Form length 76 to 559 mm Multi part forms (to be tested indivi- dually!) Copies 1 + 5... - Page 121 User guide Specifications Recycling paper made of 100% waste paper (to DIN 19 Printing paper 309) can be processed. Set of forms Sets of forms may be used only if the top edge is bound. The binding edge should be as soft as possible. A wavy binding edge may hamper the smooth feeding of these sets.
-
Page 122: Available Character Sets And Fonts
User guide Available character sets and fonts Available character sets and fonts The following list includes all the character sets you can select from the control panel or via ESC sequences and specifies the fonts in which they are available. The character sets are only available in the fonts marked with an X. - Page 123 User guide Available character sets and fonts Epson Denmark II Epson Spain II Epson Latin America Epson Korea Epson Legal Epson Turkey Epson Old Hebrew Epson/IBM New Hebrew Epson/IBM D-Hebrew CP437 Latin US CP850 Latin 1 CP851 Greek CP852 Eastern Europe CP853 Turkish CP855 Cyrillic CP857 Turkish...
- Page 124 User guide Available character sets and fonts CP866 Russian CP866 Bulgaria CP869 Greek Mazowia (Polish) 8859-7 Greek 8859-15 Latin 9 (Euro) Brazilian ASCII Abicomp (Br. Portuguese) DEC ISO Latin-1 Supplem. DEC ISO Latin-2 Supplem. DEC ISO Latin-Greek Supp. B2 DEC ISO Latin-Hebrew Sup. B3 DEC ISO Latin-Cyrillic Sup.
- Page 125 User guide Available character sets and fonts DEC Finnish DEC French-Canadian DEC JIS Roman DEC Norwegian/Danish DEC Swedish DEC Swiss DEC Supplemental DEC Technical DEC Special Graphics DEC Portuguese CP437 Greek Code MJK CP210 CP220 All codepages will be printed in all fonts, but the character shape may look the same although the font names are different.
- Page 126 User guide Available character sets and fonts Epson Turkey, Old Hebrew, New Hebrew and D-Hebrew have preliminary IDs and cannot be selected via the ESC ( t ... com- mand; but the code pages will be implemented and shown in the menu and can be selected via the menu or with the ESC R ...
-
Page 127: Emulations
User guide Emulations Emulations General When a printer understands the control set written for another printer type, it is said to emulate the other printer. Your printer in its stan- dard version emulates, i.e. “understands” the DEC-PPL2 for the se- rial interface and Epson ESC/P2 using the parallel interface. -
Page 128: Barcode
User guide Emulations Barcode Even the standard version of your printer has the possibility of using up to 18 different barcode types. Barcode mode can be accessed in DEC emulation. The user can decide whether barcode is activated permanently or activated depending on the situation by means of an escape sequence. -
Page 129: Interfaces
User guide Interfaces Interfaces Your printer offers the possibility of operating either via a parallel or via a serial interface. This chapter informs you about the parallel Centronics compatible interface and the serial interface type RS232C/V.24 and describes the communication between your com- puter and the printer. -
Page 130: Parallel Interface
User guide Interfaces Parallel interface The bidirectional parallel interface offers the so called “nibble” mode of the IEEE1284 interface norm. This enables installation in accor- dance with Windows “Plug & Play”. The standard parallel interface is able to transfer data at a speed of max. -
Page 131: Serial Interface V.24/Rs232C
User guide Interfaces Serial interface V.24/ Your printer’s serial interface supports the RS232C specification. The signals are received and transmitted by a 9 pin connector. RS232C Basically 3 lines are already enough for exchanging information bet- ween computer and printer (one receive line, one send line, one line for common grounding). -
Page 132: Interface Cable (Serial Interface)
User guide Interfaces Interface cable (serial The cables used must be shielded. The cable shield must be con- interface) nected to the connector shield on both ends. PC/AT (9-pin) Printer (9-pin) DTR/RDY PC/AT (25-pin) Printer (9-pin) DTR/RDY It depends on the menu setting whether DTR or RDY is active at pin 4. -
Page 133: Interface-Adapter If Adapter-Set Rs232 (Db9M)/Mmj
User guide Interfaces Interface-Adapter IF The set consists of an adapter RS232 (D-Sub9)/MMJ and a MMJ cable. Adapter-Set RS232 (DB9M)/MMP Adapter RS232(D-Sub9)/MMJ Serial connector D-SUB9, male, 9 pins Modular connector DEC-MMJ, female, 6 pins Internal wiring D-SUB 9 MMJ-Cable Length 3 m, unshielded, leads crossed (1–6, 2–5, 3–4) Connector... -
Page 134: Protocols
User guide Interfaces Protocols Memory mode XON/XOFF The received characters are stored in a FIFO buffer (first in/first out). The characters are processed in this buffer. The buffer capacity can be adjusted from 0 to 64 Kb. If the buffer is full, the interface signals NOT READY (signal acknow- ledgement: Level 1, -12 V) and XOFF (hex. -
Page 135: Configuring The Serial Interface Of The Pc
User guide Interfaces Configuring the serial interface of the PC DOS mode To use the serial interface of your PC, you must add the following mode commands to the AUTOEXEC.BAT file: mode com1:9600,n,8,1,p mode lpt1:= com1: With the first MODE command, you configure the serial interface Com1 of your PC to the printer’s factory defaults. -
Page 136: Physical Printer Port In Ethernet With Tcp/Ip
User guide Interfaces Physical printer port in If you use your printer in a local network with Ethernet connections and the transmission protocol TCP/IP, you have to assign some Ethernet with TCP/IP adress informations. Address information for the Ethernet port can only be made STOP available by your network administrator, who has the neces- sary rights to install printers on the network and/or make any... -
Page 137: Options And Accessories
User guide Options and accessories Options and accessories Options The following options can be ordered for your printer. Tractor 2, front The push tractor is suitable for fanfold paper and sets of forms with 1 + 5 forms. Paper formats with a width of 76 to 264 mm (narrow printer) or 406 mm (wide printer) may be used. -
Page 138: Accessories
User guide Options and accessories Accessories Ribbon cassettes Ribbon cassettes are available in the following versions. Name Part no. Ribbon cassette black, narrow printer LA55R-KN Ribbon cassette black, wide printer LA55R-KW Optional paper support Name Part no. Optional paper support 062 217 Programming manuals The available programming manuals are enclosed on this CD-ROM. -
Page 139: Index
User guide Index Index Botmrg Access to Menu mode Buffer 130, 131 Accessories Optional paper support Calling up the menu Programming manuals Ribbon cassette Care Carriage shafts ACK/NAK Changing printer settings Activation of tractors (AutoTra) Changing the paper path Additional display messages Character density Advanced menu Setting... - Page 140 User guide Index Display messages Increasing the printhead gap (Head up) Ink cartridge Emulations Installing Escape sequences Ink cartridges General Input signals Error messages via the display Installation Escape sequences Installing printer drivers ESCChar Installing the ink cartridge Installing the ink cartridge the first time Fanfold paper Interf.
- Page 141 User guide Index Left-hand area Line length Macro Line wrap Maintenance Loading menu configurations Margin Menu lock MenLock Normal characters and barcode Menu Paper handling Advanced Paper parameter Calling up Paper width Enabling access to Menu mode Print head gap manually Handling Printing out menu configurations Save settings...
- Page 142 User guide Index Optional firmware Printer At a glance Optional paper support Connecting Options Installation Optional firmware Paperways Serial interface adapter Placing Tractor 2, front Specifications Output signals Switching on Unpacking Printer drivers Pagewid Printer in single sheet mode Pap.back Printer in tractor mode Paper Printer self-test (Rolling ASCII)
- Page 143 User guide Index Rightzo Signal processing (DTR) Robust XON/XOFF Single Rolling ASCII Single sheets Loading SleepMod Save menu settings Sound Selecting character density Specifications Selecting emulation (Emulate) Interface specifications Selecting font (Font) Switching on the printer Selecting interface (Interf.) Selecting start signal for escape sequence Tear position (ESCChar) Tear position (AutoTear)
- Page 144 User guide Index Width Wrap XON/XOFF...
- Page 145 Fax: +33 1 41 30 11 10 Phone: +3 7625 1988 http://www.tallygenicom.fr Fax: +3 7625 2688 http://www.tallygenicom.com.my ITALY TallyGenicom S.R.L. Via Borsini 6 I-20094 Corsico (MI) Italia Tel.: +39 02 48608 1 Fax: +39 02 48601 141 http://www.tallygenicom.it © June 2004 TallyGenicom Computerdrucker GmbH...
Need help?
Do you have a question about the LA550N and is the answer not in the manual?
Questions and answers