Advertisement
Quick Links
ITEM #
MODEL # 1539015HD
ASSEMBLY INSTRUCTIONS GUIDE
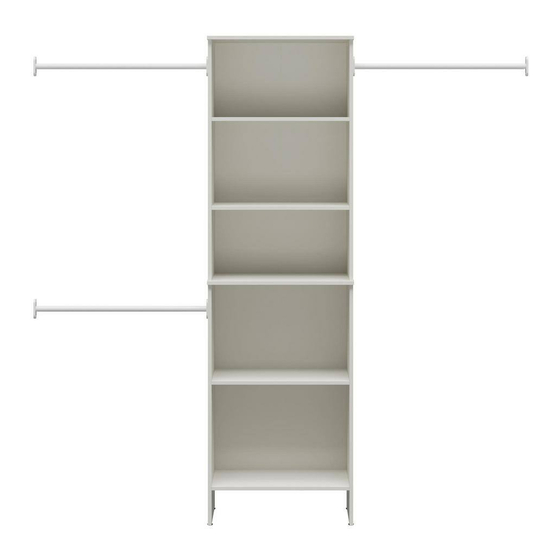
25" CLOSET SYSTEM TOWER
Questions, problems, missing parts?
Before returning to the store, call Customer Service
8 a.m. - 7 p.m., EST, Monday - Friday, 9 a.m. - 6 p.m., EST, Saturday
Phone Number: 1-877-527-0313
HOMEDEPOT.COM
THANK YOU
We appreciate the trust and confidence you have placed in StyleWell through the purchase of this closet tower kit. We strive to continually
create quality products designed to enhance your home.Visit us online to see our full line of products available for your home improvement
needs. Thank you for choosing StyleWell!
Advertisement

Related Manuals for StyleWell 1539015HD


Summary of Contents for StyleWell 1539015HD
- Page 1 THANK YOU We appreciate the trust and confidence you have placed in StyleWell through the purchase of this closet tower kit. We strive to continually create quality products designed to enhance your home.Visit us online to see our full line of products available for your home improvement...
-
Page 2: Planning Assembly
Pre-assembly PLANNING ASSEMBLY Read all instructions before assembly. To avoid damaging this product, assemble it on a soft, non-abrasive surface such as carpet or cardboard. NOTE: More than one person may be required to assemble this product. TOOLS REQUIRED Phillips Claw hammer screwdriver HARDWARE INCLUDED... - Page 3 ITEM # MODEL # 1539xxxHD Pre-assembly (continued) PACKAGE CONTENTS PART CODE PART NUMBER DESCRIPTION 37764015010 LEFT PANEL - LOWER 37764015020 RIGHT PANEL - LOWER 37764015030 LEFT PANEL - UPPER 37764015040 RIGHT PANEL - UPPER 31539015050 TOP SHELF 31539015060 BOTTOM SHELF 31539015070 MIDDLE SHELF 31539015080...
- Page 4 Assembly Arrange one Left Panel (A) and Right Panel (B) as shown. In the unfinished edge, insert the nuts (5) into the holes with a hammer. Thread adjustable leveling feet into the nuts. 2 - x4 3 - x4 4 - x4 Insert wood dowels and connectors as shown.
- Page 5 Assembly Install connectors into holes of Bottom Shelf (F). Be sure all connectors are fully seated and placed correctly. Insert wood dowels into the holes on the unfinished edge. You may need to tap connectors and dowels with a hammer to fully insert. 3 - x4 2 - x4 F - x1...
- Page 6 Assembly Install connectors into holes of both Back Panels (I & J). Be sure all connectors are fully seated and placed correctly. Insert wood dowels into the holes on the unfinished edges. You may need to tap connector and dowels with a hammer to fully insert.
- Page 7 Assembly Connect Back Panels (I) to Bottom Shelf (F) by inserting dowels and connector as shown. Turn connector screw clockwise to lock in place. Lock Unfinished Surface finished edge With Back Panels (I) and Bottom Shelf (F) connected, carefully insert dowels and connectors as shown.
- Page 8 Assembly Attach Right Panel (B) by carefully inserting dowels and connectors as shown. Turn three connector screws clockwise to lock in place. Lock Unfinished Surface Attach Left and Right Panel (C & D) to aligned Back Panels (J) by inserting the connectors as shown.
- Page 9 Assembly Attach Middle Shelf (G) to Left and Right Panels (C & D) by inserting dowels and connectors as shown. Secure the Middle Shelf using two screws as shown. 1 - x2 Attach Top Shelf (E) by inserting dowels and connectors as shown. Turn four connector screws clockwise to lock in place.
- Page 10 Assembly With a helper, attach the lower section to the upper section by carefully inserting dowels and connectors as shown. Turn four connector screws clockwise to lock in place. Lock With a helper position, the unit upright. Turn two connector screws clockwise to lock in place. Lock HOMEDEPOT.COM Please contact 1-877-527-0313 for further assistance.
- Page 11 Assembly Warning All units MUST be fastened to the wall. Place unit inside closet (allow 30" to 48" on each side for clothing rod). Use a level and adjust adjustable leveling feet to be sure it is square. Place L-bracket on top of the unit with bracket screw using existing hole location. Mark hole location on wall.
- Page 12 Assembly If you purchased additional drawer or door components to be installed in your closet tower, please refer to the drawer or door manual for installation before going to next step. If not, please go onto step 15. Optional drawers and door can be purchased separately.
- Page 13 Assembly Once the unit is secured to the wall you can install the Adjustable Shelves (H). Place the shelf supports in the desired hole locations, ensuring they are level from side to side. Insert shelves. H - x4 6 - x16 HOMEDEPOT.COM Please contact 1-877-527-0313 for further assistance.
- Page 14 Assembly Choose "double hang" and "single hang" side. If the pre-drilled hole locations are not suitable for your needs, you can mark and drill pilot holes at your desired location. Please use a 1/16" drill bit and be careful not to drill too deep. Note: the pre-drilled holes for the closet rod locations are shown on the outside of...
- Page 15 Assembly Secure each Adjustable Rod with two screws. 9 - x6 11 - x3 HOMEDEPOT.COM Please contact 1-877-527-0313 for further assistance.
- Page 16 Assembly Extend rod to the wall and hold in place. Be sure rod is level and mark hole locations on wall. Repeat for all bracket locations. Screw in wall anchors at marked locations and secure each rod to the wall with screws. 8 - x6 10 - x6 wall...
- Page 17 Questions, problems, missing parts? Before returning to the store, call StyleWell Customer Service 8 a.m. - 7 p.m., EST, Monday - Friday, 9 a.m. - 6 p.m., EST, Saturday PHONE NUMBER : 1-877-527-0313 HOMEDEPOT.COM Retain this manual for future use.
Need help?
Do you have a question about the 1539015HD and is the answer not in the manual?
Questions and answers