Table of Contents
Advertisement
Quick Links
Item # 1004 407 608 / 1004 407 609
Model # THD18028.1A / THD18028.2A
USE AND CARE GUIDE
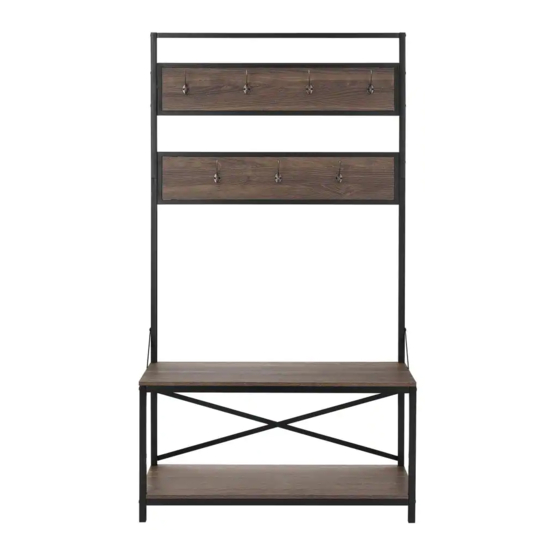
HALL TREE WITH 2 ROWS OF HOOKS AND BENCH
Questions, problems, missing parts?
Before returning to the store, call Customer Service.
8 a.m. – 7 p.m., EST, Monday – Friday, 9 a.m. – 6 p.m., EST, Saturday
1-877-527-0313
HOMEDEPOT.COM
THANK YOU
We appreciate the trust and confidence you have placed in StyleWell through the purchase of this hall tree. We strive to continually create quality
products designed to enhance your home. Visit us online to see our full line of products available for your home improvement needs. Thank you for
choosing StyleWell!
Advertisement
Table of Contents

Related Manuals for StyleWell THD18028.1A


Summary of Contents for StyleWell THD18028.1A
- Page 1 THANK YOU We appreciate the trust and confidence you have placed in StyleWell through the purchase of this hall tree. We strive to continually create quality products designed to enhance your home. Visit us online to see our full line of products available for your home improvement needs. Thank you for...
-
Page 2: Table Of Contents
Table of Contents Table of Contents ............2 Hardware Included ..............4 Safety Information ............2 Pre-assembly (continued) ..........5 Warranty ................. 3 Package Contents ..............5 1 Year Warranty ...............3 Assembly ............... 6 What is Covered ...............3 Assembly (continued) ........... 7 What is Not Covered ..............3 Assembly (continued) ........... -
Page 3: Warranty
Warranty 1 YEAR WARRANTY WHAT IS COVERED We guarantee this product to be free of manufacturing defects to the original purchaser for one year. WHAT IS NOT COVERED This warranty does not cover commercial use, acts of nature, and abusive use. HOMEDEPOT.COM Please contact 1-877-527-0313 for further assistance. -
Page 4: Pre-Assembly
Pre-assembly PLANNING ASSEMBLY Compare all parts with the Hardware Included and Package Contents lists. If any part appears missing or damaged, do not assemble this product and contact the Customer Service Team at 1-877-527-0313. TOOLS REQUIRED Phillips screwdriver (not provided) HARDWARE INCLUDED NOTE: Hardware not shown to actual size. -
Page 5: Pre-Assembly (Continued)
Pre-assembly (continued) PACKAGE CONTENTS Part Description Quantity Seat Top Bottom Upper Back Upper Back Metal Frame Lower Left Side Frame Lower Right Side Frame Upper Metal Tube Middle Left Metal Tube Middle Right Metal Tube Top Rail Metal Tube Metal Support Lower Back Sheet Support HOMEDEPOT.COM... -
Page 6: Assembly
Assembly Assemble the seat top, bottom and side frame □ Fix the metal support (K) onto the seat top (A) and bottom (B) with twenty screws (BB). □ Use hex wrench (EE) to attach the lower left side frame (E) to the seat top (A) and bottom (B) with five long bolts (AA). -
Page 7: Assembly (Continued)
Assembly (continued) Assemble the upper frame □ Use hex wrench (EE) to attach the connected side frame (G) and (H) to the top rail (J) and two upper back frames (C) with five long bolts (AA). □ Repeat to attach the right side frame (G) and (I) to top rail (J) and two upper back frames (C). -
Page 8: Assembly (Continued)
Assembly (continued) Attach the support □ Use hex wrench (EE) to attach the supports (M) to the hall tree with four small bolts (CC). Install the tipping restraint hardware □ We have included two sets of tipping restraint hardware for this unit. -
Page 9: Maintenance
Maintenance □ To clean and care for your furniture: □ Use a soft, clean cloth that will not scratch the surface when dusting. □ Use of furniture polishes is not necessary. Should you choose to use polishes, test first in an inconspicuous area. □... - Page 10 Questions, problems, missing parts? Before returning to the store, call Customer Service 8 a.m. – 7 p.m., EST, Monday – Friday, 9 a.m. – 6 p.m., EST, Saturday 1-877-527-0313 HOMEDEPOT.COM Retain this manual for future use.
Need help?
Do you have a question about the THD18028.1A and is the answer not in the manual?
Questions and answers