Table of Contents
Advertisement
Quick Links
Advertisement
Table of Contents

Related Manuals for StyleWell TS 1004


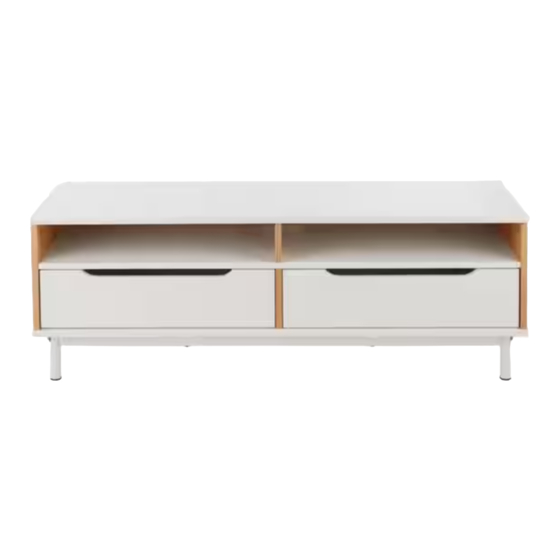
Summary of Contents for StyleWell TS 1004
-
Page 2: Table Of Contents
Table of Contents Tools Required ................. 3 Table of Contents ............2 Safety Information ............2 Hardware Included ..............3 Warranty ................. 2 Pre-assembly (continued) ..........4 1 Year Warranty ................ 2 Package Contents ..............4 What is Covered ............... 2 Assembly ............... -
Page 3: Pre-Assembly
Pre-assembly PLANNING ASSEMBLY Remove all Packaging materials , staples and packing straps form the carton . Refer to Parts List and Hardware List , and ensure parts and hardware are correct before assembly . Contact customer service for missing parts . Place all wooden parts on a clean , flat , and soft surface (e.g.carpet or rug) to prevent scratch and damage to parts . -
Page 4: Pre-Assembly (Continued)
Pre-assembly (continued) PACKAGE CONTENTS Part Quantity Descrlption Table top Left side panel Right side panel Shelf panel Vertical panel Divider panel Bottom side leg Layer box Bottom panel Bottom front leg Drawer back panel Drawer front panel Drawer left side panel Drawer right side panel Drawer bottom bar Drawer bottom panel... -
Page 5: Assembly
Assembly Attached wooden dowel(CC&DD) to vertical panel(E) and divider panel(F) as shown Locked cam bolt(AA) and attached wooden dowel(CC&DD) to left and right side panel (B&C) as shown HOMEDEPOT.COM Please contact 1-877-527-0313 for further assistance. - Page 6 Assembly (continued) Locked cam bolt(AA) to table top panel(A) and layer box(H) as shown Insert wooden dowel(CC) and locked cam bolt(AA) to shelf panel(D) as shown HOMEDEPOT.COM Please contact 1-877-527-0313 for further assistance.
- Page 7 Assembly (continued) Connect divider panel(F) to shelf panel(D) with cam lock(BB) as shown Connect left side panel(B) to divider panel(D) with cam lock(BB) from step 5 HOMEDEPOT.COM Please contact 1-877-527-0313 for further assistance.
- Page 8 Assembly (continued) Connect right side panel(C) to divider panel(D) with cam lock(BB) from step 6 Connect layer box(H) with cam lock(BB) from step 7 as shown HOMEDEPOT.COM Please contact 1-877-527-0313 for further assistance.
- Page 9 Assembly (continued) Use allen key(UU) to tighten bottom side leg(G) and bottom front leg(J) with screw (GG)and washer(HH&II) as shown Use allen key(UU) to tighten step 8 and step 9 with screw(GG) and washer(HH&II) HOMEDEPOT.COM Please contact 1-877-527-0313 for further assistance.
- Page 10 Assembly (continued) Connect vertical panel(E) with cam lock(BB) from step 10,then attached the round sticker(MM) as shown Insert bottom panel(I) from step 11 HOMEDEPOT.COM Please contact 1-877-527-0313 for further assistance.
- Page 11 Assembly (continued) Connect table top panel(A) with cam lock(BB) from step 12,then attached the round sticker(MM) as shown Locked strap(NN) to the table with screw(PP) and washer(QQ),then locked screw (RR) to back panel and locked support(TT) with screw(SS) to back panel as shown HOMEDEPOT.COM Please contact 1-877-527-0313 for further assistance.
- Page 12 Assembly (continued) Locked cam bolt(AA&JJ) to drawer front panel(L),connect drawer left and right side panel(N&M) and drawer bottom bar(O) with cam lock(BB&KK),then insert drawer bottom panel(P),locked drawer back panel(K) with screw(FF&EE) as shown AA AA HOMEDEPOT.COM Please contact 1-877-527-0313 for further assistance.
- Page 13 Assembly (continued) Attached wooden dowen(DD) to prevent drawer sliping out as shown Locked strap to the wall with screw(FF) ,washer(QQ) and wall anchor(OO) as shown HOMEDEPOT.COM Please contact 1-877-527-0313 for further assistance.
-
Page 14: Maintenance
Maintenance Keep the product away from direct heat and sunlight . Prolonged exposure to heat sources may cause scorching, or even cause color to fade . Regular vacuuming or light brushing helps to remove dirt and prevent soil build-up, which increases the appearance of wear . Periodically (every 90 days) make sure that the screws arefully tightened . - Page 15 Questions, problems, missing parts? Before returning to the store, call Customer Service 8 a.m. – 7 p.m., EST, Monday – Friday, 9 a.m. – 6 p.m., EST, Saturday 1-877-527-0313 HOMEDEPOT.COM Retain this manual for future use.
Need help?
Do you have a question about the TS 1004 and is the answer not in the manual?
Questions and answers