Advertisement
- 1 WHAT'S IN THE BOX
- 2 PREREQUISITES
- 3 ASSEMBLING YOUR PRODUCT
- 4 THE EYEPIECES AND STAR DIAGONAL
- 5 THE STARPOINTER FINDERSCOPE
- 6 ALIGNING THE STARPOINTER FINDERSCOPE
- 7 GET READY TO OBSERVE
- 8 ALIGNING YOUR UNIT
- 9 TAKE YOUR UNIT OUT FOR A SPIN
- 10 IMAGING WITH YOUR SMARTPHONE
- 11 IMAGING TIPS AND TRICKS
- 12 SPECIFICATIONS
- 13 HOW TO CONTACT CELESTRON
- 14 Documents / Resources
WHAT'S IN THE BOX
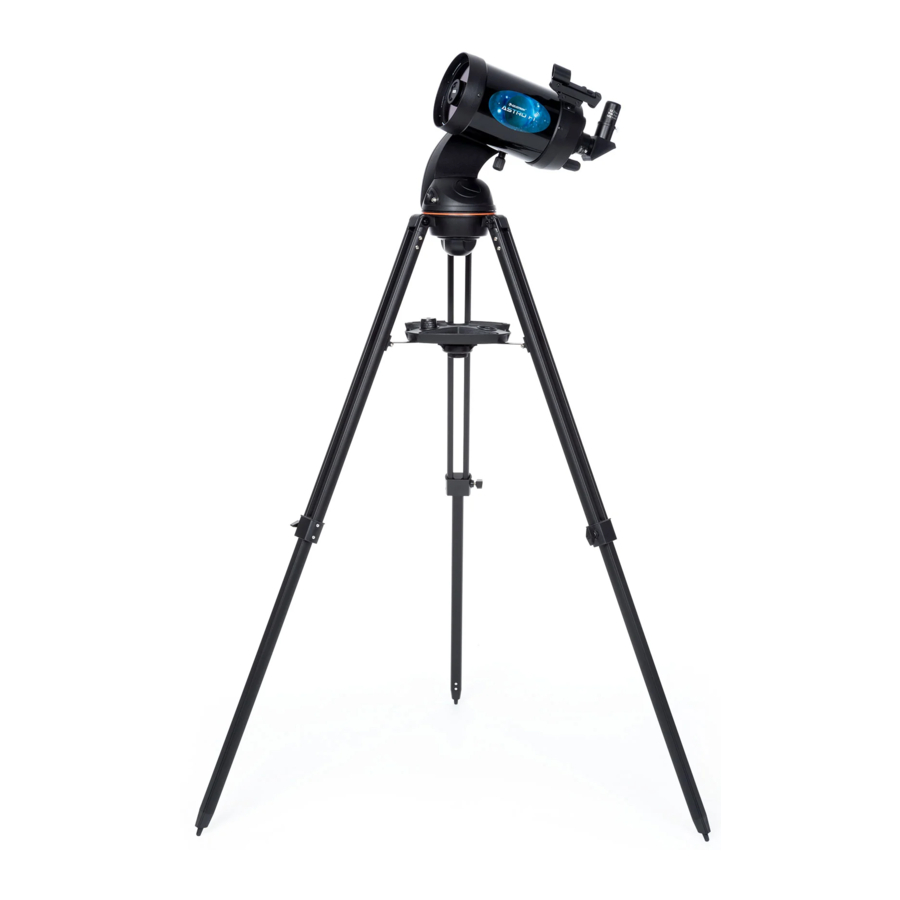
We recommend saving your telescope box so it can be used to store the telescope when it is not in use. Unpack the box carefully as some parts are small. Use the parts list below to verify that all parts and accessories are present. See Fig. 1


SOLAR WARNING
Never look directly at the Sun with the naked eye or with a telescope (unless you have the proper solar filter). Permanent and irreversible eye damage may result.
Never use your telescope to project an image of the Sun onto any surface. Internal heat build-up can damage the telescope and any accessories attached to it.
Never use an eyepiece solar filter or a Herschel wedge. Internal heat build-up inside the telescope can cause these devices to crack or break, allowing unfiltered sunlight to pass through to the eye.
Do not leave the telescope unsupervised, either when children are present or adults who may not be familiar with the correct operating procedures of your telescope.
PREREQUISITES
Your Astro Fi Telescope requires one of the following power sources:
- 8 x AA batteries
- 12 volt DC source with at least 1 ampere of current
- Celestron PowerTank (Sold Separately)
You will also need a smartphone or tablet to operate the telescope. Compatible devices include Apple iPhone or iPad with iOS 6 or later, and Samsung smartphones or tablets with Android 4.0. Visit celestron.com for a complete compatibility list.
Before you begin, you'll need to install the free Celestron SkyPortal app on your device. Download the app from the App Store or Google Play.


ASSEMBLING YOUR PRODUCT

You won't need tools to assemble the Astro Fi Telescope. Remove all the items from their packaging, then:
- Open the tripod until the center brace is fully extended (Figure 2).
- Thread the captive center bolt into the accessory tray (Figure 3).
- Place the fork arm assembly on the tripod and secure it using the captive knob under the top of the tripod (Figure 4).
- Attach the telescope optical tube by positioning the dovetail into the dovetail holder on the fork arm. Make sure the bottom of the dovetail is fl at against the dovetail holder. Firmly tighten the thumb bolt. (Figure 5).
- Adjust the tripod to a comfortable height and level it, using the lock knobs to secure each of the tripod legs.
- Install eight AA batteries (not included) into the battery pack, noting the correct position for + and -. Leave the battery pack in the accessory tray.
NOTE: The accessory tray has a special holder suitable for your smartphone or small tablet.
THE EYEPIECES AND STAR DIAGONAL
The Astro Fi 5 comes with two eyepieces, a low power 25mm and a high power 10mm. The eyepiece you choose determines your magnification and field of view. Whenever you set up your telescope, always start with the 25 mm eyepiece. After locating your target, you can switch to the higher power 10 mm eyepiece to get a more detailed view. Your telescope also comes with a star diagonal. The star diagonal positions the eyepiece at a more comfortable 90 degree angle to the telescope and provide a right side up image, though the image will be mirror reversed left to right.

Remove all dust caps, then insert the star diagonal into the visual back and tighten the 2 silver thumbscrews. Insert the 25 mm eyepiece and secure it by tightening the 2 thumbscrews on the star diagonal (Fig. 6).
THE STARPOINTER FINDERSCOPE
Your telescope comes with a StarPointer red-dot finderscope that you will use as a sighting tool when aiming the telescope at a distant target.
To install your StarPointer Finderscope:
- Locate the dovetail mount located on the top of the telescope tube.
- Slide the base of the StarPointer over the dovetail mount on the telescope. Lock it in place by tightening the silver thumbscrew (Fig. 7).
![]()

ALIGNING THE STARPOINTER FINDERSCOPE
The first time you assemble your telescope, you will need to align the StarPointer finderscope with the main optics of the telescope. This step can be done without powering on the telescope. Although this step can be done out in the field at night, it is significantly easier to accomplish this outdoors in daylight. Once you have completed the finderscope alignment, you should not have to repeat this step unless the finderscope is bumped or dropped.
- Take the telescope outside during the day and, using your naked eye, find an easily recognizable object, such as a streetlight, car license plate, or tall tree. The object should be as far away as possible, but preferably at least a quarter mile away.
- Remove the main dust cover from the front of the telescope by pulling it straight off. Make sure your 25 mm eyepiece is installed in the focuser.
- Do not try to move the telescope left and right while it is off. Move the assembled tripod so the telescope is pointed in the direction of the object you chose in step 1.
- Look through the telescope and move it up and down until the object you chose lies in the center of the view. If the image is blurry, gently turn the focus knobs on either side of the telescope until it comes into sharp focus.
NOTE: The image you see in the eyepiece will appear mirror reversed. This is perfectly normal in an astronomical telescope. - Once the object is centered in your 25 mm eyepiece, turn on the Red Dot Finder by rotating the power switch knob on the right side of the finder clockwise. You will hear an audible click to confirm that the finder has been turned on. This knob also controls the brightness of the red dot. Turn the knob all the way to the end to make the dot as bright as possible.
- With your head positioned about a foot behind the finder, look through the round window of the finder and locate the red dot. It will probably be close to, but not on top of, the object you see when you are looking through the 25 mm eyepiece.
- Without moving the telescope, use the two adjustment knobs located on the side and underneath the StarPointer finderscope (Figure 8). One controls the left-right motion of the dot. The other controls the up-down motion of the dot. Adjust both until the red dot appears over the object you are observing in the 25 mm eyepiece.
![]()

Your StarPointer Finder is now aligned!
NOTE: Be sure to turn off the Starpointer Finder when not in use to conserve battery power.
GET READY TO OBSERVE
Now that your telescope is assembled and the StarPointer is aligned, let's connect it to your smartphone or tablet. We recommend you familiarize yourself with the telescope and app during the day before using it at night.

Remember to never point the telescope at the Sun during the day without using a proper full aperture solar filter!
- Plug the battery pack into the power port on the base of the telescope, (Figure 9). The red WiFi light on the arm will light, indicating power and WiFi-ready status. Make sure the small switch near the power socket is in the RIGHT position as shown in the figure.
![]()
- Go to your device's WiFi settings, and connect to the "Celestron-xx" network. Wait for your device to confirm that you have successfully connected.
- Open Celestron Sky Portal and select "Connect to Telescope". Arrows will appear on your screen for UP/DOWN and LEFT/RIGHT. These motions are referred to as altitude and azimuth, respectively.
![]()
- Use the arrows to move your telescope. A slider will adjust the motor speed.


Start by pointing at distant terrestrial objects. Locate something with your StarPointer first, then look at the object using the 25 mm eyepiece. Switch to the 10 mm eyepiece, and notice how it increases the magnification and decreases the field of view. When you change eyepieces, you may have to readjust the focus slightly to get the sharpest image.
Now that you are familiar with your telescope, you are ready to begin observing the night sky!
ALIGNING YOUR UNIT
To take full advantage of your computerized Astro Fi 5, you must first align the telescope with the sky using the Celestron SkyPortal app. Once aligned, your telescope will automatically locate any celestial object you select on your screen! The telescope also automatically tracks objects in the sky as the Earth rotates. This keeps objects centered in the eyepiece, and makes it easy to share views with family and friends.
- Set up your telescope as you did during the day. Make sure your 25 mm eyepiece is installed. Set the tripod to a comfortable height and level it. Plug the battery pack into the power port on the telescope.
- Connect to the "Celestron-xx" WiFi network. Open the SkyPortal app and confirm the time and location on your screen. This should automatically update from your device, but if it does not, you can go into the app settings and update this manually. Select the telescope icon at on your screen, then press "Connect and Align".
The app will now walk you through each step. Simply follow the on-screen instructions.
TAKE YOUR UNIT OUT FOR A SPIN
Now that your Astro Fi is aligned, the SkyPortal app will guide you through the universe using its interactive planetarium. Hold your device up to the sky, and you will easily be able to identify bright stars, constellations, planets and deep space objects outside of our Solar System. SkyPortal will point your telescope at any of these objects. Simply tap the object on your screen, and select "GoTo." You can also select the search icon to enter an object name, such as "Orion Nebula", "Jupiter", or "Pleiades."
IMAGING WITH YOUR SMARTPHONE
Now that you have observed with your telescope, the next step is taking a picture of what you are seeing. Your telescope has a smartphone adapter built right into the lens cap.
To use this feature:
- Start by pulling the orange plug out of the camera opening in the lens cap. You can do this by pulling on the orange rubber lanyard located on the inside of the lens cap. The plug should pop right out. The plug and lanyard can be stowed out of the way by pressing the lanyard into the retaining clip located on the back of the lens cap next to the eyepiece holder.
![]()
- Turn the cap so that the outside of the cap is facing upward. Lift the bungee straps and slide your smartphone between the straps and the lens cap so that the camera is looking through the camera opening. The straps should give plenty of tension to hold the device against the cap and the black silicon ring will give enough friction to prevent the phone from sliding around.
HINT: Depending on the design of your smartphone, the camera may be in the middle of the device or in one corner. You may want to change the angle of the bungee straps to better secure the phone. There are eight different anchor points to choose from around the edge of the lens cap. Simply reposition them to different anchor points to achieve the best results.
![]()
- Turn the cap over and make sure your camera lens is centered in the opening in the lens cap. The better you have this centered, the easier it will be to take images through the telescope.
![]()
- Loosen the set screws located on the eyepiece holder on the inside of the lens cap. Place the black portion of the eyepiece into the eyepiece holder and tighten the screws to secure the eyepiece in place.
![]()
- Now take the lens cap with the phone and eyepiece attached and insert the chrome barrel of the eyepiece into the diagonal on the back of the telescope's focuser. Secure it in place by tightening the set screws on the diagonal.
![]()
- Activate your camera app on your smartphone and adjust the focus, just as you would the eyepiece, this time using the image that appears on your screen.
NOTE: Make sure you turn the phone's flash off. - When the image appears sharp snap your image.


It is best to try this in the daytime first, then, once everything is setup correctly, take it outside and try shooting the Moon. Once you have practiced and are comfortable using the 20 mm eyepiece, try using the camera adapter with the 10 mm eyepiece for higher magnification.
IMAGING TIPS AND TRICKS
Camera Controls
The standard camera apps that come preinstalled with your smartphone offer very rudimentary controls and are designed to automatically adjust focus and exposure. This is not a problem for everyday photography such as landscapes or portraits, but can be a problem for imaging a planet or the Moon where you have a very bright object against a very black sky. The phone's camera tries to compensate for the imbalance of lighting by brightening up the dark areas, but this causes the bright areas to overexpose and blow-out the details. If your camera app settings do not allow you to manually select the focus point or have an option to disable the autofocus or auto-exposure, you may want to consider using a different camera app. You can find lots of aftermarket apps for iOS and Android that offer a greater amount of control for your camera. Many of these are free.
Vibration
To help eliminate any vibration induced when you touch the camera to snap the image, try using a shutter delay. Some apps offer a 2, 5, or 10 second delay before snapping the image. This will give the vibrations a chance to dissipate before actually taking the images.
Subjects to Shoot
Using this method, you should be able to take images of daytime terrestrial objects and nighttime astronomical images of the Moon and bright planets (Venus, Mars, Jupiter and Saturn). Unfortunately, smartphone camera sensors are not designed to work well in very low light, so it will not be possible to capture faint astronomical objects such as galaxies or nebulae in this manner.
Magnification
When looking at the Moon or planets with a stationary telescope, you will notice that the object appears to drift across the field of view. This is actually caused by the Earth's rotation. If you were looking visually through your 20 mm eyepiece, a planet would take approximately 3.0 minutes to drift across the entire eyepiece's field of view. If you are using the 10 mm eyepiece, it would only take 1.5 minutes. The smartphone does not use the entire eyepiece's field of view and only uses the center of it, making the motion appear even faster. When centering an astronomical object in the phone's field of view, try leading the target. Try to point the scope ahead of the planet so that it is just entering the field of view. This will maximize the amount of time it takes to drift across the entire field, allowing you more time to take images before needing to re-aim the telescope. The 10 mm will have a narrower field of view and will need to be adjusted more often as a result. Working with the 20 mm eyepiece will be easier at the start. Once you are comfortable with it, try stepping up to the 10 mm eyepiece.
SPECIFICATIONS
| SKU # | 22204 |
| Optical Design | Schmidt-Cassegrain |
| Aperture | 125 mm (4.9") |
| Focal Length | 1250 mm |
| Focal Ratio | f/10 |
| Optical Coatings | StarBright XLT |
| Eyepiece / Magnification | 25 mm Kellner (1.25") / 50x; 10 mm Kellner (1.25") / 125x |
| Finderscope | StarPointer Red-Dot Finderscope |
| Resolution | Rayleigh: 1.11 arc seconds / Dawes Limit: 0.93 arc seconds |
| Light Gathering Power | 329x the unaided eye |
| Highest Useful Magnification | 295x |
| Lowest Useful Magnification | 18x |
| Limiting Stellar Magnitude | 13 |
| Tripod | Adjustable-height aluminum |
| Warranty | 2-Years |
| Optical Tube Length | 13 inches (33 cm) |
| Total Telescope Kit Weight | 14.2 lbs |
HOW TO CONTACT CELESTRON
How to Contact Celestron
For assistance with this product, please contact our Technical Support department at (310) 328-9560, or you may contact Celestron Support online by going to our website (www.celestron.com) and clicking on the "Support" tab at the top of the page. Here, you may search through a comprehensive database of frequently asked questions or submit a request for assistance.
Written correspondence may be sent to:
Celestron • 2835 Columbia Street • Torrance, CA 90503
Documents / Resources
References
![www.celestron.com]() Celestron - Telescopes, Telescope Accessories, Outdoor and Scientific Products
Celestron - Telescopes, Telescope Accessories, Outdoor and Scientific Products![celestron.com]() Celestron - Telescopes, Telescope Accessories, Outdoor and Scientific Products
Celestron - Telescopes, Telescope Accessories, Outdoor and Scientific Products![www.apple.com]() App Store - Apple
App Store - Apple![play.google.com]() Google Play
Google Play
Download manual
Here you can download full pdf version of manual, it may contain additional safety instructions, warranty information, FCC rules, etc.
Advertisement


Need help?
Do you have a question about the ASTRO FI and is the answer not in the manual?
Questions and answers