Table of Contents
Advertisement
Quick Links
Advertisement
Table of Contents

Related Manuals for PNI CEL130


Summary of Contents for PNI CEL130
- Page 1 PNI CEL130 Infrared Photocells...
- Page 2 Contents English ..... Български ..... Deutsch ..... Español ..... Français ..... Magyar ..... Italiano ..... Nederlands ..... Polski ..... Romana .....
-
Page 3: Technical Specifications
Technical specifications • Technology: active infrared beam • Operating distance: up to 15 m Note: the operating distance can be reduced by up to 30% in unfavorable weather conditions (rain, snow, etc.) • IR frequency: 1.95 KHz • Wavelength: 940 nm •... -
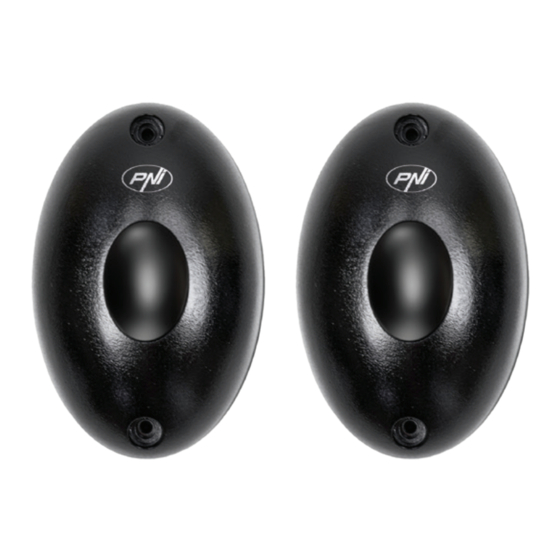
Page 4: Product Overview
Product overview NC NO A - Transmitter B - Receiver Status LED IR sensor Alignment LED Status LED... - Page 5 NO/NC selection jumper IR sensor Alignment LED The green alignment LED is on if the receiver is not correctly aligned with the transmitter or if there is an obstacle between the receiver and the transmitter. NO/NC setting Default setting: NC The photoelectric sensor has two operating modes, NO and NC.
-
Page 6: Installation
NC NO NC NO NC NO Installation The photoelectric sensor must be installed at least 20 cm from the ground. Adapt the height according to the type of vehicles that generally pass by the sensor. The distance between the two sensors should be greater than 2 meters. -
Page 7: Connection Diagram
First install the receiver and then the transmitter in a vertical position and on the same horizontal line. For correct alignment, monitor the status of the green alignment LED. Connection diagram Single sensor for entry only:... - Page 8 Two sensors for entry and exit: A, A1, A2 - Transmitter B, B1, B2 - Receiver C - Control panel...
-
Page 9: Simplified Eu Declaration Of Conformity
Simplified EU declaration of conformity ONLINESHOP SRL declares that Photocell PNI CEL130 complies with the EMC Directive 2014/30/EU. The full text of the EU declaration of conformity available following internet address: h t t p s : / / w w w . m y p n i . e u /... -
Page 10: Технически Спецификации
Технически спецификации • Технология: активен инфрачервен лъч • Работно разстояние: до 15м Забележка: работното разстояние може да бъ де намалено с до 30% при неблагоприятни метеорологични условия (дъжд, сняг и др.) • IR честота: 1.95 KHz • Дължина на вълната: 940 nm •... -
Page 11: Преглед На Продукта
• Работна температура: -26°C ~ +80°C Преглед на продукта NC NO A - Предавател B - Приемник Светодиод за състояние IR сензор Светодиод за подравняване... - Page 12 Светодиод за състояние NO/NC джъмпер за избор IR сензор Светодиод за подравняване Зеленият светодиод за подравняване свети, ако приемникът не е подравнен правилно спрямо предавателя или ако има препятствие между приемника и предавателя. NO/NC настройка Настройка по подразбиране: NC Фотоелектричният сензор има два режима...
- Page 13 част на приемника. NC NO NC NO NC NO Монтаж Фотоелектричният сензор трябва да бъде монтиран най-малко на 20 cm от земята. Адаптирайте височината според т ипа пр е в оз ни с р е д с т в а, ко и то обик...
-
Page 14: Схема На Свързване
Ако разстоянието между двата сензора е твърде малко (<1 m), може да се получи липса на реакция, когато препятствие премине през инфрачервения лъч. Първо инсталирайте приемника и след това предавателя във вертикално положение и на същата хоризонтална линия. За правилно подравняване с... - Page 15 Два сензора за влизане и излизане:...
- Page 16 B, B1, B2 - Приемник C - Контролен панел Опростена ЕС декларация за съответствие ONLINESHOP SRL декларира, че фотоклетка PNI CEL130 отговаря на EMC Директива 2014/30/EU. Пълният текст на ЕС декларацията за съответствие е достъпен на следния интернет адрес: h t t p s : / / w w w . m y p n i . e u /...
-
Page 17: Technische Daten
Technische Daten Technologie: aktiver Infrarotstrahl Arbeitsreichweite: bis zu 15 m H i n w e i s : B e i u n g ü n s t i g e n Witterungsbedingungen (Regen, Schnee usw.) kann sich die Arbeitsreichweite um bis zu 30 % verringern IR-Frequenz: 1,95 KHz Wellenlänge: 940 nm... - Page 18 Produktübersicht NC NO A - Sender B - Empfänger Status-LED IR-Sensor Ausrichtungs-LED Status-LED Jumper zur Auswahl von NO/NC IR-Sensor...
- Page 19 Ausrichtungs-LED Die grüne Ausrichtungs-LED leuchtet, wenn der Empfänger nicht richtig auf den Sender ausgerichtet ist oder wenn sich ein Hindernis zwischen Empfänger und Sender befindet. NO/NC-Einstellung Standardeinstellung: NC Der fotoelektrische Sensor verfügt über zwei Betriebsarten, NO und NC. Die Modusauswahl erfolgt durch Verschieben des Jumpers oben am Empfänger.
-
Page 20: Installation
NC NO NC NO NC NO Installation D e r foto e le k t r is ch e S e n s o r mu s s mindestens 20 cm über dem Boden installiert werden. Passen Sie die Höhe an die Art der Fahrzeuge an, die normalerweise am Sensor vorbeifahren. - Page 21 Hindernis durch den IR-Strahl fährt. Installieren Sie zuerst den Empfänger und dann den Sender in vertikaler Position und auf der s elben hor izont alen Linie. Überwachen Sie zur korrekten Ausrichtung den Status der grünen Ausrichtungs-LED. Anschlussdiagramm Einzelner Sensor nur für den Eingang:...
- Page 22 Zwei Sensoren für Ein- und Ausfahrt: A, A1, A2 - Sender B, B1, B2 - Empfänger C - Bedienfeld...
- Page 23 Vereinfachte EU- Konformitätserklärung ONLINESHOP SRL erklärt, dass die Fotozelle PNI CEL130 der EMV- Richtlinie 2014/30/EU entspricht. Der vollständige Text Konformitätserklärung ist unter der folgenden Internetadresse verfügbar:: h t t p s : / / w w w . m y p n i . e u /...
-
Page 24: Especificaciones Técnicas
Especificaciones técnicas • Tecnología: haz infrarrojo activo • Alcance de funcionamiento: hasta 15 • Nota: el alcance de funcionamiento puede reducirse hasta un 30 % en c o n d i c i o n e s m e t e o r o l ó g i c a s desfavorables (lluvia, nieve, etc.) •... -
Page 25: Descripción General Del Producto
• Temperatura de funcionamiento: -26 °C ~ +80 °C Descripción general del producto NC NO A - Transmisor B - Receptor LED de estado Sensor IR... - Page 26 LED de alineación LED de estado Puente de selección NO/NC Sensor IR LED de alineación El LED de alineación verde se enciende si el receptor no está correctamente alineado con el transmisor o si hay un obstáculo entre el receptor y el transmisor. Configuración NO/NC Configuración predeterminada: NC El sensor fotoeléctrico tiene dos modos de...
-
Page 27: Instalación
ubicado en la parte superior del receptor. NC NO NC NO NC NO Instalación El sensor fotoeléctrico debe instalarse a una distancia mínima de 20 cm del suelo. Adaptar la altura en función del tipo de vehículos que suelen pasar por el sensor. La distancia entre los dos sensores debe ser superior a 2 metros. -
Page 28: Esquema De Conexión
reacción cuando un obstáculo pase por el haz de infrarrojos. Instalar primero el receptor y después el transmisor en posición vertical y sobre la misma línea horizontal. Para una correcta alineación, controlar el estado del LED verde de alineación. Esquema de conexión Sensor único para entrada únicamente:... - Page 29 Dos sensores para entrada y salida.: A, A1, A2 - Transmisor B, B1, B2 - Receptor C - Panel de control...
- Page 30 Declaración de conformidad UE simplificada ONLINESHOP SRL declara que la fotocélula PNI CEL130 cumple con la Directiva EMC 2014/30/UE. El texto completo de la declaración de conformidad UE está disponible en la siguiente dirección de Internet: h t t p s : / / w w w . m y p n i . e u /...
-
Page 31: Spécifications Techniques
Spécifications techniques Technologie : faisceau infrarouge actif Distance de fonctionnement : jusqu’à 15m Remarque : la distance de fonctionnement peut être réduite jusqu’à 30 % en cas de conditions météorologiques défavorables Fréquence IR : 1,95 KHz Longueur d’onde : 940 nm Tension d’entrée : 12 V/24 V AC/DC Courant d’entrée : 15 mA (récepteur) / 30 mA (émetteur) -
Page 32: Présentation Du Produit
Présentation du produit NC NO A - Emetteur B - Récepteur LED d’état Capteur IR LED d’alignement LED d’état Cavalier de sélection NO/NC... - Page 33 Capteur IR LED d’alignement La LED d’alignement verte est allumée si le récepteur n’est pas correctement aligné avec l’émetteur ou s’il y a un obstacle entre le récepteur et l’émetteur. Réglage NO/NC Réglage par défaut : NC Le capteur photoélectrique possède deux modes de fonctionnement, NO et NC.
- Page 34 NC NO NC NO NC NO Installation Le capteur photoélectrique doit être installé à au moins 20 cm du sol. Adaptez la hauteur en fonction du type de véhicules qui passent généralement devant le capteur. La distance entre les deux capteurs doit être supérieure à...
-
Page 35: Schéma De Connexion
le faisceau IR. Installez d’abord le récepteur puis l’émetteur en position verticale et sur la même ligne hor izont ale. Pour un alignement correct, surveillez l’état de la LED d’alignement verte. Schéma de connexion Capteur unique pour entrée uniquement:... - Page 36 Deux capteurs pour l’entrée et la sortie: A, A1, A2 - Transmetteur B, B1, B2 - Récepteur C - Panneau de commande...
-
Page 37: Déclaration De Conformité
Déclaration de conformité simplifiée de l’UE ONLINESHOP SRL déclare que la cellule photoélectrique PNI CEL130 est conforme à la directive CEM 2014/30/UE. Le texte intégral de la déclaration de conformité de l’UE est disponible à l’adresse Internet suivante: h t t p s : / / w w w . m y p n i . e u /... - Page 38 Műszaki előírások Technológia: aktív infravörös sugár Működési távolság: 15 m-ig Megjegyzés: a működési távolság akár 30%- kal is csökkenthető kedvezőtlen időjárási körülmények között (eső, hó, stb.) IR frekvencia: 1,95 KHz Hullámhossz: 940 nm Bemeneti feszültség: 12V/24V AC/DC Bemeneti áram: 15mA (vevő) / 30mA (adó) Relé...
- Page 39 Termék áttekintése NC NO A - Adó B - Vevő Állapot LED IR érzékelő Igazítás LED Állapot LED NO/NC kiválasztó jumper...
- Page 40 IR érzékelő Igazítás LED A zöld igazítási LED világít, ha a vevő nincs megfelelően az adóhoz igazítva, vagy ha akadály van a vevő és az adó között. NO/NC beállítás Alapbeállítás: NC A fotoelek tromos ér zékelőnek két üzemmódja van, NO és NC. Az üzemmód kiválasztása a vevő...
- Page 41 NC NO NC NO NC NO Telepítés A fotoelektromos érzékelőt a talajtól legalább 20 cm-re kell felszerelni. Állítsa be a magasságot az érzékelő mellett általában elhaladó járművek típusának megfelelően. A két érzékelő közötti távolságnak 2 méternél nagyobbnak kell lennie. Ha a két érzékelő...
- Page 42 Először szerelje fel a vevőt, majd az adót függőleges helyzetbe és ugyanarra a vízszintes vonalra. A helyes beállítás érdekében figyelje a zöld igazítási LED állapotát. Csatlakozási diagram Egyetlen érzékelő csak belépéshez:...
- Page 43 Két érzékelő a be- és kilépéshez: A, A1, A2 - Adó B, B1, B2 - Vevő C - Vezérlőpult...
- Page 44 Egyszerűsített EU megfelelőségi nyilatkozat Az ONLINESHOP SRL kijelenti, hogy a PNI CEL130 fotocella megfelel a 2014/30/EU EMC-irányelvnek. Az EU- megfelelőségi nyilatkozat teljes szövege az alábbi internetcímen érhető el: h t t p s : / / w w w . m y p n i . e u /...
-
Page 45: Specifiche Tecniche
Specifiche tecniche Tecnologia: fascio infrarosso attivo Distanza operativa: fino a 15 m Nota: la distanza operativa può essere r idot t a f ino al 30 % in condizioni meteorologiche sfavorevoli Frequenza IR: 1,95 KHz Lunghezza d’onda: 940 nm Tensione di ingresso: 12 V/24 V CA/CC Corrente di ingresso: 15 mA (ricevitore) / 30 mA (trasmettitore) Uscita relè: 36 V 1 A NO/NC... -
Page 46: Panoramica Del Prodotto
Panoramica del prodotto NC NO A - Trasmettitore B - Ricevitore LED di stato Sensore IR LED di allineamento LED di stato Ponticello di selezione NO/NC... - Page 47 Sensore IR LED di allineamento Il LED di allineamento verde è acceso se il ricevitore non è allineato correttamente con il trasmettitore o se c’è un ostacolo tra il ricevitore e il trasmettitore. Impostazione NO/NC Impostazione predefinita: NC Il sensore fotoelettrico ha due modalità di funzionamento, NO e NC.
-
Page 48: Installazione
NC NO NC NO NC NO Installazione Il sensore fotoelettrico deve essere installato ad almeno 20 cm da terra. Adattare l’altezza in base al tipo di veicoli che generalmente passano vicino al sensore. La distanza tra i due sensori deve essere maggiore di 2 metri. -
Page 49: Schema Di Collegamento
Installare prima il ricevitore e poi il trasmettitore in posizione verticale e sulla stessa linea orizzontale. Per un corretto allineamento, monitorare lo stato del LED di allineamento verde. Schema di collegamento Singolo sensore solo per ingresso:... - Page 50 Due sensori per l’entrata e l’uscita: A, A1, A2 - Trasmettitore B, B1, B2 - Ricevitore C - Pannello di controllo...
- Page 51 Dichiarazione di conformità UE semplificata ONLINESHOP SRL dichiara che la fotocellula PNI CEL130 è conforme alla direttiva EMC 2014/30/UE. Il testo completo della dichiarazione di conformità UE è disponibile al seguente indirizzo Internet: h t t p s : / / w w w . m y p n i . e u /...
-
Page 52: Technische Specificaties
Technische specificaties Technologie: actieve infraroodstraal Bedrijfsafstand: tot 15 m Let op: de bedrijfsafstand kan tot 30% w o r d e n v e r k o r t b i j o n g u n s t i g e weersomstandigheden (regen, sneeuw, enz.) IR-frequentie: 1,95 KHz... - Page 53 Productoverzicht NC NO A - Zender B - Ontvanger Status-LED IR-sensor Uitlijnings-LED Status-LED NO/NC-selectiejumper...
- Page 54 IR-sensor Uitlijnings-LED De groene uitlijnings-LED brandt als de ontvanger niet correct is uitgelijnd met de zender of als er een obstakel tussen de ontvanger en de zender zit. NO/NC-instelling Standaardinstelling: NC De foto-elektrische sensor heeft twee bedrijfsmodi, NO en NC. De modusselectie wordt gedaan door de jumper aan de bovenkant van de ontvanger te verplaatsen.
- Page 55 NC NO NC NO NC NO Installatie De foto-elektrische sensor moet minimaal 20 cm van de grond worden geïnstalleerd. Pas de hoogte aan op basis van het type voertuigen dat doorgaans langs de sensor rijdt. De afstand tussen de twee sensoren moet groter zijn dan 2 meter.
- Page 56 passeert. Installeer eerst de ontvanger en vervolgens de zender in een verticale positie en op dezelfde horizontale lijn. Controleer voor een correcte uitlijning de status van de groene uitlijnings-LED. Aansluitschema Enkele sensor alleen voor binnenkomst:...
- Page 57 Twee sensoren voor in- en uitgang: A, A1, A2 - Zender B, B1, B2 - Ontvanger C - Bedieningspaneel...
- Page 58 V e r e e n v o u d i g d e E U - conformiteitsverklaring ONLINESHOP SRL verklaart dat Photocell PNI CEL130 voldoet aan de EMC-richtlijn 2014/30/EU. volledige tekst conformiteitsverklaring beschikbaar volgende internetadres: h t t p s : / / w w w . m y p n i . e u /...
-
Page 59: Dane Techniczne
Dane techniczne Technologia: aktywna wiązka podczerwieni Zasięg działania: do 15 m Uwaga: zasięg działania może zostać z m n i e j s z o n y n a w e t o 3 0 % w n i e s p r z y j a j ą c y c h w a r u n k a c h atmosferycznych (deszcz, śnieg itp.) Częstotliwość... -
Page 60: Przegląd Produktu
Przegląd produktu NC NO A - Nadajnik B - Odbiornik Dioda LED stanu Czujnik podczerwieni Dioda LED wyrównania Dioda LED stanu Zworka wyboru NO/NC... - Page 61 Czujnik podczerwieni Dioda LED wyrównania Zielona dioda LED wyrównania świeci, jeśli odbiornik nie jest prawidłowo wyrównany z nadajnikiem lub jeśli między odbiornikiem a nadajnikiem znajduje się przeszkoda. Ustawienie NO/NC Ustawienie domyślne: NC Czujnik fotoelektryczny ma dwa tryby pracy: NO i NC. Wybór trybu odbywa się poprzez przesunięcie zworki znajdującej się...
- Page 62 NC NO NC NO NC NO Montaż C zujnik fotoelek tr yc zny musi być zainstalowany co najmniej 20 cm od podłoża. Dostosuj wysokość do rodzaju pojazdów, które zazwyczaj przejeżdżają obok czujnika. Odległość między dwoma czujnikami powinna być większa niż 2 metry. Jeśli odległość...
-
Page 63: Schemat Połączeń
wiązkę podczerwieni. Najpierw zainstaluj odbiornik, a następnie nadajnik w pozycji pionowej i na tej samej linii poziomej. Aby uzyskać prawidłowe ustawienie, monitoruj stan zielonej diody LED ustawienia. Schemat połączeń Pojedynczy czujnik tylko do wejścia:... - Page 64 Dwa czujniki wejścia i wyjścia: A, A1, A2 - Nadajnik B, B1, B2 - Odbiornik C - Panel sterowania...
- Page 65 Uproszczona deklaracja zgodności UE ONLINESHOP SRL oświadcza, że fotokomórka PNI CEL130 jest zgodna z dyrektywą EMC 2014/30/UE. Pełny tekst deklaracji zgodności UE jest dostępny następującym adresem internetowym: h t t p s : / / w w w . m y p n i . e u /...
-
Page 66: Specificatii Tehnice
Specificatii tehnice • Tehnologie: fascicul infrarosu activ • Distanta de operare: pana la 15 m Nota: distanta de operare poate fi redusa cu pana la 30% in conditii meteo nefavorabile (ploaie, ninsoare etc.) • Frecventa IR: 1.95 KHz • Lungime de unda: 940 nm •... - Page 67 Prezentare produs NC NO A - Emitator B - Receptor LED indicator stare pornit/oprit Senzor IR LED de aliniere LED indicator stare pornit/oprit...
- Page 68 Jumper selectare NO/NC Senzor IR LED aliniere LED-ul verde de aliniere este aprins daca receptorul nu este aliniat corect cu emitatorul sau daca este un obstacol intre receptor si emitator. Setare NO/NC Setare implicita: NC Senzorul fotoelectric are doua moduri de operare, NO si NC.
- Page 69 NC NO NC NO NC NO Instalare Senzorul fotoelectric trebuie instalat la o inaltime de cel putin 20 cm de la sol. Adaptati inaltimea in functie de tipul autovehiculelor care in general trec prin dreptul senzorului. Distanta dintre cei doi senzori ar trebui sa fie mai mare de 2 metri.
- Page 70 unui obstacol prin dreptul fasciculului IR. Instalati mai intai receptorul si mai apoi emitatorul in pozitie verticala si pe aceeasi linie orizontala. Pentru o aliniera corecta, urmariti statusul LED-ului verde de aliniere. Diagrama conexiuni Un singur senzor doar pentru intrare:...
- Page 71 Doi senzori pentru intrare si iesire: A, A1, A2 - Emitator B, B1, B2 - Receptor C - Panoul de control...
- Page 72 Declaratie UE de conformitate simplificata ONLINESHOP declara Fotocelule PNI CEL130 este in conformitate Directiva 2014/30/EU. Textul integral declaratiei UE de conformitate este disponibil la urmatoarea adresa de internet: h t t p s : / / w w w . m y p n i . e u /...
- Page 73 Certificate of quality and commercial warranty The warranty period for natural persons is 24 months as of the delivery date for the manufacturing and material defects. The warranty period for legal entities is 12 months as of the delivery date for the manufacturing and material defects.
- Page 74 amended and supplemented by Law 296/2004 on the consumption code as subsequently amended and supplemented. Certificat de calitate si garantie comerciala Perioada de garantie pentru persoane fizice este de 24 luni de la data livrarii pentru defectele de fabricatie si de material. Perioada de garantie pentru persoane juridice este de 12 luni de la data livrarii pentru defectele de fabricatie si de...
- Page 75 Garantia comerciala nu afecteaza drepturile consumatorului prevazute prin legislatia aplicabila in vigoare, respectiv Ordonanta de Urgenta 140/28.12.2021 privind anumite aspecte referitoare la contractele de vanzare de bunuri, OG 21/1992 privind protectia consumatorilor cu modificarile si completarile ulterioare si Legea 296/2004 privind codul consumului cu modificarile si completarile ulterioare.
- Page 76 EN - Please download the full version of the warranty certificate: RO - Va rugam descarcati versiunea completa a certificatului de garantie:...
Need help?
Do you have a question about the CEL130 and is the answer not in the manual?
Questions and answers