
Related Manuals for Ki Mobility Liberty


Summary of Contents for Ki Mobility Liberty
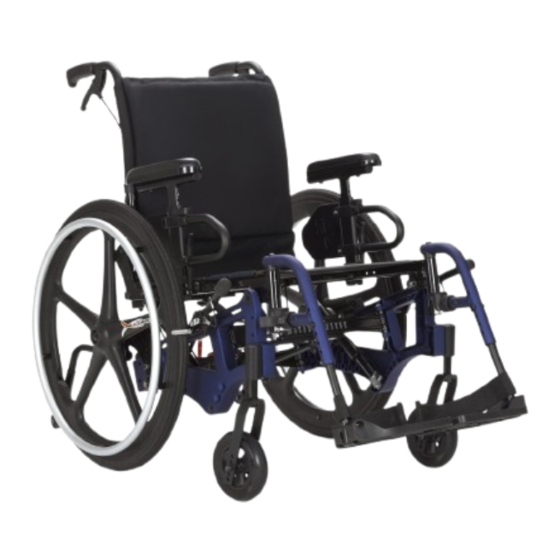
- Page 1 THIS TECHNICAL MANUAL HAS BEEN DEVELOPED FOR AND INTENDED TO BE USED BY A QUALIFIED TECHNICIAN WORKING FOR AN AUTHORIZED KI MOBILITY DEALER.
- Page 2 This technical manual is designed to aid in the different procedures that may be needed for the Liberty wheelchair. This technical manual does not replace, but aids the user instruction manual, adjustment guides and instructions. The procedures shown in this technical manual should only be performed by an Assistive Technology Practitioner (ATP) or clinical professional trained to do wheelchair repairs, adjustments and retrofits.
-
Page 3: Table Of Contents
Table of Contents Tools ....................... 3 Frame Tube Size Guide .................. 3 Spoke Tension Values ..................3 Seat Height - Rear Wheels................4 Seat Height - Casters ..................6 Seat Height - Caster Positioning within Caster Fork ........9 Seat Height - Axle Position ................10 Seat Depth - Backrest .................. -
Page 4: Tools
Tools Please see the list below to identify the tools needed throughout this tech manual. Always check tools to ensure the ends are not stripped and that the tool can perform it’s function properly without damaging any parts or hardware on the chair. Tools Needed •... -
Page 5: Seat Height - Rear Wheels
Seat Height - Rear Wheels Determine your wheel and caster selection based upon your desired seat height. Once determined, be sure to check Caster and Footrest Compatibility charts before ordering or making any physical changes to the chair. Also, be aware that a specific rear seat height may be accomplished with more than one type of axle plate. - Page 6 Seat Height - Rear Wheels Caster Size Rear Wheel 4" 5" 6" 6" X 2" 8" 8" X 2" Size Seat Height 13.5 14.5 15.5 15.5 17.5 17.5 14.5 15.5 16.5 16.5 18.5 18.5 20" 15.5 16.5 17.5 17.5 19.5 19.5 17.5 18.5...
-
Page 7: Seat Height - Casters
Seat Height - Casters Seat Height - Caster Compatibility charts are utilized to prevent interference between the caster and side frame or caster and hanger/footrest. Higher degree hangers and larger casters are more likely to create interference. Use the charts below to determine if your wheel, caster, caster stem and seat height configuration will work with your desired hanger angle selection. - Page 8 Seat Height - Casters Caster Footrest Compatibility Matrix 80° Extension Mount Hangers Caster Housing Forward Caster Housing Reversed Caster Housing Caster Size 13½ 14½ 15½ 16½ 17½ 18½ 19½ 13½ 14½ 15½ 16½ 17½ 18½ 19½ Seat height not No go with short Available with short available stem...
- Page 9 Seat Height - Casters Caster Footrest Compatibility Matrix Direct Mount Hangers Caster Housing Forward Caster Housing Reversed Caster Housing Caster Size 13½ 14½ 15½ 16½ 17½ 18½ 19½ 13½ 14½ 15½ 16½ 17½ 18½ 19½ 13½ 14½ 15½ 16½ 17½ 18½...
-
Page 10: Seat Height - Caster Positioning Within Caster Fork
Seat Height - Caster Positioning within Caster Fork To adjust the caster within the caster fork, use two 13mm wrenches to remove the bolt, two spacers (used on all except 8x2) and nut. Move everything to the correct hole and reinstall hardware to secure. 4”... -
Page 11: Seat Height - Axle Position
Seat Height - Axle Position Based on your axle plate selection or type - use the following drawings and chart below to determine the vertical position of the axle plates to achieve desired rear seat height. A 13mm wrench is needed for the axle plate bolts. -
Page 12: Seat Depth - Backrest
Seat Depth - Backrest Folding Backrest Non-Folding Backrest Seat Tube Length Backrest Position Seat Depth Short Medium Long... -
Page 13: Seat Depth - Axle Plate
Seat Depth - Axle Plate Seat depth can be changed by repositioning the axle plate horizontally. Determine the horizontal positioning of the axle by using the desired seat depth, axle plate type and Center of Gravity offset within the drawing and matrix below. CG Offset Lines represent front of back cane. -
Page 14: Seat Width
Seat Width Seat width is controlled by shortening or extending the length of the cross brace assemblies. Assemblies come in three sizes resulting in limited range per assembly. Determine the width required, confirm that the width is within the range of the assembly and relocate cross brace bolts to achieve the width desired. Back Frame Cross Brace The holes in each brace are called out for easy adjustment. - Page 15 Seat Width Upper and Lower Crossbrace Assembly Dimension A Size Adjustment Range 4” 4” Small 14" - 18" Medium 16" - 20" Large 18" - 22" Chair Width Dimension A Dimension A/2 12.28 6.14 13.28 6.64 14.28 7.14 15.28 7.64 16.28 8.14 17.28...
-
Page 16: Rigid Frame
Rigid Frame See the chart and images below for setting up a rigid frame Liberty. Cross Brace Width Settings Pivot Hole Width Chair Chair Width Dimension A Dimension B Position 12.28 10.31 13.28 11.31 Small 14.28 12.31 15.28 13.31 16.28 14.31... -
Page 17: Non-Folding Frame
Non-Folding Frame The hardware and hole locations are different for a non-folding frame. See the image below for details. Two 10mm wrenches, two 13mm wrenches and a 5mm Allen wrench are needed. NOTE: A non-folding frame does not have the locking tab, pull handle, foot pad or fold strap brackets. -
Page 18: Converting To Folding Frame
Converting to Folding Frame This section provides instructions to go from a non-folding frame to a folding frame. NOTE: Ensure all seating components are removed and no user sits in the chair while the non- folding frame converts to a folding frame. 1. - Page 19 Converting to Folding Frame 2. Install folding hardware with folding strap bracket (C), pull handle (E) and foot pad (A). Two 10mm wrenches, two 13mm wrenches and a 5mm Allen wrench are needed. NOTE: The rear lower brace hardware already exists from the non-folding frame configuration. The bolt needs to be removed so the foot pad (A) can be installed and then reinstall the hardware.
-
Page 20: Axle Plate Construction
Axle Plate Construction Use the diagrams below to assemble a Quick Release Axle or a Threaded Axle. Standard, extended and low axle plates are shown. Quick Release Axle 73mm long QR axle used for 12” and 16” wheels. 82mm long QR axle used for all other wheels. -
Page 21: Caster Construction
Adjust the eccentric washers as needed to achieve the 90° to 92°angle dimension. NOTE: Only the two holes shown in the image below are used with the Liberty casters. Not used Not used... -
Page 22: Fork And Stem Replacement
Fork and Stem Replacement Remove Fork and Stem 5. Use a flat head screwdriver to remove the cap off of the caster barrel. Be careful not to scratch paint. 6. Use a 19mm socket wrench to remove the nut and washer from inside caster housing. Hold the caster while removing the nut and washer. - Page 23 Fork and Stem Replacement 7. Remove the caster stem using a 19mm socket wrench on the bottom nut. Save all hardware and stem if you are not replacing the stem. NOTE: The hardware on the stem of your chair may look different than what is shown below depending on the size of your fork and stem.
- Page 24 Fork and Stem Replacement Install Fork and Stem 1. Install new fork onto caster with one bolt (A), one nut (B) and two spacers (C) per side using two 13mm wrenches. Standard forks use spacer 100792 (C) and wide forks use spacer 001246 (C). Also, a standard fork uses 101829 - M8 x 65 bolt (A) while a wide fork uses the longer 101709 - M8 x 80 bolt (A).
- Page 25 Fork and Stem Replacement 2. Install new stem or reinstall stem saved from Remove Fork and Stem, step 3. Install hardware based on the size stem you are using. Tighten the bottom nut (A) to 55 ft.- lbs. using the torque wrench. Standard Stem Tall Stem 3.
-
Page 26: Wheel Pull Correction
Wheel Pull Correction NOTE: The direction of the pull determines which wheel will be adjusted to fix any wheel pull. If chair pulls left, fix the left caster wheel. 1. Remove cap on caster barrel. 2. Use a 19mm socket wrench to remove the nut and washer from inside caster housing. Hold the caster while removing the nut and washer. - Page 27 Wheel Pull Correction 3. Move the washer removed in step 2 to the bottom side of the caster barrel. Add another of the same washer to the bottom side of the caster barrel (washer is part #100682 - washer ½" .518 x .875 x 0.47 F/W Black Zinc).
-
Page 28: Adjusting Gas Springs
Adjusting Gas Springs NOTE: Chair capacity is always 250 lbs. Adjustments may be made to change resistance/assistance of the tilt mechanism for the attendant. NOTE: A gas spring location chart is located on the next page for reference if needed. 1. -
Page 29: Replacing Gas Springs
6mm Allen wrench to remove the cylinder mount screw. Slide the gas spring out of the bracket. NOTE: Bracket can be removed for easier access to gas spring if needed. 2. Ki Mobility recommends the following gas strut set-up for strut needed and configuration. Assistive Gas Strut Set-Up... -
Page 30: Replacing Gas Spring Trigger Assembly
Replacing Gas Spring Trigger Assembly 1. Remove current gas spring by removing a clevis pin, cylinder mount screw, nut and two E-Clips. Use a 6mm Allen wrench to remove the cylinder mount screw. Slide the gas spring out of the bracket. NOTE: Bracket can be removed for easier access to gas spring if needed. -
Page 31: Replacing Frame Cover
Replacing Frame Cover 1. Remove current frame cover by removing nut using an 8mm wrench and a 3mm Allen wrench. 2. Separate and roll back tape backing (red) (B) from adhesive with blade on the inside of the new cover (A). -
Page 32: Fold Lever Replacement
Fold Lever Replacement NOTE: For easier access to parts involved in this instruction, remove any backrest and/or seat upholstery before beginning. 1. Remove the existing fold lever assembly by removing hardware and fold lever using a 3mm Allen wrench and an 8mm wrench. 2. - Page 33 Fold Lever Replacement 3. Install the lever upside down with pressure. Maintain the pressure as you rotate the lever 180° and secure the nut using a 3mm Allen wrench and an 8mm wrench. 4. Test the fold lever assembly by two ways. First, look at the fold lever compared to the cross brace. The fold lever should be parallel to the cross brace.
-
Page 34: Adjusting Depth
Adjusting Depth 1. If the seat depth adjustment is needed, remove bolts, washer, P-Clip and nuts using a 4mm Allen wrench and a 10mm wrench. 2. Use the chart and diagram below to find correct primary backrest bolt position. Folding Backrest Standard Backrest Backrest position is determined by the... -
Page 35: Changing Seat Sling
Changing Seat Sling 1. Remove seat sling by removing screws using a Phillips screwdriver. 2. Install seat rails into pockets on both sides of new seat sling. 3. Fold chair in part way. Install new seat sling and rails onto chair using a Phillips screwdriver. Do not tighten hardware. -
Page 36: Aa. Changing To A Short Back
Changing to a Short Back NOTE: Have chair in level position, not in any degree of tilt, while changing to a short back. This will help when working with the tilt cable in later steps. 1. Remove levers from back canes using a Phillips screwdriver. Save hardware. 2. - Page 37 Changing to a Short Back 6. Ensure cable is routed correctly while chair is in a level position. See image below for correct routing. NOTE: Ensure that cable is not pulled tight into the P-Clip on the back plate. Slack is needed between the cable connection point at the gas spring and the P-Clip to prevent damage during tilting.
-
Page 38: Ab. Replacing Tilt Cables
Replacing Tilt Cables NOTE: Have chair in level position, not in any degree of tilt, while replacing cables. 1. Loosen adjustment nuts and remove cable from chair up to the trigger handles. Adjustment Nuts 2. Pull cable out of lever channel, squeeze trigger and slide cable barrel out of trigger to remove cable. 3. - Page 39 Replacing Tilt Cables 5. Install cable into lever. Ensure cable is routed correctly. See correct routing below. NOTE: Verify there are no kinks or sharp turns in the cable. P-Clip is installed after adjustments. 6. Remove slack from tilt lever cable by adjusting the turnbuckle adapter. Verify the lever engages and tilts properly.
-
Page 40: Ac. Adjusting/Installing Strap
Adjusting/Installing Strap Strap Routing 1. Strap is attached to one bracket. Take the opposite end of the strap and go under, over and under the middle clip. Take the end of the strap up through the end bracket and out. Route the strap back to the middle clip and go under, over and under again. -
Page 41: Ad. Installing Transit
Installing Transit 1. Install front transit bracket with two screws, two washers and two nuts using a 4mm Allen wrench and a 10mm wrench. 2. Install front transit hook label in the space between the two ends of the front transit bracket. 3. -
Page 42: Ae. Wheel Lock Configurations
Wheel Lock Configurations 1. Use diagrams and charts to determine the needed wheel lock configuration for your chair. 2. Install wheel lock according to the configuration desired, determined from diagrams and chart below, using a 10mm wrench. NOTE: Always mount carriage bolts as far apart as possible to maximize rigidity. NOTE: Always loosen and tighten wheel lock hardware by alternating between the two bolts while loosening/tightening a little at a time. -
Page 43: Af. Handrim Configurations
Handrim Configurations NOTE: Not all wheels listed below are available for specific models. See an order form or the online parts manual for more information on your specific chair model. Handrim Hardware Chart Wheel Handrim Connec on Handrim Wheel Connec on Aluminum Plas c Ergonomic... -
Page 44: Ag. Handrim Construction
Handrim Construction The sequencing of hardware for the three styles of handrims is shown below. The specific hardware used is determined in the chart on the previous page, based on the tire and handrim being used. Spacer Style Detached Tab Style Tab Style... -
Page 45: Ah. Footplate And Heel Loops
Footplate and Heel Loops For additional footplate information, see pages 3 - 5 for the Caster - Footplate Compatibility Charts. Strap Length Heel Loop Standard Hanger Offset Hanger Part Strap Composite Composite Size Angle Angle Number Length Composite Angle Composite Angle Adjustable Adjustable... -
Page 46: Aj. Rotating 4-Way Latch
Rotating 4-Way Latch The 4-Way latch has eight possible configurations, four with the curve of the lever facing outward and four with the curve of the lever facing inward. See diagram below. Eight Possible Configurations Standard Position Lever Facing Outward Lever Facing Inward Rotating 1. -
Page 47: Ak. Backrest Angle Adjustment
Backrest Angle Adjustment 1. Use a 4mm Allen wrench and a 10mm wrench to remove the button head screw and nut on the backrest. 2. Rotate backrest to desired angle. Each hole represents 5° of rotation. See diagram below for the angle for each hole. -
Page 48: Al. Seat Upholstery
Seat Upholstery 1. Install seat rail and upholstery with screws using a Phillips screwdriver. NOTE: Reference the chart below to determine the number of screws needed for the upholstery based on the seat depth. NOTE: Ensure the right size seat rail is used (14", 16", 18" or 20"). Screw Quantity per Chair Seat Depth Seat Sling Depth... -
Page 49: Am. Removable Seat Pan
Removable Seat Pan 1. Assemble the seat pan as shown below according to the frame width and depth of the chair using a 4mm Allen wrench and a 10mm wrench. 2. Install the seat mount clamps onto the seat pan as shown below using a 4mm Allen wrench and a 10mm wrench. -
Page 50: An. Adjusting Height Adjustable T-Arm Position
Adjusting Height Adjustable T-Arm Position 1. Remove two screws, two washers and two nuts from armrest receiver. 2. Move receiver to desired location on seat frame and reinstall screws, washers and nuts. -
Page 51: Ao. Angle Adjustable Locking Flip Up Extendable Armrest
Angle Adjustable Locking Flip Up Extendable Armrest 1. Set the angle of the armrest. There are five holes that can be used to set the angle. Tighten the bolt once angle is set. 3 4 5 2. Set the length of the armrest. To adjust the length, remove the bolts and spacer on the tube and the screw closest to the back of the chair. -
Page 52: Ap. Anti-Tips
Anti-Tips 1. To adjust height, press in lower detent buttons. 2. Slide anti-tip up or down to desired height and allow detent buttons to click into new holes. 3. Repeat process on the opposite side. Ensure both sides are set in the same configuration. See diagrams and charts below for additional anti-tip information. -
Page 53: Aq. Multi-Angle Footrest
Multi-Angle Footrest Installation 1. Determine which configuration the ball shaft (D) will need to be in - down (eversion) or up (inversion). See figure below for example. Install footplate (B) onto upper footrest clamp (C) with two screws (A) using a 4mm Allen wrench. Install ball shaft (D) into lower footrest clamp (E) and secure to the upper footrest clamp using three screws (G) and three lock washers (F) using a 5mm Allen wrench. - Page 54 Multi-Angle Footrest 2. Install footrest mount (E) onto the end of the ball shaft and secure with screw (H) and lock washer (G) using a 4mm Allen wrench. Install the flip-up latch (D) onto the footrest mount and secure with latch spring (C), bushing (B) and screw (A) using a 4mm Allen wrench.
-
Page 55: Ar. Hemi Wheel Lock
Hemi Wheel Lock NOTE: These directions show the installation of the Hemi Wheel Lock with the master (drive) side on the right. The directions are the same, but the sides are flipped if the master (drive) side is wanted on the left. Installation 1. - Page 56 Hemi Wheel Lock 3. Install the master lock and mount assembly onto the chair frame with two carriage bolts (A), two washers (B) and two nuts (C) using a 10mm wrench. The knurled bar should be approximately ½" from the tire. The placement of the assembly can be adjusted later so the wheel lock properly engages with the tire.
- Page 57 Hemi Wheel Lock 5. Install the follower lock and mount assembly onto the chair frame with two carriage bolts (D), two washers (C), a P-Clip (B) and two nuts (A) using a 10mm wrench. The knurled bar should be approximately ½" from the tire. The placement of the assembly can be adjusted later so the wheel lock properly engages with the tire.
- Page 58 Hemi Wheel Lock 7. Attach the cable ends to the master lock assembly arm and the follower lock assembly arm. See image on the bottom of this page for a close up image if needed. Master (Drive) Side Follower Side Adjusting the Locks (See image below) 1.
- Page 59 Hemi Wheel Lock Hemi Wheel Lock Restrainer Clip Installing Hemi Wheel Lock Restrainer Clip 1. Push "A" side of the restrainer clip over the slotted end of the hemi wheel lock bracket and the cable. 2. Pull the "B" side down and over the other side of hemi wheel lock bracket and the cable. NOTE: The restrainer clip should be oriented so the restrainer clip actually covers the cable slot on the bracket.
-
Page 60: As. Drum Brake
Drum Brake NOTE: Remove wheels and axle sleeves before beginning the drum brake instructions. 1. Install the drum brake adapter (G) to the axle plate (through the anti-tip receiver if present) with bolt (F) using a 10mm wrench. 2. Install the drum brake adapter (G) to the drum brake rotor (E) with bolt (C), washer (D) and nut (H) using two 10mm wrenches. - Page 61 Drum Brake 4. Detach tilt cable from lever and remove lever. 5. Install new dual lever cable end adapter with two screws (A) and reinstall tilt cable to the top lever. 6. For the drum brake cable, remove bottom lever from mount. Remove the cable core from the cable jacket and route through the rearmost hole in the lever, then through the hole in the mount.
- Page 62 Drum Brake 7. Route the cable down the backrest cane to the drum brake. 8. Thread the end of the the cable through the hole in the pinch bolt (B) and tighten after removing all play from the cable. 9. Adjust cable with cable adjuster (D) until no wheel drag is present and positive lock is achieved with levers.Tighten lock nut (C) to secure position.
-
Page 63: At. Transit Wheels
Transit Wheels WARNING: Do not use transit wheels with long seat tubes (range 18" - 20"). The long seat tube may cause the transit wheel to unlock from it’s deployed position. This may cause a fall or tip-over resulting in serious injury or death. Installation 1. - Page 64 Transit Wheels Adjusting for Rear Seat Height The height of the transit wheels can be adjusted to accomodate the rear seat height. See the images and chart below for proper configurations with rear seat heights. NOTE: For 14" rear seat height, binding barrels is removed and replaced in the topmost hole. NOTE: For 15.5"...
-
Page 65: Au. Cane And Crutch Holder
Cane and Crutch Holder The image below shows the assembly of the cane and crutch holder. A Phillips screwdriver, two 10mm wrenches and a 4mm Allen wrench are needed for this. NOTE: The crutch holder strap (A) has velcro and closes to form a circle. - Page 66 Ki Mobility 5201 Woodward Drive Stevens Point, Wisconsin 54481 715-254-0991 www.kimobility.com DCN0311.15...
Need help?
Do you have a question about the Liberty and is the answer not in the manual?
Questions and answers