Table of Contents
Advertisement
Available languages
Available languages
Quick Links
Meat Master
SMOKELeSS
INDOOR GRILL
USER GUIDE
Safety Instructions
Features
Operating Instructions
Cooking Tips
Cleaning and Maintenance
Terms and Conditions
Warranty Registration
RJ23-SG-PL-CA
1
RJ23-SG-PL-CA_UG_FINAL_OTP_011921.indd 1
RJ23-SG-PL-CA_UG_FINAL_OTP_011921.indd 1
®
1/19/22 1:47 PM
1/19/22 1:47 PM
Advertisement
Table of Contents

Related Manuals for Chefman Meat Master RJ23-SG-PL-CA


Summary of Contents for Chefman Meat Master RJ23-SG-PL-CA
- Page 1 ® Meat Master SMOKELeSS INDOOR GRILL USER GUIDE Safety Instructions Features Operating Instructions Cooking Tips Cleaning and Maintenance Terms and Conditions Warranty Registration RJ23-SG-PL-CA RJ23-SG-PL-CA_UG_FINAL_OTP_011921.indd 1 RJ23-SG-PL-CA_UG_FINAL_OTP_011921.indd 1 1/19/22 1:47 PM 1/19/22 1:47 PM...
- Page 2 COOKING FORWARD™ Welcome! Whether this is your first Chefman appliance or you’re already part of our family, ® we’re happy to be cooking with you! With your new Smokeless Indoor Grill, you can bring all the flavor of grilling indoors (even into apartments) via one virtually smokeless unit.
- Page 3 CONTENTS Safety Instructions Features Operating Instructions Chart Cooking Tips Cleaning and Maintenance Terms and Conditions Warranty Registration RJ23-SG-PL-CA_UG_FINAL_OTP_011921.indd 3 RJ23-SG-PL-CA_UG_FINAL_OTP_011921.indd 3 1/19/22 1:47 PM 1/19/22 1:47 PM...
-
Page 4: Safety Instructions
5. Unplug from the outlet when not in use and before cleaning. Allow to cool before putting on or taking off parts and before cleaning the appliance. 6. Do not operate any appliance with a damaged cord or plug, or after the appliance malfunctions or has been damaged in any manner. Contact Chefman Customer ®... - Page 5 SAFETY INSTRUCTIONS IMPORTANT SAFEGUARDS 8. Do not use outdoors. 9. Do not let the cord hang over the edge of a table or counter, or touch hot surfaces. 10. Do not place on or near a hot gas or electric burner, or in a heated oven. 11.
-
Page 6: Short Cord Instructions
SAFETY INSTRUCTIONS IMPORTANT SAFEGUARDS SHORT-CORD INSTRUCTIONS A short power-supply cord is provided to reduce the hazards of entanglement or tripping over a longer cord. Longer detachable power-supply cords or extension cords are available and may be used if care is exercised in their use. If a longer detachable power-supply extension cord is used: The marked electrical rating of the extension cord should be at least as great as the electrical rating of the appliance. - Page 7 4. Before each use, inspect the power cord for cuts and/or abrasion marks. If any are found, this indicates that the appliance should be serviced and the power cord replaced. Please contact Chefman Customer Support for assistance. 5. Never wrap the cord tightly around the appliance, as this could place undue stress on the cord where it enters the appliance and cause it to fray and break.
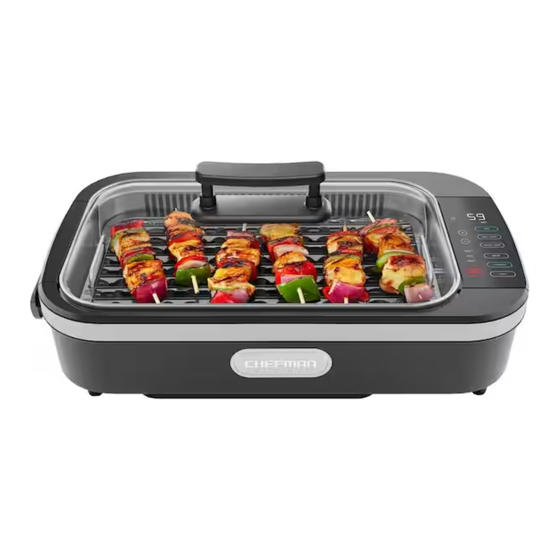
- Page 8 FEATURES Silicone-Sealed Glass Lid Nonstick Grill Plate Heating Element Capacitive-Touch Digital Display Panel Electrical Jack Probe Jack Drip Tray Water Tray Unit Base 10. Detachable Power Cord Probe Thermometer Magnetic Probe Cord Winder Electric Fan (not pictured—under base) RJ23-SG-PL-CA_UG_FINAL_OTP_011921.indd 8 RJ23-SG-PL-CA_UG_FINAL_OTP_011921.indd 8 1/19/22 1:47 PM 1/19/22 1:47 PM...
-
Page 9: Control Panel
CONTROL PANEL Flip Indicator—Illuminates partway through cooking to remind you to flip your food. Grill/Probe Lights—Indicate whether the temperature reading on the display is the grill temperature or the probe temperature. Digital Display—Counts down cooking time in manual mode; displays grill and probe temperature in probe mode. - Page 10 OPERATING INSTRUCTIONS BEFORE FIRST USE For best results, follow these steps before using your grill for the first time. Remove all packaging materials, such as plastic bags and foam inserts. 2. Check to ensure that all parts and accessories are accounted for. 3.
- Page 11 OPERATING INSTRUCTIONS HOW TO COOK IN MANUAL MODE The directions below are for cooking without the probe; if you would rather grill to a specific internal temperature, see How to Cook Using the Probe Thermometer on page 12. Ensure the probe thermometer is not plugged into its jack. 2.
- Page 12 OPERATING INSTRUCTIONS HOW TO COOK USING THE PROBE THERMOMETER Unlike an instant-read thermometer, the probe thermometer stays in your food through the entire cooking cycle, constantly monitoring the temperature until it reaches the target. If using the probe, follow these instructions to program the unit. Insert the probe horizontally into the thickest part of your food (see drawings below.) Be sure the tip of the thermometer isn’t touching bone.
- Page 13 OPERATING INSTRUCTIONS HOW TO COOK USING THE PROBE THERMOMETER 2. With the unit in Standby mode, plug the other end of the thermometer into the thermometer jack on the unit. Probe Temp will light up in blue. 3. Use the + and – buttons to set your desired target internal temperature for the food, from 125˚F to 165˚F.
- Page 14 OPERATING INSTRUCTIONS HOW TO COOK USING THE PROBE THERMOMETER 8. During cooking, the temperature display will alternate between a live reading of the current temperature of your food and the current temperature of your grill. NOTE: If the probe comes unplugged from the jack during cooking, it will beep until plugged back in.
- Page 15 OPERATING INSTRUCTIONS PRESET FUNCTION CHART The below chart indicates target temperatures for the preset functions. Because the temp- erature continues to increase for several minutes after the food is removed from the grill, note that the “End” temperature (when the unit will beep and tell you it’s done) is sometimes lower than the final target temperature.
-
Page 16: Cooking Tips
COOKING TIPS Preheating not only the unit but also the grill plate is essential to getting the great grill marks that are a hallmark of grilled food. CAUTION: Be careful when adding food after preheating as the interior of the grill will be hot. 2. -
Page 17: Cleaning And Maintenance
CLEANING AND MAINTENANCE Let the unit cool completely before cleaning. Detach the power cord and probe cord from the unit if they are not already removed. 2. Remove the grill plate, heating element, drip pan, and water tray, and empty the water. - Page 18 NOTES RJ23-SG-PL-CA_UG_FINAL_OTP_011921.indd 18 RJ23-SG-PL-CA_UG_FINAL_OTP_011921.indd 18 1/19/22 1:47 PM 1/19/22 1:47 PM...
- Page 19 NOTES RJ23-SG-PL-CA_UG_FINAL_OTP_011921.indd 19 RJ23-SG-PL-CA_UG_FINAL_OTP_011921.indd 19 1/19/22 1:47 PM 1/19/22 1:47 PM...
-
Page 20: Terms And Conditions
. Any changes to the Terms and ® Conditions of this Warranty must be in writing, signed by a representative of Chefman ® No other party has the right or ability to alter or change the Terms and Conditions of this Warranty. -
Page 21: What The Warranty Covers
— and workmanship, under normal household use, for a period of 1 year from the date of purchase when used in accordance with the directions listed in the Chefman User ® Guide. If your product does not work as it should, please contact Customer Support at support@chefman.com so that we may assist you. - Page 22 CHEFMAN WARRANTY REGISTRATION ® WHAT DO I NEED TO REGISTER MY PRODUCT? Contact Information 2. Model Number 3. Proof of Purchase: online confirmation, receipt, gift receipt 4. Date Code 5. Access Code Model/Modele: RJ25-C Conveyor toaster 120v~60hz 1800W CONFORMS TO UL STD. 1026 CERTIFIED TO CSA STD.C22.2 No.64...
- Page 23 CHEFMAN WARRANTY REGISTRATION ® HOW DO I REGISTER MY PRODUCT? All you need to do is fill out a simple Chefman registration form. ® You can easily access the form in one of the two ways listed below: Visit chefman.com/register 2.
- Page 24 RJ23-SG-PL-CA_UG_FINAL_OTP_011921.indd 1 RJ23-SG-PL-CA_UG_FINAL_OTP_011921.indd 1 1/19/22 1:47 PM 1/19/22 1:47 PM...
-
Page 25: Guide De L'utilisateur
® Maître de la Grillade Gril pour l’intérieur sans fumée GUIDE DE L'UTILISATEUR Consignes de sécurité Caractéristiques Instructions d’utilisation Conseils de cuisson Nettoyage et entretien Conditions Enregistrement de la garantie RJ23-SG-PL-CA RJ23-SG-PL-CA_UG_FINAL_OTP_011921.indd 1 RJ23-SG-PL-CA_UG_FINAL_OTP_011921.indd 1 1/19/22 1:47 PM 1/19/22 1:47 PM... - Page 26 COOKING FORWARD Bienvenue! Que cet appareil Chefman soit votre premier ou qu’il fasse déjà partie de notre ® famille, nous sommes heureux de faire la cuisine avec vous! Avec votre nouveau gril pour l’intérieur sans fumée, vous pouvez obtenir toute la saveur de grillade à...
- Page 27 CONTENU Consignes de sécurité Caractéristiques Instructions d’utilisation Tableau Conseils de cuisson Nettoyage et entretien Conditions générales Enregistrement de la garantie RJ23-SG-PL-CA_UG_FINAL_OTP_011921.indd 3 RJ23-SG-PL-CA_UG_FINAL_OTP_011921.indd 3 1/19/22 1:47 PM 1/19/22 1:47 PM...
-
Page 28: Consignes De Sécurité
6. N’utilisez pas d’appareil dont la fiche ou le cordon est endommagé, ou après un dysfonctionnement ou suite à des dommages quels qu’ils soient. Communiquez avec le service à la clientèle de Chefman pour tout examen, réparation ou ajustement. ®... - Page 29 CONSIGNES DE SÉCURITÉ MESURES DE PROTECTION IMPORTANTES 9. Ne laissez pas le cordon suspendu au bord d’une table ou d’un plan de travail ni en contact avec des surfaces chaudes. 10. Ne placez pas l’appareil sur ou proche d’un brûleur à gaz, d’un brûleur électrique ou d’un four, chauds.
- Page 30 CONSIGNES DE SÉCURITÉ MESURES DE PROTECTION IMPORTANTES INSTRUCTIONS RELATIVES AU CORDON COURT Le cordon d’alimentation fourni est court afin de réduire les risques d’enchevêtrement ou de chute qu’un cordon plus long pourrait entraîner. Des cordons d’alimentation détachables plus longs ou des rallonges sont disponibles et peuvent être utilisés en respectant les précautions d’usage.
- Page 31 4. Avant chaque utilisation, inspecter le cordon d’alimentation pour détecter toute coupure ou marque d’abrasion. En cas de coupure ou de marque d’abrasion, contacter le service clientèle de Chefman pour obtenir de l’aide. 5. Ne jamais enrouler le cordon trop étroitement autour de l’appareil, pour éviter une tension inutile sur la partie du cordon qui pénètre dans l’appareil et l’effilocher ou...
-
Page 32: Caractéristiques
CARACTÉRISTIQUES Couvercle en verre scellé à la silicone Plaque de cuisson antiadhésive Élément chauffant Panneau d'affichage numérique tactile capacitif Prise d’électrique Prise de la sonde Ramasse-gouttes Plateau à eau Base de l’appareil 10. Cordon d'alimentation démontable Thermomètre à sonde Enrouleur magnétique du cordon de la sonde Ventilateur électrique (non illustré—sous la base) -
Page 33: Panneau De Commande
PANNEAU DE COMMANDE Indicateur de retournement—s’allume en cours de cuisson pour indiquer de retourner l’aliment. Témoins de gril/de sonde—indiquent la lecture de la température de cuisson ou celle de la sonde sur l’afficheur. Affichage numérique—décomptage de la durée de cuisson en mode Manuel; affichage de la température de cuisson et de la sonde en mode Sonde. -
Page 34: Instructions D'utilisation
INSTRUCTIONS D’UTILISATION AVANT L’EMPLOI INITIAL Pour obtenir les meilleurs résultats, suivez ces étapes avant d’utiliser votre gril la première fois. Retirez tous les matériaux de conditionnement comme les sacs en plastique et les éléments en mousse. 2. Vérifiez qu’il ne manque pas de pièces ni d’accessoires. 3. - Page 35 INSTRUCTIONS D’UTILISATION COMMENT CUIRE EN MODE MANUEL Les directives ci-dessous sont destinées à une cuisson sans sonde; si vous souhaitez cuire au gril à une température interne spécifique, consultez Comment cuire avec le thermomètre à sonde à la page 12. Assurez-vous que le thermomètre à...
- Page 36 INSTRUCTIONS D’UTILISATION COMMENT CUIRE EN MODE MANUEL 8. À la fi n du décompte, l’appareil émet un bip et End (fi n) s’affi che. Retirez soigneusement l’aliment. Vérifi ez le niveau de cuisson et dégustez. La majorité des morceaux de viande, de poulet et de poisson sont meilleurs s’ils sont laissés au repos quelques minutes avant de les servir.
- Page 37 INSTRUCTIONS D’UTILISATION COMMENT CUIRE AVEC LE THERMOMÈTRE À SONDE 2. L’appareil en mode Attente, branchez l’autre extrémité du thermomètre dans la prise de l’appareil. Le témoin de Température de la sonde s’allume en bleu. 3. Utilisez les boutons + et – pour régler votre température interne cible pour l’aliment, entre 52 ˚C et 74 ˚C.
- Page 38 INSTRUCTIONS D’UTILISATION COMMENT CUIRE AVEC LE THERMOMÈTRE À SONDE 8. Pendant la cuisson, la température affichée passera en alternance de la lecture de la température actuelle de l’aliment à la température actuelle de votre gril. REMARQUE : si la sonde se débranche lors de la cuisson, un bip sera émis jusqu’à ce qu’elle soit rebranchée.
- Page 39 INSTRUCTIONS D’UTILISATION TABLEAU DES FONCTIONS PRÉRÉGLÉES Le tableau ci-dessous donne les températures cibles pour les fonctions préréglées. Comme la température continue à augmenter pendant plusieurs minutes une fois que l’aliment est retiré du gril, notez que la température de retrait (lorsque l’appareil émet un bip de cuisson terminée) est inférieure à...
-
Page 40: Conseils De Cuisson
CONSEILS DE CUISSON Le préchauffage non seulement de l’appareil mais aussi de la plaque de cuisson est essentiel pour obtenir cette fameuse cuisson au gril. ATTENTION : faites attention lors de l’introduction des aliments car après le préchauffage l’intérieur du gril est très chaud. -
Page 41: Nettoyage Et Entretien
NETTOYAGE ET ENTRETIEN Avant de nettoyer l’appareil, laissez-le refroidir complètement. Séparez de l’appareil le cordon d’alimentation et le cordon de la sonde s’ils sont toujours branchés. 2. Retirez la plaque de cuisson, l’élément chauffant, le ramasse-gouttes et le plateau à eau. Videz le plateau à eau. 3. - Page 42 NOTES RJ23-SG-PL-CA_UG_FINAL_OTP_011921.indd 18 RJ23-SG-PL-CA_UG_FINAL_OTP_011921.indd 18 1/19/22 1:47 PM 1/19/22 1:47 PM...
- Page 43 NOTES RJ23-SG-PL-CA_UG_FINAL_OTP_011921.indd 19 RJ23-SG-PL-CA_UG_FINAL_OTP_011921.indd 19 1/19/22 1:47 PM 1/19/22 1:47 PM...
-
Page 44: Conditions Générales
Cette garantie est annulée en l’absence de preuve d’achat aux États-Unis ou au Canada. Veuillez noter que cette garantie remplace toutes les autres garanties et constitue l’intégralité de l’accord entre le consommateur et Chefman . Tout changement des conditions de cette garantie doit être effectué par écrit et signé par un représentant Chefman . - Page 45 Maintenance inappropriée—Manque général d’entretien approprié. Nous vous encourageons à prendre soin de vos appareils Chefman pour pouvoir continuer d’en profiter. Veuillez consulter les consignes Nettoyage et entretien du guide de l’utilisateur de Chefman pour des informations sur une maintenance appropriée.
- Page 46 ENREGISTREMENT DE LA GARANTIE CHEFMAN INFORMATIONS NÉCESSAIRES POUR ENREGISTRER LE PRODUIT : Coordonnées 2. Numéro du modèle 3. Preuve d’achat (confirmation en ligne, reçu, reçu de cadeau) 4. Code de date 5. Code d’accès Model/Modele: RJ25-C Conveyor toaster 120v~60hz 1800W CONFORMS TO UL STD.
- Page 47 ENREGISTREMENT DE LA GARANTIE CHEFMAN COMMENT ENREGISTRER LE PRODUIT? Il vous suffit de remplir le formulaire d’enregistrement simple de Chefman Vous pouvez facilement accéder au formulaire de l’une des deux façons ci-dessous : Se rendre sur chefman.com/register. 2. Scanner le QR code pour accéder au site.
- Page 48 ® ©CHEFMAN 2022 RJ23-SG-PL-CA_UG_FINAL_OTP_011922 RJ23-SG-PL-CA_UG_FINAL_OTP_011921.indd 24 RJ23-SG-PL-CA_UG_FINAL_OTP_011921.indd 24 1/19/22 1:47 PM 1/19/22 1:47 PM...
Need help?
Do you have a question about the Meat Master RJ23-SG-PL-CA and is the answer not in the manual?
Questions and answers