Table of Contents
Advertisement
Quick Links
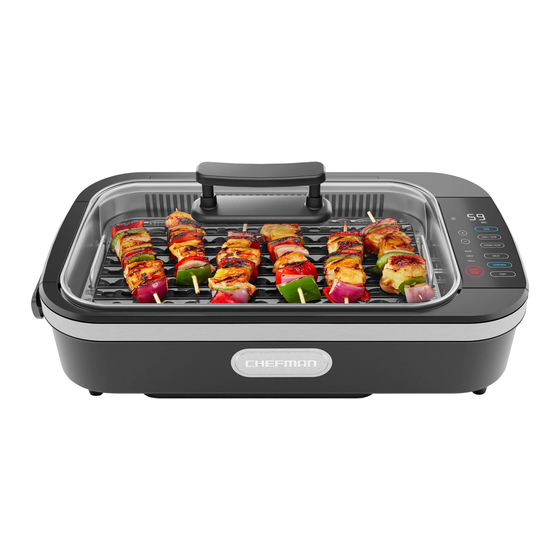
Meat Master
SMOKELeSS
INDOOR GRILL
USER GUIDE
Safety Instructions
Features
Operating Instructions
Cooking Tips
Cleaning and Maintenance
Terms and Conditions
Warranty Registration
RJ23-SG-PL
1
RJ23-SG-PL-CA_UG_FINAL_OTP_123021_AM.indd 1
RJ23-SG-PL-CA_UG_FINAL_OTP_123021_AM.indd 1
®
12/29/21 8:47 PM
12/29/21 8:47 PM
Advertisement
Table of Contents

Related Manuals for Chefman Meat Master


Summary of Contents for Chefman Meat Master
- Page 1 ® Meat Master SMOKELeSS INDOOR GRILL USER GUIDE Safety Instructions Features Operating Instructions Cooking Tips Cleaning and Maintenance Terms and Conditions Warranty Registration RJ23-SG-PL RJ23-SG-PL-CA_UG_FINAL_OTP_123021_AM.indd 1 RJ23-SG-PL-CA_UG_FINAL_OTP_123021_AM.indd 1 12/29/21 8:47 PM 12/29/21 8:47 PM...
- Page 2 COOKING FORWARD™ Welcome! Whether this is your first Chefman appliance or you’re already part of our family, ® we’re happy to be cooking with you! With your new Smokeless Indoor Grill, you can bring all the flavor of grilling indoors (even into apartments) via one virtually smokeless unit.
- Page 3 CONTENTS Safety Instructions Features Operating Instructions Chart Cooking Tips Cleaning and Maintenance Terms and Conditions Warranty Registration RJ23-SG-PL-CA_UG_FINAL_OTP_123021_AM.indd 3 RJ23-SG-PL-CA_UG_FINAL_OTP_123021_AM.indd 3 12/29/21 8:47 PM 12/29/21 8:47 PM...
-
Page 4: Safety Instructions
5. Unplug from the outlet when not in use and before cleaning. Allow to cool before putting on or taking off parts and before cleaning the appliance. 6. Do not operate any appliance with a damaged cord or plug, or after the appliance malfunctions or has been damaged in any manner. Contact Chefman Customer ®... - Page 5 SAFETY INSTRUCTIONS IMPORTANT SAFEGUARDS 8. Do not use outdoors. 9. Do not let the cord hang over the edge of a table or counter, or touch hot surfaces. 10. Do not place on or near a hot gas or electric burner, or in a heated oven. 11.
-
Page 6: Short Cord Instructions
SAFETY INSTRUCTIONS IMPORTANT SAFEGUARDS SHORT-CORD INSTRUCTIONS A short power-supply cord is provided to reduce the hazards of entanglement or tripping over a longer cord. Longer detachable power-supply cords or extension cords are available and may be used if care is exercised in their use. If a longer detachable power-supply extension cord is used: The marked electrical rating of the extension cord should be at least as great as the electrical rating of the appliance. - Page 7 4. Before each use, inspect the power cord for cuts and/or abrasion marks. If any are found, this indicates that the appliance should be serviced and the power cord replaced. Please contact Chefman Customer Support for assistance. 5. Never wrap the cord tightly around the appliance, as this could place undue stress on the cord where it enters the appliance and cause it to fray and break.
- Page 8 FEATURES Silicone-Sealed Glass Lid Nonstick Grill Plate Heating Element Capacitive-Touch Digital Display Panel Electrical Jack Probe Jack Drip Tray Water Tray Unit Base 10. Detachable Power Cord Probe Thermometer Magnetic Probe Cord Winder Electric Fan (not pictured—under base) RJ23-SG-PL-CA_UG_FINAL_OTP_123021_AM.indd 8 RJ23-SG-PL-CA_UG_FINAL_OTP_123021_AM.indd 8 12/29/21 8:47 PM 12/29/21 8:47 PM...
-
Page 9: Control Panel
CONTROL PANEL Flip Indicator—Illuminates partway through cooking to remind you to flip your food. Grill/Probe Lights—Indicate whether the temperature reading on the display is the grill temperature or the probe temperature. Digital Display—Counts down cooking time in manual mode; displays grill and probe temperature in probe mode. - Page 10 OPERATING INSTRUCTIONS BEFORE FIRST USE For best results, follow these steps before using your grill for the first time. Remove all packaging materials, such as plastic bags and foam inserts. 2. Check to ensure that all parts and accessories are accounted for. 3.
- Page 11 OPERATING INSTRUCTIONS HOW TO COOK IN MANUAL MODE The directions below are for cooking without the probe; if you would rather grill to a specific internal temperature, see How to Cook Using the Probe Thermometer on page 12. Ensure the probe thermometer is not plugged into its jack. 2.
- Page 12 OPERATING INSTRUCTIONS HOW TO COOK USING THE PROBE THERMOMETER Unlike an instant-read thermometer, the probe thermometer stays in your food through the entire cooking cycle, constantly monitoring the temperature until it reaches the target. If using the probe, follow these instructions to program the unit. Insert the probe horizontally into the thickest part of your food (see drawings below.) Be sure the tip of the thermometer isn’t touching bone.
- Page 13 OPERATING INSTRUCTIONS HOW TO COOK USING THE PROBE THERMOMETER 2. With the unit in Standby mode, plug the other end of the thermometer into the thermometer jack on the unit. Probe Temp will light up in blue. 3. Use the + and – buttons to set your desired target internal temperature for the food, from 125˚F to 165˚F.
- Page 14 OPERATING INSTRUCTIONS HOW TO COOK USING THE PROBE THERMOMETER During cooking, the temperature display will alternate between a live reading of the current temperature of your food and the current temperature of your grill. NOTE: If the probe comes unplugged from the jack during cooking, it will beep until plugged back in.
- Page 15 OPERATING INSTRUCTIONS PRESET FUNCTION CHART The below chart indicates target temperatures for the preset functions. Because the temp- erature continues to increase for several minutes after the food is removed from the grill, note that the “pull” temperature (when the unit will beep and tell you it’s done) is lower than the final target temperature.
-
Page 16: Cooking Tips
COOKING TIPS Preheating not only the unit but also the grill plate is essential to getting the great grill marks that are a hallmark of grilled food. CAUTION: Be careful when adding food after preheating as the interior of the grill will be hot. 2. -
Page 17: Cleaning And Maintenance
CLEANING AND MAINTENANCE Let the unit cool completely before cleaning. Detach the power cord and probe cord from the unit if they are not already removed. 2. Remove the grill plate, heating element, drip pan, and water tray, and empty the water. - Page 18 NOTES RJ23-SG-PL-CA_UG_FINAL_OTP_123021_AM.indd 18 RJ23-SG-PL-CA_UG_FINAL_OTP_123021_AM.indd 18 12/29/21 8:47 PM 12/29/21 8:47 PM...
- Page 19 NOTES RJ23-SG-PL-CA_UG_FINAL_OTP_123021_AM.indd 19 RJ23-SG-PL-CA_UG_FINAL_OTP_123021_AM.indd 19 12/29/21 8:47 PM 12/29/21 8:47 PM...
-
Page 20: Terms And Conditions
. Any changes to the Terms and ® Conditions of this Warranty must be in writing, signed by a representative of Chefman ® No other party has the right or ability to alter or change the Terms and Conditions of this Warranty. -
Page 21: What The Warranty Covers
— and workmanship, under normal household use, for a period of 1 year from the date of purchase when used in accordance with the directions listed in the Chefman User ® Guide. If your product does not work as it should, please contact Customer Support at support@chefman.com so that we may assist you. - Page 22 CHEFMAN WARRANTY REGISTRATION ® WHAT DO I NEED TO REGISTER MY PRODUCT? Contact Information 2. Model Number 3. Proof of Purchase: online confirmation, receipt, gift receipt 4. Date Code 5. Access Code Model/Modele: RJ25-C Conveyor toaster 120v~60hz 1800W CONFORMS TO UL STD. 1026 CERTIFIED TO CSA STD.C22.2 No.64...
- Page 23 CHEFMAN WARRANTY REGISTRATION ® HOW DO I REGISTER MY PRODUCT? All you need to do is fill out a simple Chefman registration form. ® You can easily access the form in one of the two ways listed below: Visit chefman.com/register 2.
Need help?
Do you have a question about the Meat Master and is the answer not in the manual?
Questions and answers