
Related Manuals for Toshiba ML-EM32PA SS


Summary of Contents for Toshiba ML-EM32PA SS
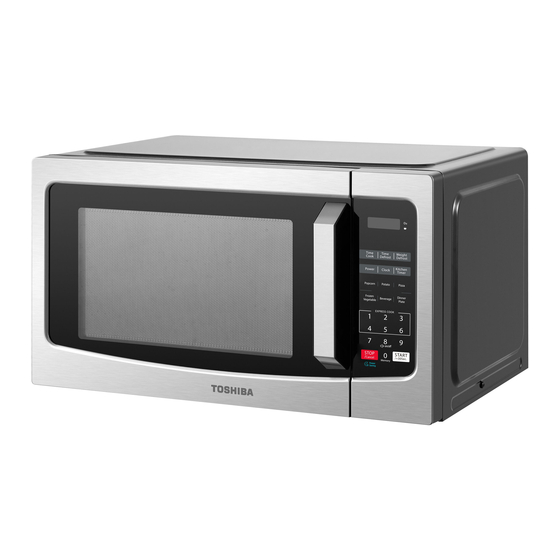
- Page 1 INSTRUCTION MANUAL MICROWAVE OVEN ML-EM32PA(SS) Please review this instruction manual before operating.
-
Page 3: Table Of Contents
CONTENTS PRODUCT SAFETY Precautions to avoid possible exposure to excessive microwave energy ........EN-01 ............................EN-02 Important safety instructions ........................EN-03 Grounding instructions ........................... EN-07 Radio interference ........................... EN-09 Utensils .................................. EN-10 Materials you can use in microwave oven ....................EN-11 Materials can not be used in microwave oven .................. - Page 4 ..........................6. Defrost by weight EN-23 7. Defrost by time ............................. EN-23 8. Multi-stage cooking ..........................EN-24 9. Auto menu ..............................EN-25 10. Memory function ........................EN-26 11. Lock function for children ........................EN-27 12. ECO function ............................EN-27 13.
-
Page 5: Product Safety
PRODUCT SAFETY PRECAUTIONS TO AVOID POSSIBLE EXPOSURE TO EXCESSIVE MICROWAVE ENERGY (a). Do not attempt to operate this oven with the door open since open door operation can result in harmful exposure to microwave energy. It is important not to defeat or tamper with the safety interlocks. -
Page 6: Specifications
SPECIFICATIONS MODEL ML-EM32PA(SS) 120VAC 60Hz POWER SUPPLY 1600 W 1000 W All pictures in this manual are for illustrative purposes only; these may be sligh rchased equipment, please refer to the NOTE actual product. EN-02... -
Page 7: Important Safety Instructions
IMPORTANT SAFETY INSTRUCTIONS When using electrical appliances basic safety precautions should be followed, including the following. To reduce the risk of burns, electric shock, WARNING microwave energy. Read all instructions before USE THE MICROWAVE. using the appliance. Use caution when removing hot items. - Page 8 IMPORTANT SAFETY INSTRUCTIONS the container to stand Keep cord away from in the microwave oven heated surface. for a short time before removing the container. Liquids, such as water, 5. Use extreme care when co ee, or tea are able inserting a spoon or to overheat beyond the other utensil into the...
- Page 9 IMPORTANT SAFETY INSTRUCTIONS Do not store this appliance 2. Remove wire twist-ties from paper or plastic outdoors. Do not use this product near water - for bag before placing bag example, near a kitchen in oven. sink, in a wet basement, 3.
- Page 10 IMPORTANT SAFETY INSTRUCTIONS Do not operate this Do not let cord hang over appliance if it has a edge of table or counter. damaged cord or plug, if it is not working properly, or if it has been damaged or dropped.
-
Page 11: Grounding Instructions
GROUNDING INSTRUCTIONS This appliance must be grounded. In the event of an electrical short circuit, grounding reduces the risk of electric shock by providing an escape wire for the electric current. This appliance is equipped with a cord having a grounding wire with a grounding plug. - Page 12 GROUNDING INSTRUCTIONS Electric Shock Hazard: Improper use of the grounding can result in electric shock. Do not plug into an outlet until appliance is properly installed and grounded. 1. A short power-supply cord is provided to reduce the risks resulting from becoming entangled in or tripping over a longer cord.
-
Page 13: Radio Interference
RADIO INTERFERENCE 1. Operation of the microwave oven may cause interference to your radio, TV or similar equipment. 2. When there is interference, it may be reduced or eliminated by taking the following measures: (1). Clean door and sealing surface of the oven. (2). -
Page 14: Utensils
UTENSILS Personal Injury Hazard: Tightly-closed utensils could explode. Closed containers should be opened and plastic pouches should be pierced before cooking. See the instructions on "Materials you can use in microwave oven." or "Materials can not be used CAUTION in microwave oven ." There may be certain non-metallic utensils that are not safe to use for microwaving. -
Page 15: Materials You Can Use In Microwave Oven
MATERIALS YOU CAN USE IN MICROWAVE OVEN UTENSILS REMARKS Follow manufacturer’s instructions. The bottom of browning dish must be at least 3/16 inch (5mm) above the turntable. Incorrect usage may cause Browning dish the turntable to break. Microwave-safe only. Follow manufacturer’s instructions. - Page 16 MATERIALS YOU CAN USE IN MICROWAVE OVEN UTENSILS REMARKS Microwave-safe only. Follow the manufacturer’s instructions. Should be labeled “Microwave Safe”. Some plastic containers soften, as the food inside gets hot. “Boiling bags” and tightly closed plastic bags should be Plastic slit, pierced or vented as directed by package.
-
Page 17: Materials Can Not Be Used In Microwave Oven
MATERIALS CAN NOT BE USED IN MICROWAVE OVEN UTENSILS REMARKS May cause arcing. Transfer food into microwave-safe dish. Aluminum tray May cause arcing. Transfer food into microwave-safe dish. Food carton with metal handle Metal shields the food from microwave energy. Metal trim may cause arcing. -
Page 18: Product Setting
PRODUCT SETTING NAMES OF MICROWAVE OVEN PARTS AND ACCESSORIES Remove the oven and all materials from the carton and oven cavity. Glass Tray Turntable Ring Assembly Instruction Manual Glass turntable Observation Oven cavity Waveguide cover window Control panel Safety interlock system Turntable ring assembly... -
Page 19: Door Opening Guidance
DOOR OPENING GUIDANCE In case of any d erences between the appliance and the pictures in this manual, the product shall prevail. NOTE EN-15... -
Page 20: Turntable Installation
TURNTABLE INSTALLATION Clean the cooking compartment and place the turntable. For new installations, make sure all packaging and shipping tape has been removed from the turntable shaft. Before using the appliance to prepare food for the first time, you will need to put the turntable in place correctly. -
Page 21: Countertop Installation
COUNTERTOP INSTALLATION Remove all packing material and accessories. Examine the oven for any damage such as dents or broken door. Do not install if oven is damaged. remove the waveguide cover that is attached to the oven cavity to protect the magnetron. INSTALLATION 1. -
Page 22: Instruction For Use
INSTRUCTION FOR USE BEFORE USING FOR THE FIRST TIME It is normal that the oven may produce unpleasant odors when it is used for the first time. This section tells you what you need to do before using your microwave to prepare food for the "PRODUCT SAFETY "... -
Page 23: Operation
OPERATION CONTROL PANEL AND FEATURES EN-19... -
Page 24: Setting The Clock
1. SETTING THE CLOCK Press once and then “00:00” will display. Press the number keys to enter the time. Example: To set the clock to 12:10, please press “1,2,1,0” in turn. • The clock is a 12-hour display. And if the clock is not set, it will not work when powered. -
Page 25: Power Levels
3. POWER LEVELS power levels are available LEVEL POWER DISPLAY 100% PL10 4. MICROWAVE COOKING Press once and then “00:00” will display. Press the number keys to set the cooking time. The maximum time value is “99:99”. Press once and then “PL10” will display. Press the number keys to set the power level. -
Page 26: Speedy Cooking
• Opening the oven door or pressing during operation will interrupt the current mode. • If "PL0" is selected, the oven will work with a fan for no power. You can use this level to remove the odor of the oven. NOTE •... -
Page 27: Defrost By Weight
6. DEFROST BY WEIGHT Press once and then “dEF1” will display. Press the number keys to set the weight of the food. The range of weight is 4 to 70 Oz. Press to start defrosting. • The buzzer will sound to remind you to turn the food over during defrosting. If no operation, the oven will continue working. -
Page 28: Multi-Stage Cooking
8. MULTI-STAGE COOKING Example: Defrost food for 5 minutes and then cook with 80% microwave power for 7 minutes. once and then “dEF2” Press will display. Press “5”, “0”, and “0” to set the desired defrost time to 5 minutes. Press once and then press “7”, “0”, and “0”... -
Page 29: Auto Menu
9. AUTO MENU In standby mode, press the corresponding menu key repeatedly to select the weight of the food you want. Example: Press once and then “3.2 ” displays. Press to start cooking. Auto Menu chart Menu Weight Display Power 3.2Oz PL10 3.5Oz... -
Page 30: Memory Function
10. MEMORY FUNCTION You can save the settings for a dish in the memory and call it up again. Press repeatedly to select memory 1-3 procedure. “1”, “2” and “3” will display in order. If the procedure has been set, press start working. -
Page 31: Lock Function For Children
11. LOCK FUNCTION FOR CHILDREN You can use this function to prevent children from accidentally turning the oven on. To activate the lock: In standby mode, press and hold for three seconds. A beep sounds and “ ” will display. To deactivate the lock: In the locked state, press and hold for three seconds. -
Page 32: Cleaning And Maintenance
CLEANING AND MAINTENANCE CLEANING With good care and cleaning, your appliance will retain its appearance and remain fully functioning for a long time to come. Here are the instructions on how to properly care for the microwave oven. • Scratched glass in the appliance door may develop into a crack. Do not use a glass scraper, sharp or abrasive cleaning aids or detergents. -
Page 33: Door Panels
APPLIANCE FRONT WITH STAINLESS STEEL Hot soapy water: Clean using a dish cloth and then dry with a soft cloth. Remove splashes and patches of limescale, grease, starch and albumin immediately. Corrosion can form under these patches or splashes. Do not use glass cleaners or metal or glass scrapers for cleaning. -
Page 34: Trouble Shooting
TROUBLE SHOOTING Check your problem by using the chart below and try the solutions for each problem. If the microwave oven still does not work properly, contact the nearest authorized service center. TROUBLE POSSIBLE CAUSE POSSIBLE REMEDY a. Electrical cord for oven is not a. -
Page 35: One Year Limited Warranty
If service is required during the warranty period, properly pack your unit. We recommend using the original carton and packing materials. If additional assistance is needed, please contact customer assistance at: customercare@us.toshiba-lifestyle.com 855-204-5313 Midea America Corp. expressly disclaims all responsibility for consequential damages or incidental losses caused by use of the appliance. - Page 36 Details Matter...
-
Page 37: Horno Microondas
MANUAL DE INSTRUCCIONES HORNO MICROONDAS ML-EM32PA(SS) Lea este manual de instrucciones antes de usar el aparato. - Page 39 CONTENIDO SEGURIDAD DEL PRODUCTO Precauciones para evitar una posible exposición a energía excesiva de microondas....ES-01 Especificaciones..............................ES-02 Instrucciones de seguridad importantes....................ES-03 Instrucciones para conexión a tierra ......................ES-07 Interferencia de radio ............................ES-09 Utensilios................................ES-10 Materiales que puede utilizar en el horno microondas ............... ES-11 Materiales a evitar en el horno microondas .....................
- Page 40 6. Descongelación por peso........................... ES-23 7. Descongelación por tiempo ........................ES-23 8. Cocción en múltiples etapas ........................ES-24 9. Menú automático ............................ES-25 10. Función de memoria..........................ES-26 11. Función de bloqueo para niños......................ES-27 12. Función ECO..............................ES-27 13. Función de consulta........................... ES-27 14.
-
Page 41: Seguridad Del Producto
SEGURIDAD DEL PRODUCTO PRECAUCIONES PARA EVITAR UNA POSIBLE EXPOSICIÓN A ENERGÍA EXCESIVA DE MICROONDAS (a). No intente utilizar este horno microondas con la puerta abierta ya que esto puede provocar una exposición peligrosa a la energía de microondas. Es importante no anular ni manipular indebidamente los dispositivos de seguridad. -
Page 42: Especificaciones
ESPECIFICACIONES ML-EM32PA(SS) MODELO FUENTE DE ALIMENTACIÓN 120 V CA 60 Hz POTENCIA NOMINAL DE ENTRADA (MICROONDAS) 1600 W POTENCIA NOMINAL DE SALIDA (MICROONDAS) 1000 W Todas las imágenes de este manual son solo para nes ilustrativos; pueden ser ligeramente diferentes del electrodoméstico adquirido; NOTA consulte el producto real. -
Page 43: Instrucciones De Seguridad Importantes
INSTRUCCIONES DE SEGURIDAD IMPORTANTES Al utilizar aparatos eléctricos, se deben seguir siempre las precauciones básicas de seguridad, que incluyen las siguientes. Para reducir el riesgo de quemaduras, ADVER- descargas eléctricas, incendios, lesiones a personas o TENCIA exposición excesiva a energía de microondas. Lea todas las instrucciones NO PERMITA QUE LOS NIÑOS antes de utilizar el aparato. - Page 44 INSTRUCCIONES DE SEGURIDAD IMPORTANTES recipiente en el horno Mantenga el cable de microondas durante un alimentación alejado de corto tiempo antes de superficies calientes. retirarlo. 5. Tenga mucho cuidado al Los líquidos, como agua, insertar una cuchara u café o té pueden otro utensilio en el sobrecalentarse más allá...
- Page 45 INSTRUCCIONES DE SEGURIDAD IMPORTANTES No guarde este aparato al de papel o de plástico aire libre. No utilice este antes de colocarlas en el producto cerca del agua, horno. por ejemplo, cerca del 3. Si los materiales dentro fregadero de la cocina, en del horno empiezan a un sótano húmedo, cerca de arder, mantenga cerrada...
- Page 46 INSTRUCCIONES DE SEGURIDAD IMPORTANTES No utilice este artefacto si No cuelgue el cable de el cable de alimentación o alimentación sobre el enchufe están dañados, si borde de la mesa o no funciona mostrador. correctamente o si tiene daños o se ha caído. No cubra ni bloquee ninguna ranura del aparato.
-
Page 47: Instrucciones Para Conexión A Tierra
INSTRUCCIONES PARA CONEXIÓN A TIERRA Este electrodoméstico debe estar conectado a tierra. En caso de que se produzca un cortocircuito eléctrico, la conexión a tierra reduce el riesgo de descarga eléctrica al proporcionar una vía de escape para la corriente eléctrica. Este electrodoméstico está equipado con un cable que tiene una conexión a tierra con un enchufe con conexión a tierra. - Page 48 INSTRUCCIONES PARA CONEXIÓN A TIERRA Peligro de descarga eléctrica: El uso inadecuado de la conexión a tierra puede provocar una descarga eléctrica. No lo enchufe en un tomacorriente hasta que el electrodoméstico esté correctamente instalado y conectado a tierra. 1. Se proporciona un cable de alimentación corto con el propósito de reducir el riesgo de tropezarse o enredarse con un cable más largo.
-
Page 49: Interferencia De Radio
INTERFERENCIA DE RADIO 1. El funcionamiento del horno microondas puede causar interferencias en su radio, televisor o equipos similares. 2. Cuando hay interferencia, ésta puede reducirse o eliminarse tomando las siguientes medidas: (1). Limpie la puerta y la superficie de sellado del microondas. (2). -
Page 50: Utensilios
UTENSILIOS Riesgo de lesiones personales: Los recipientes demasiado cerrados podrían explotar. Los recipientes cerrados deben abrirse y las bolsas de plástico deben perforarse antes de cocinar. Consulte las instrucciones en "Materiales que puede utilizar en el horno microondas" o "Materiales que PRE- deben evitarse en el horno microondas". -
Page 51: Materiales Que Puede Utilizar En El Horno Microondas
MATERIALES QUE PUEDE UTILIZAR EN EL HORNO MICROONDAS UTENSILIOS COMENTARIOS Siga las instrucciones del fabricante. El fondo del plato para dorar debe estar por lo menos a 5 mm por encima del plato giratorio. El uso incorrecto Plato para dorar podría causar la rotura del plato giratorio. - Page 52 MATERIALES QUE PUEDE UTILIZAR EN EL HORNO MICROONDAS UTENSILIOS COMENTARIOS Utilice solamente envolturas aptas para microondas. Siga las instrucciones del fabricante. Debe estar etiquetado como "apto para microondas". Algunos recipientes de plástico se ablandan al calentarse la comida en el interior. Las "Bolsas Plástico para hervir"...
- Page 53 MATERIALES QUE DEBEN EVITARSE EN EL HORNO MICROONDAS UTENSILIOS COMENTARIOS Podría causar arcos eléctricos. Utilice un plato apto para microondas. Bandeja de aluminio Podría causar arcos eléctricos. Utilice un plato apto para microondas. Cartón para alimentos con asa de metal El metal protege el alimento de la energía de microondas.
-
Page 54: Instalación Del Producto
INSTALACIÓN DEL PRODUCTO NOMBRES DE LAS PARTES Y ACCESORIOS DEL HORNO Retire el horno y todos los materiales de la caja y del interior del horno. Plato de cristal Conjunto de Anillo Giratorio Manual de instrucciones Plato giratorio de cristal Ventana del Cavidad del Horno Cubierta de la guía de ondas... -
Page 55: Guía De Apertura De La Puerta
GUÍA DE APERTURA DE LA PUERTA Tire del gatillo de liberación hacia arriba y luego tire de la manija para abrir la puerta. Gatillo de liberación Manija En caso de que haya diferencias entre el aparato y las imágenes de este manual, prevalecerá... -
Page 56: Instalación Del Plato Giratorio
INSTALACIÓN DEL PLATO GIRATORIO Limpie el compartimento de cocción y coloque el plato giratorio. En el caso de una nueva instalación, asegúrese de que se ha retirado todo el material de embalaje y de cinta adhesiva del eje del plato giratorio. Antes de utilizar el aparato para preparar alimentos por primera vez, deberá... -
Page 57: Instalación En Encimera
INSTALACIÓN EN ENCIMERA Retire todo el material de embalaje y los accesorios. Verifique el horno para asegurarse de que no haya ningún daño, como abolladuras o puerta rota. No lo instale si el horno está dañado. Gabinete: Retire cualquier película protectora que se encuentre en la superficie del gabinete del horno microondas. -
Page 58: Instrucciones De Uso
INSTRUCCIONES DE USO ANTES DE USAR POR PRIMERA VEZ Es normal que el horno produzca olores desagradables cuando se utiliza por primera vez. Esta sección le indica lo que debe hacer antes de utilizar el microondas para preparar alimentos por primera vez. Lea antes la sección titulada "SEGURIDAD DEL PRODUCTO". Antes de poder utilizar su nuevo electrodoméstico, deberá... -
Page 59: Panel De Control Y Características
FUNCIONAMIENTO PANEL DE CONTROL Y CARACTERÍSTICAS ES-19... -
Page 60: Configuración Del Reloj
1. CONFIGURACIÓN DEL RELOJ Presione una vez, y a continuación, se mostrará "00:00". Presione los botones numéricos para ingresar el tiempo. Ejemplo: Para ajustar el reloj a las 12:10, presione "1,2,1,0" sucesivamente. Presione para con rmar. El reloj está con gurado. •... -
Page 61: Niveles De Potencia
3. NIVELES DE POTENCIA Hay 11 niveles de potencia disponibles NIVEL POTENCIA PANTALLA 100% PL10 4. COCCIÓN POR MICROONDAS Presione una vez, y a continuación, se mostrará "00:00". Presione los botones numéricos para ajustar el tiempo de cocción. El valor máximo de tiempo es "99:99". Presione una vez, y a continuación, se mostrará... -
Page 62: Cocción Rápida
• Abrir la puerta del horno o presionar durante el funcionamiento interrumpirá el modo actual. • Si selecciona "PL0", el horno funcionará con el ventilador sin potencia. Puede utilizar este nivel para eliminar el olor del horno. • El nivel de potencia puede cambiarse durante el funcionamiento. Presione NOTA una vez y, a continuación, se mostrará... -
Page 63: Descongelación Por Peso
6. DESCONGELACIÓN POR PESO Presione una vez y, a continuación, se mostrará "dEF1". Presione los botones numéricos para ajustar el peso de los alimentos. El rango de peso es de 4 a 70 oz. Presione para iniciar la descongelación. • La alarma sonará para recordarle que debe dar vuelta los alimentos durante la descongelación. -
Page 64: Cocción En Múltiples Etapas
8. COCCIÓN EN MÚLTIPLES ETAPAS Ejemplo: Descongele los alimentos durante 5 minutos y luego cocine con un 80% de potencia de microondas durante 7 minutos. Presione una vez y, a continuación, se mostrará "dEF2". Presione "5", "0" y "0" para ajustar el tiempo de descongelación deseado en 5 minutos. -
Page 65: Menú Automático
9. MENÚ AUTOMÁTICO En el modo de espera, presione repetidamente el botón de menú correspondiente para seleccionar el peso de la comida que desee. Ejemplo: Presione una vez y, a continuación, se mostrará "3,2 ". Presione para iniciar la cocción. Tabla del menú... -
Page 66: Función De Memoria
10. FUNCIÓN DE MEMORIA Puede guardar los ajustes de un plato en la memoria para volver a utilizarlo. Presione repetidamente para seleccionar el procedimiento de memoria 1-3. "1", "2" y "3" aparecerán en orden. Si el procedimiento ha sido ajustado, presione para iniciar la cocción. -
Page 67: Función De Bloqueo Para Niños
11. FUNCIÓN DE BLOQUEO PARA NIÑOS Puede usar esta función para evitar que los niños enciendan el horno accidentalmente. Para activar el bloqueo: En el modo de espera, mantenga presionado durante tres segundos. Sonará un pitido y se mostrará " ". -
Page 68: Limpieza Y Mantenimiento
LIMPIEZA Y MANTENIMIENTO LIMPIEZA Con un buen cuidado y limpieza, su electrodoméstico conservará su aspecto y seguirá funcionando perfectamente durante mucho tiempo. Aquí están las instrucciones sobre cómo cuidar adecuadamente el horno microondas. • Una raspadura en el vidrio de la puerta del aparato puede convertirse en una grieta. - Page 69 PARTE FRONTAL DE ACERO INOXIDABLE Agua caliente con jabón: Limpie con un paño de cocina y luego seque con un paño suave. Elimine inmediatamente las salpicaduras y manchas de cal, grasa, almidón y albúmina. Se puede formar corrosión debajo de estos parches o salpicaduras.
-
Page 70: Solución De Problemas
SOLUCIÓN DE PROBLEMAS Veri que el problema utilizando la siguiente tabla y pruebe las soluciones para cada problema. Si el horno microondas aún no funciona correctamente, póngase en contacto con el centro de servicio autorizado más cercano. PROBLEMA POSIBLE CAUSA POSIBLE SOLUCIÓN a. -
Page 71: Garantía Limitada De Un Año
Se recomienda utilizar la caja y los materiales de embalaje originales. Si requiere asistencia adicional, póngase en contacto con el servicio de atención al cliente en: customercare@us.toshiba-lifestyle.com 855-204-5313 Midea America Corp. renuncia expresamente a toda responsabilidad por daños consecuentes o pérdidas incidentales causadas por el uso del electrodoméstico.
Need help?
Do you have a question about the ML-EM32PA SS and is the answer not in the manual?
Questions and answers
I have a Toshiba microwave ML-EM32PA(SS) countertop microwave and the clock setting goes off after a few minutes. Is there a way to keep the clock setting always on display?
To keep the clock display always on for the Toshiba microwave ML-EM32PA(SS), do not activate ECO mode. If ECO mode is active, the display turns off in standby. You can cancel ECO mode by pressing any key or opening and closing the door.
This answer is automatically generated
When placing the glass tray into the Turntable ring Assembly the three little recessed glass bumps don't hit anything? Like other glass trays in other microwaves actually lock into the turntable center. This one it doesn't you can place it where it goes and spin it freely. Is this normal ?? The instruction manual isn't clear on this issue.....
How turn off the ECO Mode on a Toshiba microwave ML-EM32PA(SS) countertop microwave.