
Related Manuals for Toshiba ML-EM62P


Summary of Contents for Toshiba ML-EM62P
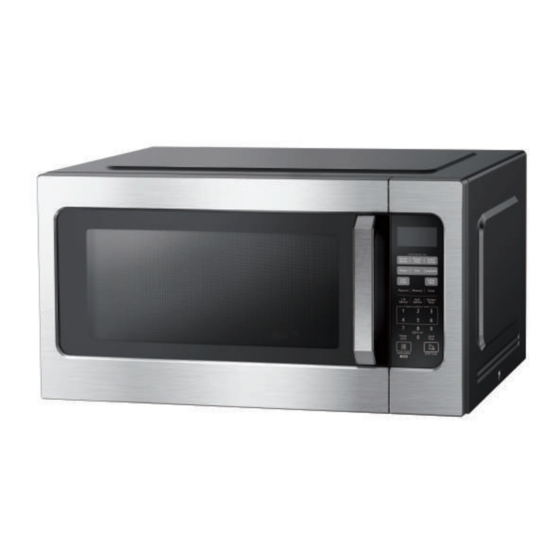
- Page 1 MICROWAVE OVEN INSTRUCTION MANUAL ML-EM62P(SS) Please review this instruction manual before operating.
-
Page 2: Table Of Contents
CONTENTS PRODUCT SAFETY Precautions to avoid possible exposure to excessive microwave energy ........EN-01 Important safety instructions ........................EN-03 Grounding instructions ........................... EN-07 Radio interference ............................EN-09 Utensils .................................. EN-10 Materials you can use in microwave oven ....................EN-11 Materials can not be used in microwave oven ..................EN-13 PRODUCT SETTING Setting up your oven ............................ - Page 3 11. Soften/melt ..............................EN-27 12. Memory function ............................EN-28 13. Multi-stage cooking ..........................EN-29 14. Inquiring function ............................. EN-30 15. Lock function .............................. EN-30 16. Cooking end reminder function ......................EN-30 17. Other specifications ..........................EN-31 18. Screen-out function ..........................EN-31 19.
-
Page 4: Product Safety
PRODUCT SAFETY PRECAUTIONS TO AVOID POSSIBLE EXPOSURE TO EXCESSIVE MICROWAVE ENERGY (a). Do not attempt to operate this oven with the door open since this can result in harmful exposure to microwave energy. It is important not to defeat or tamper with the safety interlocks. - Page 5 SPECIFICATIONS MODEL ML-EM62P(SS) RATED VOLTAGE 120V~ 60Hz RATED INPUT POWER (MICROWAVE) 1700W RATED OUTPUT POWER (MICROWAVE) 1200W OVEN CAPACITY 2.2 cu.ft / 62L TURNTABLE DIAMETER 16.5 inch/420 mm EXTERNAL DIMENSIONS 24.4x19.6x13.6 inch (620x498x346 mm) NET WEIGHT Approx. 43.4 Lbs (19.7 kg) All pictures in this manual are for illustrative purposes only;...
-
Page 6: Important Safety Instructions
IMPORTANT SAFETY INSTRUCTIONS To reduce the risk of burns, electric shock, fire, injury to persons or exposure to excessive microwave oven energy when using your appliance,follow basic WARNING safety precautions, including the following: Read all instructions before To reduce the risk of fire in using the appliance. - Page 7 IMPORTANT SAFETY INSTRUCTIONS Liquids, such as water, Do not leave paper coffee, or tea are able products, cooking to overheat beyond the utensils, or food in the boiling point without cavity when not in use. appearing to be boiling. Visible bubbling or boiling Install or locate this oven when the container only in accordance with...
- Page 8 IMPORTANT SAFETY INSTRUCTIONS 4. After heating, allow Some products such as the container to stand whole eggs and sealed in the microwave oven containers, for example, for a short time before closed glass jars are able to removing the container. explode and should not be 5.
- Page 9 IMPORTANT SAFETY INSTRUCTIONS Do not cover or block any Do not immerse cord or openings on the oven. plug in water or any other liquid. Do not store or use this appliance outdoors. Do not use this oven Do not let cord hang over near water, for example, edge of table or counter.
-
Page 10: Grounding Instructions
GROUNDING INSTRUCTIONS This appliance must be grounded. In the event of an electrical short circuit, grounding reduces the risk of electric shock by providing an escape wire for the electric current. This appliance is equipped with a cord having a grounding wire with a grounding plug. - Page 11 GROUNDING INSTRUCTIONS Electric Shock Hazard: Improper use of the grounding can result in electric shock. Do not plug into an outlet until appliance is properly installed and grounded. 1. A short power-supply cord is provided to reduce the risks resulting from becoming entangled in or tripping over a longer cord.
-
Page 12: Radio Interference
RADIO INTERFERENCE 1. Operation of the microwave oven may cause interference to your radio, TV or similar equipment. 2. When there is interference, it may be reduced or eliminated by taking the following measures: (1). Clean door and sealing surface of the oven. (2). -
Page 13: Utensils
UTENSILS Personal Injury Hazard: Tightly-closed utensils could explode. Closed containers should be opened and plastic pouches should be pierced before cooking. See the instructions on "Materials you can use in microwave oven " or "Materials can not be used CAUTION in microwave oven."... -
Page 14: Materials You Can Use In Microwave Oven
MATERIALS YOU CAN USE IN MICROWAVE OVEN UTENSILS REMARKS Follow manufacturer’s instructions. The bottom of browning dish must be at least 3/16 inch (5mm) above the turntable. Incorrect usage may cause Browning dish the turntable to break. Microwave-safe only. Follow manufacturer’s instructions. - Page 15 MATERIALS YOU CAN USE IN MICROWAVE OVEN UTENSILS REMARKS Microwave-safe only. Follow the manufacturer’s instructions. Should be labeled “Microwave Safe”. Some plastic containers soften, as the food inside gets hot. “Boiling bags” and tightly closed plastic bags should be Plastic slit, pierced or vented as directed by package.
-
Page 16: Materials Can Not Be Used In Microwave Oven
MATERIALS CAN NOT BE USED IN MICROWAVE OVEN UTENSILS REMARKS May cause arcing. Transfer food into microwave-safe dish. Aluminum tray May cause arcing. Transfer food into microwave-safe dish. Food carton with metal handle Metal shields the food from microwave energy. Metal trim may cause arcing. -
Page 17: Product Setting
PRODUCT SETTING SETTING UP YOUR OVEN NAMES OF OVEN PARTS AND ACCESSORIES Remove the oven and all materials from the carton and oven cavity. Your oven comes with the following accessories: Glass Tray (Can be used under all functions) Instruction Manual A. -
Page 18: Setting Up Your Oven
SETTING UP YOUR OVEN TURNTABLE INSTALLATION Cleaning the cooking compartment and putting the turntable in place. For new installations, make sure all packaging and shipping tape has been removed from the turntable shaft. Before using the appliance to prepare food for the first time, you will need to put the turntable in place correctly. - Page 19 SETTING UP YOUR OVEN COUNTERTOP INSTALLATION Remove all packing material and accessories. Examine the oven for any damage such as dents or broken door. Do not install if oven is damaged. Cabinet: Remove any protective film found on the microwave oven cabinet surface. Do not remove the light brown Mica cover that is attached to the oven cavity to protect the magnetron.
- Page 20 SETTING UP YOUR OVEN 2. Plug microwave oven into a standard household outlet. Be sure the voltage and the frequency is the same as the voltage and the frequency on the rating label. • Do not install oven over a range cooktop or other heat-producing appliance.
-
Page 21: Instruction For Use
INSTRUCTION FOR USE BEFORE USING FOR THE FIRST TIME The appliance may produce unpleasant odors when it is used for the first time. This section tells you what you need to do before using your microwave to prepare food for the first time. -
Page 22: Operation
OPERATION CONTROL PANEL AND FEATURES EN-19... -
Page 23: Clock Setting
1. CLOCK SETTING When the microwave oven is plugged into a outlet, "0:00" will display. Press "Clock", "00:00" and "Clock" will appear in the display. The first figure will flash; ":" and other "0" will be lighted. Press the number pads and enter the current clock time. For example, if the time is now 10:12, press "... -
Page 24: Microwave Cook
• The Kitchen Timer setting is different from the Clock setting; it is simply a timer. • During the Kitchen Timer function, no cooking function can be set into operation. NOTE • Kitchen Timer amount cannot be increased by pressing •... -
Page 25: Power Level
• Press "Power Level" once , then press "5" to select 50% microwave power. • Press to start cooking. • In the process of setting, if the pad is pressed or if there is no operation within 1 minute, the oven will automatically return to display the clock. NOTE 4. -
Page 26: One Touch Start
5. ONE TOUCH START Instant cooking at 100% power level and 1 to 6 minutes cooking time can be started by pressing number pads 1 to 6. Press to increase the cooking time by 30 seconds with each press. The maximum cooking time is 99 minutes, 99 seconds. -
Page 27: Lb Defrost
• During defrosting, the oven will beep twice to remind you to turn over the food. Open the door to pause operation. Turn over food, close the door and press to resume defrost cycle. If you do not open door to pause NOTE operation, the oven will continue the defrost cycle without interruption. - Page 28 Example: Potato Sensor Pad Press "Potato" pad once, "SC-4", "Auto" and "SENS." will appear in the display. Press to cook. • Puncture the surface of each potato several times with the times of a fork. • Place up to 4 potatoes on the glass turntable. Keep at least 1 inch of space NOTE between each potato.
-
Page 29: Popcorn
Example: Veggie Sensor Pad Press Vegetable once , "SC-6" will display, to cook fresh vegetable. Press Vegetable 2 times , "SC-7" will display, to cook frozen vegetable. Press to cook. After the cooking time displays, food can be turned over. Oven beeps 5 times when cooking is finished. Sensor cook chart MENU BUTTON FOOD... -
Page 30: Soften/Melt
Press "Auto Cook" four more times, "CC-2, CC-3, CC-4, CC-5" will display in order. After selecting CC setting, press a number pad to select the weight or portion of food item. (Press number pads to enter the weight of food item for CC-4.) Press to cook, "Auto"... -
Page 31: Memory Function
MENU BUTTON FOOD DISPLAY WEIGHT/PORTION Melt-Butter/Margarine 1-3 STICKS Melt-Chocolate 4/8 Oz Melt-Cheese 8/16 Oz Soften/Melt Melt-Marshmallows 5/10 Oz Soften-Butter 1-3 STICKS Soften-Ice cream/Frozen juice 6/12/16 Oz Soften-Cream cheese 3/ 8 Oz 12. MEMORY FUNCTION Press Memory to program and choose up to three cooking procedures. -
Page 32: Multi-Stage Cooking
• To choose the procedure from the memory list, press Memory twice. Screen will display "2". Press to run procedure. 13. MULTI-STAGE COOKING At most 2 stages can be set for cooking. If one stage is Defrost, it will automatically set to be the first stage. -
Page 33: Inquiring Function
• To choose the procedure from the memory list, press "Memory" three times. Screen will display "3"; press to run procedure. • If you do not want to save a particular multi-stage program as a • procedure, do not press Favorite as the first step. Press after NOTE programming both stages. -
Page 34: Other Specifications
17. OTHER SPECIFICATIONS must be pressed to continue cooking if the oven door is opened during cooking. A single beep sounds to indicate that a pad is correctly pressed; if pad is not correctly pressed, no beep sounds. 18. SCREEN-OUT FUNCTION In standby, click the key twice into the black screen save electricity mode. -
Page 35: Cleaning
CLEANING With good care and cleaning, your appliance will retain its appearance and remain fully functioning for a long time to come. We will explain here how you should correctly care for and clean your appliance. • Scratched glass in the appliance door may develop into a crack. Do not use a glass scraper, sharp or abrasive cleaning aids or detergents. - Page 36 CLEANING APPLIANCE FRONT PLATE Hot soapy water: Clean using a dish cloth and then dry with a soft cloth. Remove splashes and patches of limescale, grease, starch and albumin immediately. Corrosion can form under these patches or splashes. Do not use glass cleaners or metal or glass scrapers for cleaning.
-
Page 37: Maintenance
MAINTENANCE TROUBLE SHOOTING Check your problem by using the chart below and try the solutions for each problem. If the microwave oven still does not work properly, contact the following number for customer. TROUBLE POSSIBLE CAUSE POSSIBLE REMEDY a. Electrical cord for oven is not a. -
Page 38: Trouble Shooting
TROUBLE SHOOTING TROUBLE POSSIBLE CAUSE POSSIBLE REMEDY a. Cover or lid over food must a. Cover or lid on food not contain vent hole for escaping vented. steam. Sensor cooked foods b. Door opened before sensor- b. Do not open door to stir or not properly cooked detected cooking time appears turn food before sensor-... -
Page 39: One Year Limited Warranty
If service is required during the warranty period, properly pack your unit. We recommend using the original carton and packing materials. If additional assistance is needed, please contact customer assistance at: customercare@us.toshiba-lifestyle.com 855-204-5313 Midea America Corp. expressly disclaims all responsibility for consequential damages or incidental losses caused by use of the appliance. - Page 40 Details Matter Customercare@us.toshiba-lifestyle.com 855-204-5313...
- Page 41 HORNO MICROONDAS MANUAL DE INSTRUCCIONES ML-EM62P(SS) Lea este manual de instrucciones antes de usar el aparato.
- Page 42 CONTENIDO SEGURIDAD DEL PRODUCTO Precauciones para evitar posibleexposición a excesiva energíade microondas ......SP-01 Instrucciones de seguridad importantes ....................SP-03 Instrucciones de conexión a tierra ......................SP-08 Interferencia de radio ............................. SP-10 Utensilios ................................SP-11 Materiales que se pueden utilizar en el horno de microondas ............SP-12 Materiales que deben evitarse en el horno de microondas ..............
- Page 43 11. Ablandar/derretir ............................SP-28 12. Memoria función ............................SP-30 13. Fase de cocción múltiple ........................SP-31 14. Función de verific ación .......................... SP-32 15. Funcion de bloqueo para niños ......................SP-32 16. Función recordaoria de la terminacion de cocción ..............SP-33 17.
-
Page 44: Seguridad Del Producto
SEGURIDAD DEL PRODUCTO PRECAUCIONES PARA EVITAR POSIBLEEXPOSICIÓN A EXCESIVA ENERGÍADE MICROONDAS (a). No intente operar este horno con la puerta abierta ya que esto puede causar una exposición dañina a energía de microondas. Es importante no quebrar u obstruir los cierres de seguridad. - Page 45 ESPECIFICACIONES MODELO: ML-EM62P(SS) ALIMENTACIÓN 120V~ 60Hz POTENCIA DE ENTRADA 1700W POTENCIA DE SALIDA DE MICROONDAS 1200W CADICAPAD 2.2 PIES CÚBICOS/62L DIÁMETRO DE LA BANDEJA 16.5 inch/420 mm DIMENSIONES EXTERNAS 24.4 19.6 13.6 inch /620x498x346 mm PESO NETO Aproximadamente 43.4 Lbs /19.7 kg Todas las imágenes de este manual son solo para fines ilustrativos;...
-
Page 46: Instrucciones De Seguridad Importantes
INSTRUCCIONES DE SEGURIDAD IMPORTANTES Con el fin de reducir el riesgo de que se produzcanque-maduras, una descarga eléctrica, un incendio, lesiones o exposiciones a la energíamicroondas excesivaalmo-mento de ADVERTENCIA usar este electrodoméstico, siga las siguientes precauciones de seguridad básicas: Lea todas las instrucciones Este electrodoméstico antes de utilizar el debe conectarsea tierra. - Page 47 INSTRUCCIONES DE SEGURIDAD IMPORTANTES Instale y ubique este horno u otrosmateriales solamentedeacuerdo combustibles. con las instrucciones de 2. Retire los cintillos de instalación de este manual. alambre o asas demetal de las bolsas o envases de pa-pel o plástico Como con cualquier otro antes de colocarlos electrodoméstico, debe dentro del horno.
- Page 48 INSTRUCCIONES DE SEGURIDAD IMPORTANTES Los líquidos, tales como dejeque el envase o el agua, café o té pueden recipiente repose dentro sobrecalentarse más allá del horno amicroon- del punto de ebullición das durante un periodo sin parecer haber hervido. corto antes de retirarlo. El burbujeo o hervido 5.
- Page 49 INSTRUCCIONES DE SEGURIDAD IMPORTANTES Esta aplicación se dedica secaralimentos. No solamente para el ha sido diseñadopara usoprivado y édomstico. usos industriales o de laboratorio. Algunos productos como huevos ente-ros y envases No utilice el cerrados herméticamente, electrodoméstico si el por ejemplofrascos de cordón o el enchufe se vidrio, podrían explotar por encuentran daña-dos, si no...
- Page 50 INSTRUCCIONES DE SEGURIDAD IMPORTANTES No permitaque el cordón cuelgue del borde de lamesa o repostero de cocina. No sumerja el cordón ni el enchufe en agua. GUARDE ESTAS INSTRUCCIONES SOLO PARA USO DOMÉSTICO (NO PARA USO COMERCIAL) SP-07...
-
Page 51: Instrucciones De Conexión Atierra
INSTRUCCIONES DE CONEXIÓN A TIERRA Este aparato debe estar conectado a tierra. En caso que se produzca un cortocircuito eléctrico, la conexión a tierra reduce el riesgo de descarga eléctrica al proporcionar una vía de escape para la corriente eléctrica. Este aparato está equipado con un cable que tiene una conexión a tierra con un enchufe a tierra. - Page 52 INSTRUCCIONES DE CONEXIÓN A TIERRA Peligro de descarga eléctrica: El uso inadecuado de la conexión a tierra puede provocar una descarga eléctrica. No lo enchufe en un tomacorriente hasta que el aparato esté correctamente instalado y conectado a tierra. 1. Se proporciona un cable de alimentación corto con el propósito de reducir el riesgo de tropezarse o enredarse con un cable más largo.
-
Page 53: Interferencia De Radio
INTERFERENCIA DE RADIO 1. El funcionamiento del microondas puede causar interferencias en la radio, la televisión o aparatos similares. 2. En caso de interferencia, esta puede ser reducida o eliminada tomando las siguientes medidas: (1). Limpie la puerta y la superficie de sellado del horno. (2). -
Page 54: Utensilios
UTENSILIOS Peligro de lesiones personales Es peligroso para cualquiera que no esté cualificado realizar reparaciones o mantenimiento que supongan retirar la tapa de mica que protege de la exposición a las microondas. Véanse las instrucciones sobre. Materiales que pueden usarse o deben evitarse en el horno PRECAUCIÓN microondas. -
Page 55: Materiales Que Se Pueden Utilizar En El Horno De Microondas
MATERIALES QUE SE PUEDEN UTILIZAR EN EL HORNO DE MICROONDAS UTENSILIOS OBSERVACIONES Siga las recomendaciones del fabricante. El fondo del plato para dorar debe estar al menos 3/16 pulgadas (5mm) por sobre del plato giratorio. Su uso incorrecto Plato para dorar podría provocar que el plato se quiebre. - Page 56 MATERIALES QUE SE PUEDEN UTILIZAR EN EL HORNO DE MICROONDAS UTENSILIOS OBSERVACIONES Utilice sólo productos microondeables. Siga las recomenda-ciones del fabricante. Debe tener una marca que señale que el producto es "Microondeable". Algunos contenedores de plástico se ablandan, pues la comida en su interior se calienta.
-
Page 57: Materiales Que Deben Evitarse En El Horno De Microondas
MATERIALES QUE DEBEN EVITARSE EN EL HORNO DE MICROONDAS UTENSILIOS OBSERVACIONES Podría provocar un arco eléctrico. Transfiera la comida a un plato microondeabe. Bandeja de aluminio Podría provocar un arco eléctrico. Transfiera la comida a un plato microondeable. Comida envuelta con manijas de metal Metal shields the food from microwave energy. -
Page 58: Ajuste Del Producto
AJUSTE DEL PRODUCTO AJUSTANDO SU HORNO DE MICROONDAS NOMBRES DE LAS PARTES DEL HORNO Y ACC ESORIOS Retire el horno y todos los materiales de la caja de cartón y de la cavidad del horno. Su horno posee los siguientes accesorios: Bandeja de vidrio Manual de instrucciones A. - Page 59 CONFIGURE SU HORNO INSTALACIÓN DEL PLATO GIRATORIO Limpie el compartimento de cocción y coloque el plato giratorio Para la nueva instalación, asegúrese de que todo el embalaje y la cinta adhesiva se hayan retirado del eje de la plato giratoria. Antes del primer uso del aparato para la preparación del alimento, tendrá...
- Page 60 CONFIGURE SU HORNO INSTALACIÓN DE ENCIMERO Retire todo el material de embalaje y accesorios. Averigüe el horno para ver si hay daños, como abolladuras o puertas rotas. No instale si el horno está dañado. Armario: Retire cualquier membrana protectora que se encuentre en la superficie del armario del horno de microondas.
- Page 61 CONFIGURE SU HORNO 2. Conecte el horno de microondas en una toma de corriente estándar del hogar. Asegúrese de que el voltaje y la frecuencia sean conformes a los que están indicados en la etiqueta de clasificación. No instale el horno sobre un quemador u otro aparato que genera calor.
-
Page 62: Instrucciones De Uso
INSTRUCCIONES DE USO ANTES DEL USO POR PRIMERA VEZ Este aparato puede producir olores desagradables cuando se usa por primera vez. Esta parte le ayudará a conocer qué tiene que hacer antes de usar su microondas para la preparación de alimento por primera vez. Lee anticipadamente el título de la parte “INSTRUCCIONES DE SEGURIDAD IMPORTANTE”... -
Page 63: Funcionamiento
FUNCIONAMIENTO PANEL DE CONTROL Y FUNCIONES SP-20... -
Page 64: Ajuste De Reloj
1. AJUSTE DE RELOJ Cuando horno de microondas está conectado con el enchufe, se mostrará "0:00". Presione “Clock”, "00:00" y "Clock" aparecerán en la pantalla. La primera figura parpadeará; ":" y "0" se encenderan. Pulsar los botones de números y entrar la hora actual del reloj. Por ejemplo, la hora actual es 10:12, ahora, por favor presione "1, 0, 1, 2"... -
Page 65: Cocción Microondas
• El tiempo de cocina es diferente al sistema de 12 horas, el temporizador de cocina es un temporizador. • Durante el temporizador de cocina, no se podrá establecer cualquier programa. • Suma de tiempo de cocina no se puede aumentar a trav és de presionar NOTA •... -
Page 66: Nivel De Potencia
• Presione "Power Level" una vez, luego presione "5" para seleccionar el 50%de potencia de microonda. • Presione para empezar a cocinar. • En el proceso de la configuraci n, si el botón es pulsado o si no hay ninguna operación en 1 minuto, el horno volverá automáticamente a mostrar NOTA el reloj. -
Page 67: Cocción Rápida
5. COCCIÓN RÁPIDA Una cocción instantánea a nivel de potencia de 100% y de 1a 6 minutos puede empezar con el pulso de los números de 1 a 6. Pulsar Para incrementar tiempo de cocinado por 30 segundos con cada pulsado. El máximo tiempo de cocinado es 99 minutos, 99 segundos. -
Page 68: Descongelaciónde 1 Libra
Presiona botones de nùmero para encontrar el peso a descongelar. "Lbs" se encendera. Introduce el rango de peso entre 0.1-6.0 libras. Si el peso introducido no está entre un 0.1-6.0 libras, la introducción no será válida. La unidad no trabajará hasta que los números válidos estén introducidos. - Page 69 Presiona " " para empezar el proceso de cocinapor sensor. Una vez que el objeto ha sido detectado, el tiempo restante de cocinase mostratá. El horno emitirápitido de 5 veces cuando la cocina ha terminado. • Para obtener mejores resultados decocinapor sensor: a.
- Page 70 • Las comidas que deben evitarse el recalentamiento por sensor. a. Pan y otras comidassecas, tales como galletas o pasteles. b. Alimentos crudos o no cocinados. c. Bebidas y alimentos congelados. • La comida puede ser cubierta, pero la cubierta o la tapa debe ventilarse con un agujero para permitir que el vapor escapa.
-
Page 71: Palomitas
9. PALOMITAS Presione "Popcorn" repetidas veces hasta que el número que desea aparezca en la pantalla, "1.75", "3.0", "3.5" oz aparecerá en orden. "Auto" y "Oz" aparecern en la pantalla. Presione para cocinar, "Oz" desaparecerá, "Auto" se encende. El horon emite cinco sonidos, cuando la cocción termina. - Page 72 Después de seleccionar la funcion SC, presiona el botón de numérico para seleccionar el peso o la porción de comida. Presiona para cocinar, "Auto" se encende. Horno emitirapitido de 5 veces cuando la cocina ha terminado. Tabla de menú de Auto: BOTÓN DE MENÚ...
-
Page 73: Memoria Función
12. MEMORIA FUNCIÓN Presione "Memory" para seleccionar la memoria del procedimiento 1- 3. La pantalla mostrará 1, 2, 3. Pulsar "Memory" hasta que el número deseado del procedimiento aparezca en la pantalla. Pulsar para empezar. Un máximo de dos etapas de cocción puede cjustar para cada procedimiento. -
Page 74: Fase De Cocción Múltiple
• Si desea iniciar el procedimiento grabado en la etapa de espera, presione "Memory" dos veces, la pantalla mostrará "2", luego presione para iniciar. 13. FASE DE COCCIÓN MÚLTIPLE Solo 2 etapas pueden ser programadas como máximo. En la fase cocción múltiple, si una etapa es el descongelamiento, entonces el descongelamiento deberá... -
Page 75: Función De Verific Ación
• Para seleccionar el procedimiento de la lista de memoria, pulsar "Memory" tres veces. En la pantalla se muestra "3"; pulsar para que el procedimiento funcione. • Si no quieres guardar un programa particular de multi-etapa como un procedimiento, no pulsar "Memory" como el primer paso. Pulsar NOTA después del funcionamiento de las dos etapas. -
Page 76: Función Recordaoria De La Terminacion De Cocción
16. FUNCIÓN RECORDAORIA DE LA TERMINACION DE COCCIÓN Cuando la cocción ha terminado, el timbre sonará 5 beep para avisar que la cocción ha terminado. "End" se mostrará. La hora del día aparecerá a través de abrir la puerta o presionarel botón 17. - Page 77 Esta función solo funciona para una cocción completa. Si hace una pausa o abre la puerta del horno durante el enfriamiento, la cocción actual no puede ingresar a la función de reinicio del plato giratorio. En estado de espera, presione la tecla numérica "5" durante 3 segundos, se escuchará...
-
Page 78: Limpieza
LIMPIEZA Con limpieza y mantenimiento adecuados, su aparato mantendrá su apariencia y seguirá funcionando plenamente durante un largo período de tiempo. Explicaremos a continuación para decirle cómo realizar el mantenimiento y la limpieza para su aparato. • El vidrio rayado en la puerta del aparato puede convertirse en una rotura. Se prohíbe usar raspadores de vidrio, productos de limpieza o detergentes afilados o abrasivos. - Page 79 LIMPIEZA CHAPA DE LA PARTE DELANTERA DEL APARATO Agua caliente jabonosa: Utilice un paño de cocina para limpiar y luego seque con un paño suave. Elimine inmediatamente las salpicaduras y manchas de cal, grasa, almidón y albúmina. La parte inferior de estos parches o salpicaduras puede causar la corrosión.
-
Page 80: Mantenimiento
MANTENIMIENTO SOLUCIÓN DE PROBLEMAS Esta guía de mantenimiento y problemas ha sido desarrollada para que el usuario pueda referirse a ella en caso de que algún problema se presente con el aparato. Usted debe revisar esta guía antes de llamar a servicio técnico y determinar que lo que esta presentado el horno no sea posible resolverlo por medio de estas instrucciones. -
Page 81: Solución De Problemas
SOLUCIÓN DE PROBLEMAS PROBLEMA CAUSA POSIBLE POSIBLE SOLUCIÓN a. Utilice solo utensiliospara a. Materiales ajenos estánsiendo microondas. usados. b. Descongele la comidapor b. La comida no esta porcompleto Alimentos crudas completo. descongelada. nococidos c. Revise que laventilación sea c. La ventilación no esadecuada. laadecuada. -
Page 82: Garant A Limitada Por Un Año
Recomendamos el uso de la caja y los materiales de embalaje originales. Para asistencia adicional por favor contacte nuestro servicio de asistencia al cliente bajo el número: customercare@us.toshiba-lifestyle.com 855-204-5313 Midea America Corp. expresamente rechaza cualquier responsabilidad por daños resultantes es o pérdid as accidental es causad as p or el apara. to Algun os estad os no permit en es ta exclusión o limitación de pérdidas resultantes o accidentales, por lo que la limitación de... - Page 84 Details Matter Customercare@us.toshiba-lifestyle.com 855-204-5313...
Need help?
Do you have a question about the ML-EM62P and is the answer not in the manual?
Questions and answers
Purchased the ML-EM62P(SS) through Amazon last December. I can not get the Power Level to adjust at all. Remains at PL10. When I push the Power Level button the PL10 displays but pressing any of the digits has no effect.