Table of Contents
Advertisement
Advertisement
Table of Contents

Related Manuals for Toshiba ML-EM45P


Summary of Contents for Toshiba ML-EM45P
- Page 1 Microwave Oven Instruction ML-EM45P(BS)
-
Page 2: Precautions To Avoid Possible Exposure To Excessive Microwave Energy
(1) DOOR (bent) (2) HINGES AND LATCHES (broken or loosened) (3) DOOR SEALS AND SEALING SURFACES (d) The oven should not be adjusted or repaired by anyone except properly ML-EM45P(BS) Model: Rated Voltage: 120V~ 60Hz 1600W... -
Page 3: Important Safety Instructions Warning
IMPORTANT SAFETY INSTRUCTIONS WARNING When using electrical appliances basic safety precautions should be followed, including the following: WARNING - To reduce the risk of burns, electric shock, re, injury to persons or exposure to excessive microwave energy: 1. Read all instructions before using the appliance. 2. - Page 4 IMPORTANT SAFETY INSTRUCTIONS WARNING 1). Do not overcook food. Carefully attend appliance when paper, plastic, or other combustible materials are placed inside the oven to facilitate cooking. 2). Remove wire twist-ties from paper or plastic bag before placing bag in oven. 3).
-
Page 5: Grounding Instructions
GROUNDING INSTRUCTIONS This appliance must be grounded. In the event of an electrical short circuit, grounding reduces the risk of electric shock by providing an escape wire for the electric current. This appliance is equipped with a cord having a grounding wire with a grounding plug. - Page 6 GROUNDING INSTRUCTIONS RADIO INTERFERENCE 1. Operation of the microwave oven may cause interference to your radio, T V or similar equipment. 2. When there is interference, it may be reduced or eliminated by taking the following measures: 1) Clean door and sealing surface of the oven 2) Reorient the receiving antenna of radio or television.
-
Page 7: Materials You Can Use In Microwave Oven
MATERIALS YOU CAN USE IN MICROWAVE OVEN UTENSILS REMARKS Browning dish Follow manufacturer* instructions. The bottom of browning dish must be at least 3/16 inch (5mm) above the turntable. Incorrect usage may cause the turntable to break. Dinnerware Microwave-safe only. Follow manufacturer's instructions. Do not use cracked or chipped dishes. -
Page 8: Setting Up Your Oven
SETTING UP YOUR OVEN NAMES OF OVEN PARTS AND ACCESSORIES Remove the oven and all materials from the carton and oven cavity. Your oven comes with the following accessories: Glass tray Turntable ring assembly Instruction Manual A) Control panel B) Turntable shaft C) Turntable ring assembly D) Glass tray E) Observation window... -
Page 9: Countertop Installation
SETTING UP YOUR OVEN COUNTERTOP INSTALLATION Remove all packing material and accessories. Cabinet: Remove any protective lm found Examine the oven for any damage such as on the microwave oven cabinet surface. dents or broken door. Do not install if oven is Do not remove the light brown Mica cover damaged. -
Page 10: Operation
OPERATION 1. Power Level Ten power levels are available. Number key Level Power 100% PL10 Display 2. Clock Setting When the microwave oven is plugged into a outlet, the oven will display " 0:00 " 1) Press " CLOCK ", the screen will display 00:00 . The hour gure will ash; ":" and other "0"... -
Page 11: Auto Defrost
OPERATION 3) Press " POWER LEVEL " once, the screen will display "PL10". The default power is 100% power. Now you can press number keys to adjust the power level. 4) Press " START/30SEC. " to start cooking. Example: to cook the food with 50% microwave power for 15 minutes. a. -
Page 12: Sensor Reheat
OPERATION 8.Sensor Cook 1) In waiting state, put the food in the oven press the menu key in the sensor cook 2) Press "START/30SEC ." to start sensor cook function and no need to set time. 3) When the steaming is emanated, the surplus time will display. The buzzer will sound 5 beeps when nishing. - Page 13 OPERATION 5)The sensor reheat has different request for different food. Casseroles- Add to 4 tablespoons of water, cover with lid or vented plastic wrap. Stir when time appears in the display window. Canned foods-Empty contents into casserole dish or serving bowl,cover dish with lid or vented plastic wrap.
-
Page 14: Custom Cook
OPERATION POPCORN In standby mode, press the Popcom button and the display displays the default amount of popcorn. For example, press " POPCORN " once, "3.5" displays. 2) Press " START/30SEC. " START" sign extinguished. CUSTOM COOK 1) Press " AUT0/COOK " repeatedly until the menu you needed appears in t h e display. 2) After choosing the menu, press a number pad to select the weight or portion of the food. -
Page 15: Memory Function
OPERATION 11. SOFTEN/MELT 1) Press " SOFTEN/MELT " repeatedly until the menu you needed appears in thedisplay. 2) After choosing the menu, press a number pad to select the weight or portion of the food. 3) Press "START/30SEC. " to cook. Auto M enu Chart: Weight/ Food... -
Page 16: Inquiring Function
OPERATION d. Press " MEMOR Y " to save the current setting. If press " START/30SEC.",the cooking program can be operated and save it as memory 2. e. To run the saved program, in waiting states, press " MEMORY " twice, "2" displays and press "START/30SEC."... - Page 17 OPERATION 16. COOKING END REMINDING FUNCTION When the cooking is over, the screen will display "End" to reminds user the cooking is nished. In order to make the appliance into the normal operating state, please press " STOP / CANCEL " or open the door . 17.
-
Page 18: Maintenance
MAINTENANCE TROUBLESHOOTING Check your problem by using the chart below and try the solutions for each problem. If the microwave oven still does not work properly, contact the nearest authorized service center. TROUBLE POSSIBLE CAUSE POSSIBLE REMEDY a. Electrical cord for oven is a. - Page 20 Customer Assistance: 855- -5313 Midea America Corp 5 Sylvan Way, Parsippany, NJ 07054...
Need help?
Do you have a question about the ML-EM45P and is the answer not in the manual?
Questions and answers
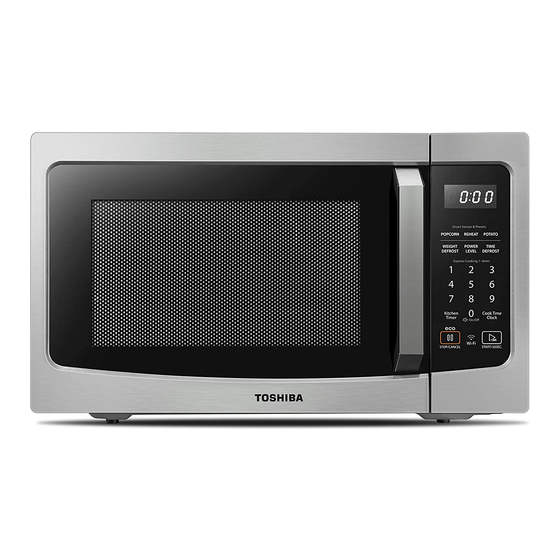
is the 3" on each side and 12" above absolutely required and if so why. I am locating on a closet shelf TOSHIBA ML-EM45P(BS) Countertop Microwave Oven with Smart Sensor
Yes, the Toshiba ML-EM45P countertop microwave oven requires a 3-inch clearance on each side and 12 inches above.
This answer is automatically generated
Why is this space required
I **** having trouble resetting the time. I follow the instructions, but when I hit the "clock" button, it shows 09:00. one of the number buttons work to reset the time. If I hit the Clock button one more time, it changes to the timer. Then the number buttons work. What is wrong?
The correct method to set the clock on the Toshiba ML-EM45P(BS) microwave, according to the instructions, is:
1. Press the Clock/Timer button once.
2. Enter the desired time using the number pad.
3. Press the Clock/Timer button again to confirm the time.
However, users have reported issues where the microwave enters Timer mode instead of allowing them to set the clock. If this occurs, it may indicate a design flaw or a widespread issue with this model. If the steps above do not work, contacting Toshiba support may be necessary.
This answer is automatically generated