Advertisement
Advertisement
Table of Contents

Related Manuals for Goblin IB34050018


Summary of Contents for Goblin IB34050018
- Page 1 Instructions 340 Series...
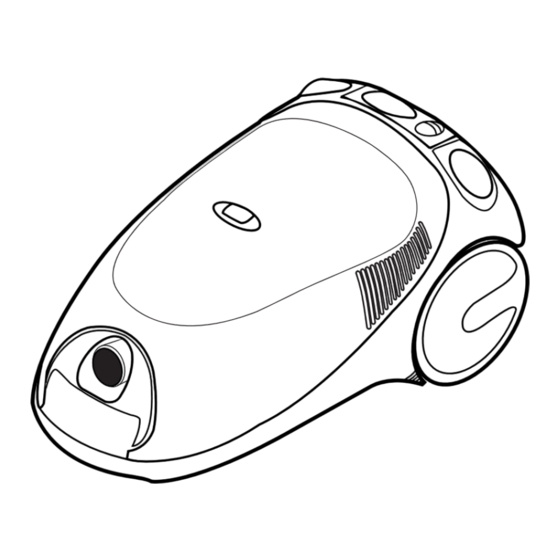
- Page 2 fi ‚ „ fl ¤ ‡ · › Ë ‹ ⁄ Á ‰ Ê Â ⁄ Carrying handle ‚ On/off power foot pedal ¤ Dustbag compartment lid release „ Electronic power control (certain models) ‹ Hose inlet ‰ Stair-Lock bracket (certain models) ›...
-
Page 3: Important User Information
Electrical connection and supply Check that the supply voltage details given on the letter ‘N’ or is coloured black. the rating plate are in accordance with your This appliance is double insulated and must not electricity supply. be connected to the terminal of the plug which Important The wires in the mains lead of this may be marked with the letter ‘E’... - Page 4 Using your Goblin vacuum cleaner Assembly • turn fully clockwise for maximum suction for carpets, hard floors etc. To fit the hose to the cleaner, insert the hose • turn anti-clockwise for reduced suction end into the hose inlet ‹ until it clips securely for upholstery and curtains.
-
Page 5: Replacing/Emptying The Dustbag
Replacing/emptying the dustbag To obtain the best results from your cleaner be sure to change the dustbag when necessary, otherwise the airflow and cleaning power will be reduced. When the dustbag condition indicator › shows fully red and performance deteriorates, first check if there are any blockages in the accessories or tubes. - Page 6 6 Slide the clip back onto the bottom of the dustbag and replace the dustbag into position ensuring the collar is firmly secured at the base F. 7 Pull forward as shown G so it locks under the plastic securing tab at the top. 8 Important Ensure the plastic seal is pushed down otherwise it will not be possible to fit the hose.
-
Page 7: Cleaning And Replacing The Filters
Cleaning and replacing the filters Motor protection filter Ê This is in the dustbag compartment. Clean it everytime you change/empty the dustbag and replace it after approximately 5 dustbag changes. 1 Lift out the red filter as shown H and clean by tapping. -
Page 8: Care And Maintenance
Storage The floor nozzle can be secured on the underside of the cleaner when it is stood on end by locating the bracket found on the nozzle into the slot provided. Care and maintenance ALWAYS DISCONNECT FROM THE MAINS BEFORE with a damp cloth will help maintain its good WORKING ON OR CLEANING YOUR CLEANER. - Page 9 Guarantee and service procedure If you suspect a fault, first of all carry out the However, should your vacuum cleaner become following simple checks: defective during the guarantee period, please 1 Check the filters - be certain that they have not return it to your nearest Authorised Service Agent, been blocked by fine dust.
Need help?
Do you have a question about the IB34050018 and is the answer not in the manual?
Questions and answers