Advertisement
USE OF THE MANUAL
Before using the helmet, you must carefully read the documentation and any integrations thereof that comes with the product. The documentation is an integral part of the product and must be kept throughout the lifespan of the helmet.
The AGV User Manual consists of two volumes, one general volume extended to the whole of the range helmets and one for the specific helmet model.
Dainese S.p. A. reserves the right to make changes to the product and to the respective documentation without notice. To make sure that you have the documentation in the most recent update available, contact an AGV Service Centre.
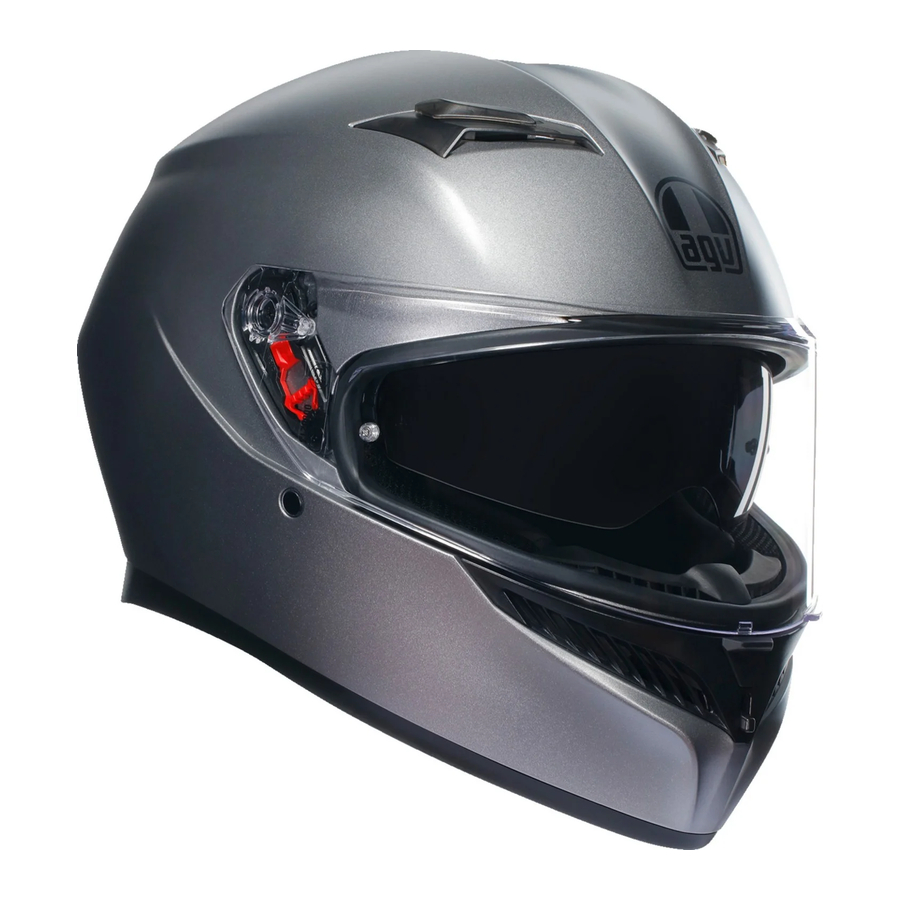
The products shown in the images are considered to be indicative and may differ from the product purchased.
WORDINGS AND SYMBOLS
| Prerequisite | Preliminary and/or preparatory requirement to a procedure of removal, installation, handling or cleaning of the components. |
 | Single action in a sequence of actions. |
| › | Conclusion and/or the result of an operation. |
 Prescription and/or precautionary measure to be taken carefully. Failure to comply may result in damage to the product, the possible impairment of the warranty and/or a decrease in the performance of safety.
 Information and/or tip for a more effective actuation, handling, control, adjustment, maintenance and cleaning.

HELMET EQUIPMENT
STANDARD, INCLUDED ACCESSORIES
The following accessories are included. Make sure they are present immediately after purchase. If any of these are missing, please contact an AGV Service Centre.
User Safety Manual
AGV helmet fabric bag
Wind protection
AGV sticker
Pinlock® 70 anti-fog lens
THIS HELMET'S SHELL OF THE K3 HELMET IS MADE OF THERMOPLASTIC RESIN THIS HELMET'S LINER IS MADE OF POLYSTYRENE (EPS)
AFTERMARKET ACCESSORIES
For more information about the available accessories for K3, go to the store at www.agv.com or contact an AGV Service Centre.
K3 can only be fitted with original AGV accessories. Please contact an AGV Service Centre if you have any questions or concerns regarding compatibility or assembly.
VISOR
VISOR MECHANISM

› Upper catch seating  ;
;
› Teeth on visor mechanism base  ;
;
› Visor lock  ;
;
› Visor lock slider  .
.
REMOVING/FITTING THE VISOR

The non-scratch polycarbonate visor is fitted with catches which click into the visor mechanism base. The visor tooth interact with the teeth on the mechanism base to provide stability when the visor is open in different positions.
› Upper catch ;
› Visor tooth ;
› Lower catch .
Only use AGV GT6 visors.
We recommend that you carry out the following tasks with the helmet resting on a level surface.

To remove the visor, raise it to the fully open position .

Start on one side of the helmet by pulling the visor lock slider downwards and detach the catches from the visor. Repeat on the other side and remove the visor.

To fit the visor, start on one side of the helmet with the visor fully raised and insert the upper catch into its seating on the mechanism base .

Next, insert the visor lower catch into the visor lock (pulling the slider downwards may help)  . Repeat on the other side of the helmet. Lower the visor and make sure it is working properly.
N.B. It the visor does not line up properly with the rubber seal on the helmet, you may need to adjust or replace the visor mechanism base. In such case, contact AGV for assistance.
SUN VISOR
Made of scratch-resistant polycarbonate, the sun visor improves comfort and offers protection from UV radiation. Transmittance varies between 20% and 35% depending on approvals. The position can be adjusted based on the shape of the nose.
The sun visor must only be used during the day in optimal visibility conditions. It must never be used at night, at dawn, at sunset, or when weather conditions do not allow perfect visibility.
OPERATION AND ADJUSTMENT

To lower the sun visor, push the operating slider  towards the back of the helmet .
Once lowered, the sun visor can be adjusted by regulating the last 5 mm of travel.
Do not operate the sun visor without using the predefined cursor.
REMOVAL AND INSTALLATION

Prerequisite: in a seated position, rest the helmet on your knees. Lower the sun visor.
Grasp the sun visor and push it towards the inside of the shell until the plastic tab  detaches from its housing
  as in figure .
Repeat the operations above on the other side mechanism.
To install the sun visor, repeat the previous operations in reverse order, taking care to ensure correct movement.
PINLOCK® ANTI-FOG LENS
A hydrophilic plastic device with anti-fog features capable of absorbing humidity.
By fitting precisely into the specially shaped seat on the inner surface of the visor, it creates an air pocket that limits the onset of fogging without compromising the field of view.
Anti-fog devices delay the formation of condensation, but do not guarantee that the problem will not occur. Such devices delay the onset of the problem. Therefore, under extreme environmental conditions, fogging of the visor may occur.
It is strongly recommended the use of Pinlock ® lens with air temperatures below 20°C and/or humidity levels above 70% and/or in the rain.
The Pinlock ® lens should be handled with care and without the use of tools that could scratch it or abrade its surface.
INSTALLATION
Prerequisite: the visor is removed from the helmet and has been thoroughly cleaned. The lens is resting on the inner surface of the visor, facing so that the silicone gasket is in contact with the visor.

Stretch the visor slightly by grasping it at the ends .

Attach the lens  to the eccentric pawls of the visor; first on one side, then on the other. Ensure that the silicone gasket of the lens adheres perfectly to the visor along its entire length .
Remove the protective film from the lens and install the visor on the helmet.
REMOVAL
Prerequisite: remove the visor from the helmet. Stretch the visor slightly by grasping it at the ends .
Lift the lens by acting on its lower central part, then release it from the eccentric pawlsi on the visor; first on one side, then on the other .
The lens is now detached. Remove it.
The Pinlock® lens should be handled with care and without the use of tools that could scratch it or abrade its surface.
TENSIONING
See the illustrative document included in the Pinlock

VENTILATION SYSTEMS

› Polystyrene ducting ;
› Front air vents ;
› Chin air vent ;
› Upper air extractor .
OPENING/CLOSING THE FRONT VENTS

To open/close the front air vents, push the slider until you hear it click which indicates it is locked in position and .
VISOR MICRO OPENING

To operate the visor micro opening system, push the central slider on the chin guard upwards to open the micro-opening system, push down wards to close .
INTERNAL COMPONENTS

› Crown pad ;
› Cheek pads ;
› Wind-proof chin strap protection .
REMOVING/FITTING CHEEK PADS
Prerequisite: in a seated position, place the helmet upside-down on your knees.

To remove the cheek pads, hold them in front near the chin guard and pull them in the direction of the arrow to free them from the press studs .

Slide the plastic flap out of its position and remove the cheek pads .

To put the cushions back in place, insert the plastic strip in its rear slots and in the relative pins on the side of the cover .

To refit the cheek pads, slide them into the helmet and fasten them into place with the press studs  .
.
Make sure that the cheek pads are properly fastened to the helmet.
REMOVING/FITTING THE WIND-PROOF CHIN STRAP PROTECTION
Prerequisite: in a seated position, rest the helmet on your knees.

To fit the fabric protector, mesh the teeth on the chin guard with the edge of the base and .

To remove the protection first detach the side clips one at a time and then the one in the middle .
REMOVING/FITTING THE CROWN PAD
Prerequisite: in a seated position, place the helmet upsidedown on your knees.
To remove the crown pad from the front hooks then at the rear .
Reverse the process to fit the pad.

ACCESSORIES

Only use original AGV accessories.
To know which are the original AGV accessories go to www.agv.com.
The use of non-original accessories may compromise the safety of the helmet and will render all product warranty null and void. Dainese Spa shall reject all responsibility in case of use of non-original accessories (e.g. communication systems, action camera, visors and other accessories).
FASTENING SYSTEMS
There are three types of fastening systems: Double "D", Quick release mechanism, Micrometric fastener.
Below are the instructions for using these three systems.
DOUBLE "D" RETENTION SYSTEM
To fasten the helmet, pass the strap between the two rings , pull the end of the strap until the belt presses against your jaw and fasten the press-stud , asshown in the diagram.
Check that the helmet is secure (see also the section entitled "Choice of appropriate helmet" in the "Safety Warning" booklet).
To loosen the helmet, undo the press-stud by pulling the end of the strap and loosen the strap through the rings, using the red tab, as shown in the diagram .

N.B. THE PRESS STUDS/VELCRO ON THE RETENTION SYSTEM.
ARE NOT FOR FASTENING THE HELMET BUT ONLY TO PREVENT FLAPPING:
THEY MUST NOT BE USED AS AN ALTERNATIVE FOR FASTENING THE STRAP.

MICROMETRICALLY ADJUSTABLE STRAP RETENTION SYSTEM
The micrometrically adjustable strap retention system needs the strap to be adjusted for length before being fastened.

The following instructions and diagrams show you how to adjust the length of the strap by increasing or decreasing the amount which passes through the ring until the helmet fits perfectly with the strap fastened.

To fasten the helmet, insert the pronged section into the buckle and press it firmly home until you feel the strap pressing against your jaw.
The micrometric adjustment system allows even more precise "calibration" of the strap for improved comfort thanks to the number of setting available. (We recommend however that you insert the strap as far into the buckle as possible). Make sure that the helmet fits your head perfectly (also see "Choosing the right helmet" in the "Safety Warning" booklet).

To unfasten the helmet, lift the red lever with the help of the fabric tape then slide the strap out of the buckle .
Documents / Resources
References
Download manual
Here you can download full pdf version of manual, it may contain additional safety instructions, warranty information, FCC rules, etc.
Advertisement


Need help?
Do you have a question about the K3 and is the answer not in the manual?
Questions and answers