Table of Contents
Advertisement
Quick Links
WARNING:
To reduce the risk of injury to persons - Use this
operator only with Residential Sectional Garage
doors.
WARNING:
To reduce the risk of injury to persons - Use this operator only with Residential Sectional Garage doors.
Owner's Manual
Owner's Manual
Please read and understand this manual and safety instructions carefully before installation.
• Please read and understand this manual and safety instructions carefully before installation.
The Opener WILL NOT CLOSE until the Photo Eye Safety System is properly installed and aligned.
• The Opener WILL NOT CLOSE until the Photo Eye Safety System is properly installed and aligned.
• REGULARLY CHECK and TEST the Opener according to the safety label to ENSURE SAFE OPERATION.
REGULARLY CHECK and TEST the Opener according to the safety label to ENSURE SAFE OPERATION.
• If using the unattended operation feature, use ONLY with sectional doors.
Retain this manual for future reference.
• Retain this manual for future reference.
Serial # __ __ __ __ __ __ __
Serial # __ __ __ __ __ __ __
Located on label on the side of your opener.
Located on the label on top of your opener.
The illustrations used in this instruction manual may differ from the actual product you have purchased.
GDO Manual Revised: 01-25
Date Installed __ __ /__ __ /__ __ __ __
Date Installed __ __ /__ __ /__ __ __ __
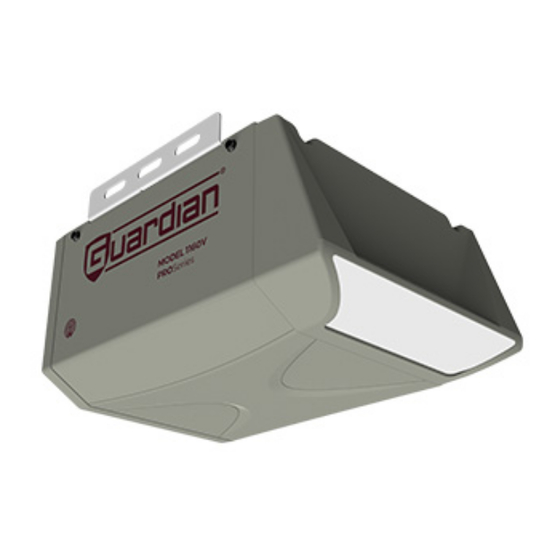
MODEL 1160V
PRO Series
Works with the beam
Smart Controller
Chain Or Belt
Drive
GDOMU15A-10
Advertisement
Table of Contents

Related Manuals for Guardian 1160V


Summary of Contents for Guardian 1160V
- Page 1 MODEL 1160V WARNING: To reduce the risk of injury to persons - Use this PRO Series operator only with Residential Sectional Garage doors. WARNING: To reduce the risk of injury to persons - Use this operator only with Residential Sectional Garage doors.
-
Page 2: Table Of Contents
Table of Contents Inventory Symbols and Icons Inventory and Hardware Needed Safety Instructions Prepare / Sectional Garage Door / Tools Requeried Assembly Assembling T-Rail to Operator / Tension the Belt and Chain (Optional) Installation Mounting Header Bracket Attaching Rail to Header Bracket and Door Bracket Mounting Opener to Ceiling Attaching Door Arms Emergency Release Handle... -
Page 3: Inventory
5. Manual 6. Photo Eyes 7. Door Bracket 8. Header Bracket 9. Door Arms MODEL 1160V PRO SERIES Hardware Needed INSTALLATION HARDWARE, LOCATED IN HARDWARE BAG* (SHOW ACTUAL SIZE 1:1) Clevis Pin Long 5/16” x 2-1/4”’ Screw #6 x 1-3/8’’... -
Page 4: Safety Instructions
Safety Instructions IMPORTANT INSTALLATION INSTRUCTIONS WARNING o reduce the risk of severe injury or death: 1. READ AND FOLLOW ALL INSTALLATION INSTRUCTIONS. 2. Install only on a properly balanced garage door. An improperly balanced door has the potential to inflict severe injury. Have a qualified service person make repairs to cables, spring assemblies, and other hardware before installing the opener. -
Page 5: Prepare / Sectional Garage Door / Tools Requeried
Preparation WARNING To prevent SERIOUS INJURY or DEATH: - Before beginning installation of the Opener please complete the following test to ensure that your door is balanced and in good working condition. - A poorly balanced door can cause serious injury and damage to the Opener. - Always have a qualified garage door service technician make any required adjustments and /or repairs to your door before proceeding with installation. -
Page 6: Assembling T-Rail To Operator / Tension The Belt And Chain (Optional)
Assembling T-rail WARNING To prevent SERIOUS INJURY: - DO NOT connect power until instructed. - Keep hands and fingers clear from sprocket during operation. - Wear gloves when installing chain/belt and cable. - Keep hands and fingers away from joints and possible sharp edges. To Assemble the Rail 1. -
Page 7: Mounting Header Bracket
Mounting Header Bracket WARNING To prevent SERIOUS INJURY: - DO NOT connect power until instructed. - The Header Bracket MUST be SECURELY fastened to the structural support on the mounting wall or ceiling, otherwise the door may not reverse when required. DO NOT install the Header Bracket over drywall. -
Page 8: Attaching Rail To Header Bracket And Door Bracket
Attaching Rail to Header Bracket and Door Bracket CAUTION To prevent SERIOUS INJURY: - DO NOT connect power until instructed. - Horizontal and vertical REINFORCEMENT is recommended for the top panel of fiberglass, aluminum or light weight steel garage doors BEFORE installing the door Bracket. Contact your door manufacturer for door strut and vertical reinforcement options. -
Page 9: Mounting Opener To Ceiling
Mounting Opener to Ceiling WARNING To prevent SERIOUS INJURY or DEATH: - DO NOT connect power until instructed. - Install the Opener at least 7 feet (2.13m) above the floor. - Fasten the Opener SECURELY to STRUCTURAL SUPPORTS of the garage to prevent falling. - If installing Brackets to masonry, concrete anchors (not provided) MUST be used. -
Page 10: Attaching Door Arms
Attaching Door Arms WARNING To prevent SERIOUS INJURY: - DO NOT connect power until instructed. - Keep hands and fingers away from the sprocket during operation. - Wear gloves when installing chain/belt and cable. - Keep hands and fingers away from joints and possible sharp edges. To Connect Door Arm 1. -
Page 11: Emergency Release Handle
Installing Emergency Release Handle WARNING To prevent SERIOUS INJURY or DEATH from a falling garage door: - In case of power failure or door obstruction, PULL EMERGENCY HANDLE to release door from Opener. - When Emergency Release is in the released position, the door can be operated manually. - To reconnect, flip the lever on the Trolley towards Opener, back to Connect position, it will reconnect automatically upon pressing Door Control Console or Remote Control. -
Page 12: Wiring Instructions
Wiring Instructions WARNING To prevent SERIOUS INJURY or DEATH from electrocution: - Power MUST NOT be connected until instructed. - NO exposed part of the wire should be visible outside of the terminal for proper connection. In the following section, the Photo Eye Safety System and Push Button will be connected to the Opener. -
Page 13: Connecting Photo Eye Safety System
Connecting Photo Eye Safety System WARNING To prevent possible SERIOUS INJURY or DEATH: - Power MUST NOT be connected BEFORE Photo Eye Safety system is connected and aligned. - The Opener will not operate until the Photo Eye Safety System is properly connected and aligned. - Install the Photo Eyes NO higher than 6”... -
Page 14: Connecting Push Button
Connecting Push Button WARNING To prevent SERIOUS INJURY or DEATH from electrocution: - Power MUST NOT be connected until instructed. To prevent SERIOUS INJURY or DEATH from using the Push Button and a closing door: - Install the Push Button within sight of the door at a minimum height of 5 feet (1.5m) above the floor. Make sure it is out of the reach of children and moving parts of door and hardware. -
Page 15: Connecting Power
Connecting Power WARNING To prevent possible FROM ELECTROCUTION or FIRE: - Power MUST be DISCONNECTED BEFORE proceeding with permanent wiring procedures. - Garage Door Opener installation and wiring MUST be in compliance with all local electrical and building codes. Make sure the Opener is ALWAYS grounded. - NEVER use an extension cord, 2-wire adapter or modify the power plug in any way to make it fit the outlet. -
Page 16: Travel Limit Adjustment Up
Travel Limit Adjustment UP WARNING To prevent SERIOUS INJURY or DEATH from improper Force Adjustment: - DO NOT adjust force manually to compensate for binding or sticking of the garage door. Call a qualified garage door service technician to make necessary adjustments in case of binding. - DO NOT manually increase the force required for closing the door. -
Page 17: Travel Limit Adjustment Down
Travel Limit Adjustment DOWN WARNING To prevent SERIOUS INJURY or DEATH from improper Force Adjustment: - DO NOT adjust force to compensate binding or sticking of the garage door. Call a qualified garage door service person to make necessary adjustments in case of binding. - DO NOT increase force beyond minimum force required for closing the door. -
Page 18: Auto Force Adjustment
Auto Force Adjustment WARNING To prevent possible SERIOUS INJURY or DEATH: - DO NOT adjust force to compensate binding or sticking of the garage door. Call a qualified garage door service technician to make necessary adjustments in case of binding. - DO NOT increase force beyond minimum force required for closing the door. -
Page 19: Final Adjustment And Testing
Final Adjustments and Testing WARNING To prevent SERIOUS INJURY or DEATH from a closing garage door: - The Safety Reversal Test MUST be conducted ONCE A MONTH. - NO ONE should cross the path of and moving door during operation and/or testing. - After ANY adjustments to the door system, the Safety Reversal Test MUST be performed to ensure the door reverses on contact with a 1-1/2 inch (3.8 cm) thick (2x4 laid flat) object. -
Page 20: Programming Remote Control
Programming Remote Controls WARNING To prevent possible SERIOUS INJURY or DEATH: - Keep remote control and battery out of reach of children. - NEVER permit children to access the Deluxe Door Control Console or Remote Controls. - Operate the door ONLY when it is properly adjusted, and there are no obstructions present. - ALWAYS keep a moving door in sight until completely closed. -
Page 21: Important Safety Instructions
Important Safety Instructions IMPORTANT SAFETY INSTRUCTIONS WARNING To reduce the risk of severe injury or death: 1. READ AND FOLLOW ALL INSTRUCTIONS. 2. Never let children operate or play with door controls. Keep the remote control away from children. 3. Always keep the moving door in sight and away from people and objects until it is completely losed. -
Page 22: Operating The Opener
Operating the Opener WARNING To Prevent SERIOUS INJURY or DEATH: - READ AND FOLLOW ALL INSTRUCTIONS AND WARNINGS IN THE OWNER’S MANUAL AND LABELS. - Keep Remote Control and battery out of reach of children. - NEVER permit children to access the Door Control Console, Push Button or Remote Controls. - Operate the door ONLY when it is properly adjusted, and there are no obstructions and is in clear sight. -
Page 23: V3 Installation
Operating the Opener WARNING To prevent SERIOUS INJURY or DEATH: - Use emergency release to disconnect the motor ONLY when the door is CLOSED to prevent unexpected rapid falling in case of a unbalanced / poor-conditioned door. - Use emergency release ONLY when doorway is clear of persons and obstructions. - DO NOT use emergency release to pull the door open or closed. - Page 24 beam Wi-Fi Smart Controller Installation (Optional) WARNING To reduce the risk of INJURY to persons: - Disconnect ALL electric power BEFORE performing ANY service or maintenance. - Operate the door ONLY when it is properly adjusted, and there are no obstructions present. - Use this Smart Garage Door Controller only with Residential Sectional Garage Doors.
-
Page 25: Maintenance & Troubleshooting
(Refer to pages 16-18 to reset the travel limits & travel force). SYMPTOM: During limit learn mode, if door travels only 1” to 28” then stops. • Check RPM encoder connections or replace RPM encoder (call service tech). Please contact Guardian Tech Support for further assistance. www.adhguardianusa.com... -
Page 26: Installation And Accessory Parts
(Refer to pages 16-18 to reset the travel limits and the travel force). Please contact Guardian Tech Support for further assistance. SYMPTOM: Door travels 1” to 12” then stops, and beeps 25 times •... -
Page 27: Repair Parts
Repair Parts Installation Parts Name/Description Part number GUAT-027 Header Bracket GUAT-022 Door Bracket GUAT-023 Hardware Bag GUAT-024 Curved Door Arm GUAT-025 Straight Door Arm GUAT-026 Emergency Release Handle & Rope Accessories Name/Description Part number GUAT-201 Photo Eyes Remote Control STDPBX Push Button CR2032 Remote Control Battery (CR2032) -
Page 28: Opener Assembly Parts
Opener Assembly Parts Part number Name/Description GUDT-416 Receiver/Logic Board End Panel Assembly GUDT-301 Chassis 1160V GUDT-323 DC Motor GUDT-314 Encoder Module GUDT-321 Transformer GUDT-417 Opener Cover GUDT-418 Front Panel, LED strip Part number Name/Description 1 GUDT-419 Back Panel 2 GUDT-420... -
Page 29: Warranty
Your operator has been installed by a professional installation specialist. If service information is required please contact the installing company or your local Guardian dealer. Look for your Guardian dealer on line, in the yellow pages or call our service number for a dealer near you.
Need help?
Do you have a question about the 1160V and is the answer not in the manual?
Questions and answers