TP-Link Tapo C720 / TC55 / TC53 Manual
- Quick start manual (2 pages) ,
- Quick start manual (2 pages) ,
- Quick start manual (71 pages)
Advertisement
About This Guide
This guide provides a brief introduction to the Smart Floodlight Camera and the Tapo app, as well as regulatory information.
Please note that features available in Tapo may vary by model and software version. Tapo availability may also vary by region. All images, steps, and descriptions in this guide are only examples and may not reflect your actual Tapo Camera experience.
Conventions
In this guide, the following convention is used:
| Convention | Description |
| Blue | Key information appears in blue, including management page text such as menus, items, buttons and so on. |
| Underline | Hyperlinks are in blue and underlined. You can click to redirect to a website. |
 Note: Note: | Ignoring this type of note might result in a malfunction or damage to the device. |
More Info
- Specifications can be found on the product page athttps://www.tapo.com.
- Our Technical Support and troubleshooting information can be found athttps://www.tapo.com/support/.
Introduction
Light the Night Up with Ultra-Bright Floodlights
Upgrade your outdoor security with 2800lm motion-activated floodlights, 2K QHD full-color video, integrated siren, and more. Monitor your yard from anywhere, day and night.
- 2800lm Angle-Adjustable Floodlights – Light up your yard, garage, or any other specific zone with high-intensity 2800 lumens and angle-adjustable lighting.
- 2K QHD Color Night Vision – Enhances your security with crystal-clear 2K QHD full-color images and vivid details even at night.
- Motion-Activated – Deftly identifies moving objects and turns on the floodlights within a 270°detection zone.
- Customizable Sound Alarm – Record your customized audio as an alarm that plays when motion is detected.
- Smart AI Detection with Motion Tagging – Check live views with tagged movement when a person, pet, vehicle is detected.
- 270° Motion-Activated Floodlights – Deftly identifies moving objects and turns on the floodlights automatically within a 270° detection zone.
- 150° Wide FOV – A wide FOV up to 150° provides a larger detection range covering more space.
- Two-Way Audio – Enables communication through a built-in microphone and speaker.
- IP65 Weatherproof – Offers excellent waterproof and dustproof performance for outdoor scenarios.
- Local and Cloud Storage – Save recorded video on a microSD card* (up to 512 GB). No subscription required. Cloud storage** is also supported for added flexibility.
*microSD card needs to be purchased separately. Actual storage capacity depends on the size of the microSD card used.
**Subscribe for cloud storage at https://www.tapo.com/tapocare/
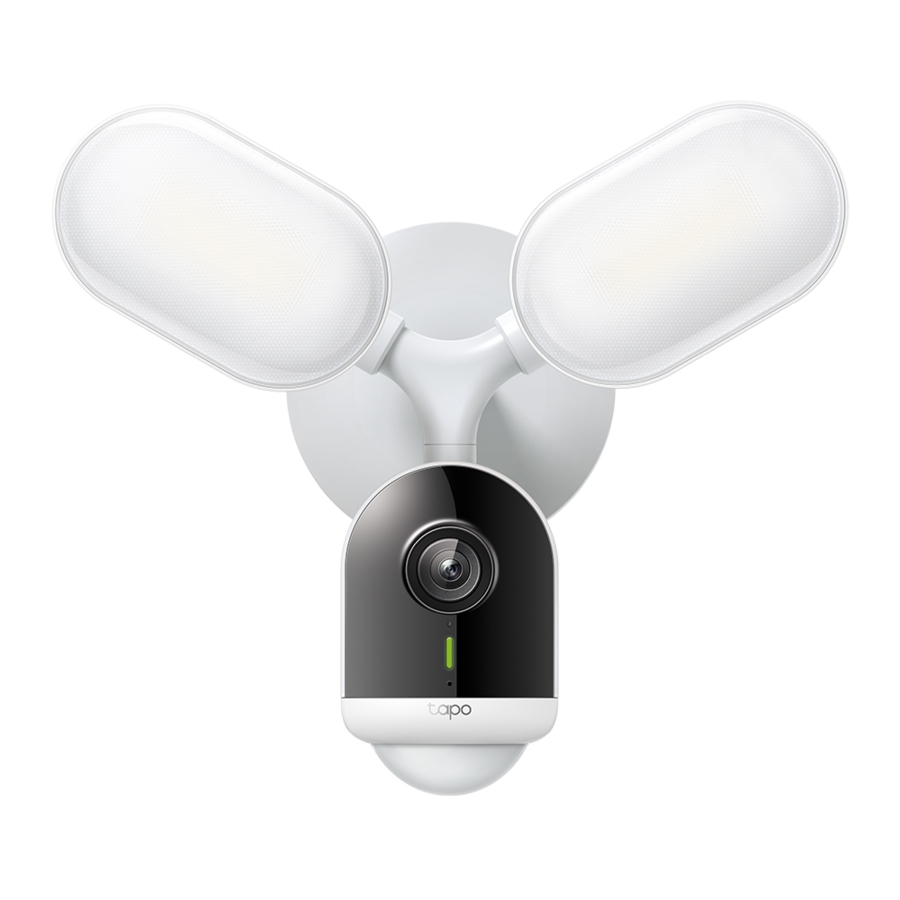
Appearance

- Floodlights
- Camera Lens
- System LED
- Motion Sensor
- Light Sensor
- Microphone
- Speaker
- Reset button*
- Camera Adjustment Knob
- microSD Card Slot**
*Reset Button
While the camera is powered on, press and hold the RESET button for at least 5 seconds until the System LED blinks red. The camera will reset and reboot.
**microSD Card Slot
Loosen the screws and insert a microSD card. Initialize it on the Tapo app for local recording.
microSD card not included

System LED Indication
| Solid red | Starting up |
| Blinking red and green | Ready for setup |
| Blinking red slowly | Connecting to Wi-Fi |
| Solid amber | Connected to Wi-Fi |
| Solid green | Connected to the cloud |
| Blinking red quickly | Camera resetting |
| Blinking green quickly | Camera updating |
Mount Your Camera
You can mount your Tapo smart floodlight camera vertically on a wall or overhang under an eave. Make sure the area has a strong Wi-Fi signal.


For Wall Mount
Ensure the UP arrow on the bracket points up.
*To install horizontally, adjust the bracket to ensure the air bubble in the level is centered.
For Eave Mount
Point the UP arrow on the bracket towards your house.
Before You Start

Risk of Electric Shocks
- Disconnect power at the fuse or circuit breaker before installing.
- Verify that the power supply voltage is correct. Connect fixture to a 110-240 VAC 50/60 Hz power source.
- Always follow code standards when installing wired connections.
- Install only on a UL-listed junction box or on a wall with a Neutral wire and a Line wire.
- An all-pole mains switch shall be incorporated in the electrical installation of the building. And the contact separation of the switch shall not be less than 3 mm.
- You can always find detailed wiring and mounting instructions in the Tapo app.
![www.apple.com]()
![play.google.com]()
OR
![]()
![]()
![]()


If you are unfamiliar with basic electrical wiring, please consult a licensed electrician.
NOTICE
- Do not install near combustible or flammable surfaces.
- Do not connect this light fixture to a dimmer switch or timer.
Option 1: Install on an existing junction box
The floodlight camera can be mounted on a junction box on a wall or under an eave. Accessories as below may vary from US and EU versions.

- Turn off the circuit breaker. Make sure the power is off by turning your light on and off a few times.
![shock hazard]() Take care to avoid electric shocks.
Take care to avoid electric shocks.
![]()
- Remove the existing floodlight camera and disconnect wires from the junction box.
![]()
- Choose a pair of plate screws based on your junction box. Install the mounting plate to the junction box.
![]()
- Cover the Ground wire (usually green/green and yellow) with the provided wire nut. Route the Neutral wire (usually white/blue) and the Line wire (usually black/brown/red) through the bracket.
Note: To identify wire colors, you can refer to https://www.tp-link.com/support/faq/3474/
![]()
- Connect the Neutral and Line wires (recommended strip length: 10-15 mm [0.4-0.6 in.]) to the silicone holes in the bracket. Secure the wires with a slotted screwdriver.
Note: Do not expose stripped wires outside the waterproof silicone holes. If the wires are too short, stiff, or soft to connect, refer to https://www.tp-link.com/support/faq/3883/
![]()


- Hide the wires in the junction box. Attach the bracket to the mounting plate on the junction box with the bracket screw.
![]()
- Insert the camera screws into the screw holes. Align the mounting posts on the bracket with the holes on the floodlight camera. Tighten the camera screws in the screw holes to secure the floodlight camera to the bracket. Insert the screw caps into the screw holes.
![]()
- Adjust the camera and light position to the desired angles.
![]()
- Turn on the circuit breaker. Wait until the System LED blinks red and green for setup.
Note: Floodlights are auto-on in darkness upon power-up. Avoid direct eye contact at close range to prevent eye injury.


Option 2: Install with existing electrical wires
Install where the Neutral wire and Line wire are available. Accessories as below may vary from US and EU versions.

- Turn off the circuit breaker. Make sure the power is off by turning your light on and off a few times.
![shock hazard]() Take care to avoid electric shocks.
Take care to avoid electric shocks. - Route the wires through the mounting template and place the template. Drill two holes where indicated.
- Insert two wall anchors into the holes. Route the wires through the mounting bracket. Use the screws to affix the bracket over the anchors.
Size of Mounting Screws:
![]()
- Cover the Ground wire (usually green/green and yellow) with the provided wire nut.
Note: To identify wire colors, you can refer to https://www.tp-link.com/support/faq/3474/

- Connect the Neutral (usually white/blue) and the Line (usually black/brown/red) wires (recommended strip length: 10-15 mm [0.4-0.6 in.]) to the silicone holes in the bracket. Secure the wires with a slotted screwdriver.
Note: Do not expose stripped wires outside the waterproof silicone holes. If the wires are too short, stiff, or soft to connect, refer to https://www.tp-link.com/support/faq/3883/
![]()
- Hide the wires in the bracket. Insert the camera screws into the screw holes. Align the mounting posts on the bracket with the holes on the floodlight camera. Tighten the camera screws in the screw holes to secure the floodlight camera to the bracket. Insert the screw caps into the screw holes.
![]()
- Adjust the camera and light position to the desired angles.
![]()
- Turn on the circuit breaker. Wait until the System LED blinks red and green for setup.
Note: Floodlights are auto-on in darkness upon power-up. Avoid direct eye contact at close range to prevent eye injury.


Set Up Your Camera
Follow the steps below to get started with your new camera.
- Download Tapo App
Get the Tapo app from the App Store or Google Play, or by scanning the QR code below.
![www.apple.com]()
![play.google.com]()
OR
![]()
![]()
- Log In
Open the app, and log in with your TP-Link ID. If you don't have an account, create one first.
![]()
- Add Your Camera
Tap the![]() button > Add Device in the app and search for your model. Follow the app instructions to complete setup.
button > Add Device in the app and search for your model. Follow the app instructions to complete setup.
![]()


Set Up Using Amazon Frustration-Free Setup
Note: Only Tapo C720 supports Amazon Frustration-Free Setup.
What is Amazon Frustration-Free Setup?
Amazon Frustration-Free Setup can help connect and set up Tapo smart devices in fewer steps, without having to remember and re-enter your Wi-Fi password on each device.
To use this feature, confirm the following:
- The new Tapo device supports Amazon FFS.
- The new Tapo device is purchased from Amazon.
- You have an Amazon FFS enabled Alexa device or router.
- You have saved your Wi-Fi information to Amazon by using Alexa echo.
- Your Tapo device and router are on the same network as your Alexa echo.
LED Indications during Amazon Frustration-Free Setup
| LED | Status |
| Blinking red and green | Ready for setup |
| Blinking amber | FFS setup in progress |
| Solid green | Working properly |
If the LED does not turn solid green after a long time, you can try to add the Tapo device manually. (Press the Reset button on your Tapo device once.
Then open the Tapo app, tap the + button on the page, select your device model, and follow the app instructions. )
How to use Amazon Frustration-Free Setup with Tapo devices
- Open the Amazon Alexa app. Then tap More and select Skills & Games.
![]()

- Enter Tapo in the search bar and choose Tapo.


- Tap the ENABLE TO USE button.
![]()
- Log in with your TP-Link ID that has bound to your Tapo device, and tap Authorize. After authorized successfully, the message Tapo has been successfully linked will come up.

- Plug in your Tapo device and the setup will complete automatically in two minutes.
For setting up more Tapo devices, just plug in and enjoy!


Done!
If this device displays on the Home page in the Tapo app, it indicates this device has been successfully associated with your Amazon account and joined your Wi-Fi network automatically.
If this device does not display on the Home page in the Tapo app, try setting it up manually. (Tap the + button on the page, select your device model, and then follow the app instructions.)
Safety Information
- Keep the device away from fire or hot environments. DO NOT immerse in water or any other liquid.
- Do not disassemble, repair or modify the product.
- Do not use the device where wireless devices are not allowed.
- Do not use the product if the casing has been broken. Danger of electric shock.
- Never touch the product with wet hands.
- It is NOT recommended to expose this product to heavy rain or any type of moisture.
- Do not place near automatically controlled devices such as fire alarms. Radio waves emitted from this product may cause such devices to malfunction resulting in an accident.
- Observe restrictions on using wireless products in fuel depots, chemical plants or when blasting operations are in progress.
- Do not use liquid to clean the product. Only use a dry cloth.
- Never put metal objects inside the product. If a metal object enters the product turn off the circuit breaker and contact an authorised electrician.
- This product is not intended to be used when providing medical care. Consult the manufacturer of any personal medical devices, such as pacemakers or hearing aids to determine if they are adequality shielded from external RF (radio frequency) energy.
- Do not use this product in health care facilities. Hospitals or health care facilities may be using equipment that could be sensitive to external RF energy.
- The product should be kept free from excessive smoke, dust or high temperature and vibration.
- Avoid direct sunlight for better performance.
- Do not place heavy objects on top of the product.
- This product may interfere with other electronic products such as TV, radios, personal computers, phones or other wireless devices.
- The light source of this luminaire is not replaceable; when the light source reaches its end of life the whole luminaire shall be replaced.
- Operating Temperature: -20°C ~ 45°C (-4°F ~ 113°F)
Please read and follow the above safety information when operating the device. We cannot guarantee that no accidents or damage will occur due to improper use of the device. Please use this product with care and operate at your own risk.
Explanation of the symbols on the product label
Note: The product label is on the back of the product. Symbols may vary from products.


Documents / Resources
References
How to Identify Different Wires by Their Colors | TP-Link
What if the Electrical Wiring is too Short, Frail, or Rigid to Connect When Installing a Tapo Floodlight Camera? | TP-Link
Tapo | Smart Devices for Smart Living
Support | Tapo
Tapo Care | Tapo
![www.apple.com]() App Store - Apple
App Store - Apple![play.google.com]() Google Play
Google Play
Download manual
Here you can download full pdf version of manual, it may contain additional safety instructions, warranty information, FCC rules, etc.
Advertisement


Need help?
Do you have a question about the Tapo C720 and is the answer not in the manual?
Questions and answers