Advertisement

Conventions
In this guide, the following convention is used:
| Convention | Description |
| Teal | Key information appears in teal, including management page text such as menus, items, buttons and so on. |
| Underline | Hyperlinks are in teal and underlined. You can click to redirect to a website. |
More Info
- Specifications can be found on the product page at https://www.tp-link.com.
- Our Technical Support and troubleshooting information can be found at https://www.tp-link.com/support/.
- A TP-Link Community is provided for you to discuss our products at https://community.tp-link.com.
- Frequently Asked Questions (FAQs) can be found at https://www.tp-link.com/support/faq/.
Introduction
This guide provides a brief introduction to the Kasa Spot Pan Tilt and the Kasa Smart app, as well as regulatory information.
Features available in Kasa Smart may vary by model and software version. Kasa Smart availability may also vary by region or ISP. All images, steps, and descriptions in this guide are only examples and may not reflect your actual Kasa Smart experience.
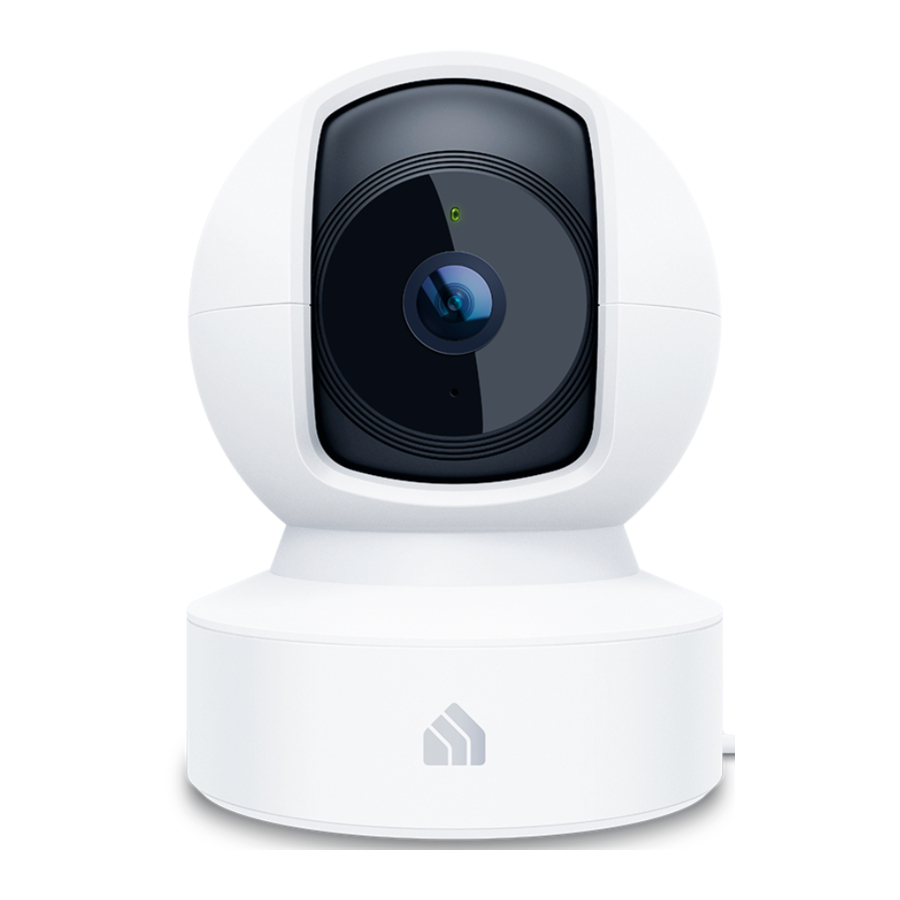
With the Kasa Spot Pan Tilt connected to your home network, you can get the full picture of any space in your apartment, dorm or home. With a 360° horizontal view and 118° vertical view, the Pan Tilt has everything covered. With Motion Tracking and Patrol Mode, track activity from beginning to end and set multiple distinct viewpoints for your camera to monitor at set intervals.

- Crystal Clear Video – Sharp and clear 1080p Full HD provides high-quality video right in the palm of your hand.
- Pan and Tilt – Swipe up, down, left and right on your phone to rotate and set the camera's point of view.
- Motion Tracking – When motion activity is detected, Kasa Spot Pan Tilt tracks and follows the subject to keep it within the camera's field of view.
- Cloud Storage Plans – Upgrade your Kasa Care subscription plan and enjoy video recordings for up to 30 days.
- Patrol Mode – Set 4 distinct viewpoints and program your pan tilt camera to keep an eye on each region at intervals of your choosing.
- Night Vision – Even in the dark, the camera has Night Vision up to 30 feet. Never miss a thing at night and still get the same high-quality video you're used to.
- Instant Activity Alerts – No need to check your Kasa Spot Pan Tilt throughout the day. Get automatic alerts when it detects motion. Take quick action when you see your pet on the couch, a roommate walking through your room, or an intruder enter your front door.
- Two-Way Audio - Use crisp two-way audio to communicate with nosy roommates, family or even mischievous pets.
- Activity Zones - Control what alerts you receive by creating up to 16 custom activity zones, at no charge, around areas that are important to you.
Appearance
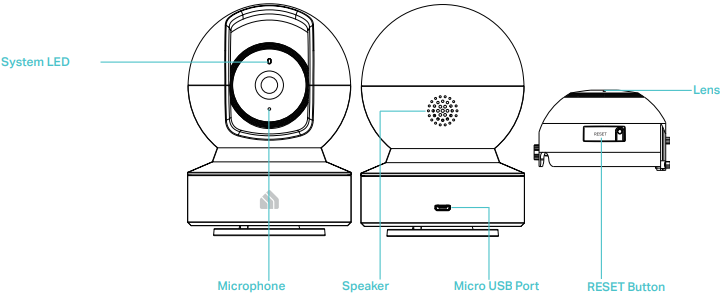
Kasa Spot Pan Tilt has a system LED that changes color according to its status, a lens, microphone, speaker, micro USB port and a RESET button.
System LED
![]() Solid amber: Rebooting
Solid amber: Rebooting
![]() Alternating amber and green: Ready for setup
Alternating amber and green: Ready for setup
![]() Flashing red: Connecting to Wi-Fi
Flashing red: Connecting to Wi-Fi
![]() Flashing green: Connected to Wi-Fi
Flashing green: Connected to Wi-Fi
![]() Solid green: Bound to Cloud
Solid green: Bound to Cloud
![]() Flashing amber: Resetting to SoftAP/Factory mode
Flashing amber: Resetting to SoftAP/Factory mode
Microphone Built-in internal microphone.

Speaker The sound comes out of the camera.
Micro USB Port Connect the power cord provided.
RESET Button Tilt your camera lens up to find the RESET button.
- Press and hold for 3 to 15 seconds: Reset to SoftAP mode
- Press and hold for over 15 seconds: Reset to Factory mode
Set Up Your Camera
Follow the steps below to get started with your new camera.
Step 1. Download Kasa
Get the Kasa Smart app from the Apple App Store or Google Play, or by scanning the QR code below.
Step 2. Log In
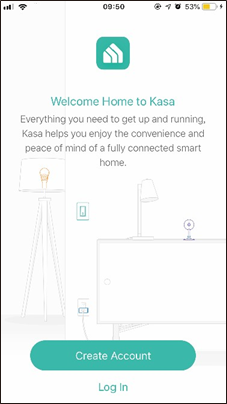
Open the app, and log in with your TP-Link ID.
If you don't have an account, create one first.
Step 3. Start Setup
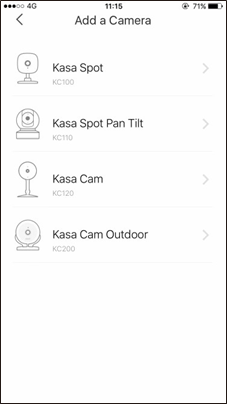
Tap the ![]() button in the Kasa app and select Cameras > Kasa Spot Pan Tilt.
button in the Kasa app and select Cameras > Kasa Spot Pan Tilt.
Step 4. Configure Camera
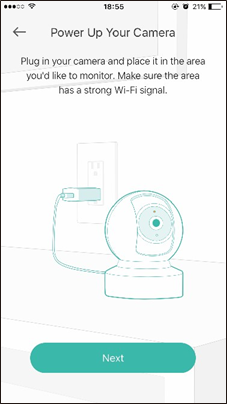
Follow app instructions to configure your camera and add it to your home network.
Step 5. Place Camera
Place your camera on a flat surface, or install it on a wall or ceiling with the provided indicator label and mounting screws.
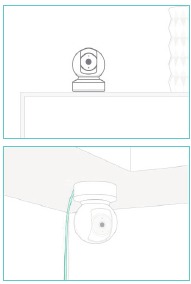
- For cement wall: Drill two φ6mm holes with the help of indicator label, insert the plastic expansion tubes into holes and screw the mounting screws into the expansion tubes.
- For soft surface: Directly screw the screws in.
Main Device Controls
After you successfully set up your camera, you will see the home page of the Kasa app and the camera page. .
Home Page
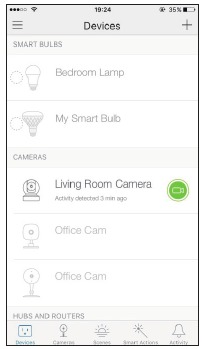
This page lists your cameras and other smart home devices if any. You can instantly turn on or off the recording function of the camera.
Camera Page
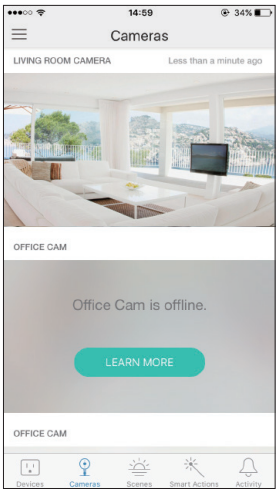
This page lists all your cameras and you can view all cameras directly and manage them easily.
Use Your Camera
Tap a camera, then view and manage it with the Kasa app.
View the Live Video
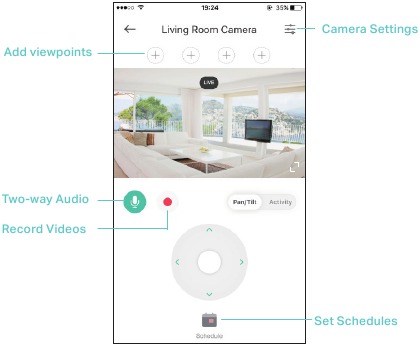
You can view your camera from anywhere at any time. Use Pan/Tilt to rotate your camera to monitor every angle of your room.
Check Activities
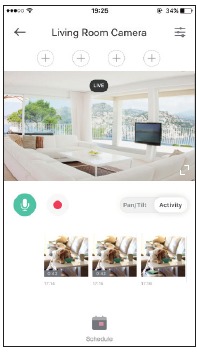
When you receive an instant alert, you can view live video immediately or check the video clips recorded in the past 3 hours under Activity.
Change Camera Settings
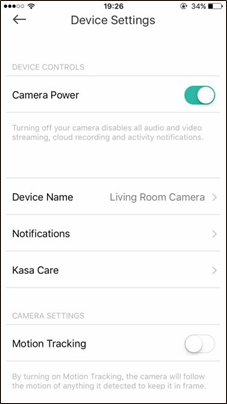
Change the settings of your camera to meet various needs, such as change your camera name, set activity notifications, enable Motion Tracking function, and customize Patrol Mode.
Set Schedules
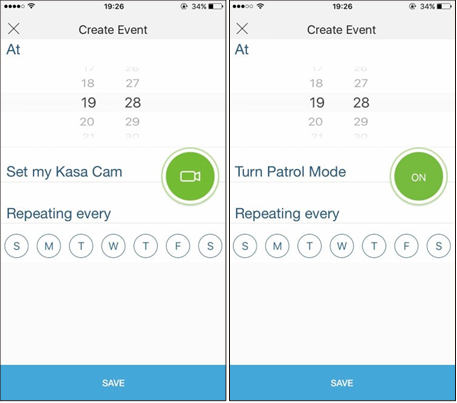
Create schedules to automatically turn alerts, activity clips and camera privacy on and off, or customize when to turn Patrol Mode on and off.
Check Activity Notifications

Get automatic alerts when it detects motion. You can view all video clips and activity notifications on each date in Activity Center.
Work with Other Smart Home Productss
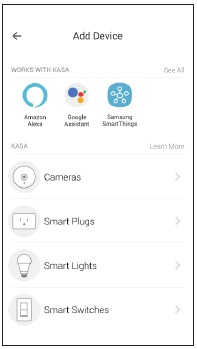
Tap the ![]() button on the home page, and add more TP-Link devices or other devices that work with Kasa.
button on the home page, and add more TP-Link devices or other devices that work with Kasa.

Documents / Resources
References
![www.tp-link.com]() WiFi Networking Equipment for Home & Business | TP-Link
WiFi Networking Equipment for Home & Business | TP-LinkTP-Link Product Support - Wireless Networking Equipment Support
https://community.tp-link.com
TP-Link Frequently Asked Questions - FAQS
![www.apple.com]() App Store - Apple
App Store - Apple![play.google.com]() Google Play
Google Play
Download manual
Here you can download full pdf version of manual, it may contain additional safety instructions, warranty information, FCC rules, etc.
Advertisement


Need help?
Do you have a question about the KC110 and is the answer not in the manual?
Questions and answers