Table of Contents
Advertisement
Available languages
Available languages
Quick Links
Advertisement
Chapters
Table of Contents

Related Manuals for BUTURE VC60


Summary of Contents for BUTURE VC60
- Page 1 User Manual Cordless Vacuum Cleaner VC60...
- Page 2 Language English 01~18 Deutsch 19~36 Français 37~54 Español 55~72 Italia 73~90 日本語 91~107...
-
Page 3: Table Of Contents
tech-support@ibuture.com Content 1. WARNING 2. PACKAGE LIST 3. KNOW YOUR PRODUCT 3.1 Product Details 3.2 Digital Display Screen 3.3 Accessories Function 4. PRODUCT ASSEMBLY 4.1 Install the Battery Pack 4.2 Install Full Vacuum Cleaner 5. HOW TO USE 6. MAINTENANCE 6.1 Main Body Cleaning 6.2 Dust Cup and Filters Cleaning 6.3 Brush Roller Cleaning... -
Page 4: Warning
1. WARNING Thank you for purchasing the BUTURE VC60 cordless vacuum cleaner. Before using this machine, please read the following safety warning first and take safety protection measures to avoid malfunctions caused by improper operation. The product provides a free 2-year warranty by default. -
Page 5: Package List
Please check and confirm the accessories and parts according to the following sheet before using. Main Body*1 Telescopic Tube*1 Motorized Brush*1 (Roller installed) Long Crevice Tool *1 2 in 1 Brush*1 Extra Hepa & Sponge Filter Adapter*1 Stick Vacuum Cleaner VC60 Wall Mount (with screw*3,expansion tube*3) Aromatic Tablet*1 Cleaning Brush*1 Quick User Guide*1... -
Page 6: Know Your Product
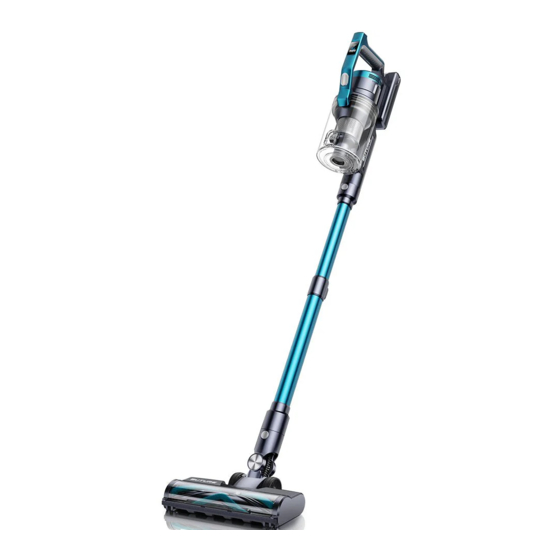
tech-support@ibuture.com 3. KNOW YOUR PRODUCT 3.1 Product Details 3.2 Digital Display Screen Speed Adjustment Switch Button Button Charging Port Display Screen Battery Release Button Dust Cup Air Outlet of the Release Button Fragrance 50 % Dust Cup Dust Empty Button Suction Level Battery Low Battery Detachable Battery... -
Page 7: Accessories Function
tech-support@ibuture.com 3.3 Accessories Function • • Long Crevice Nozzle 2 in 1 Upholstery Brush Remove dust on the hard-to-reach areas like windows, bed Easy to snap-on, and can help you remove dust and hairs in feet, gaps between sofa, etc. keyboard or on the carpet. -
Page 8: Product Assembly
tech-support@ibuture.com 4. PRODUCT ASSEMBLY ② 4.1 Install the Battery Pack Directly Install Cleaning Accessories Insert the battery pack into the main body in the direction guided as the photo below. 4.2 Install Full Vacuum Cleaner ① ③ Install Extention Tube & Cleaning Accessories Install Wall Mount... - Page 9 tech-support@ibuture.com ④ According to different needs, the length of the tube can be adjusted. ⑤ According to different needs, place or take out the aromatic tablet. WARNING • Please make sure there is no gas, water, or electrical cables and wires behind the mounting area. •...
-
Page 10: How To Use
tech-support@ibuture.com 5. HOW TO USE ② 5.1 Charging Hang on the wall mount to charge. When the battery indicator on the display screen is under 30% or the following animation appears, the vacuum cleaner needs to be charged as soon as possible. ③... - Page 11 tech-support@ibuture.com 5.2 Operating Warning: 1. Do not exceed the "MAX" dust collection capacity of the dust cup. 2. Please keep the suction nozzle unobstructed and avoid blockage. Otherwise, the motor will overheat and cause danger. • Press the switch button to start work Speed control button Switch button •...
-
Page 12: Maintenance
tech-support@ibuture.com 6. MAINTENANCE Warm Tips: • Please clean the vacuum cleaner regularly to extend its lifespan. • After cleaning the parts of the vacuum cleaner, please wait until they are completely dry before reinstalling them on the vacuum cleaner. 6.1 Main Body Cleaning •... -
Page 13: Dust Cup And Filters Cleaning
tech-support@ibuture.com 6.2 Dust Cup and Filters Cleaning ① Empty the Dust Cup • • When the garbage in the dust cup exceeds MAX Line, please Press the dust empty button to empty the dust. empty it in time. ② Remove the Dust Cup and Filters •... - Page 14 tech-support@ibuture.com ③ Clean the Dust Cup and Filters with Water (Warning: make sure the dust cup and filters are completely dry before installation.) ④ Install the Dust Cup and Filters • • Put the filters into dust cup, the sponge is placed under the Press the dust cup release button and reinstall it on the vacuum HEPA.
-
Page 15: Brush Roller Cleaning
tech-support@ibuture.com 6.3 Brush Roller Cleaning Ensure the appliance is disconnected from the charger before removing the roller brush. Be careful not to pull the ON button. ① ② Push the button to the “unclock" sign, remove the brush Remove the debris wrapped around the roller with the roller mini cleaning brush ③... -
Page 16: Specifications
7. SPECIFICATIONS Product Cordless Vacuum Cleaner Model VC60 Rated Voltage DC 25.9V Battery Type Li-ion Cleaning Mode MANUAL... -
Page 17: Troubleshooting
tech-support@ibuture.com 8. TROUBLESHOOTING If there is any problem during use, please check the following troubleshooting table. If the problem can't be solved, please contact the after-sales email: tech-support@ibuture.com 8.1 Abnormal Indicator * When the vacuum cleaner does not work properly, there will be a corresponding fault remind animation on the screen, please check it in time. Floor brush clogging reminder, please check Low battery warning, please charge in time. -
Page 18: Other Common Trouble
tech-support@ibuture.com 8.2 Other Common Trouble Common Trouble Possible Causes Solutions 1. Low battery power 1. Charge before use 2. Automatic protection triggered by excessive 2. Clean the floor brushes, dust suction ports or air inlet Vacuum can not work temperature due to blockage filters, and restart after cooling down 3. - Page 19 tech-support@ibuture.com Common Trouble Possible Causes Solutions 1. Replace a battery 1. Battery damaged Battery indicator does not 2. Check whether the adapter is plugged in. 2. Wrong charger used light up when charging 3. Make sure to use the original charger, the specification is: 3.
-
Page 20: Warranty
9. WARRANTY • Warranty Service BuTure cordless vacuum cleaner has a two-year warranty. To extend the warranty to 3 year, please contact tech-support@ibuture.com in time to activate. The warranty includes: free maintenance of the cordless stick vacuum, free replacement of defective parts, including battery, filters, floor brush, dust container, charger and motor. - Page 21 tech-support@ibuture.com Katalog 1. WARNUNG 2. LIEFERUMFANG 3. IHR PRODUKT KENNEN 3.1 Produkt-Details 3.2 Touch-Display 3.3 Zubehör Funktion 4. DIAGRAMM ZUR PRODUKTMONTAGE 4.1 Setzen Sie den Akku ein 4.2 Installieren Sie einen kompletten Akku Staubsauger 5. VERWENDUNG 6. WARTUNG 6.1 Reinigen Sie den Hauptkörper 6.2 Reinigen Sie den Staubbehälter/Filters 6.3 Reinigung von Bürstenrollen 7.
-
Page 22: Warnung
1. WARNUNG Vielen Dank, dass Sie sich für den Akku Staubsauger BUTURE VC60. Bevor Sie dieses Gerät verwenden, lesen Sie bitte zuerst die folgende Sicherheitswarnung und ergreifen Sie Sicherheitsmaßnahmen, um Fehlfunktionen durch unsachgemäßen Betrieb zu vermeiden. 2-Jahres-Garantie 3 Jahre Dieses Produkt wird standardmäßig mit einer kostenlosen... -
Page 23: Lieferumfang
Bitte überprüfen und bestätigen Sie das Zubehör und die Teile gemäß dem folgenden Blatt, bevor Sie es verwenden. Hauptkörpar*1 Teleskoprohr*1 Elektrobürste*1 (Installierte Rollen) Fugendüse*1 2 in 1 Bürste*1 Extra Hepa- & Schwammfilter Ladegerät*1 Stick Vacuum Cleaner VC60 Wandhalterung*1 dufttablette*1 Kleine Reinigungsbürste*1 Kurzanleitung*1... -
Page 24: Ihr Produkt Kennen
tech-support@ibuture.com 3. IHR PRODUKT KENNEN 3.1 Produkt-Details 3.2 Touch-Display Speed Adjustment EIN/AUS Taste Button Ladeanschluss Display-Bildschirm Entriegelungstaste für Akku Entriegelungstaste für Staubbehälter 50 % Luftauslass Staubbehälter Anzeige für niedrigen Batterien Entriegelungstaste Saugmodusanzeige Akku für Staubentleerung in Prozent Batteriestand Motor Entriegelungstaste für Teleskoprohr Teleskoprohr Taste für Längeneinstellung... -
Page 25: Zubehör Funktion
tech-support@ibuture.com 3.3 Zubehör Funktion • • Fugendüse 2-in-1-Bürste Entfernen Sie Staub an schwer zugänglichen Stellen wie Einfaches Design zum Aufschnappen. Kann Ihnen helfen, Fenstern, Bettfein, Zwischenraumen zwischen Tischen und Staub und Haare vom Teppich. Stuhlen, etc. • • Wandhalterung Mini Reinigungsbürste Befestigen Sie Ihren Akku-Staubsauger und Zubehör zur Entfernen Sie Haare, Mull und Mikrostaub vom Burstenschaft, einfachen Aufbewahrung am Wandregal. -
Page 26: Diagramm Zur Produktmontage
tech-support@ibuture.com 4. DIAGRAMM ZUR PRODUKTMONTAGE ② 4.1 Setzen Sie den Akku ein Direkte Installation von Reinigungszubehör Setzen Sie den Akku in der in der Abbildung unten gezeigten Richtung in die Hauptkörpar ein. 4.2 Installieren Sie einen kompletten Akku Staubsauger ① ③... - Page 27 tech-support@ibuture.com ④ Je nach Bedarf kann die Länge des Schlauchs eingestellt werden La longueur du tube est réglable en fonction des besoins. ⑤ Je nach Bedarf die Dufttabletten platzieren oder entfernen. Awarnung • Achten Sie darauf, dass sich hinter dem Montagebereich keine Gas, Wasseroder Elektrokabel und leitungen befinden.
-
Page 28: Verwendung
tech-support@ibuture.com 5. VERWENDUNG ② 5.1 Aufladen Zum Aufladen an die Wandhalterung hängen. Wenn die Batterieanzeige auf dem Bildschirm unter 30 % liegt oder die folgende Animation angezeigt wird, muss der Staubsauger so schnell wie möglich aufgeladen werden. ③ Laden Sie den Akku direkt auf. Drei Lademethoden ①... -
Page 29: Betrieb
tech-support@ibuture.com 5.2 Betrieb Awarnung: 1. Überschreiten Sie nicht die "MAX"-Linie des Staubbechers . 2. Vermeiden Sie ein Verstopfen der Saugdüse, was zu einer Überhitzung des Motors führen könnte. • Drücken Sie die EIN/AUS Taste, um mit der Arbeit zu beginnen. Taste für EIN/AUS Taste Saugeinstellung... -
Page 30: Wartung
tech-support@ibuture.com 6. WARTUNG Tipps: • Bitte reinigen Sie ihn regelmäßig, um die Lebensdauer des Staubsaugers zu verlangern • Nachdem Sie die Teile des Staubsaugers gereinigt haben, warten Sie, bis sie vollständig getrocknet sind, bevor Sie ihn wieder auf den Staubsauger setzen. 6.1 Reinigen Sie den Hauptkörper •... -
Page 31: Reinigen Sie Den Staubbehälter/Filters
tech-support@ibuture.com 6.2 Reinigen Sie den Staubbehälter/Filters ① Leeren Sie den Staubbehälter • • Wenn der Abfälle im Staubbehälter die MAX-Linie überschreitet, Drücken Sie die Staubentleerungstaste, um den Staub zu entleeren. leeren Sie ihn bitte rechtzeitig. ② Entfernen Sie den Staubbehälter und die Filter •... - Page 32 tech-support@ibuture.com ③ Reinigen Sie den Staubbehälter und die Filter mit Wasser (Tipps: Stellen Sie sicher, dass vor der Installation vollständig trocken sind.) ④ Installieren Sie die Staubbehälter/filter • • Setzen Sie die Filter in den Staubbehälter ein, der Schwamm Drücken Sie die Entriegelungstaste des Staubbehälters und setzen Sie wird unter den HEPA filter gelegt.
-
Page 33: Reinigung Von Bürstenrollen
tech-support@ibuture.com 6.3 Reinigung von Bürstenrollen Stellen Sie sicher, dass das Gerät vom Ladegerät getrennt ist, bevor Sie die Bürstenrolle entfernen. Achten Sie darauf, dass Sie nicht an der ON-Taste ziehen. ① ② Drücken Sie den Knopf auf das Zeichen "Entriegeln" und Entfernen Sie den um die Bürstenrolle gewickelten Schmutz mit der nehmen Sie die Bürstenrolle heraus. -
Page 34: Specification
7. SPECIFICATION Produkt Kabelloser Staubsauger Modell VC60 Nennspannung DC 25.9V Akku-Typ Li-ion Reinigungsmodus MANUELL... -
Page 35: Fehlerbehebung
tech-support@ibuture.com 8. FEHLERBEHEBUNG Wenn während der Verwendung Probleme auftreten, lesen Sie bitte die nachstehende Tabelle zur Fehlerbehebung. Wenn das Problem nicht gelöst werden kann, wenden Sie sich bitte an die Kundendienst-E-Mail: tech-support@ibuture.com 8.1 Abnormaler Indikator * Wenn der Staubsauger nicht richtig funktioniert, erscheint auf dem Bildschirm eine entsprechende Animation, die Sie daran erinnert. Bitte prüfen Sie, ob sich die Bodenbürste durch Warnung bei niedrigem Batteriestand, bitte Hindernisse verfangen hat, und reinigen Sie sie... -
Page 36: Andere Häufige Probleme
tech-support@ibuture.com 8.2 Andere häufige Probleme Häufige Probleme Mögliche Ursachen Lösungen 1. vor dem Gebrauch aufladen 1. geringe Batterieleistung 2. die Bodenbürsten, Staubansaugöffnungen oder Das Vakuum kann nicht 2. automatischer Schutz, ausgelöst durch Lufteinlassfilter reinigen und nach dem Abkühlen neu Übertemperatur aufgrund von Verstopfung funktionieren starten 3. - Page 37 tech-support@ibuture.com Häufige Probleme Mögliche Ursachen Lösungen 1. Ersetzen Sie eine Batterie 1. der Akku beschädigt ist 2. Prüfen Sie, ob der Adapter eingesteckt ist. Die Batterieanzeige leuchtet 2. falsches Ladegerät verwendet 3. Stellen Sie sicher, dass Sie das Original-Ladegerät beim Laden nicht auf verwenden, die Spezifikation lautet: 31.0V 0.5A 3.
-
Page 38: Garantie
9. GARANTIE • Garantie Service Der kabellose Staubsauger BuTure hat eine zweijährige Garantie. Um die Garantie auf 3 Jahre zu verlängern, wenden Sie sich bitte rechtzeitig an tech- support@ibuture.com, um sie zu aktivieren. Die Garantie umfasst: kostenlose Wartung des kabellosen Stabstaubsaugers, kostenlosen Ersatz defekter Teile, einschließlich Akku, Filter, Bodenbürste, Staubbehälter, Ladegerät und Motor. - Page 39 tech-support@ibuture.com Contenu 1. AVERTISSEMENT 2. LISTE DES PAQUETS 3. CONNAÎTRE VOTRE PRODUIT 3.1 Détails du Produit 3.2 Écran Tactile Numérique 3.3 Accessoires Fonction 4. ASSEMBLAGE DU PRODUIT 4.1 Installation de la Batterie 4.2 Installation de L'aspirateur Complet 5. MODE D'EMPLOI 6.
-
Page 40: Avertissement
① Cet appareil BuTure n'est pas destiné à être utilisé par des personnes (y compris les enfants) dont les capacités physiques, sensorielles ou mentales sont réduites, ou qui manquent d'expérience et de connaissances, à moins qu'elles n'aient été supervisées ou instruites par une personne responsable concernant l'utilisation de l'appareil afin de s'assurer qu'elles peuvent l'utiliser en toute sécurité. -
Page 41: Liste Des Paquets
Corps Principal*1 Tube Télescopique*1 Brosse Motorisée*1 (Rouleau Installé) Filtres Hepa et Éponge Long Suceur Plat*1 Brosse 2 en 1*1 Supplémentaires Adaptateur*1 Stick Vacuum Cleaner VC60 Montage Mural*1 (avec vis*3, tube d'expansion*3) Tablette Aromatique*1 Mini Brosse de Nettoyage*1 Guide D'utilisation Rapide*1... -
Page 42: Connaître Votre Produit
tech-support@ibuture.com 3. CONNAÎTRE VOTRE PRODUIT 3.1 Détails du Produit 3.2 Écran Tactile Numérique Bouton de Speed Adjustment L'interrupteur Button Port de Charge Écran LED Bouton de Libération de la Batterie Bouton de Déverrouillage du bac à Poussière 50 % Sortie d'Air du Parfum Bac à... -
Page 43: Accessoires Fonction
tech-support@ibuture.com 3.3 Accessoires Fonction • • Long Duceur Plat Brosse à Rembourrage 2 en 1 Enlève la poussière sur les zones difficiles à atteindre Conception facile à enclencher, peut vous aider à enlever la comme les fenêtres, les pieds de lit, les espaces entre les poussière et les cheveux sur le tapis. -
Page 44: Assemblage Du Produit
tech-support@ibuture.com 4. ASSEMBLAGE DU PRODUIT ② 4.1 Installation de la Batterie Installer directement les accessoires de nettoyage Insérez le bloc-batterie dans le corps principal dans le sens indiqué sur la photo ci-dessous. 4.2 Installation de L'aspirateur Complet ① ③ Installer le tube d'extension et les accessoires de nettoyage Installer le support mural... - Page 45 tech-support@ibuture.com ④ La longueur du tube est réglable en fonction des besoins. ⑤ Selon les besoins, placez ou retirez la tablette aromatique. AVERTISSEEMT • Veuillez vous assurer qu’aucun câble ou fil de gaz, d’eau ou d’électricité ne se trouve derrière la zone de montage. •...
-
Page 46: Mode D'emploi
tech-support@ibuture.com 5. MODE D'EMPLOI ② 5.1 Chargement Accrochez le support mural pour le charger. Lorsque l'indicateur de batterie sur l'écran d'affichage est inférieur à 30 % ou que l'animation suivante apparaît, l'aspirateur doit être rechargé dès que possible. ③ Chargez la batterie directement. Trois méthodes de chargement ①... -
Page 47: Régler La Puissance D'aspiration
tech-support@ibuture.com 5.2 Fonctionnement AVERTISSEEMT: 1. Ne dépassez pas la capacité de dépoussiérage "MAX" de la coupe à poussière. 2. Veillez à ce que la buse d'aspiration ne soit pas obstruée et évitez de la bloquer. Sinon, le moteur risque de surchauffer et de présenter un danger. •... -
Page 48: Maintenance
tech-support@ibuture.com 6. MAINTENANCE Conseils Chaleureux: • Veuillez nettoyer l'aspirateur régulièrement pour prolonger sa durée de vie. • Après avoir nettoyé les pièces de l'aspirateur, attendez qu'elles soient complètement sèches avant de les réinstaller sur l'aspirateur. 6.1 Nettoyage du Corps Principal •... -
Page 49: Nettoyage Du Bac À Poussière Et Des Filtres
tech-support@ibuture.com 6.2 Nettoyage du bac à Poussière et des Filtres ① Vider le Bac à Poussière • • Lorsque la quantité de déchets dans le bac à poussière dépasse Appuyez sur le bouton de vidange pour vider la poussière. la ligne MAX, veuillez le vider à temps. ②... - Page 50 tech-support@ibuture.com ③ Nettoyer le Bac à Poussière et les Filtres avec de L'eau (Attention : assurez-vous que le godet à poussière et les filtres sont complètement secs avant de les installer). ④ Installer le Godet à Poussière et les Filtres •...
-
Page 51: Nettoyage Des Rouleaux De Brosse
tech-support@ibuture.com 6.3 Nettoyage des Rouleaux de Brosse Assurez-vous que l'appareil est débranché du chargeur avant de retirer la brosse à rouleau. Veillez à ne pas tirer sur le bouton de l'interrupteur. ① ② Poussez le bouton vers le signe "déverrouillage", retirez le Enlevez les débris enroulés autour du rouleau avec la mini-brosse de rouleau-brosse. -
Page 52: Spécification
7. SPÉCIFICATION Produit Aspirateur Balai sans Fil Modèle VC60 Tension nominale DC 25.9V Type de batterie Li-ion Mode de nettoyage MANUAL... -
Page 53: Fehlersuche
tech-support@ibuture.com 8. FEHLERSUCHE En cas de problème lors de l'utilisation, veuillez consulter le tableau de dépannage suivant. Si le problème ne peut être résolu, veuillez contacter le service après-vente par courriel : tech-support@ibuture.com. 8.1 Indicateur D'anomalie * Lorsque l'aspirateur ne fonctionne pas correctement, l'écran affiche une animation de rappel de panne correspondante, veuillez la vérifier à temps. Rappel concernant le colmatage de la brosse à... -
Page 54: Autres Problèmes Courants
tech-support@ibuture.com 8.2 Autres Problèmes Courants Problèmes Courants Causes Possibles Solutions 1. Charger avant l'utilisation 1. Faible puissance de la batterie 2. Nettoyer les brosses de sol, les orifices d'aspiration de la 2. Protection automatique déclenchée par une Le vide ne fonctionne pas poussière ou les filtres d'entrée d'air, et redémarrer après température excessive due à... - Page 55 tech-support@ibuture.com Problèmes Courants Causes Possibles Solutions 1. Remplacer une pile 1. Battery damaged L'indicateur de batterie 2. Vérifier si l'adaptateur est branché. ne s'allume pas lors du 2. Wrong charger used 3. Veillez à utiliser le chargeur d'origine, dont les spécifications sont les suivantes : 31,0 V 0,5 A.
-
Page 56: Garantie
9. GARANTIE • Service de Garantie L'aspirateur sans fil BuTure est garanti deux ans. Pour étendre la garantie à 3 ans, veuillez contacter tech-support@ibuture.com à temps pour l'activer. La garantie comprend : l'entretien gratuit de l'aspirateur-balai sans fil, le remplacement gratuit des pièces défectueuses, y compris la batterie, les filtres, la brosse à... - Page 57 tech-support@ibuture.com Contenido 1. ADVERTENCIA 2. LISTA DE PAQUETES 3. CONOZCA EL PRODUCTO 3.1 Product Details 3.2 Pantalla Táctil Digital 3.3 Función de Accesorios 4. MONTAJE DEL PRODUCTO 4.1 Instalación de la Batería 4.2 Installation de L'aspirateur Complet 5. CÓMO UTILIZAR 6.
-
Page 58: Advertencia
1. ADVERTENCIA Gracias por adquirir el aspirador sin cable BUTURE VC60. Antes de usar esta máquina, por favor, lea primero la siguiente advertencia de seguridad y tome las medidas de protección de seguridad para evitar el mal funcionamiento causado por la operación incorrecta. -
Page 59: Lista De Paquetes
Verifique y confirme los accesorios y piezas de acuerdo con la siguiente hoja antes de usar. Cepillo motorizado*1 Cuerpo principal*1 Tubo telescópico*1 (rodillo instalado) Filtros Hepa y de esponja Accesorio para hendiduras largo*1 Cepillo 2 en 1*1 adicionales Cargador*1 Stick Vacuum Cleaner VC60 Soporte de pared*1 Pastilla aromática*1 Mini cepillo de limpieza*1 Quick user guide*1... -
Page 60: Conozca El Producto
tech-support@ibuture.com 3. CONOZCA EL PRODUCTO 3.1 Product Details 3.2 Pantalla Táctil Digital Speed Adjustment Botón ON/OFF Button Pantalla inteligente Quitar el botón de la batería Taza de polvo botón de liberación Salida de aire de la 50 % fragancia Taza de polvo Indicador del Modo Baterías en Indicador de Batería... -
Page 61: Función De Accesorios
tech-support@ibuture.com 3.3 Función de Accesorios • • Boquilla de Pana Larga Cepillo para Limpieza 2 en 1 Elimine el polvo de las áreas de difícil acceso, como Diseño fácil de colocar, puede ayudarlo a eliminar el polvo y ventanas, pies de cama, espacios entre sofás, etc. el cabello de la alfombra. -
Page 62: Montaje Del Producto
tech-support@ibuture.com 4. MONTAJE DEL PRODUCTO ② 4.1 Instalación de la Batería Instalación Directa de Accesorios de Limpieza Inserte la batería en el cuerpo principal en la dirección indicada en la foto. 4.2 Installation de L'aspirateur Complet ① ③ Install Extension Tube & Cleaning Accessories Instalar el aspirador completo... - Page 63 tech-support@ibuture.com ④ Según las diferentes necesidades, la longitud del tubo se puede ajustar ⑤ Según las diferentes necesidades, colocar o sacar la pastilla aromática ADVERTENCIA • Asegúrese de que no haya cables de gas, agua o electricidad detrás del área de montaje. •...
-
Page 64: Cómo Utilizar
tech-support@ibuture.com 5. CÓMO UTILIZAR ② 5.1 Cargando Colgar en el soporte de pared para cargar Cuando el indicador de batería de la pantalla esté por debajo del 30% o aparezca la siguiente animación, es necesario cargar el aspirador lo antes posible. ③... -
Page 65: Ajustar La Potencia De Aspiración
tech-support@ibuture.com 5.2 Operando ADVERTENCIA: 1. No supere la capacidad de captación de polvo "MAX" del depósito de polvo 2. Mantenga la boquilla de aspiración sin obstáculos y evite que se obstruya. De lo contrario, el motor se sobrecalentará y causará peligro. •... -
Page 66: Mantenimiento
tech-support@ibuture.com 6. MANTENIMIENTO Consejos: • limpie la aspiradora regularmente para prolongar su vida útil. • Después de limpiar las piezas del aspirador, espere a que estén completamente secas antes de volver a instalarlas en el aspirador. 6.1 Motor con Pantalla Digital •... -
Page 67: Limpieza Del Depósito De Polvo Y De Los Filtros
tech-support@ibuture.com 6.2 Limpieza del Depósito de Polvo y de Los Filtros ① Vaciar el depósito de polvo • • Cuando la basura en el depósito de polvo exceda la línea MAX, Pulse el botón de vaciado de polvo para vaciar el polvo. por favor vacíelo a tiempo. - Page 68 tech-support@ibuture.com ③ Limpie la taza de polvo y los filtros con agua. (Advertencia: asegúrese de que la taza de polvo y los filtros estén completamente secos antes de la instalación). ④ Instale la copa antipolvo y los filtros. • • Colocar los filtros en la taza de polvo, la esponja se coloca Presione el botón de liberación del depósito de polvo y vuelva a debajo del HEPA.
-
Page 69: Limpieza De Cepillos Y Rodillos
tech-support@ibuture.com 6.3 Limpieza de Cepillos y Rodillos Asegúrese de que el aparato está desconectado del cargador antes de retirar el cepillo del rodillo.Tenga cuidado de no tirar del botón ON. ① ② Presiona el interruptor hacia el lado de "desbloqueo", Retire los residuos que envuelven el rodillo con el mini cepillo de saca el cepillo del rodillo. -
Page 70: Especificación
7. ESPECIFICACIÓN Producto Aspirador Sin Cable Modelo VC60 Voltaje nomina DC 25.9V Tipo de Batería Li-ion Modo de limpieza MANUAL... -
Page 71: Solución De Problemas
tech-support@ibuture.com 8. SOLUCIÓN DE PROBLEMAS Si tiene algún problema durante el uso, consulte la siguiente tabla de solución de problemas. Si el problema no se puede resolver, por favor, póngase en contacto con el correo electrónico de post-venta: tech-support@ibuture.com 8.1 Indicador de Anomalías * Cuando el aspirador no funcione correctamente, aparecerá... -
Page 72: Otros Problemas Comunes
tech-support@ibuture.com 8.2 Otros Problemas Comunes Problemas comunes Posibles causas Soluciones 1. Cargar antes de usar 1. Batería baja 2. Limpie los cepillos del suelo, los puertos de aspiración de 2. Protección automática activada por exceso de El vacío no funciona polvo o los filtros de entrada de aire, y vuelva a arrancar temperatura debido a bloqueo después de enfriarse... - Page 73 tech-support@ibuture.com Problemas comunes Posibles causas Soluciones 1. Sustituir una batería 1. Batería dañada 2. Compruebe si el adaptador está enchufado. El indicador de batería no se 2. Cargador incorrecto 3. Asegúrese de utilizar el cargador original, la enciende durante la carga especificación es: 31.0V 0.5A 3.
-
Page 74: Garantía
9. GARANTÍA • Servicio de garantía El aspirador sin cable BuTure tiene dos años de garantía. Para ampliar la garantía a 3 años, póngase en contacto con tech-support@ibuture.com a tiempo para activarla. La garantía incluye: mantenimiento gratuito de la aspiradora de varilla sin cable, sustitución gratuita de las piezas defectuosas, incluida la batería, los filtros, el cepillo para suelos, el contenedor de polvo, el cargador y el motor. - Page 75 tech-support@ibuture.com Contenuto 1. AVVERTIMENTO 2. CONTENUTO DEL PACCO 3. CONOSCERE IL PRODOTTO 3.1 Dettagli del Prodotto 3.2 Schermo di Visualizzazione Digitale 3.3 Introduzione alle Funzioni degli Accessori 4. ASSEMBLAGGIO DEL PRODOTTO 4.1 Installazione della Batteria 4.2 Installazione dell'Aspirapolvere Completo 5. COME USARE 6.
-
Page 76: Avvertimento
1. AVVERTIMENTO Grazie per aver acquistato l'aspirapolvere senza fili BUTURE VC60. Prima di utilizzare questa macchina, leggere prima le seguenti avvertenze di sicurezza. tech-support@ibuture.com Il prodotto offre una garanzia gratuita di 2 anni per impostazione predefinita. Per estendere la garanzia a 3 anni, contattare tempo utile per l'attivazione. -
Page 77: Contenuto Del Pacco
Corpo principale*1 Tubo di prolunga regolabile*1 (rullo installato) Utensile per fessure lunghe*1 Spazzola per tappezzeria 2 in 1*1 Extra Hepa & Sponge Filter Caricabatterie*1 Stick Vacuum Cleaner VC60 Supporto a parete*1 Compressa aromatica*1 Mini spazzola per la pulizia*1 Guida rapida all'uso*1... -
Page 78: Conoscere Il Prodotto
tech-support@ibuture.com 3. CONOSCERE IL PRODOTTO 3.1 Dettagli del Prodotto 3.2 Schermo di Visualizzazione Digitale Speed Adjustment Tasto ON/OFF Button Porta di Ricarica Schermo di Pulsante di Rilascio Visualizzazione della Batteria Pulsante di Rilascio della Tazza della Polvere Uscita dell'aria della 50 % Fragranza Tazza per la Polvere... -
Page 79: Introduzione Alle Funzioni Degli Accessori
tech-support@ibuture.com 3.3 Introduzione alle Funzioni degli Accessori • • Ugello per Fessure Lunghe Spazzola per Tappezzeria 2 in 1 Può aiutarti a rimuovere polvere e capelli sul tappeto. Rimuovere la polvere dalle aree difficili da raggiungere come finestre, piedini del letto, spazi tra il divano, ecc. •... -
Page 80: Assemblaggio Del Prodotto
tech-support@ibuture.com 4. ASSEMBLAGGIO DEL PRODOTTO ② 4.1 Installazione della Batteria Installare direttamente gli accessori per la pulizia Inserire la batteria nel corpo principale nella direzione guidata dalla foto qui sotto. 4.2 Installazione dell'Aspirapolvere Completo ① ③ Installare il Tubo di Prolunga e gli Accessori per la Pulizia Installazione del Supporto a Parete... - Page 81 tech-support@ibuture.com ④ In base alle diverse esigenze, è possibile regolare la lunghezza del tubo ⑤ Seconda delle diverse esigenze, posizionare o estrarre la compressa aromatica AVVERTIMENTO • Si prega di assicurarsi che non ci siano gas, acqua o cavi e fili elettrici dietro l’area di montaggio. •...
-
Page 82: Come Usare
tech-support@ibuture.com 5. COME USARE ② 5.1 Ricarica Appendi al supporto a parete per caricare Quando l'indicatore della batteria sul display è inferiore al 30% o appare la seguente animazione, è necessario caricare l'aspirapolvere il prima possibile. ③ Carica direttamente la batteria Tre metodi di ricarica ①... - Page 83 tech-support@ibuture.com 5.2 Operativo AVVERTIMENTO: 1. Non superare la linea "MAX" della tazza per la polvere. 2. Si prega di tenere l'ugello di aspirazione libero ed evitare il blocco. In caso contrario, il motore si surriscalda e causerà pericolo. • Premere il pulsante Interruttore per iniziare a lavorare Pulsante di controllo Tasto ON/OFF della velocità...
-
Page 84: Manutenzione
tech-support@ibuture.com 6. MANUTENZIONE Suggerimenti: • Si prega di pulirlo regolarmente per prolungare la durata dell'aspirapolvere. • Dopo aver pulito le parti dell'aspirapolvere, attendere che siano completamente asciutte prima di reinstallarle sull'aspirapolvere. 6.1 Pulizia del Corpo Principale • Spegnere l'apparecchio e rimuovere il pacco batteria prima di pulire il corpo principale. •... -
Page 85: Pulizia Della Coppa Della Polvere E Dei Filtri
tech-support@ibuture.com 6.2 Pulizia della Coppa della Polvere e dei Filtri ① Vaciar el depósito de polvo • • Quando i rifiuti nel contenitore della polvere superano la linea Premere il pulsante di svuotamento della polvere per svuotare la MAX, svuotarlo in tempo. polvere. - Page 86 tech-support@ibuture.com ③ Pulire il contenitore della polvere e i filtri con acqua (Attenzione: prima dell'installazione, accertarsi che la coppa della polvere e i filtri siano completamente asciutti). ④ Installare la coppa della polvere e i filtri • • Mettere i filtri nella tazza della polvere, la spugna viene Premere il pulsante di rilascio del contenitore della polvere e posizionata sotto l'HEPA.
-
Page 87: Pulizia Della Spazzola Rotant
tech-support@ibuture.com 6.3 Pulizia della Spazzola Rotant Assicurarsi che l'apparecchio sia scollegato dal caricabatterie prima di rimuovere la spazzola a rullo. Fare attenzione a non tirare il pulsante Interruttore. ① ② Premere il pulsante sul segno "unclock", rimuovere la Rimuovere i detriti avvolti attorno al rullo con la mini spazzola di spazzola rotante. -
Page 88: Especificación
7. ESPECIFICACIÓN Prodotto Aspirapolvere Senza Fili Modello VC60 Tensione nominale DC 25.9V Tipo di batteria Li-ion Modalità di pulizia MANUAL... -
Page 89: Risoluzione Dei Problemi
tech-support@ibuture.com 8. RISOLUZIONE DEI PROBLEMI In caso di problemi durante l'uso, controllare la seguente tabella di risoluzione dei problemi. Se il problema non può essere risolto, contattare il servizio di assistenza tecnica: tech-support@ibuture.com 8.1 Indicatore Anomalo * Quando l'aspirapolvere non funziona correttamente, sullo schermo viene visualizzata un'animazione che ricorda il guasto. Promemoria sull'intasamento della spazzola del pavimento, verificare se la spazzola del Avviso di batteria scarica: si prega di caricare... -
Page 90: Altri Problemi Comuni
tech-support@ibuture.com 8.2 Altri Problemi Comuni Problemi comuni Possibili cause Soluzioni 1. Caricare prima dell'uso 1. Batteria scarica 2. Pulire le spazzole del pavimento, le porte di aspirazione Il vuoto non può 2. Protezione automatica attivata da una temperatura della polvere o i filtri di ingresso dell'aria e riavviare dopo eccessiva a causa di un'ostruzione funzionare il raffreddamento. - Page 91 tech-support@ibuture.com Problemi comuni Possibili cause Soluzioni 1. Sostituire una batteria L'indicatore della 1. Batería dañada 2. Controllare se l'adattatore è collegato. batteria non si accende 2. Cargador incorrecto 3. Assicurarsi di utilizzare il caricabatterie originale, la cui specifica è: 31,0V 0,5A durante la carica 3.
-
Page 92: Garanzia
9. GARANZIA • Servizio di garanzia L'aspirapolvere cordless BuTure ha una garanzia di due anni. Per estendere la garanzia a 3 anni, contattare tech-support@ibuture.com in tempo utile per l'attivazione. La garanzia comprende: manutenzione gratuita dell'aspirapolvere a batteria, sostituzione gratuita delle parti difettose, tra cui batteria, filtri, spazzola per pavimenti, contenitore per la polvere, caricabatterie e motore. - Page 93 tech-support@ibuture.com 目録 1. 安全上のご注意 2. パッケージリスト 3. 製品について 3.1 部品の名前 3.2 LED ディスプレイ 3.3 アクセサリー機能紹介 4. 製品の組立 4.1 バッテリーの装着 4.2 掃除機の装着 5. 使用方法 5.1 充電 5.2 操作方法 6. お手入れ 6.1 本体クリーニング 6.2 ダストカップとフィルターのお手入れ 6.3 回転ブラシのお手入れ 7. スペック 8. 故障の点検 8.1. 異常インジケータ 8.2.
-
Page 94: 安全上のご注意
1. 安全上のご注意 BuTure VC60 コードレス掃除機をお買い上げいただきありがとうございました。間違い操作による間違い動作を防止するための安全対策としてはごしようまえに取扱説明書をよくも 読みください。 tech-support@ibuture.com 本製品は 2 年間の無償保証を提供しています。保証期間を 3 年に延長するには、製品が届いてから にお問い合わせください。 ① この BUTURE アプライアンスは、身体的、感覚的、精神的な能力は低下している、または経験と知識が不足している人(子供を含む)のご使用ができません。 本製品を安全にお使いいただくために、責任者の方が使用方法を監督・指導してください。 ② 乾燥した場所にのみ適しています。濡れたままの状態で屋外で使用・保管しないでください。濡れた手でプラグや機器のどの部分も触らないでください。 屋内の乾燥した場所に適切に保管してください。 ③ 破損したケーブルやプラグを使用しないでください。デバイスや充電器が正常に動作しない場合、落下させた場合、破損させた場合、見逃した場合、水に 落とした場合は、tech-support@ibuture.com、BuTure アフターセールスチームにご連絡ください ④ ガソリンなどの可燃性液体がある場所で使用したりしないでください。 ⑤ アダプタの抜き差しをする前に、電源スイッチを切ってください。 ⑥ タバコやマッチ、熱い灰など、燃えているものや煙が出ているものを吸引しないでください。 ⑦ モーターの破損や空気の汚染を避けるため、フィルターやダストカップがない状態で使用しないでください。掃除機を使用した後は、手を洗ってください。 ⑧ 火気厳禁 - 本製品を調理器などの高温の場所に置いたり、近くに置いたりしないでください。また、本製品が大きく破損しても焼却しないでください。電 池が燃えたり、爆発したりする恐れがあります。 ⑨... -
Page 95: パッケージリスト
2. パッケージリスト ご使用になる前に、次のシートにしたがって、付属品や部品を確認してください。 多機能ローラーブラシヘッド 本体 *1 延長パイプ *1 (ブラシ装着済み) 隙間ノズル *1 2in1 ブラシツール *1 交換用 Hepa・スポンジフィルター アダプター *1 Stick Vacuum Cleaner VC60 壁掛け式スタンド *1(ネジ付き *3、 膨張管付き *3) アロマ *1*1 お手入れミニブラシ *1 クイックユーザーガイド *1... -
Page 96: 製品について
tech-support@ibuture.com 3. 製品について 3.1 部品の名前 3.2 LED ディスプレイ 吸引力調節ボタン オン / オフスイッチ 充電口 LED ディスプレイ バッテリーリリースボタン ダストカップリリ アロマ排気口 ースボタン 50 % ダストカップ ゴミ捨てボタン 吸引力表示 バッテリーパーセント 電量不足表示 着脱式バッテリー パイプリリースボタン モーター本体 延長パイプ パイプ長さ調節ボタン CHECK THE BRUSH AIRWAY BLOCKAGE ブラシ点検 風道塞ぐ 専用アダプターで 充電しない表示 多機能ローラー ブラシヘッドリリー... -
Page 97: アクセサリー機能紹介
tech-support@ibuture.com 3.3 アクセサリー機能紹介 • • 隙間ノズル 2 - in -1 ブラシツール 窓やベッドの足元、ソファの䫍間など、手の届かないところのホコリ カーペットについたホコリや髪の毛を 取り除くのに便利なスナップオ を取り除きます。 ンデザインです。 • • 壁掛け式スタンド お手入れミニブラシ コードレス掃除機と付属品を壁に収納するようにします。 ノズルやブラシなどから髪の毛やダストを取り除きます。... -
Page 98: 製品の組立
tech-support@ibuture.com 4. 製品の組立 ② 4.1 バッテリーの装着 アクセサリーを直接に取り付けられる。 下図のように、電池パックを本体の方向に押します。 4.2 掃除機の装着 ① ③ パイプとアクセサリーを取り付ける。 壁掛け式スタンドの装着... - Page 99 tech-support@ibuture.com ④ さまざまなニーズに応じて、チューブの長さを調整できる。 ⑤ 必要に応じて、アロマを置いたり取り出したりできる。 ご注意 • ガス、水道、電気のケーブルや配線がないことを確認してください。 • 壁掛け用プレートが落下しないように、しっかりと固定してください。 • 室内の乾燥した場所で適切に保管してください。日光や氷点下の温度にさらされない ようにしてください。推奨温度範囲, 39.2° F(4° C)-104° F(40° C)。...
-
Page 100: 使用方法
tech-support@ibuture.com 5. 使用方法 ② 5.1 充電 壁掛けで充電する。 ディスプレイ上のバッテリ LED が 30% 未満になる場合は、できるだけ早く掃除 機を充電してください。 ③ 単独にバッテリーと接続して充電する。 三つの充電方法 ① 本体と接続して充電する。 バッテリに充電すると、バッテリ表示ランプは赤く点滅し、満充電になると 青色に変わります。 バッテリ表示ランプ... -
Page 101: 操作方法
tech-support@ibuture.com 5.2 操作方法 ご注意 : 1. ダストカップ中のゴミを MAX ラインを超えないようににしてください。 2. モーターが過熱になって危険を引き起こすため、モーターヘッドやチューブの詰まりを避けてください。 • オン / オフスイッチを押して作業を始める。 スビード調節ボタン オン / オフスイッチ • 吸引力を切替える 吸引力切替えボタンを押して吸引力を調整する。 画面上の吸引力は緑色であれば、掃除機は ボタンを 1 回押すと、画面上の吸引力はミ ボタンをもう 1 回押すと、画面上の吸引力 ECO モードで稼働する。 ントグリーンに変わり、掃除機は MID モー が青色に変わり、掃除機は MAX モードで稼 ドで稼働する。 働する。... -
Page 102: お手入れ
tech-support@ibuture.com 6. お手入れ お知らせ : • 掃除機を長持ちさせるためにも、定期的にお手入れしてください。 • 掃除機の部品を掃除したら、完全に乾燥してから掃除機に取り付け直してください。 6.1 本体クリーニング • 本体をクリーニングする前に、電源を切り、バッテリパックを取り外してください。 • 中性洗剤を使用し、本体を半湿布で拭き取ってください。 • 日光にさらされず、日陰で乾燥した場所に保管してください。 100. -
Page 103: ダストカップとフィルターのお手入れ
tech-support@ibuture.com 6.2 ダストカップとフィルターのお手入れ ① 防塵カップを空にする • • ダストカップのゴミが MAX Line を超えた場合は、速やかに空にしてくだ ダストクリアボタンを押してダストをクリアします。 さい。 ② ダストカップとフィルターの取り外し • • ダストカップを取り外します。 ステンレスフィルタと高効率エアフィルタを取り外します。 101. - Page 104 tech-support@ibuture.com ③ 防塵カップとフィルターを水で洗浄する (警告:設置前にダストカップとフィルターが完全に乾燥していることを確認してください。) ④ ダストカップとフィルターの取り付け • • フィルターをダストカップに入れ、スポンジを高効率エアフィルターの下 ダストカップのリリースボタンを押して、掃除機に取り付け直します。 に置く。 102.
-
Page 105: 回転ブラシのお手入れ
tech-support@ibuture.com 6.3 回転ブラシのお手入れ お手入れをする前に電源を切ること。モーターヘッド上のリリースボタンを押して、モーターヘッドを取り外します。 ① モーターヘッド上の「解錠」ボタンを押して、回転ブラシを取り ② お手入れミニブラシで回転ブラシのダストを除く。 外します。 ④ ③ 水あり / なしでローラーブラシのお手入れをする。 回転フラシが完全に乾かしてからご使用ください。 回転プラシをモーターヘッドに入れて、固定させる。 103. -
Page 106: スペック
7. スペック 製品 コードレス掃除機 型番 VC60 定格電圧 DC 25.9V バッテリータイプ Li-ion 吸引モード マニュアル 104. -
Page 107: 故障の点検
tech-support@ibuture.com 8. 故障の点検 使用中に問題が発生した場合は、次のトラブルシューティング・テーブルをご参照ください。問題が解決しない場合は、アフターサービスメールにご連絡ください: tech-support@ibuture.com 8.1. 異常インジケータ * 掃除機が正常に動作していない場合は、画面に適切な障害通知のアニメーションが表示されますので、ご確認ください。 ブラシ詰まり注意、ブラシがゴミに絡まっていないかどう バッテリ残量の警告がありますので、速やかにご充電く かをチェックし、速やかにお手入れをしてください。 ださい。 CHECK THE BRUSH 間違った充電器を使用しています。間違った充電器は真 画面アニメーションのように風道塞ぐの警告が表示され 空を破壊する可能性があります。オリジナルの充電器を ているので、延長チューブとダストカップを点検してお 使用していることを確認し、仕様が 31.0 V 0.5 A であ 手入れをしてください。 ることをご確認ください。 AIRWAY BLOCKAGE 105. -
Page 108: その他の一般的な障害
tech-support@ibuture.com 8.2. その他の一般的な障害 よくある障害 可能な理由 ソリューション 1. 電池残量が低い 1. 使用前の充電 掃除機が働かない 2. 閉塞による温度過昇起動の自動保護 2. 床ブラシ、掃除口または吸気フィルタを清潔にし、冷却後に再起動する 3. バッテリの破損 3. 電池交換 1. ダストカップが埃だらけ 1. 防塵カップを空にする 2. フィルターはほこりで覆われている 2. フィルタのクリーニングまたは交換 吸引力が下げる 3. 伸縮管又はブラシの入口閉塞 3. 配管とブラシ入口の閉塞物を取り除く 4. バッテリー残量が低い 4. 使用前充電 1. 電池を充電する 2. 電池交換 1. -
Page 109: 保証書
tech-support@ibuture.com 9. 保証書 • 保証サービス 本製品は 2 年間の無償保証を提供しています。保証期間を 3 年に延長するには、製品が届いてから にお問い合わせください。 tech-support@ibuture.com 保証には、コードレス掃除機の無償保守、電池、フィルター、ブラシ、ほこり容器、充電器、モーターなどの欠陥部品の無償交換が含まれています。 • テクニカルサポート お客様のマシンが正常に動作していない場合、またはこのマニュアルをよく読んだ後も問題がある場合は、いつでもお問い合わせください。 tech-support@ ibuture.com を選択して、営業日 24 時間以内に回答し、お客様に満足いただけるソリューションを提供するよう努めます。【祝日・連休以外】 tech-support@ibuture.com 107. -
Page 110: Federal Communication Commission Interference Statement
Federal Communication Commission Interference Statement NOTE: This equipment has been tested and found to comply with the limits for a Class B digital device, pursuant to part 15 of the FCC Rules. These limits are designed to provide reasonable protection against harmful interference in a residential installation. This equipment generates, uses and can radiate radio frequency energy and, if not installed and used in accordance with the instructions, may cause harmful interference to radio communications. -
Page 111: Declaration Of Conformity
Equipment: Vacuum Cleaner Signature: Place/Date: Shenzhen,China/Jan.05-2023 Model No. : VC60 to which this declaration relates is in conformity with the essential requirement set out in the Council Directive on the Approximation of the laws of the Member States relating to LVD Directive(2014/35/EU) & EMC Directive(2014/30/EU) &... - Page 112 Better Life, Better Future tech-support@ibuture.com...
Need help?
Do you have a question about the VC60 and is the answer not in the manual?
Questions and answers
バッテリーまでは通電しているが、表示が出ないし、本体も動かない。バッテリーなのか、アダプターなのか、どこが悪いのか、せつめいしてください。
The BUTURE VC60 may have power to the battery but not display or operate due to the following possible causes:
1. Automatic Protection Triggered – If the vacuum has overheated due to blockage, it may have entered a protection mode. Solution: Clean the floor brushes, dust suction ports, or air inlet filters, and restart after cooling down.
2. Battery Damage – A damaged battery may have power but fail to deliver it correctly. Solution: Replace the battery.
3. Adaptor Issues – If the wrong charger is used or the adapter is incorrectly connected or damaged, the vacuum may not function properly. Solution: Ensure the original charger (31.0V 0.5A) is used and replace the adapter if necessary.
This answer is automatically generated