Cisco Business 250 Series, CBS250, CBS250-8T-E-2G, CBS250-8PP-E-2G Manual
- Quick start manual ,
- Get to know (10 pages) ,
- Quick start manuals (5 pages)
Advertisement
What's in the Box

- Cisco Business 250 Series Smart Switch
- Power Cord or Adapter
- Rack-Mount/Wall-Mount Kit
- Quick Start Guide
- Pointer Card with China RoHS
- Technical Support Contacts

- Cisco Business 250 Series Switch
- Power Cord or Adapter
- Wall-Mount Kit
- Quick Start Guide
- Pointer Card with China RoHS
- Technical Support Contacts
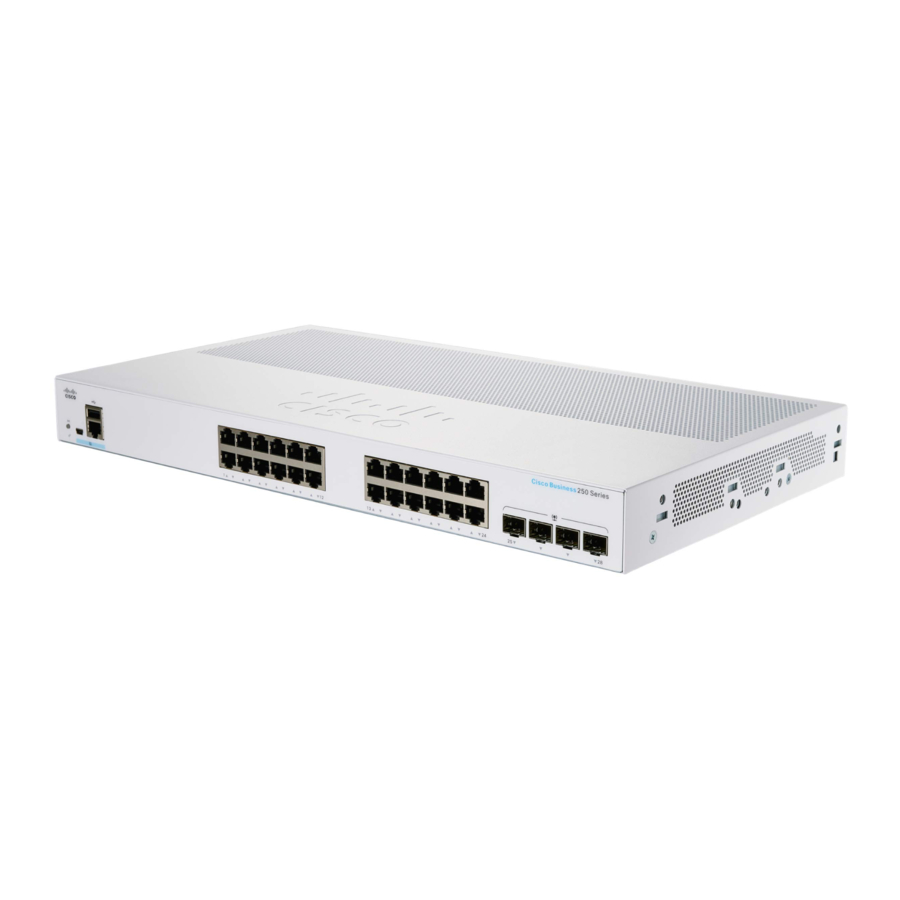
Product Features

- System LED
- Reset Button
- Mini USB Console Port
- USB Port
- RJ45 Console Port
- LINK/ACT LEDs
- Gigabit Network Ports
- SFP/SFP+ Uplink Ports

- Reset Button
- System LED
- Link/ACT LEDs
- PoE (Power over Ethernet) LEDs*
First, You'll Need...
- RJ-45 Ethernet cables (Category 5e or higher) for connecting network devices
- Tools for mounting the hardware
- Computer with ethernet port and a web browser (Firefox, Chrome, Safari or Edge)
Get Connected
Preparing Your Product
Plug the power cord of the switch into an outlet. Connect your computer to the switch using an ethernet cable. Ensure that your computer is on and proceed to "Get Configured".

LED Functions
| LED | GREEN STEADY | GREEN FLASHING | AMBER | OFF |
| System | Switch has acquired an IP address through DHCP or a static IP address has been manually configured. | Booting, performing self tests or acquiring IP address or factory default IP address is being used. | Flashing Hardware failure detected. | Switch is powered off. |
| LINK/ACT | Link between corresponding port and another device detected. | Port is passing traffic. | Link down. | |
| PoE* | Steady Power is being supplied to a device connected to the port. | Power is not being supplied or nothing is connected to the port. | ||
| Gigabit* | 1000 Mbps link is estabslished. | Connection speed is under 1000 Mbps or nothing is connected to the port. |
* Depending on model. PoE switches will only have a PoE LED whereas non PoE switches will have a Gigbit LED.
Get Configured
To connect the managed switch:
- The switch will attempt to acquire an IP address if there is a DHCP server in the network. If the switch cannot acquire an IP address through DHCP, it uses the factory default IP address of 192.168.1.254, with a subnet of /24.
- If the switch is using the factory default IP address of 192.168.1.254/24, you must choose an IP address for the computer in the range of 192.168.1.2-192.168.1.253 that is not already in use.
- If the IP address is assigned by a DHCP server, make sure the DHCP server is running and can be reached from the switch and the computer. It might be necessary to disconnect and reconnect the devices for them to discover their new IP addresses from the DHCP server.
NOTE: Details on how to change the IP address on your computer depend upon the type of architecture and operating system you are using. Use the computer Help and Support functionality to search for "IP Addressing."
Access the managed switch:
- Open a web browser window.
- Enter the switch IP address in the address bar and press Enter. For example, http://192.168.1.254. The Switch Login Page displays.
- Enter the default login information:
- Username is cisco
- Default password is cisco (passwords are case-sensitive)
- Click Log In. If this is the first time that you have logged on with the default username and password, the Change Password page opens. The rules for constructing a new password are displayed on the page.
- Enter a new password and confirm the password.
NOTE: Password complexity is enabled by default. The password must comply with the default complexity rules. - Click Apply.
 Make sure that any configuration changes made are saved before exiting from the web-based interface by clicking on the Save icon. Exiting, rebooting or losing power before you save your configuration will result in all changes being lost.
The Getting Started window displays. You are now ready to configure the switch. Refer to your Administration Guide for further information.
Command Line Interface (CLI)
You can also access the switch by using the switch's command-line interface, refer to the Cisco Business 250 Series Administration Guide for more information.
Mounting
For mounting and stacking instructions, please see the Cisco Business 250 Series Administration Guide.
Documents / ResourcesDownload manual
Here you can download full pdf version of manual, it may contain additional safety instructions, warranty information, FCC rules, etc.
Download Cisco Business 250 Series, CBS250, CBS250-8T-E-2G, CBS250-8PP-E-2G Manual
Advertisement


Need help?
Do you have a question about the Business 250 Series and is the answer not in the manual?
Questions and answers