Advertisement
Get To Know Your Switch
This chapter contains the following sections:
•
•
•
•
•
•
•
Introduction
Thank you for purchasing the Cisco CBS 250 Series Switch. The Cisco CBS 250 Series Switches are the next
generation of affordable smart switches that combine powerful network performance and reliability with a
complete suite of network features that you need for a solid business network. These expandable Gigabit
Ethernet switches, with Gigabit or 10-Gigabit uplinks, provide multiple management options, rich security
capabilities, and Layer-3 static routing features far beyond those of an unmanaged or consumer-grade switch,
at a lower cost than fully managed switches. With an easy-to-use web user interface, Smart Network
Application, and Power over Ethernet Plus capability, you can deploy and configure a complete business
network in minutes.
Before You Begin
Before you begin installing your device, ensure that the following items are available:
• RJ-45 Ethernet cables for connecting network devices. A category 6a and higher cable is required for
• Tools for installing the hardware.
Introduction, on page 1
Rack Mounting Switch, on page 2
Wall Mounting a Switch, on page 3
Power over Ethernet Considerations, on page 5
Front Panel, on page 7
Configuring Switches, on page 9
Navigation, on page 11
10G ports; a category 5e and higher cable is required for all other ports.
• The rack-mount kit packed with the switch contains four rubber feet for desktop placement, and
two brackets and twelve screws for rackmounting.
• If the supplied screws are lost, use replacement screws in the following size:
• Diameter of the screw head: 6.9 mm
• Length of face of screw head to base of screw: 5.9 mm
Get To Know Your Switch
1
Advertisement

Related Manuals for Cisco CBS 250 Series


Summary of Contents for Cisco CBS 250 Series
-
Page 1: Table Of Contents
Navigation, on page 11 Introduction Thank you for purchasing the Cisco CBS 250 Series Switch. The Cisco CBS 250 Series Switches are the next generation of affordable smart switches that combine powerful network performance and reliability with a complete suite of network features that you need for a solid business network. These expandable Gigabit... -
Page 2: Rack Mounting Switch
Get To Know Your Switch Rack Mounting Switch • Shaft diameter: 3.94 mm • A computer to manage the device either via the console port or via the web-based interface. for web based interface the computer needs to support one of the following browsers: •... -
Page 3: Wall Mounting A Switch
Get To Know Your Switch Wall Mounting a Switch Wall Mounting a Switch You can mount the switches on a wall, using wall studs or to a firmly attached plywood mounting backboard. Caution Read these instructions carefully before beginning installation. Failure to use the correct hardware or to follow the correct procedures could result in a hazardous situation to people and damage to the system. - Page 4 Get To Know Your Switch Wall Mount an 8 Port Switch Wall Mount an 8 Port Switch To wall-mount a 8-port switch using mounting screws, follow these steps: Step 1 Locate the screw template. The template is used to align the mounting screw holes. Step 2 Position the screw template so that the edge that is marked as CABLE SIDE ENTRY faces toward the floor.
-
Page 5: Power Over Ethernet Considerations
Get To Know Your Switch Power over Ethernet Considerations Power over Ethernet Considerations Some switches support PoE while others do not. The switch models that support PoE have a P in their model number, such as: CBSxxx-xxP-xx. If your switch is one of the Power over Ethernet (PoE) models, consider the following power requirement. - Page 6 Get To Know Your Switch Power over Ethernet Considerations SKU Name Description PoE PD Chipset Type PoE PSE Support CBS250-8FP-E-2G 8-Port Gigabit PoE Smart TPS2388 AF/AT Switch CBS250-16P-2G 16-Port Gigabit PoE 2*TPS2388 AF/AT Smart Switch CBS250-24PP-4G 24-Port Gigabit PoE 3*TPS2388 AF/AT Smart Switch CBS250-24P-4G...
-
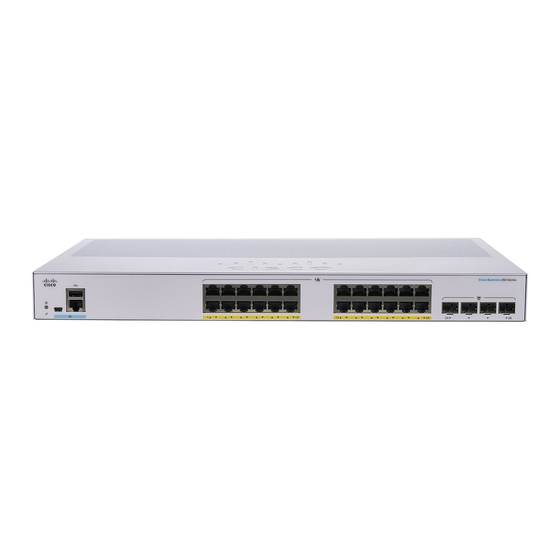
Page 7: Front Panel
Cisco Business 250 Series Model Note Models may differ within the CBS 250 series and this is just a representation of a model within the series. • Console port with RJ-45 and mini-USB connectors. The console connects a serial cable to a computer serial port so that it can be configured using a terminal emulation program. - Page 8 Get To Know Your Switch Front Panel LEDs Front Panel LEDs The following are the global LEDs found on the devices: • System—(Green) The LED lights steady when the switch is powered on, and flashes when booting, performing self-tests, or acquiring an IP address. If the LED flashes Amber, the switch has detected a hardware or firmware failure, and/or a configuration file error.
-
Page 9: Configuring Switches
Using the console port requires advanced user skills. The following table shows the default settings used when configuring your switch for the first time. Parameter Default Value Username cisco Password cisco LAN IP 192.168.1.254 Configuring Your Switch Using the Web-based Interface To access the switch with a web-based interface, you must know the IP address that the switch is using. - Page 10 Configuring Your Switch Using the Console Port To configure the switch using the console port, proceed with the following steps: Step 1 Connect a computer to the switch console port using a Cisco console cable (purchased separately) or a cable with mini USB connector. Step 2 Start a console port utility such as HyperTerminal on the computer.
-
Page 11: Navigation
Console access also provides additional interfaces for debug access which are not available via the web interface. These debug access interfaces are intended to be used by a Cisco Support Team personnel, in cases where it is required to debug device’s behavior. - Page 12 Get To Know Your Switch Basic or Advanced Display Mode Get To Know Your Switch...
Need help?
Do you have a question about the CBS 250 Series and is the answer not in the manual?
Questions and answers