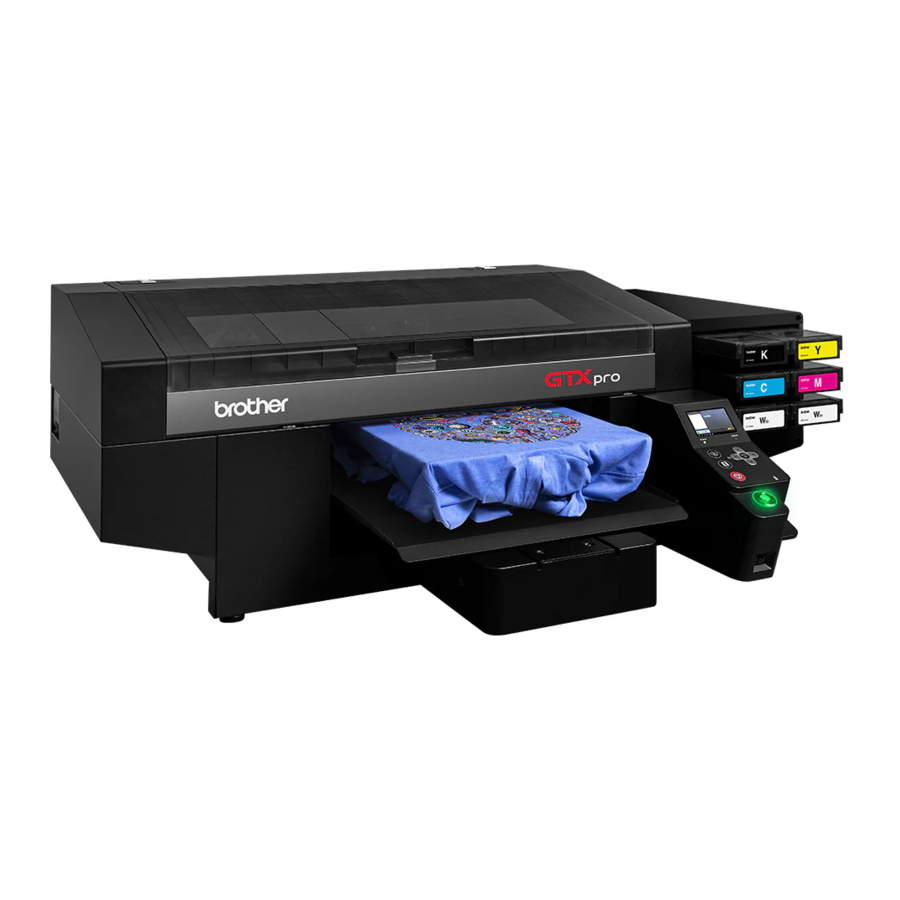
Brother GTX pro Manual
- Instruction manual (356 pages) ,
- Setup manual (40 pages) ,
- Cookbook (22 pages)
Advertisement
Checking the installation site


- The following environmental requirements should be met:
Environment Temperature Humidity Keeping your printer 0°C (32°F) to 40°C (104°F) 20% to 85 %
(no condensation)Working Environment*1 10°C (50°F) to 35°C (95°F) Recommended Print Environment*2 18°C (64.4°F) to 30°C (86°F) 35% to 85 %
(no condensation)Electrical Requirements Power Power Consumptions ― Single-phase 100-240 V, 50/60 Hz 80 W *1: Environmental range where the printer can be operated.
*2: Environmental range where sufficient printing quality can be secured. - When installing the printer, avoid any place that presents direct sunlight or a large amount of dust.
- The body size is 55.1 in. (width) x 51.2 in. (depth) x 21.7 in. (height) (140 cm (width) x 130 cm (depth) x 55 cm (height)) and the mass weighs 128 kg (282 lb).
- Dimensions of the legs are 34.1 in. (86.7 cm) in width and 16.7 in. (42.3 cm) in depth. The diameter of the legs is 1.57 in. (40mm).
- The height from the table to the top surface of the platen is approx. 12.6 in. (32 cm).
- Do not use an extension cable.
- Ensure ample work space of over 39.4 in. (100 cm) in front of and to each side of the printer is available. Also, as a space to install the rear cover, keep 15.7 in. (40 cm) or wider space in the back of the printer. Keep 17.7 in. (45 cm) or wider space in the ceiling direction as well. As the air is exhausted toward the rear side, keep 7.9 in. (20 cm) or more space from the exhaust opening. If this space is not secured, you will have to move peripherals or the printer when making a repair.
- The table that supports the printer should be at least 35.4 in. (90 cm) in width and 23.6 in. (60 cm) in depth, and should be able to bear a weight of 150 kg (330 lb) or more. The tabletop should be horizontal and should not rattle when the printer is running.
- When installing the printer, place a level gauge on the top surface of the cover and the top surface of the platen to make adjustments so that the main unit is set horizontally.
- In preparation for a major earthquake or other natural disasters, fix the table and the main unit with a tool like a fixing band to prevent the main unit from falling from the table.
- When connecting the power cord of the printer, do not use overloaded sockets.
![]()

Transporting the printer


The printer machine weighs 128 kg (282 lb). Transporting and installing the printer requires four or more people to hold it at the ▼-marked positions (which are located where the printer can be held).
Otherwise the machine may fall down, causing injury or resulting in failure of the printer.
Mounting the supplied accessories
Mount the supplied accessories according to the following procedures.
Please note that the platen should be mounted after turning on the power.
Rear cover

Be careful not to touch the claws of mounting portion on the upper side of the rear cover. Otherwise you may be injured.
Print head
![]()
![]()
When you unpack the head, be careful not to touch the bottom of the head.
Otherwise it may cause poor printing.
![]()
When you mount the head, shift the carriage toward the center of the printer; to the position above the platen. If you perform the mounting of the head when the carriage is directly above the maintenance unit, it may damage the maintenance unit or the heads.- Insert the head firmly to direction
![]() .
.

![]()
If the print head is not inserted sufficiently, the part as illustrated in (b) could come into contact with its bottom surface, which in turn may result in poor printing. Make sure to insert it to the end.
![]()
When mounting the head, be careful not to move the carriage as much as can be avoided. Your hand may be caught in the carriage and injured. In addition, the tubes may be rolled together possibly damaging them. - Push with force in the direction as indicated in
![]() so that the (c) area makes contact with the side of the metal plate of the head.
so that the (c) area makes contact with the side of the metal plate of the head.

![]()
When you mount![]() , hold it down from the top. Otherwise your finger may be pinched and injured.
, hold it down from the top. Otherwise your finger may be pinched and injured.


 .
.
 so that the (c) area makes contact with the side of the metal plate of the head.
 , hold it down from the top. Otherwise your finger may be pinched and injured.
Ink cartridge setup and installation
Install the ink pouches into cartridges by referring to the illustrations on the label located on the ink bay cover of the machine.
- Since there is a component within the white ink which becomes deposited, please be sure to shake the ink pouch before it is taken out of the box.
Hold each edge of the carton containing the pouch tightly and shake it 100 times from side to side.
Next, turn it upside down and shake it 100 times. ![]()
- Open the lid of the ink cartridge.

![]()
When opening the lid, be sure not to touch portion (a). Otherwise, it could be damaged.
![]()
Place the entire cartridge on a flat surface, push the latches on the bottom surface of the cartridge downward and open the lid. - Push the tip of the ink pouch in until it clicks.
Straighten the ink pouch so that it can fit the grooves of the ink cartridge lid and mount it while pulling it by hand.

- Check that the two illustrated areas (b) and (c) are straight.

![]()
Be careful not to touch area (a) illustrated above.
Otherwise you may be injured.


Maintenance list
To maintain the printing quality and use the printer for a longer time, the following maintenance is needed.
For details, refer to the Instruction Manual.
| Maintenance timing | Description | Error/Warning display |
| Before printing | Confirmation and disposal of waste ink | ― |
| Confirmation and refilling of cleaning solution | ○ | |
| Daily agitation of the white ink | ○ | |
| Print out of the nozzle check pattern (checking on the print heads) | ― | |
| When an error/warning is displayed | Replacement of ink pouch with a new one | ○ |
| Cleaning of the nozzle guard, wiper, exhaust cap and suction cap | ○ | |
| Replacing the wiper cleaner | ○ | |
| Replacing the flushing foam | ○ | |
| Replacing the fan filter | ○ | |
| When the printer becomes dirty | Head cleaning | ― |
| White ink circulation | ― | |
| Cleaning the CR (carriage) plate | ― | |
| Cleaning the internal area of printer | ― | |
| Replacing the platen sheet | ― |
SAFETY INSTRUCTIONS
- Safety indications and their meanings
This instruction manual and the indications and symbols that are used on the printer itself are provided in order to ensure safe operation of this printer and to prevent accidents and injury to yourself or other people. The meanings of these indications and symbols are given below.Indications ![]()
The instructions which follow this term indicate situations where failure to follow the instructions will result in death or serious injury. ![]()
The instructions which follow this term indicate situations where failure to follow the instructions could result in death or serious injury. ![]()
The instructions which follow this term indicate situations where failure to follow the instructions may result in minor or moderate injury. ![]()
The instructions which follow this term indicate situations where failure to follow the instructions may result in damage to property. NOTE The instructions which follow this term indicate precautions and restrictions for use. Symbols ![]()
This symbol ( ![]() ) indicates something that you should be careful of. The picture inside the triangle indicates the nature of the caution that must be taken. (For example, the symbol at left means "beware of injury".)
) indicates something that you should be careful of. The picture inside the triangle indicates the nature of the caution that must be taken. (For example, the symbol at left means "beware of injury".)![]()
This symbol ( ![]() ) indicates something that you must not do.
) indicates something that you must not do.![]()
This symbol ( ![]() ) indicates something that you must do. The picture inside the circle indicates the nature of the thing that must be done. (For example, the symbol at left means "you must make a ground connection".)
) indicates something that you must do. The picture inside the circle indicates the nature of the thing that must be done. (For example, the symbol at left means "you must make a ground connection".) - Notes on safety
![]()
Contact with high voltage sections may lead to a serious injury. Turn off the power, and remove the cover 5 minutes later.
![]()
Basic precautions ![]()
To prevent accidents and problems, do not modify the machine yourself. Brother will not be held responsible for any accidents or problems resulting from modifications made to the machine. ![]()
Do not handle the power cord with wet hands. Otherwise, it may cause electric shocks. Installation ![]()
Do not set up the printer in a dusty environment. If dust collects inside the printer, it may cause fire or electric shocks or problems with correct operation. ![]()
Be sure to connect the ground. If the ground connection is not secure, you run a high risk of receiving a serious electric shock, and problems with correct operation may also occur. ![]()
Do not bend the cords excessively or fasten them too hard with staples or anything similar to secure cords. Otherwise it may cause fire or electric shocks. Printing ![]()
If a foreign object gets inside the printer, immediately turn off the power, disconnect the power cord, and contact the place of purchase or a qualified technician. If you continue to use the printer while there is a foreign object inside, it may result in fire or electric shocks or problems with correct operation. ![]()
Do not allow the printer to come into contact with liquids. Otherwise it may cause fire or electric shocks or problems with correct operation. If any liquid gets inside the printer, immediately turn off the power, disconnect the power cord, and contact the place of purchase or a qualified technician. ![]()
Do not use the printer when smoke or a bad odor is coming from the printer. Otherwise it may cause fire or electric shocks or problems with correct operation. Immediately turn off the power, disconnect the power cord, and contact the place of purchase or a qualified technician. ![]()
Keep your finger or any body part away from the rotating fan. Otherwise it will be caught up, which results in injuries.
Turn off the power when you approach the fan.![]()
Environmental requirements ![]()
Use the printer in a place which is adequately ventilated. A slight odor is generated when the printed articles are being fixed by heat. Installation ![]()
Setting up and moving of the printer should only be carried out by a qualified technician. ![]()
The printer machine weighs 128 kg (282 lb). Transporting and setting up of the printer should be held in the proper way. Otherwise it may fall down and cause injury. ![]()
When the printer falls down, disconnect the power cord and contact the place of purchase or a qualified technician. If you continue to use it, it may result in fire or electric shocks or poor printing quality. ![]()
Do not place the printer on a shaky table or high shelf or other unstable location. Otherwise it may tip over or fall down and cause injury. Furthermore, the table that supports the machine should be at least 35.4 in. (90 cm) in width and 23.6 in. (60 cm) in depth, and should be able to bear a weight of 150 kg (330 lb) or more. ![]()
Do not set up the printer in a place where it will be affected by vibration. Otherwise the printing quality may be degraded or the printer may fall down, which causes injury or results in failure of the printer. ![]()
Do not connect the power cord until installation is complete. The printer may operate if the power is turned on by mistake, which could result in injury. ![]()
Do not climb onto the printer or place heavy objects on top of it. Otherwise it may become unbalanced and tip over or fall down and cause injury. ![]()
Be careful not to touch the claws of the mounting portion on the upper side of the rear cover. Otherwise you may be injured. Printing ![]()
This printer should only be used by operators who are appropriately trained in its safe operation. ![]()
Ensure there is adequate space left in front of the printer and avoid placing any objects. Otherwise your hand may get caught between the platen and an object, which may result in injury. ![]()
Do not handle the platen while printing. If your hand gets caught between the platen or the T-shirt tray and the covers, it may be injured. ![]()
Do not put your hands inside the covers while the printer's power is turned on. Otherwise your hands may touch against moving parts and this may result in injury. ![]()
When the pretreatment is applied to printed objects (like a T-shirt) with a spray or pretreatment applicator, sprayed mist is generated. So wear a pair of plastic gloves, a mask and protective glasses (or goggles) designed to shield against liquid splash, and fully take care of the air ventilation when you are working with it. ![]()
When a problem occurs with the operation of the printer, contact the place of purchase or a qualified technician. Maintenance ![]()
Be careful not to get your fingers caught when closing the front cover, otherwise it may result in injury to your fingers. ![]()
When you mount or replace the head, be careful not to get your hands or fingers caught. Otherwise you may be injured. ![]()
Do not disassemble the ink pouch. If the ink gets into your eyes or onto your skin, it may cause inflammation. In case of contact with eyes, do not rub but immediately rinse the eyes with water. ![]()
Do not drink liquids such as the ink, maintenance solution, cleaning solution, pretreatment, or waste. They may cause diarrhea or vomiting.
Avoid causing your eyes or skin to make contact with the ink, maintenance solution, cleaning solution, pretreatment or waste. It may cause inflammation. In case of contact with eyes, do not rub but immediately rinse the eyes with water.
Keep the liquids out of the reach of children.![]()
Be sure to wear protective goggles and gloves when handling the grease, so that it does not get into your eyes or onto your skin.
It can cause inflammation. Do not drink or eat the grease. It may cause diarrhea or vomiting.
Keep the liquids out of the reach of children.![]()
When replacing parts and installing optional accessories, be sure to use only genuine Brother parts. Brother will not be held responsible for any accidents or problems resulting from the use of non-genuine parts. ![]()
When replacing parts or installing optional accessories, be sure to follow the procedures described in the Instruction Manual. Incorrect procedures could cause injuries or problems. ![]()
Printing ![]()
Do not move the platen by hand. Otherwise the printer may be mechanically and electrically damaged. ![]()
Ensure there is adequate space left in front of the printer and avoid placing any objects. The platen may be hit and damaged. NOTE
![]()
Use the printer in an area which is free from sources of strong electrical noise such as electrical line noise or static electric noise. Sources of strong electrical noise may cause problems with correct operation. ![]()
Any fluctuations in the power supply voltage should be within ±10% of the rated voltage for the printer. Voltage fluctuations which are greater than this may cause problems with correct operation. ![]()
The power supply capacity should be greater than the requirements for the printer's power consumption. Insufficient power supply capacity may cause problems with correct operation. ![]()
In the event of an electrical storm, turn off the power and disconnect the power cord from the wall outlet. Lightning may cause problems with correct operation. ![]()
The printer is not suitable for use in places where children are present. - Warning labels
![]()
This printer has the following warning labels displayed on it.
Follow the precautions given on each warning label for your work.
When the label is peeled off or illegible, contact the place of purchase.
![]()


 ) indicates something that you should be careful of. The picture inside the triangle indicates the nature of the caution that must be taken. (For example, the symbol at left means "beware of injury".)
 ) indicates something that you must not do.
 ) indicates something that you must do. The picture inside the circle indicates the nature of the thing that must be done. (For example, the symbol at left means "you must make a ground connection".)


BROTHER INDUSTRIES, LTD.
1-5, Kitajizoyama, Noda-cho, Kariya 448-0803, Japan.
https://www.brother.com/
Documents / Resources
References
Download manual
Here you can download full pdf version of manual, it may contain additional safety instructions, warranty information, FCC rules, etc.
Advertisement


Need help?
Do you have a question about the GTX pro and is the answer not in the manual?
Questions and answers